
As I stood in my kitchen, the sweet aroma of caramel wafted through the air, instantly transporting me to my favorite bakery. The centerpiece of my latest culinary adventure? A Salted Caramel Cake that promises to impress. This delightful dessert showcases layers of moist vanilla cake, lovingly coated in a creamy salted caramel buttercream. Not only is it a show-stopper for any celebration, but it’s also surprisingly easy to make at home, allowing you to replace takeout with a taste of magic from your own oven. If you’re ready to elevate your dessert game and create a dessert that will have your loved ones swooning, you’re in the right place! What exciting twist will you add to this classic cake?
What makes Salted Caramel Cake irresistible?
Decadence at Its Finest: Each bite of this cake is a heavenly combination of moist vanilla cake and rich, homemade salted caramel, making it a treat for all occasions.
Easy to Follow: This recipe features straightforward instructions, ensuring that you can whip it up with confidence, even if baking isn’t your forte.
Versatile Flavor Options: You can customize it by adding almond extract for a twist or even substituting chocolate cake layers for a delightful chocolate experience.
Perfect for Celebrations: Whether it’s a birthday, anniversary, or simple family gathering, this cake is guaranteed to impress and become the highlight of your dessert table.
Homemade Goodness: Ditch the takeout and enjoy the satisfaction of creating something magical right at home, just like the indulgent layers found in Peach Cake Brown or Cinnamon Swirl Bundt Cake.
Salted Caramel Cake Ingredients
• Prepare to amaze with these delightful components!
For the Caramel
- Granulated Sugar – Adds sweetness and structure; ensure fully wet for perfect caramel.
- Water – Assists in caramelizing; use precisely for the right consistency.
- Butter – Provides richness; opt for unsalted for better salt control.
- Heavy Cream – Delivers creaminess; can be substituted with full-fat Greek yogurt for a lighter option.
- Salt – Enhances flavor and balances sweetness; adjust to taste for your ideal mix.
For the Cake
- All-Purpose Flour – Creates structure for each layer; substitute with gluten-free flour if desired.
- Cornstarch – Adds tenderness to the cake; omit if allergic, but it’s beneficial for texture.
- Baking Powder & Baking Soda – Essential leavening agents; check freshness for effective rise.
- Salt – Enhances flavor and balances sweetness; crucial for a well-rounded cake.
- Butter – Ensures flavor and moisture; use room temperature for optimal mixing, or replace half with oil.
- Granulated Sugar – The base sweetener for cake; a fine texture blends better.
- Eggs – Provide structure and moisture; room temperature helps with incorporation.
- Sour Cream – Adds moisture and tang; yogurt can serve as a substitute.
- Vegetable Oil – Keeps cake moist; good alternatives are canola or sunflower oil.
- Vanilla Extract – Brings depth of flavor; high-quality extract makes a noticeable difference.
For the Buttercream
- Powdered Sugar – Sweetens and stabilizes the frosting; sift before measuring for lump-free results.
- Vanilla Extract (for buttercream) – Flavoring agent; adjust amount according to your taste preference.
- Caramel (for buttercream) – Infuses the frosting with luscious caramel flavor; homemade or store-bought works well.
Step‑by‑Step Instructions for Salted Caramel Cake
Step 1: Prepare Caramel
In a medium saucepan, combine granulated sugar and a splash of water over medium heat. Stir gently until the mixture begins to bubble and turns a rich golden brown, approximately 8-10 minutes. Carefully stir in butter and heavy cream, watching out for vigorous bubbling. Once combined, remove from heat and let the salted caramel cool as it thickens. Transfer to the fridge to set while you move on to the cake.
Step 2: Sift Dry Ingredients
In a large mixing bowl, sift together all-purpose flour, cornstarch, baking powder, baking soda, and salt. This step is crucial for aerating the flour, ensuring your Salted Caramel Cake has a light and fluffy texture. Once sifted, whisk the dry ingredients gently to combine, then set aside, allowing the flavors to meld as you prepare the wet ingredients.
Step 3: Mix Wet Ingredients
In another bowl, cream together room temperature butter and granulated sugar until the mixture is light and fluffy, about 3-4 minutes. Gradually add in the eggs, one at a time, mixing well after each addition. Next, incorporate the sour cream, vegetable oil, and vanilla extract. Stir in the dry ingredient mixture in three parts, alternating with the wet components for a smooth batter, ensuring everything is fully combined and well incorporated.
Step 4: Bake Layers
Preheat your oven to 170ºC (340ºF). Prepare three 20 cm round cake pans by lining the bottoms with parchment paper and greasing the sides. Divide the batter evenly among the pans, smoothing the tops with a spatula. Bake in the preheated oven for 20-23 minutes, or until a cake tester comes out clean and the edges are golden brown. Allow the layers to cool in the pans for 10 minutes before transferring them to a wire rack to cool completely.
Step 5: Prepare Buttercream
In a large mixing bowl, beat softened butter until creamy and smooth. Gradually add in the sifted powdered sugar and cooled salted caramel, mixing on low speed initially to combine, then increase speed to medium until the buttercream is fluffy and well blended. Taste and adjust the vanilla extract as desired, ensuring the buttercream is both sweet and infused with delicious caramel flavor for frosting the layers.
Step 6: Assemble Cake
To assemble your Salted Caramel Cake, place one layer of the cooled cake on a serving plate. Generously spread a layer of buttery caramel buttercream on top and drizzle some of the cooled salted caramel over it. Repeat this process with the second cake layer, adding more frosting and caramel. After placing the final layer, apply a crumb coat of buttercream around the sides and top of the cake. Chill for 30 minutes to set.
Step 7: Final Frosting and Decoration
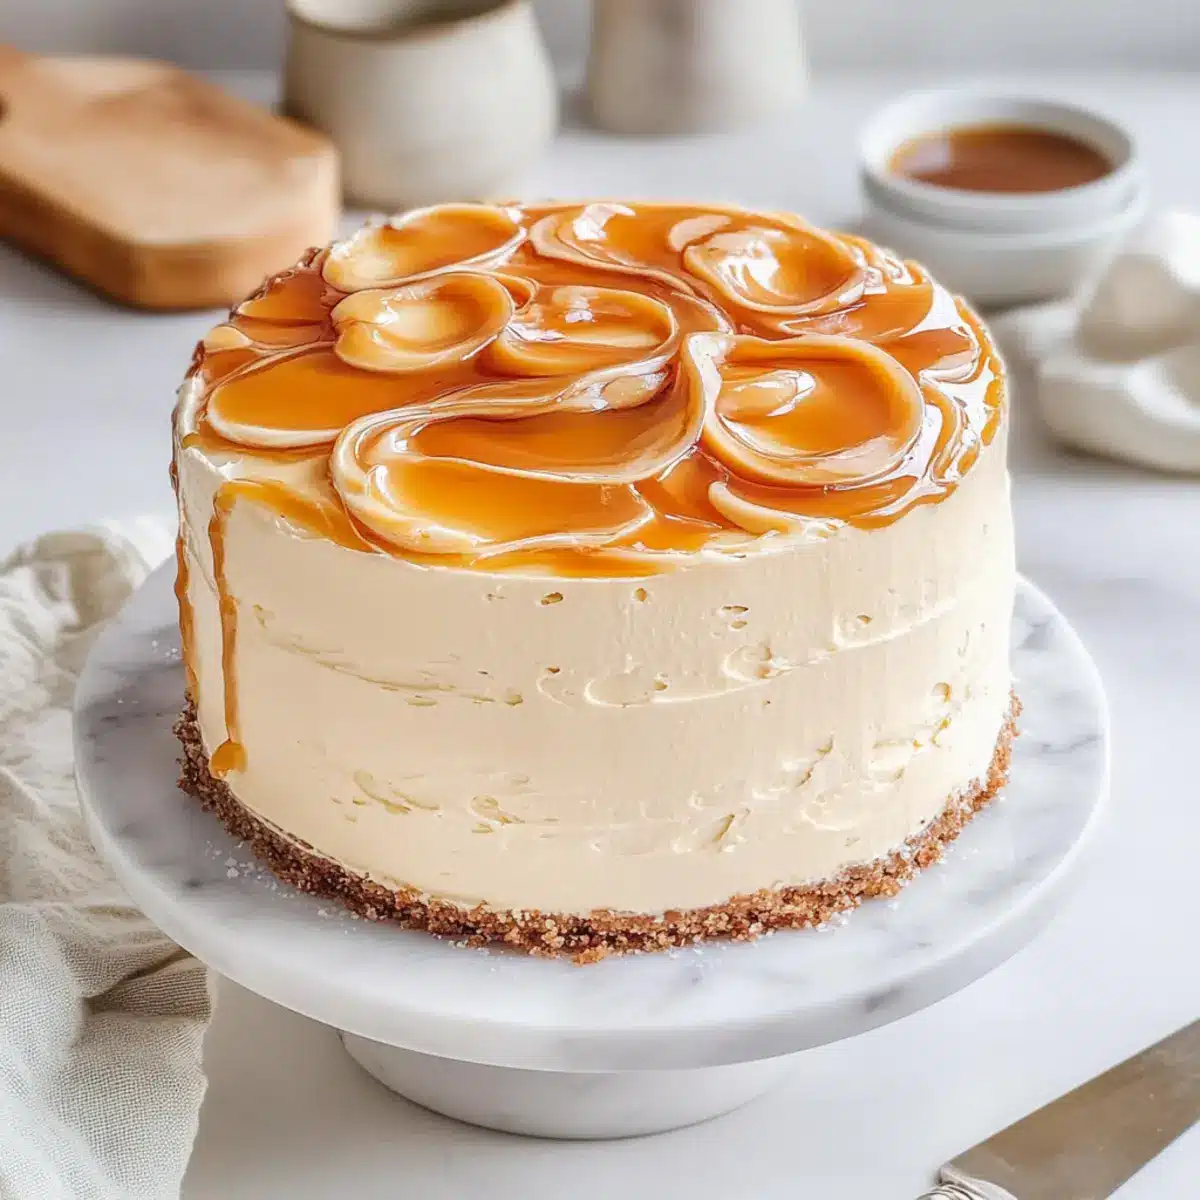
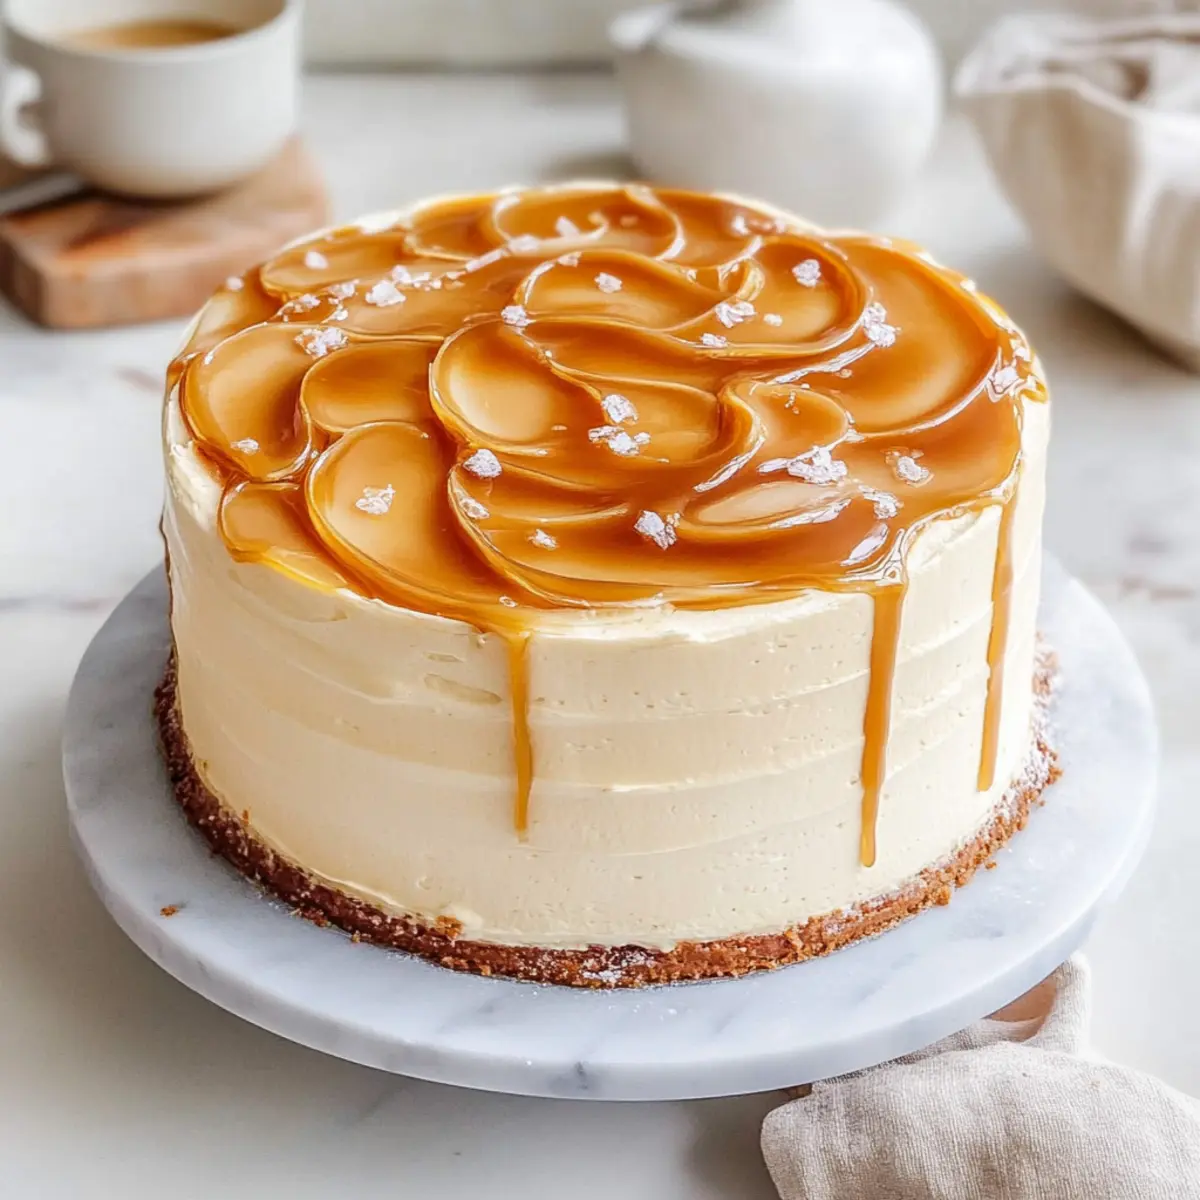
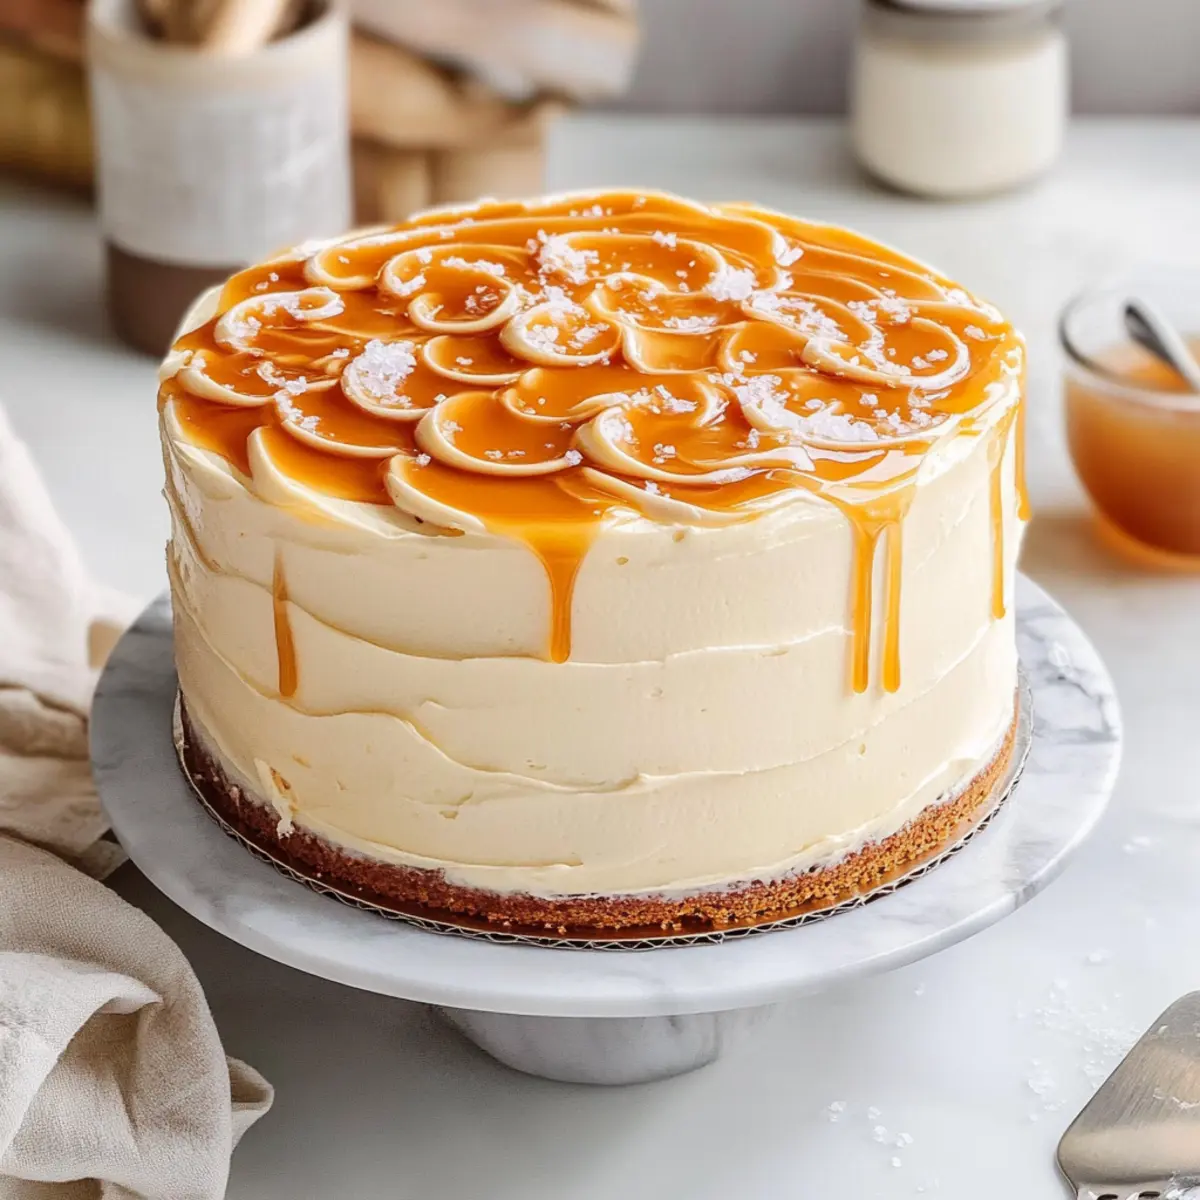
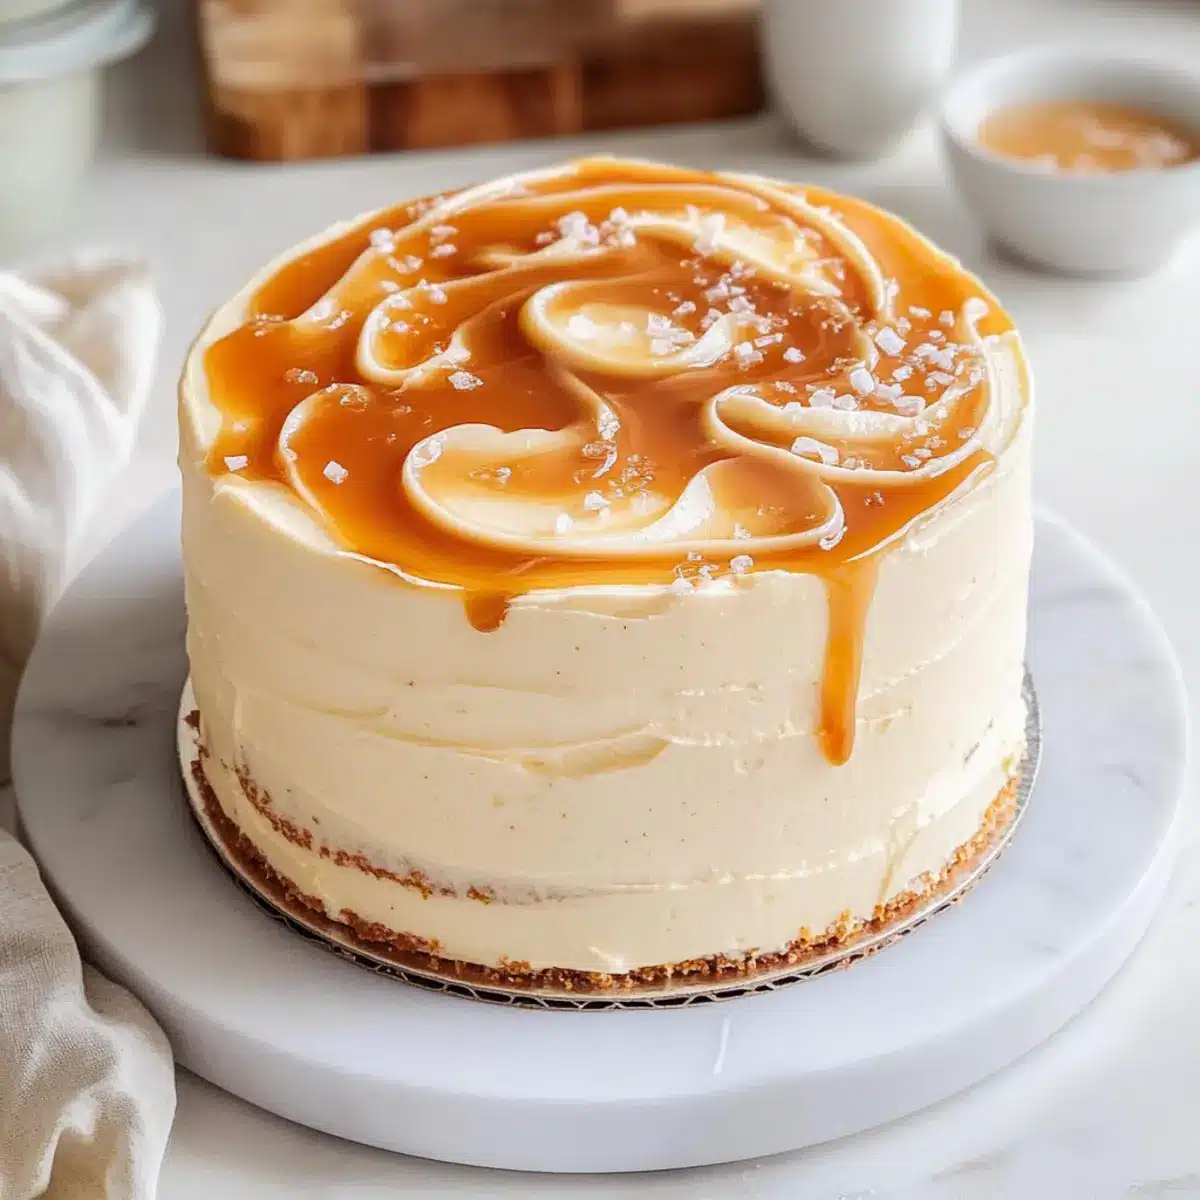
Once chilled, take the cake out and frost the top and sides with the remaining buttercream, smoothing it out for a clean finish. Decorate with drizzles of the leftover salted caramel, allowing it to cascade down the sides, and sprinkle flaky salt on top for that perfect contrast. Your Heavenly Salted Caramel Cake is now ready to impress at your next gathering!
What to Serve with Salted Caramel Cake?
Elevate your dessert experience with delightful pairings that complement the rich flavors and textures of this sumptuous treat.
-
Fresh Berries: The tartness of strawberries or raspberries cuts through the sweet richness, providing a refreshing contrast.
-
Vanilla Ice Cream: Creamy and cold, a scoop of vanilla ice cream alongside the warm cake creates a decadent indulgence that melts in your mouth.
-
Espresso or Coffee: A strong cup of coffee enhances the sweet and salty notes of the cake, creating a delicious balance for your taste buds.
-
Whipped Cream: Light and airy, freshly whipped cream adds a fluffy texture that beautifully complements the cake’s richness without overpowering it.
-
Chocolate Sauce: Drizzling a bit of chocolate sauce over the cake can introduce a delightful layer of flavor, perfect for chocolate lovers.
-
Caramel Sauce: A touch more caramel creates a luxurious experience, intensifying the salted caramel flavor for those who can’t get enough!
-
Fruit Salad: A light fruit salad adds a fresh element that brings brightness and a hint of acidity, balancing the cake’s sweetness.
-
Nutty Crunch: Sprinkle some chopped pecans or walnuts on top for extra texture and a satisfying crunch that contrasts with the softness of the cake.
Expert Tips for Salted Caramel Cake
- Caramel Consistency: Aim for a deep amber color while making the caramel; if it’s too light, it may not yield the rich flavor you desire.
- Room Temperature Ingredients: Bringing items like butter and eggs to room temperature is key for a well-emulsified batter, ensuring a fluffy salted caramel cake.
- Sifting Matters: Always sift your dry ingredients together—this avoids lumps and helps achieve that light, airy cake texture everyone loves.
- Cooling Layers: Let the cake layers cool completely before frosting; this prevents melting and ensures a beautiful finish on your salted caramel cake.
- Decorating Delight: Drizzle extra salted caramel on the top just before serving to give it a stunningly appetizing appearance and enhanced flavor!
How to Store and Freeze Salted Caramel Cake
Fridge: Keep your Salted Caramel Cake in an airtight container to maintain its moisture and flavor, where it will stay fresh for up to 3 days.
Freezer: For longer storage, wrap individual slices tightly in plastic wrap and then place in a freezer-safe container, preserving its deliciousness for up to 3 months.
Reheating: To enjoy frozen cake slices, thaw in the fridge overnight, then bring to room temperature before serving for the best texture.
Leftovers: If you have leftover frosting, store it in an airtight container in the fridge for up to 1 week; gently rewhip before using it again.
Salted Caramel Cake Variations & Substitutions
Feel free to explore your creativity and add a personal touch to this tantalizing cake!
-
Almond Extract: Swap vanilla extract with almond for a nutty flavor twist that enhances the overall experience.
-
Chocolate Layers: Replace vanilla cake layers with rich chocolate cake for a decadent chocolate-caramel fusion.
-
Espresso Buttercream: Add espresso powder to the buttercream for a delightful mocha flavor that pairs beautifully with caramel.
-
Nutty Crunch: Incorporate chopped nuts, such as pecans or hazelnuts, into the batter for added texture and a nutty delight in every bite.
-
Fruit Flavors: Mix fresh fruit purees like raspberry or mango into the buttercream for a fruity contrast to the caramel sweetness; this adds a refreshing twist.
When looking for more luscious desserts, consider giving a nod to Pumpkin Spice Latte Cake or even indulge in a warm slice of Gingerbread Pudding Cake.
-
Coconut Milk: Replace heavy cream in the caramel with coconut milk for a tropical flair — you’ll love the creamy, rich texture.
-
Spicy Kick: Add a hint of cayenne pepper to the caramel for an unexpected burst of warmth that nicely balances the sweetness.
Make Ahead Options
Preparing this Salted Caramel Cake ahead of time is a brilliant way to save precious minutes on busy days! You can make the caramel sauce up to 3 days in advance, letting it chill in the refrigerator. Additionally, the cake layers can be baked and stored in an airtight container for up to 24 hours before assembly. To maintain moisture and flavor, ensure the layers are completely cool before wrapping them tightly in plastic wrap. When you’re ready to complete the cake, simply whip together the buttercream and layer it with the cooled cake along with the salted caramel. This way, you’ll have a beautifully crafted dessert ready to impress without the last-minute rush!
Salted Caramel Cake Recipe FAQs
What type of sugar should I use for the caramel?
Absolutely! For making salted caramel, using granulated sugar is best as it dissolves evenly during cooking. Make sure the sugar is fully wet before you start heating it; this helps achieve a smooth caramel consistency.
How should I store my Salted Caramel Cake?
To maintain its deliciousness, store your Salted Caramel Cake in an airtight container in the fridge. It will stay fresh and tasty for up to 3 days. Make sure to bring it to room temperature before serving for the best flavor!
Can I freeze Salted Caramel Cake?
Very! For freezing, wrap individual slices tightly in plastic wrap and place them in a freezer-safe container. This way, you can enjoy your cake for up to 3 months! When you’re ready to indulge, simply thaw the slices in the fridge overnight and let them come to room temperature before enjoying.
Why is my cake dense? What can I do?
If your salted caramel cake comes out dense, it could be due to overmixing the batter or using cold ingredients straight from the fridge. Make sure to mix just until combined and always use room temperature butter, eggs, and dairy to create a light and fluffy texture.
Can my dog eat salted caramel cake?
No, I wouldn’t recommend it! The butter and sugar content can be too rich for dogs, and the salt might not suit their digestive systems. Always keep desserts like Salted Caramel Cake away from your furry friends and stick to dog-safe treats for them!
What if I have leftover salted caramel?
If you find yourself with surplus salted caramel, store it in an airtight container in the fridge for up to 2 weeks. Reheat gently in the microwave before using it as a topping for ice cream, pancakes, or even as a delightful drizzle over coffee!
Heavenly Salted Caramel Cake for Your Sweetest Moments
Ingredients
Equipment
Method
- In a medium saucepan, combine granulated sugar and a splash of water over medium heat. Stir gently until the mixture begins to bubble and turns a rich golden brown, approximately 8-10 minutes. Carefully stir in butter and heavy cream, watching out for vigorous bubbling. Once combined, remove from heat and let the salted caramel cool as it thickens. Transfer to the fridge to set while you move on to the cake.
- In a large mixing bowl, sift together all-purpose flour, cornstarch, baking powder, baking soda, and salt. This step is crucial for aerating the flour, ensuring your Salted Caramel Cake has a light and fluffy texture. Once sifted, whisk the dry ingredients gently to combine, then set aside, allowing the flavors to meld as you prepare the wet ingredients.
- In another bowl, cream together room temperature butter and granulated sugar until the mixture is light and fluffy, about 3-4 minutes. Gradually add in the eggs, one at a time, mixing well after each addition. Next, incorporate the sour cream, vegetable oil, and vanilla extract. Stir in the dry ingredient mixture in three parts, alternating with the wet components for a smooth batter, ensuring everything is fully combined and well incorporated.
- Preheat your oven to 170ºC (340ºF). Prepare three 20 cm round cake pans by lining the bottoms with parchment paper and greasing the sides. Divide the batter evenly among the pans, smoothing the tops with a spatula. Bake in the preheated oven for 20-23 minutes, or until a cake tester comes out clean and the edges are golden brown. Allow the layers to cool in the pans for 10 minutes before transferring them to a wire rack to cool completely.
- In a large mixing bowl, beat softened butter until creamy and smooth. Gradually add in the sifted powdered sugar and cooled salted caramel, mixing on low speed initially to combine, then increase speed to medium until the buttercream is fluffy and well blended. Taste and adjust the vanilla extract as desired, ensuring the buttercream is both sweet and infused with delicious caramel flavor for frosting the layers.
- To assemble your Salted Caramel Cake, place one layer of the cooled cake on a serving plate. Generously spread a layer of buttery caramel buttercream on top and drizzle some of the cooled salted caramel over it. Repeat this process with the second cake layer, adding more frosting and caramel. After placing the final layer, apply a crumb coat of buttercream around the sides and top of the cake. Chill for 30 minutes to set.
- Once chilled, take the cake out and frost the top and sides with the remaining buttercream, smoothing it out for a clean finish. Decorate with drizzles of the leftover salted caramel, allowing it to cascade down the sides, and sprinkle flaky salt on top for that perfect contrast. Your Heavenly Salted Caramel Cake is now ready to impress at your next gathering!
Leave a Reply