
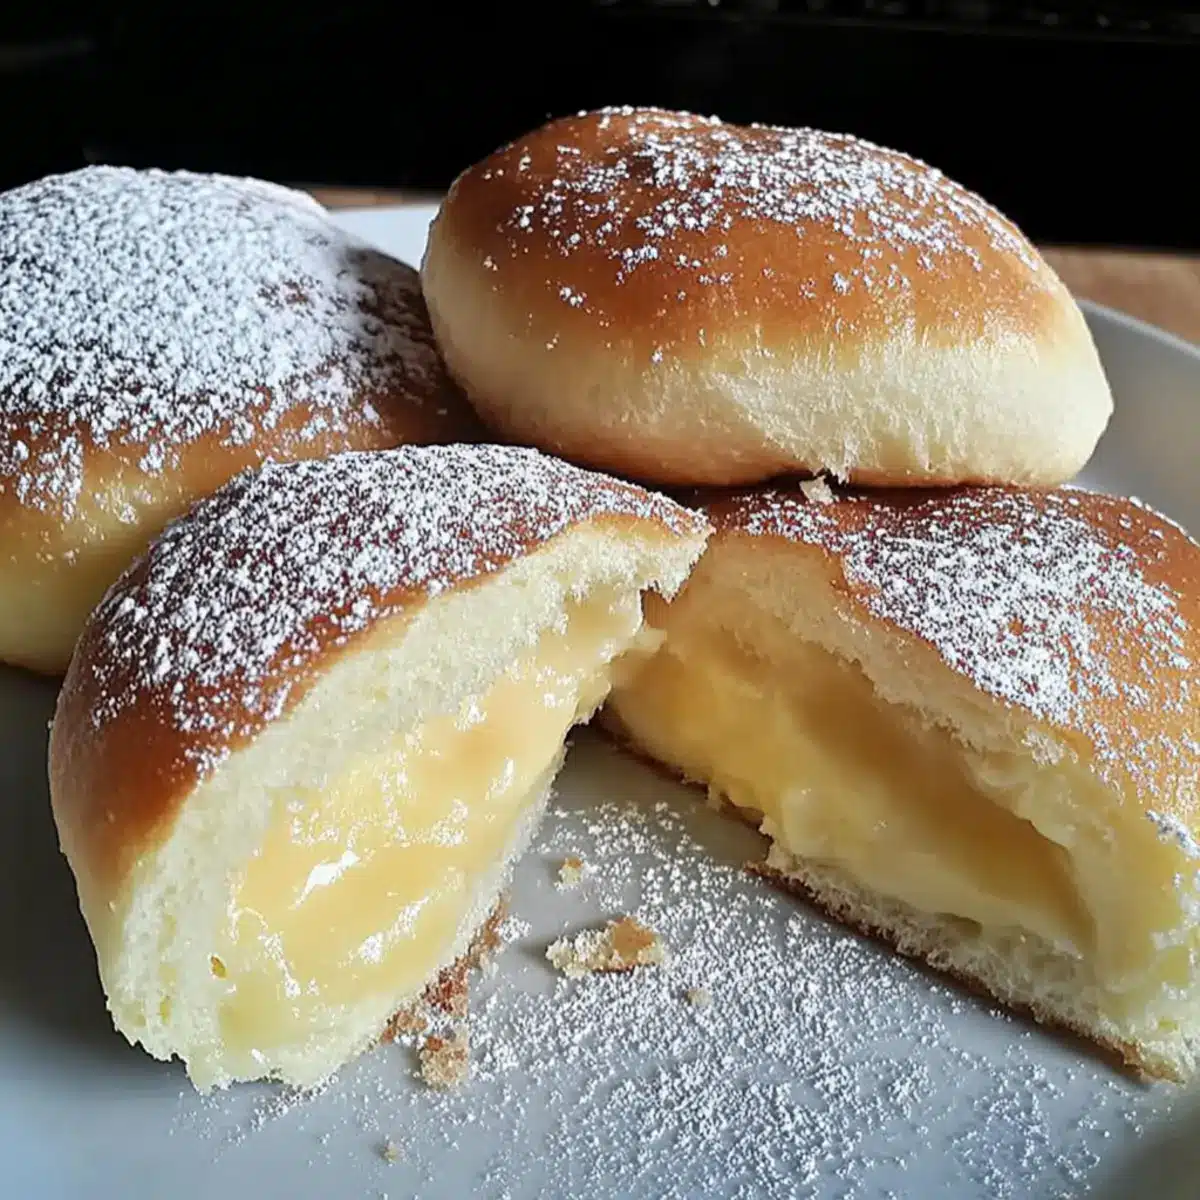
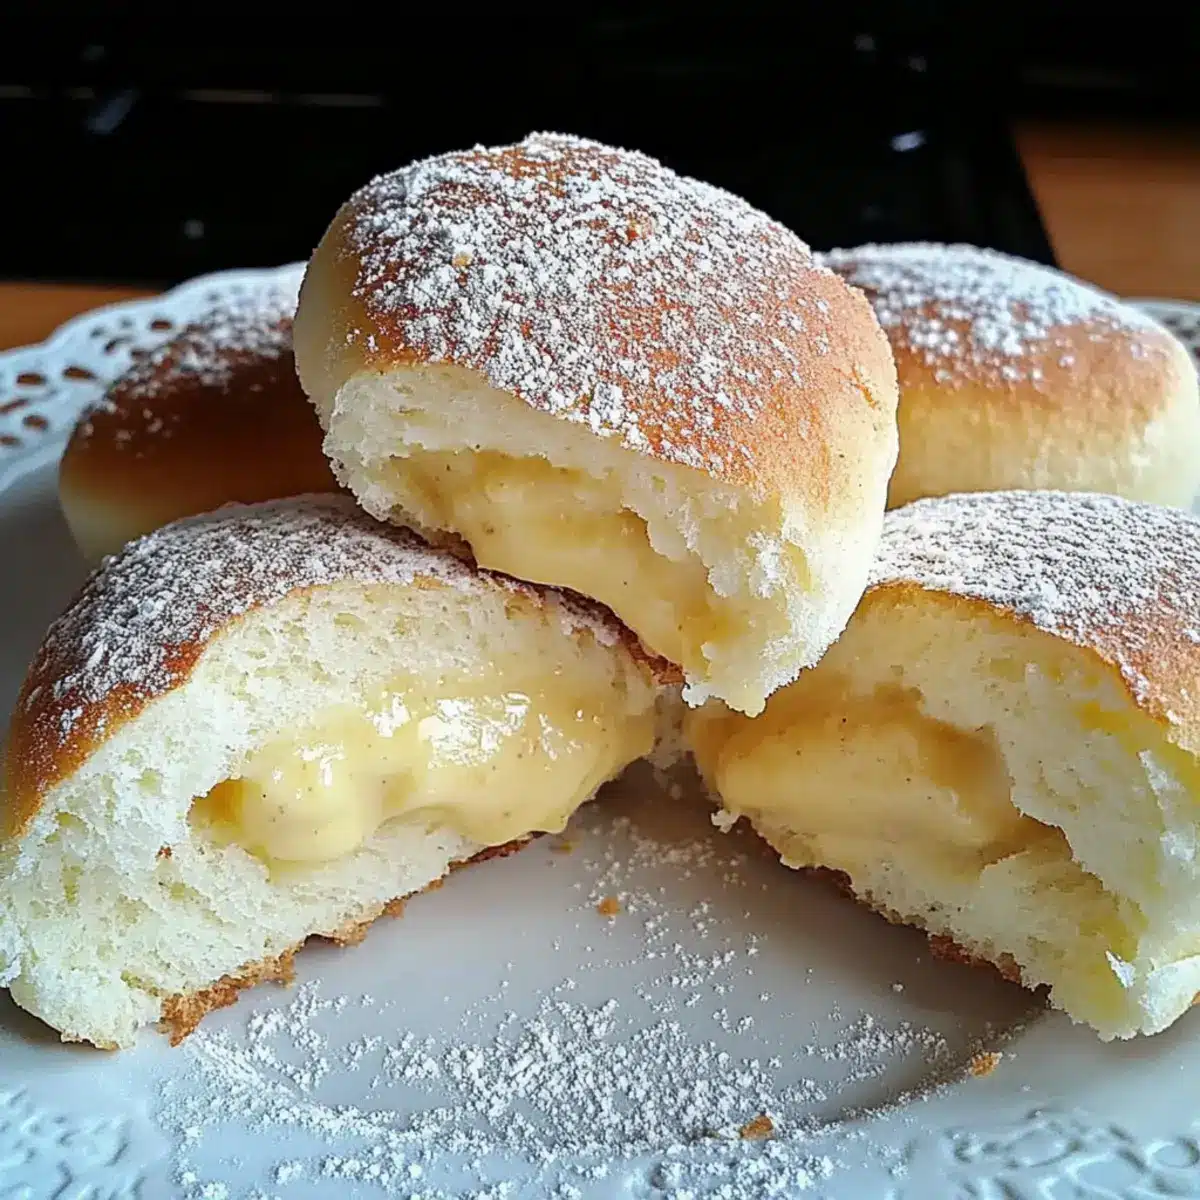
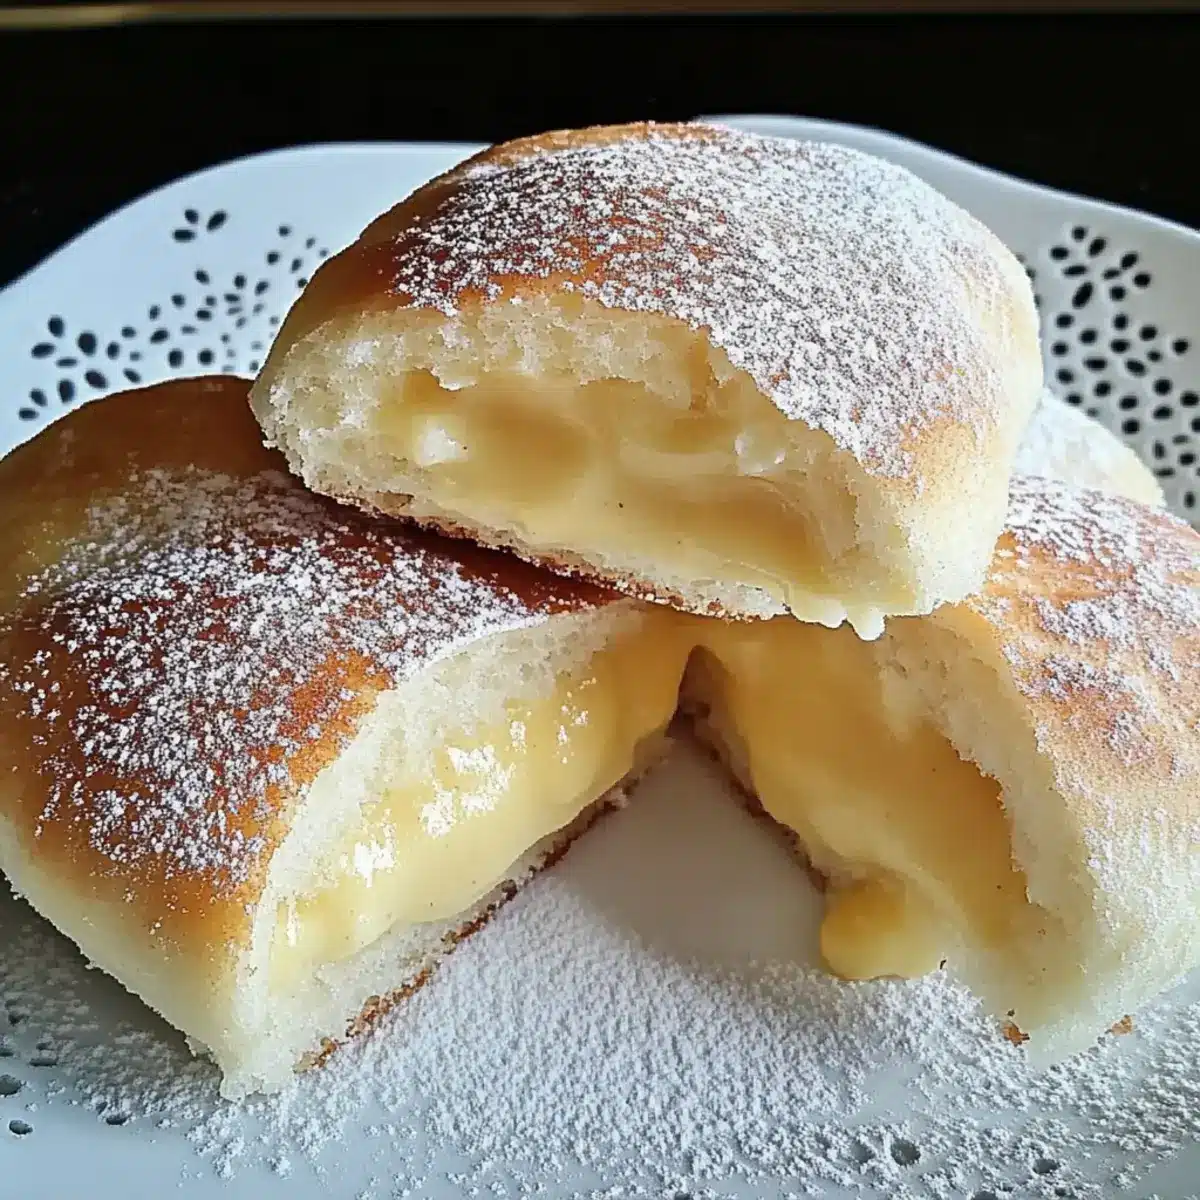
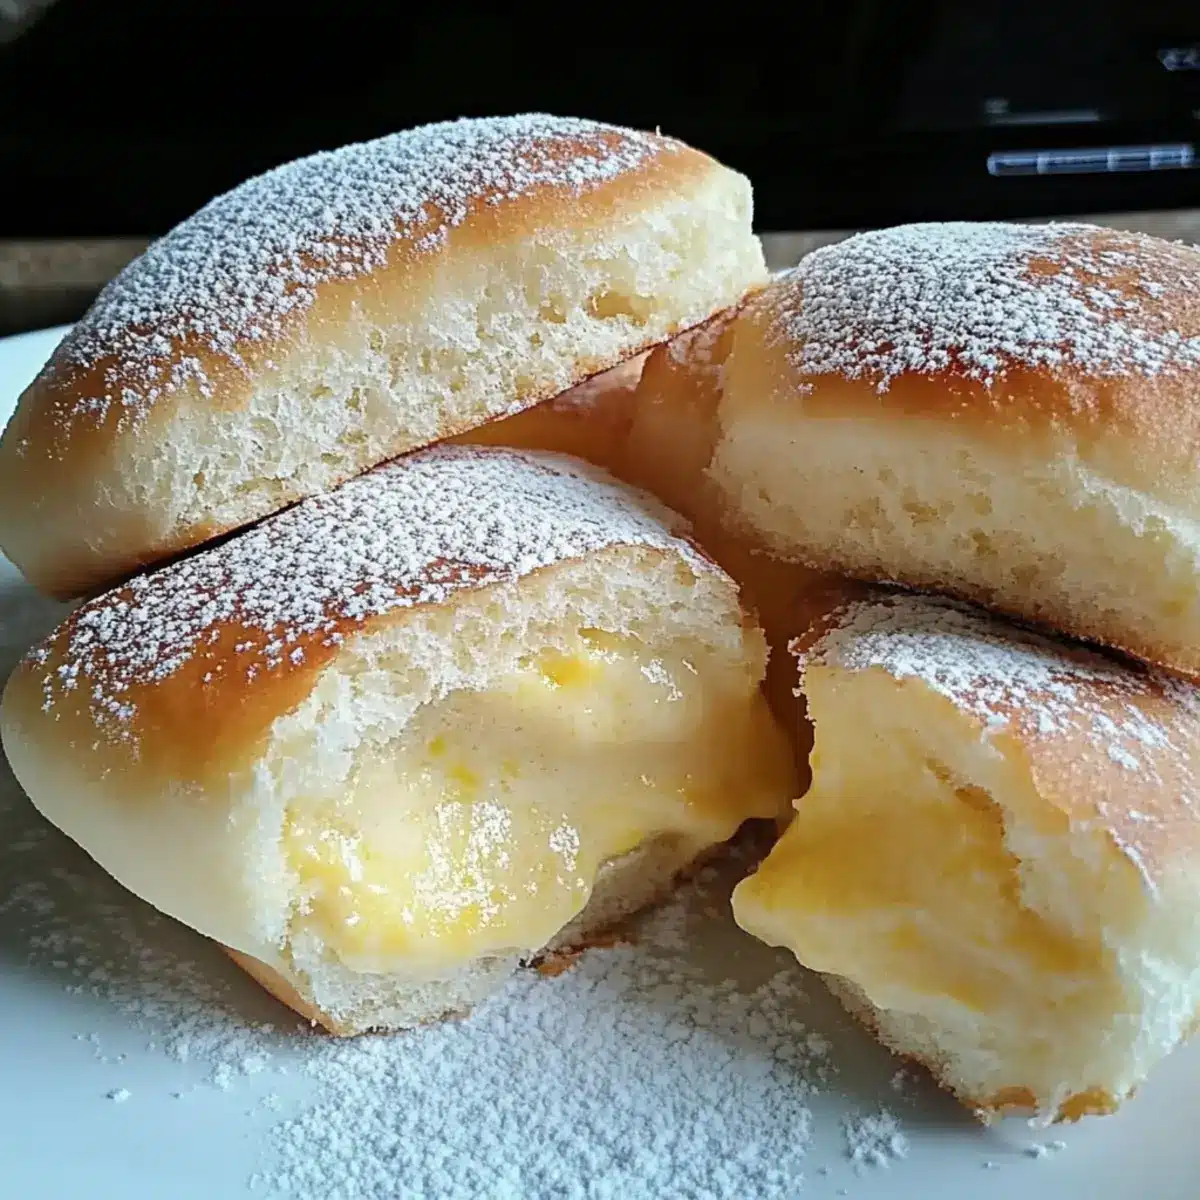
Flipping through my old recipe notebook, I stumbled upon a culinary gem that instantly transported me back to my childhood kitchen—Stovetop Custard Cream Buns. These delightful egg-free treats are a hug for your taste buds, enveloping luscious custard in soft, fluffy buns. The beauty of this recipe lies not only in its comforting aroma that wafts through the house but also in the fact that they come together effortlessly on the stovetop—no oven needed! Perfect for a cozy breakfast or an afternoon snack, they’re a healthier twist on traditional pastries and make for an impressive crowd-pleaser. Plus, you can dust them with powdered sugar for a touch of whimsy. Are you ready to indulge in nostalgia with each bite? Let’s dive into this delightful recipe!
Why are Stovetop Custard Cream Buns Special?
Mouthwatering Creativity: These buns fill your home with the comforting scent of fresh bread while offering an exciting twist on traditional pastries.
Health-Conscious Choice: With an egg-free custard, they cater to various dietary needs without compromising on taste.
Stovetop Simplicity: No oven? No problem! This recipe is perfect for those who love effortless cooking or have limited kitchen space.
Crowd-Pleasing Delight: Ideal for sharing with family and friends, they’re sure to impress at breakfast gatherings or casual get-togethers.
Versatile Flavor Options: Feeling adventurous? Try adding chocolate custard or a hint of fruit puree to personalize your buns!
Perfect Pairing: Serve warm with a cup of coffee or tea, and consider enjoying leftover buns as a sweet afternoon snack. These delightful treats are not just food; they’re a joyful experience!
Stovetop Custard Cream Buns Ingredients
Discover the delightful ingredients for your stovetop custard cream buns!
For the Dough
- All-purpose / cake flour – Provides structure and softness to the dough; substitute with whole wheat flour for a heartier texture.
- Instant dry yeast – Causes the dough to rise, resulting in fluffy buns; ensure yeast is fresh for best results.
- White granulated or castor sugar – Adds sweetness and helps activate the yeast; can substitute with coconut sugar for a different flavor.
- Salt – Enhances flavor; do not omit, as it balances the sweetness.
- Warm water – Activates yeast and hydrates the dough; use at around 110°F for optimal activation.
- Milk – Adds richness and contributes to the dough’s softness; can replace with non-dairy milk for a vegan version.
- Oil (canola or sunflower) – Adds moisture and tenderness to the dough; other neutral oils like vegetable oil work too.
For the Custard Filling
- Custard powder – The star of your filling; choose either homemade or store-bought custard powder for an egg-free, sweet contrast.
Enjoy the scrumptious journey of making these stovetop custard cream buns right in your own kitchen!
Step‑by‑Step Instructions for Stovetop Custard Cream Buns
Step 1: Make the Dough
In a large bowl, whisk together the instant dry yeast, sugar, and salt before adding the all-purpose flour. In a separate container, mix the warm water (about 110°F), milk, and oil together. Gradually combine the wet mixture with the dry ingredients, stirring until a shaggy dough forms. Knead the dough on a floured surface for about 5 minutes until it becomes smooth and elastic.
Step 2: First Rise
Transfer the kneaded dough into a lightly oiled bowl, covering it with a clean kitchen towel or plastic wrap. Place the bowl in a warm, draft-free spot and let it rise for approximately 1 hour, or until it has doubled in size. This crucial first rise will create the fluffy texture that defines your stovetop custard cream buns.
Step 3: Prepare the Custard Filling
While the dough is rising, prepare the custard filling according to package instructions for the custard powder you’ve chosen. Stir until smooth and thickened, then set aside to cool completely. Ensuring the custard cools properly is vital to avoid soggy buns when you fill them later.
Step 4: Shape the Buns
Once the dough has risen, punch it down to release air, then knead it briefly on a floured surface. Divide the dough into 12 equal pieces, rolling each into a circle about 4–5 inches in diameter. Carefully place a generous spoonful of the cooled custard in the center, fold the dough over the filling, and pinch the edges to seal securely. Let the shaped buns rest for 15 minutes.
Step 5: Cook the Buns
Heat a non-stick pan over low heat and lightly grease it if necessary. Place the rested buns in the pan, making sure they have space to rise further. Cook them for about 10 minutes on one side, or until they are golden brown. Gently flip the buns and cook for an additional 5 minutes, ensuring they are cooked through and nicely browned. Allow them to cool slightly before serving.
What to Serve with Stovetop Custard Cream Buns?
Indulging in these delicate buns opens a world of flavors to complement your cozy breakfast experience.
-
Creamy Mashed Potatoes: These buttery potatoes bring a hearty balance, making your meal feel homey and comforting.
-
Fresh Fruit Salad: A refreshing mix of seasonal fruits brightens the palate and adds a burst of color to your table.
-
Herbal Tea or Coffee: Pairing with a fragrant herbal tea or your favorite coffee elevates the overall dining experience.
-
Savory Avocado Toast: A delicious layer of seasoned avocado brings a creamy, rich texture that pairs beautifully with the sweet custard.
-
Yogurt Parfait: Creamy yogurt layered with granola and berries offers a satisfying crunch and freshness alongside the soft buns.
-
Chocolate Ganache Dip: For a decadent twist, serve the buns with a warm chocolate dip, perfect for those with a sweet tooth.
-
Baked Cinnamon Apples: Lightly spiced baked apples offer a sweet and fruity contrast, perfect to complement the richness of the custard.
-
Toasted Coconut Flake Topping: A sprinkle of toasted coconut adds tropical flair and crunchy texture, enhancing the overall delight of the buns.
Each pairing is designed to create a delightful dining affair that turns your stovetop custard cream buns into a star of the meal.
Make Ahead Options
These Stovetop Custard Cream Buns are perfect for meal prep enthusiasts! You can prepare the dough up to 24 hours in advance by completing Steps 1 and 2 of the recipe, then covering the dough tightly with plastic wrap and refrigerating it. This will help maintain its freshness and fluffiness. Additionally, you can prepare the custard filling (Step 3) and store it in the refrigerator, ensuring it cools completely to prevent sogginess. When you’re ready to enjoy these delicious buns, simply shape and cook them (Steps 4 and 5), and you’ll have warm, comforting treats with minimal effort—a delightful breakfast or snack ready in no time!
Expert Tips for Stovetop Custard Cream Buns
-
Cool the Custard: Ensure the custard is completely cooled before filling the buns to prevent sogginess and maintain a fluffy texture.
-
Knead Thoroughly: Knead the dough until smooth and elastic; this will help avoid dense buns and promote that delightful fluffiness everyone loves.
-
Monitor Heat Levels: Cooking on low heat is essential; too high can burn the buns before they cook through, compromising the soft inside.
-
Proper Sealing: Pinch the edges of the dough well after filling to keep the custard inside while cooking, ensuring the perfect bite each time.
-
Parchment Paper: If you’re not using a non-stick pan, consider lining it with parchment paper to prevent sticking and make cleanup a breeze.
Enjoy making your stovetop custard cream buns with these helpful tips, and watch them become a family favorite!
Stovetop Custard Cream Buns Variations
Feel free to get creative with these delightful buns and make them your own!
- Gluten-Free: Use gluten-free flour blend in place of all-purpose flour for a delicious alternative that everyone can enjoy.
- Dairy-Free: Swap milk for almond, coconut, or soy milk to make your buns perfect for a dairy-free diet.
- Nutty Flavor: Add a splash of almond extract to the dough for a delightful nutty undertone that elevates the flavor profile.
- Fruity Twist: Incorporate fruit purees like mango or raspberry into the custard for a refreshing burst of flavor.
- Chocolate Delight: Mix in cocoa powder with the custard filling for a rich chocolatey version that feels indulgent.
- Herbal Infusion: Add a hint of vanilla or a sprinkle of cinnamon to the dough for a warm, aromatic flavor complement.
- Spicy Kick: Mix in a touch of cinnamon or nutmeg for a spiced twist that brings warmth to every bite.
- Creamy Indulgence: Consider pairing your custard buns with a dollop of whipped cream or a drizzle of chocolate sauce for an extra sweet touch.
For more delicious recipes to try with your new baking techniques, check out Cajun Chicken Pasta or Pepper Chicken Mac. The options are endless, so let your imagination flow!
Storage Tips for Stovetop Custard Cream Buns
Room Temperature: Store buns in a cool, dry place for up to 1 day to maintain their fluffy texture; cover with a kitchen towel to avoid drying out.
Fridge: Place leftovers in an airtight container in the refrigerator for up to 2 days; warm them gently in the microwave before serving to restore softness.
Freezer: Freeze uncooked buns by placing them on a baking sheet until firm, then transfer to a freezer-safe bag for up to 2 months; cook directly from frozen, adding a few extra minutes to the cooking time.
Reheating: Reheat refrigerated or frozen buns in the microwave for about 15-20 seconds, ensuring they don’t become too dry; serve warm for the best experience.
Stovetop Custard Cream Buns Recipe FAQs
How should I select the best flour for my buns?
I recommend using all-purpose or cake flour for the best texture in your Stovetop Custard Cream Buns. The flour provides lightness and softness that’s essential for fluffy buns. If you prefer a heartier option, you can substitute with whole wheat flour, but be aware that the texture may change slightly.
What is the best way to store leftover custard cream buns?
To keep your lovely buns fresh, place them in an airtight container and store them in the refrigerator for up to 2 days. They retain their fluffy texture best when gently reheated in the microwave for about 15-20 seconds before serving.
Can I freeze the custard buns?
Absolutely! To freeze uncooked buns, shape them as usual and place them on a baking sheet to freeze until firm. Once frozen, transfer them to a freezer-safe bag and store for up to 2 months. When you’re ready to enjoy them, cook them directly from frozen, adding a few extra minutes to the cooking time for perfect results.
What if my custard filling turns out too runny?
If your custard filling is too runny, it’s usually because it didn’t cook long enough. Follow the package instructions carefully and ensure to stir the custard until it’s thick and smooth. Once it cools completely, it should be ready for filling your buns without making the dough soggy!
Are these buns suitable for people with dietary restrictions?
Yes! These Stovetop Custard Cream Buns are egg-free, accommodating those who avoid eggs in their diet. For a gluten-free version, you can use a specific gluten-free custard powder and gluten-free flour. Always double-check your other ingredients to ensure they meet any other dietary needs.
What should I do if the dough doesn’t rise?
If your dough doesn’t rise, it may be due to the yeast being inactive. To troubleshoot, check the expiration date on your instant dry yeast, and ensure you mixed it with warm water (around 110°F) for activation. If the dough still doesn’t rise after an hour, it may be best to start over to achieve that lovely fluffy texture typical of Stovetop Custard Cream Buns.
Delicious Stovetop Custard Cream Buns for Cozy Mornings
Ingredients
Equipment
Method
- In a large bowl, whisk together the instant dry yeast, sugar, and salt before adding the all-purpose flour. In a separate container, mix the warm water, milk, and oil together. Gradually combine the wet mixture with the dry ingredients, stirring until a shaggy dough forms. Knead the dough on a floured surface for about 5 minutes until it becomes smooth and elastic.
- Transfer the kneaded dough into a lightly oiled bowl, covering it with a clean kitchen towel or plastic wrap. Place the bowl in a warm, draft-free spot and let it rise for approximately 1 hour, or until it has doubled in size.
- While the dough is rising, prepare the custard filling according to package instructions for the custard powder you've chosen. Stir until smooth and thickened, then set aside to cool completely.
- Once the dough has risen, punch it down to release air, then knead it briefly on a floured surface. Divide the dough into 12 equal pieces, rolling each into a circle about 4–5 inches in diameter. Carefully place a generous spoonful of the cooled custard in the center, fold the dough over the filling, and pinch the edges to seal securely. Let the shaped buns rest for 15 minutes.
- Heat a non-stick pan over low heat and lightly grease it if necessary. Place the rested buns in the pan, cooking them for about 10 minutes on one side, or until they are golden brown. Gently flip the buns and cook for an additional 5 minutes, ensuring they are cooked through and nicely browned.
Leave a Reply