
You know that delightful crunch you hear right before indulging in a perfectly made dessert? That’s exactly what you’ll experience with these homemade cannoli shells! Crispy on the outside and slightly sweet, these classic Italian treats are surprisingly easy to whip up in your own kitchen. Best of all, they’re a fantastic opportunity to customize and get creative—whether you choose to flavor the dough or explore different fillings, the possibilities are endless. Not only do you avoid the preservatives found in store-bought versions, but you also get a fresh, comforting dessert that’s sure to be a crowd-pleaser for any gathering. Ready to elevate your dessert game? Let’s dive into crafting these delicious cannoli shells!
Why are these cannoli shells irresistible?
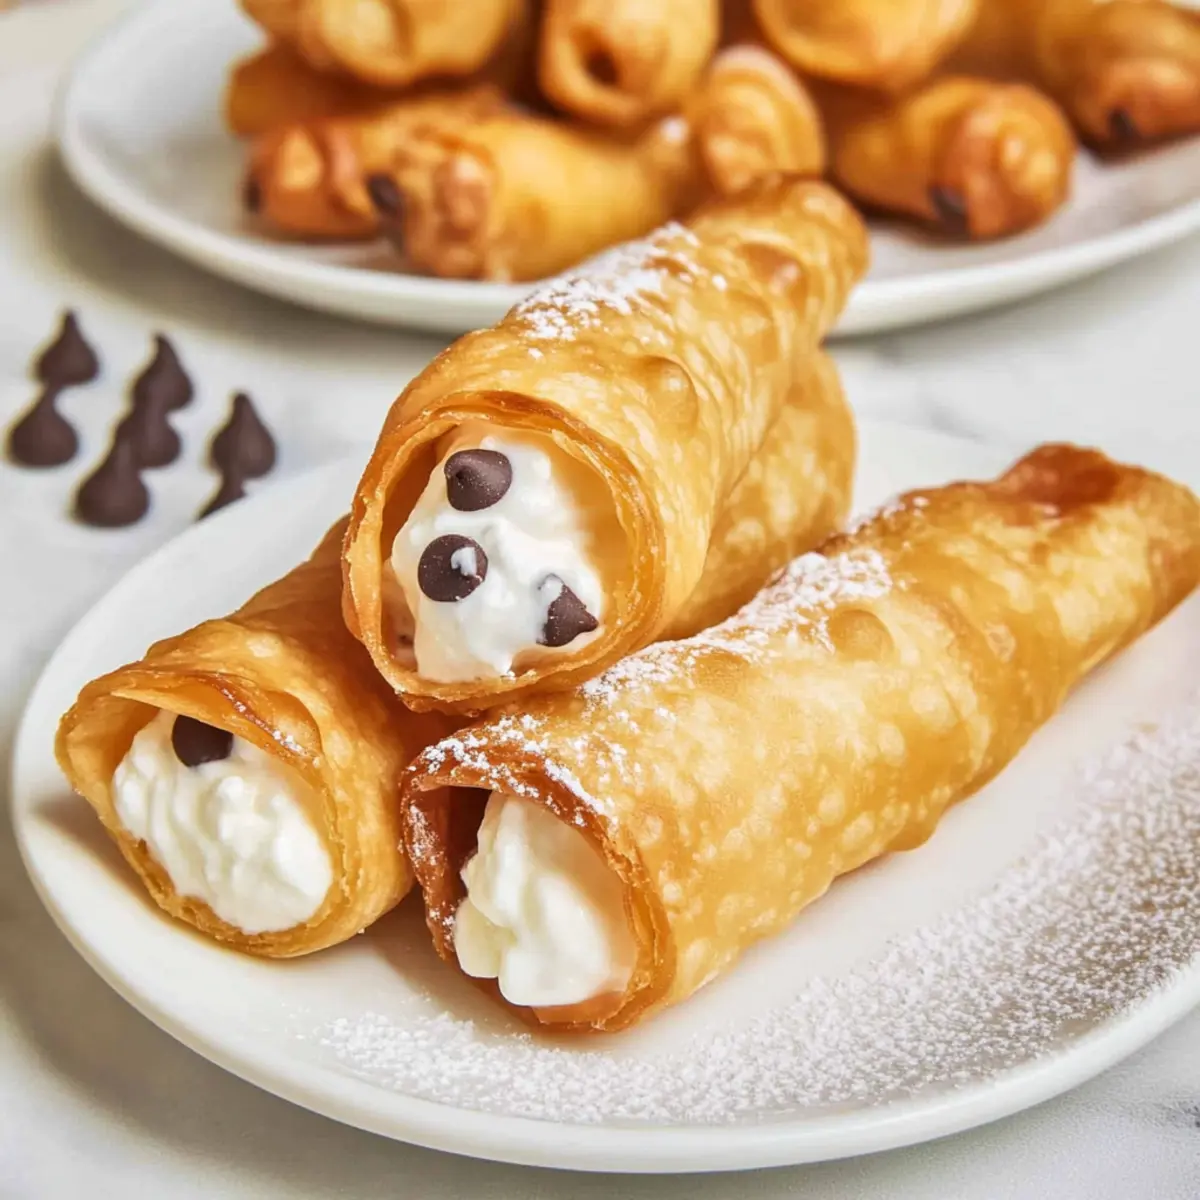
Crispy Perfection: These cannoli shells deliver a satisfying crunch that gives way to a slightly sweet flavor, making them the ultimate indulgence.
Endless Customization: Feel free to get creative! Add spices like cinnamon or nutmeg to the dough or experiment with different fillings such as sweetened ricotta or chocolate cream.
Quick and Easy: With just a few simple steps, you’ll have fresh, homemade shells in no time—perfect for impressing guests at your next gathering.
No Preservatives: Skip the store-bought options laden with preservatives; your homemade shells are fresh, flavorful, and wholesome.
Dive into Tradition: Every bite offers a taste of authentic Italian culinary heritage, perfect for indulging or sharing with family and friends. Enjoy the gratifying recipe for Hassle-Free Cheesy Pumpkin Shells alongside these delightful treats!
Cannoli Shells Ingredients
For the Dough
- All-Purpose Flour – Provides structure and stability to the shell. Note: Proper measurement is crucial—use a kitchen scale if possible or aerate before measuring to avoid a heavy result.
- Granulated Sugar – Adds subtle sweetness to the dough. Can be substituted with a sugar alternative for a lower-calorie option.
- Kosher Salt – Enhances flavor balance. Any fine salt can be used in a pinch.
- Unsalted Butter – Contributes to richness and a flaky texture in the shells. Cold and cubed for best results; margarine can be used but may alter flavor.
- Dry White Wine – Adds sweetness and creates a bubbly texture when frying. Substitute with apple juice or white grape juice for a non-alcoholic option.
- Large Egg – Binds the dough together and adds richness. Use a flax egg for a vegan alternative.
For Sealing
- Egg White – For brushing to seal dough edges. No substitutions needed, but can be omitted if desired.
Step‑by‑Step Instructions for Homemade Crispy Cannoli Shells
Step 1: Prepare Dough
In a food processor, combine all-purpose flour, granulated sugar, and kosher salt; pulse to blend. Next, add cold, cubed unsalted butter, and pulse until the mixture resembles coarse crumbs. Gradually pour in dry white wine and add the large egg, processing until a cohesive dough forms. This should take about 1-2 minutes.
Step 2: Knead & Rest
Transfer the dough to a floured surface, kneading it for 3-5 minutes until smooth and elastic. Shape the dough into a ball, wrap it in plastic film, and allow it to rest at room temperature for 1 hour. This resting period is crucial for gluten relaxation, leading to perfectly crispy cannoli shells.
Step 3: Fry Shells
Heat vegetable oil in a deep fryer or heavy saucepan to 350°F (175°C). Roll out the rested dough on a floured surface to about 1/16 inch thick, then cut into 4-inch rounds. Wrap each round around cannoli forms, brushing the edges with egg white to seal and ensure they stay together during frying.
Step 4: Cooking Cannoli
Carefully lower the wrapped forms into the hot oil, frying for about 1 minute per side. Watch for a golden brown color indicating they are done; adjust heat as needed to maintain the oil temperature. Work in batches to avoid overcrowding the pot, which can lead to uneven frying.
Step 5: Cool & Remove Forms
Once golden and crispy, remove the cannoli shells from the oil, allowing them to drain on paper towels. Gently remove the shells from the cannoli forms while they are still warm. Let the shells cool completely to maintain their delightful crunch before filling them with your desired sweets.
What to Serve with Homemade Crispy Cannoli Shells
Embrace the elegance of dessert as you create a delightful spread to accompany those golden, crunchy delights.
- Velvety Ricotta Filling: A classic choice, sweetened ricotta provides a rich and creamy contrast to the crunchy shells, making for an indulgent experience.
- Chocolate Mousse: This decadent, airy dessert adds a luxurious touch that complements the flavors of the cannoli shells, ideal for chocolate lovers.
- Fresh Berries: A vibrant medley of strawberries, raspberries, and blueberries introduces a refreshing burst of color and flavor, balancing the sweetness beautifully.
- Espresso or Coffee: A strong cup of espresso or freshly brewed coffee makes for a perfect pairing, enhancing the overall Italian experience with each sip.
- Citrus Zest: Sprinkle the cannoli with some lemon or orange zest for an uplifting zing that contrasts wonderfully with the creamy filling and rich shell.
- Powdered Sugar Dusting: A simple yet elegant finishing touch, the powdered sugar not only adds sweetness but also makes the cannoli visually appealing.
- Amaretto or Frangelico: For the adults, a splash of amaretto or hazelnut liqueur offers a fragrant complement to the savory notes of the homemade cannoli.
- Almond Biscotti: For a cozy crunch, serve some crunchy almond biscotti on the side, providing an additional textural element for your guests to enjoy.
Whichever pairing you choose, these options will elevate your serving experience while celebrating the charm of homemade crispy cannoli shells!
Tips for the Best Cannoli Shells
- Temperature Matters: Ensure your oil is at 350°F for frying; too hot can burn the shells, while cooler oil makes them greasy.
- Measure Correctly: Use a kitchen scale or aerate your flour before measuring to avoid dense cannoli shells.
- Resting the Dough: Don’t skip the 1-hour resting period; it’s essential for achieving that flaky texture in your homemade cannoli shells.
- Fry in Batches: Avoid overcrowding the pot, which can lead to uneven frying. Fry a few shells at a time for the best results.
- Use Quality Forms: If you don’t have traditional cannoli forms, create your own by wrapping a 1-inch dowel in foil—this helps shape the shells perfectly.
Cannoli Shells Variations & Substitutions
Embrace your culinary creativity and personalize these delightful cannoli shells with these fun and tasty variations!
-
Spiced Dough: Incorporate cinnamon or nutmeg into the dough to add a warm, aromatic flavor that’s perfect for fall gatherings. This subtle spice can transform your shells into a special treat that hints at holiday cheer.
-
Dairy-Free: Use margarine instead of unsalted butter for a dairy-free alternative. You can also try a plant-based milk in place of white wine for moisture, ensuring everyone can enjoy these delicious shells.
-
Gluten-Free: Substitute gluten-free all-purpose flour for a similar result that caters to gluten-free diets. This way, you can share the joy of homemade cannoli without compromising on flavor or texture!
-
Chocolate Delight: Mix in some cocoa powder (about 2 tablespoons) to the dough for a chocolatey twist. This variation not only adds color but also enhances the richness, making every bite irresistible.
-
Crispy Cornmeal: Replace a quarter of the flour with fine cornmeal for a unique texture and subtly sweet flavor. The cornmeal gives the shells a delightful crunch and a hint of its own character.
-
Fiery Kick: Add a pinch of cayenne pepper or chili powder to the dough for those who enjoy a little heat. This unexpected twist can lead to a delightful contrast when combined with sweet fillings.
-
Sweet Citrus Zest: Incorporate some freshly grated lemon or orange zest into the dough for a refreshing touch. The citrus notes not only brighten the flavor but also complement chocolate or ricotta fillings beautifully.
-
Innovative Fillings: Consider alternative fillings like Pastry Cream or Whipped Cream instead of the classic ricotta or chocolate. For a delightful surprise, try a savory filling inspired by traditional cannoli, such as a cream cheese blend with herbs.
Exploring these variations can lead to exciting culinary experiences! If you’re in the mood for something different, why not try making Cheesy Pumpkin Shells as an equally delightful alternative? Happy cooking!
Storage Tips for Cannoli Shells
- Room Temperature: Unfilled cannoli shells can be stored in an airtight container for up to 2 days at room temperature to maintain their crispiness.
- Freezer: For longer storage, place unfilled shells in a resealable plastic bag and freeze for up to 2 months. Ensure they are laid flat to prevent breakage.
- Reheating: If you need to restore crunch, reheat frozen shells in a preheated oven at 350°F for about 5-7 minutes. Avoid microwaving, which can make them soggy.
- Filled Cannoli: Make sure to enjoy filled cannoli within a few hours of preparation for the best texture, as they can become soft over time.
Make Ahead Options
These crispy cannoli shells are perfect for busy home cooks looking to save time while still delivering a delightful treat! You can prepare the dough up to 24 hours in advance by wrapping it tightly in plastic wrap and refrigerating. When you’re ready to cook, simply let it sit at room temperature for about 30 minutes before rolling out to ensure it’s easy to work with. If you prefer, you can also fry the shells ahead of time; they will stay fresh in an airtight container at room temperature for up to 2 days. This way, you can enjoy restaurant-quality cannoli shells with minimal effort before serving, just fill them with your favorite sweet filling right before indulging!
Cannoli Shells Recipe FAQs
How do I choose the right flour for cannoli shells?
Absolutely! For the best results, all-purpose flour is ideal as it provides the perfect structure and stability. Ensure you’re measuring correctly; if possible, use a kitchen scale for precision. A common mistake is to pack flour too tightly; I often aerate mine before measuring for fluffier shells.
What is the best way to store unfilled cannoli shells?
You can keep unfilled cannoli shells in an airtight container at room temperature for up to 2 days. This will help retain their delightful crunch! If you want to store them longer, freeze the shells in a resealable plastic bag for up to 2 months. Just lay them flat in the bag to prevent breakage.
Can I freeze filled cannoli shells?
It’s best not to freeze filled cannoli because they can become soggy due to the moisture from the filling. However, if you do have leftovers, store them in the refrigerator and consume them within a few hours for the best texture. Trust me—homemade desserts taste best fresh!
What should I do if my cannoli shells are too greasy?
Very! If your shells are greasy, it often means the oil temperature was too low during frying. Ensure your oil is at 350°F for optimal frying—this keeps the shells light and crisp. You can fix greasy shells by letting them rest on paper towels immediately after frying, allowing excess oil to drain away.
Are there any dietary considerations I should be aware of?
Absolutely! If you’re preparing these delightful cannoli shells for someone with dietary restrictions, feel free to substitute the large egg with a flax egg to make them vegan. Also, ensure that you check for allergies related to the fillings you plan to use, especially dairy or any nut-based options, as those are common allergens.
What’s a good way to ensure my cannoli shells turn out crispy?
For crispy cannoli shells, proper dough resting is essential. Allow the dough to rest for at least 1 hour, as this relaxes the gluten, resulting in a flaky texture. Additionally, frying in batches helps maintain oil temperature and prevents sogginess. Keep an eye on the golden-brown color while frying, which should take about 1 minute per side.
Crispy Cannoli Shells for an Authentic Italian Delight
Ingredients
Equipment
Method
- In a food processor, combine all-purpose flour, granulated sugar, and kosher salt; pulse to blend. Add cold, cubed unsalted butter, and pulse until the mixture resembles coarse crumbs.
- Gradually pour in dry white wine and add the large egg, processing until a cohesive dough forms. This should take about 1-2 minutes.
- Transfer the dough to a floured surface, kneading it for 3-5 minutes until smooth and elastic. Shape the dough into a ball, wrap it in plastic film, and allow it to rest at room temperature for 1 hour.
- Heat vegetable oil in a deep fryer or heavy saucepan to 350°F (175°C). Roll out the rested dough to about 1/16 inch thick, then cut into 4-inch rounds.
- Wrap each round around cannoli forms, brushing the edges with egg white to seal.
- Carefully lower the wrapped forms into the hot oil, frying for about 1 minute per side. Watch for a golden brown color indicating they are done.
- Once golden and crispy, remove the cannoli shells from the oil, allowing them to drain on paper towels. Gently remove the shells while they are still warm.
- Let the shells cool completely to maintain their delightful crunch before filling them with your desired fillings.
Leave a Reply