
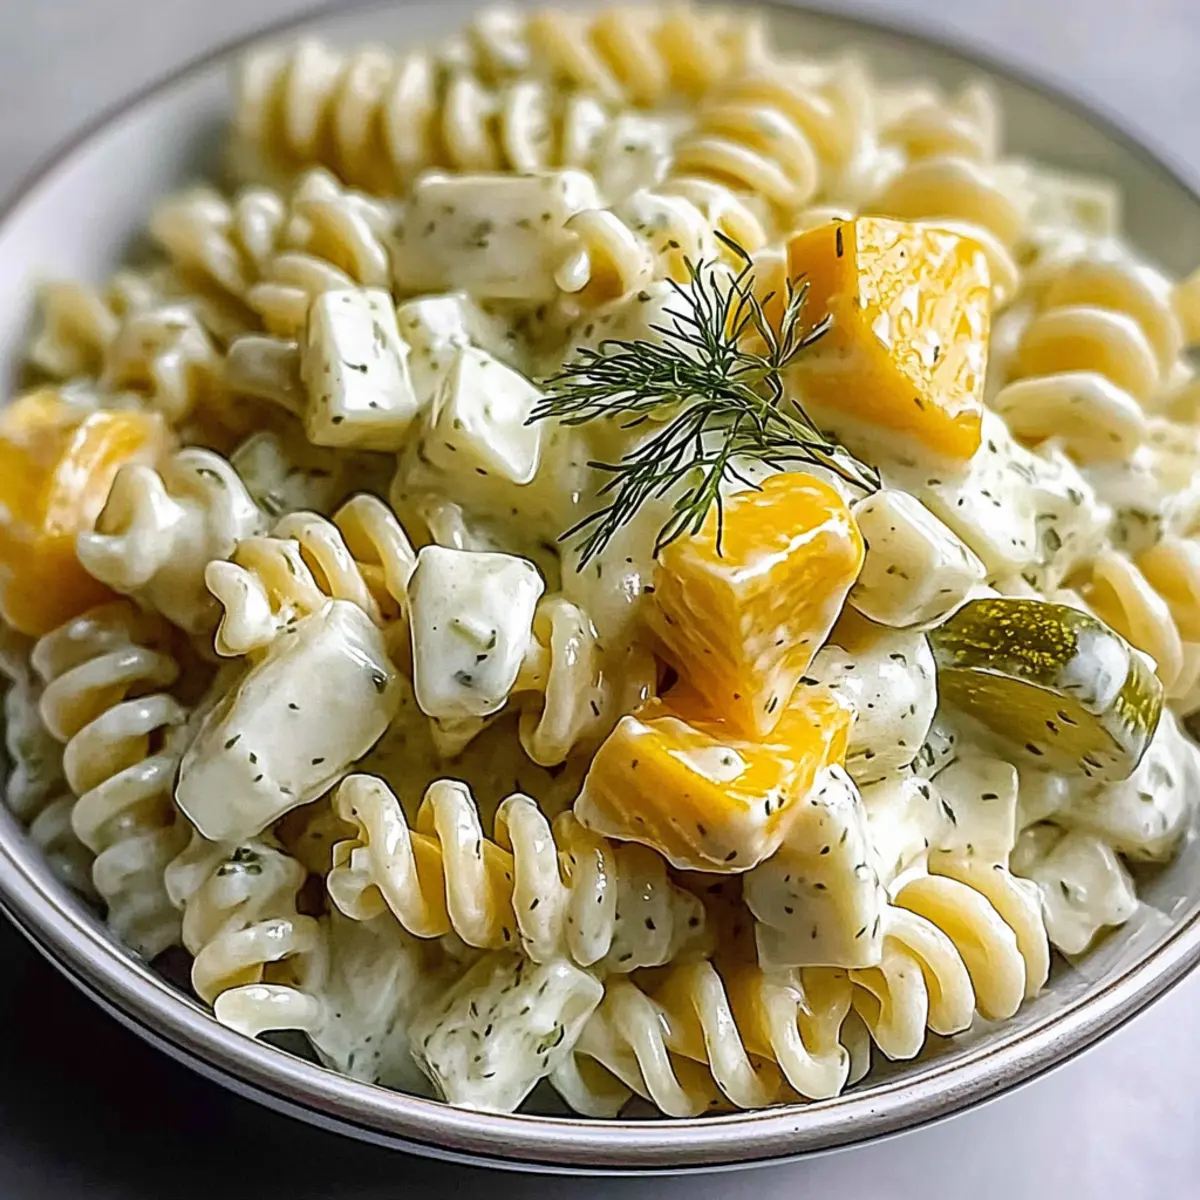
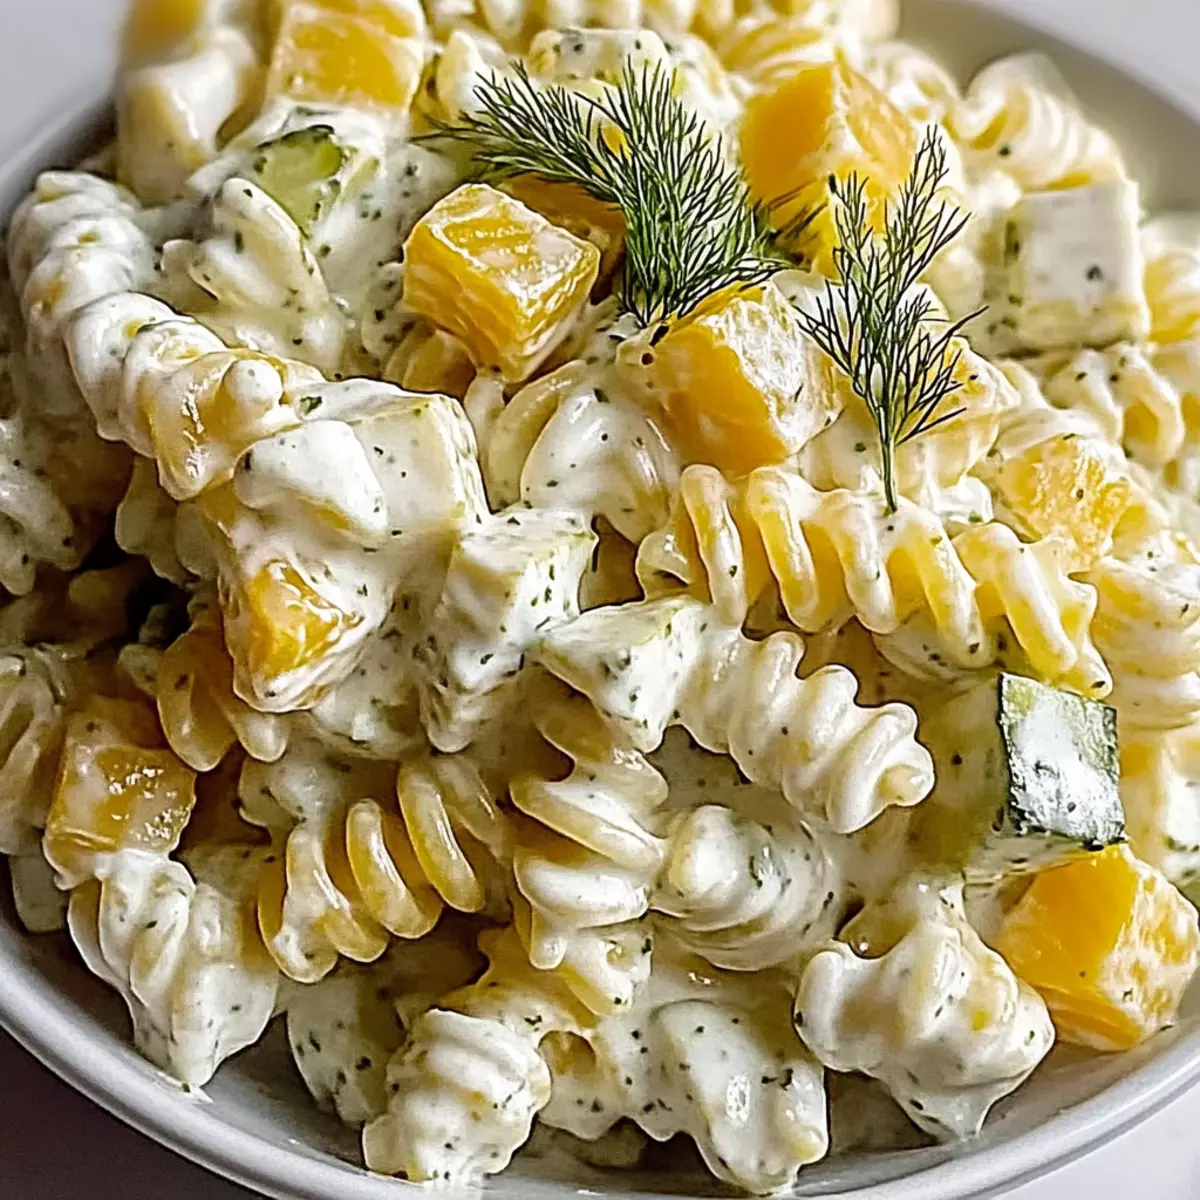
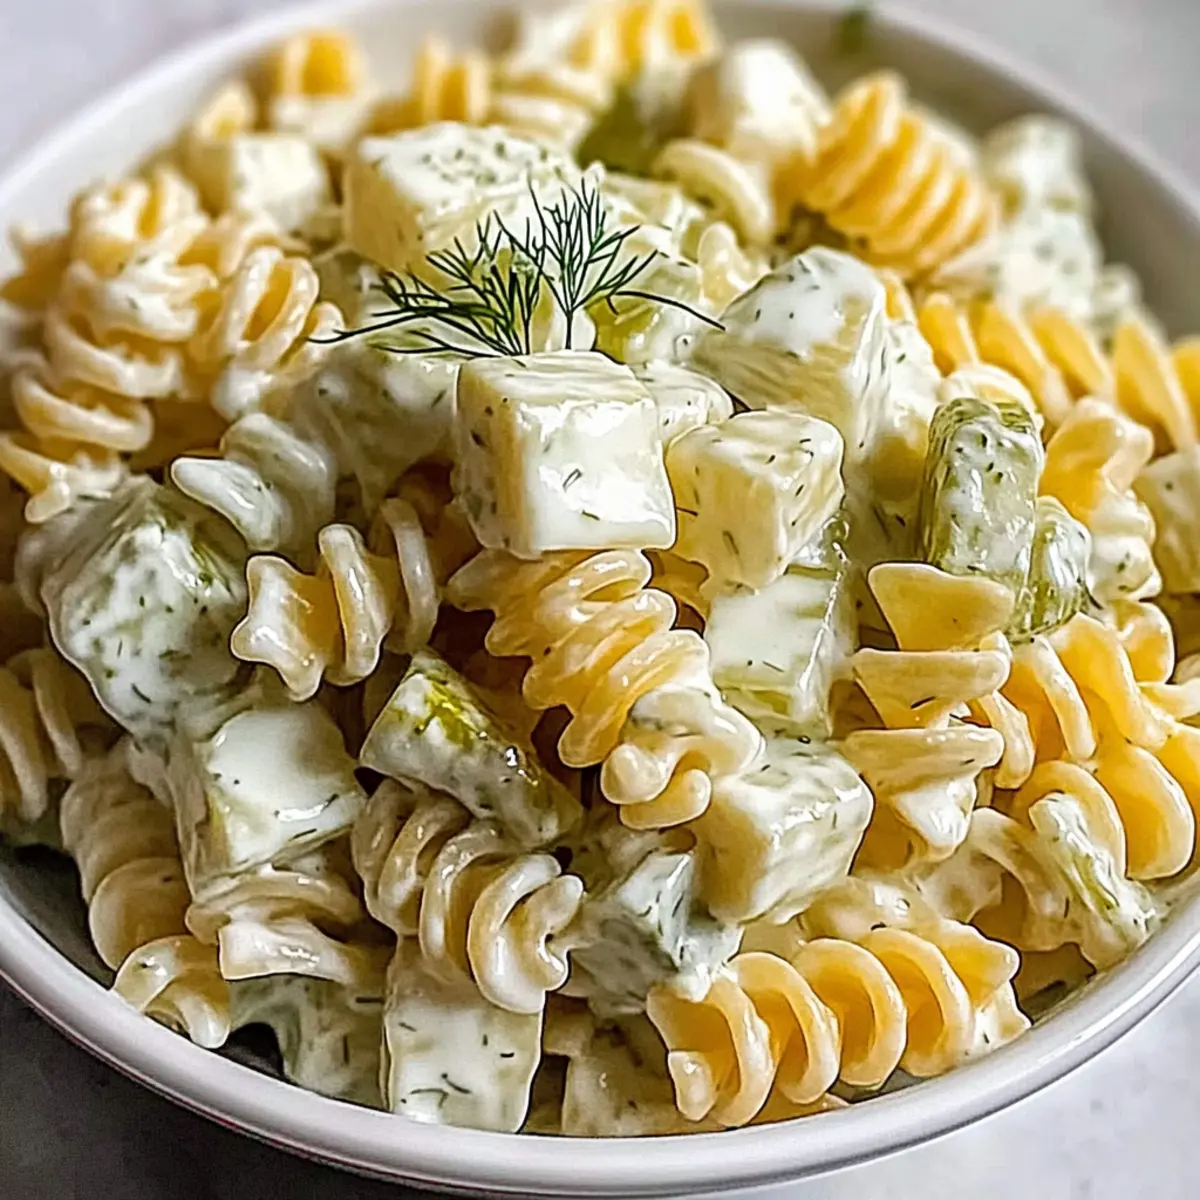
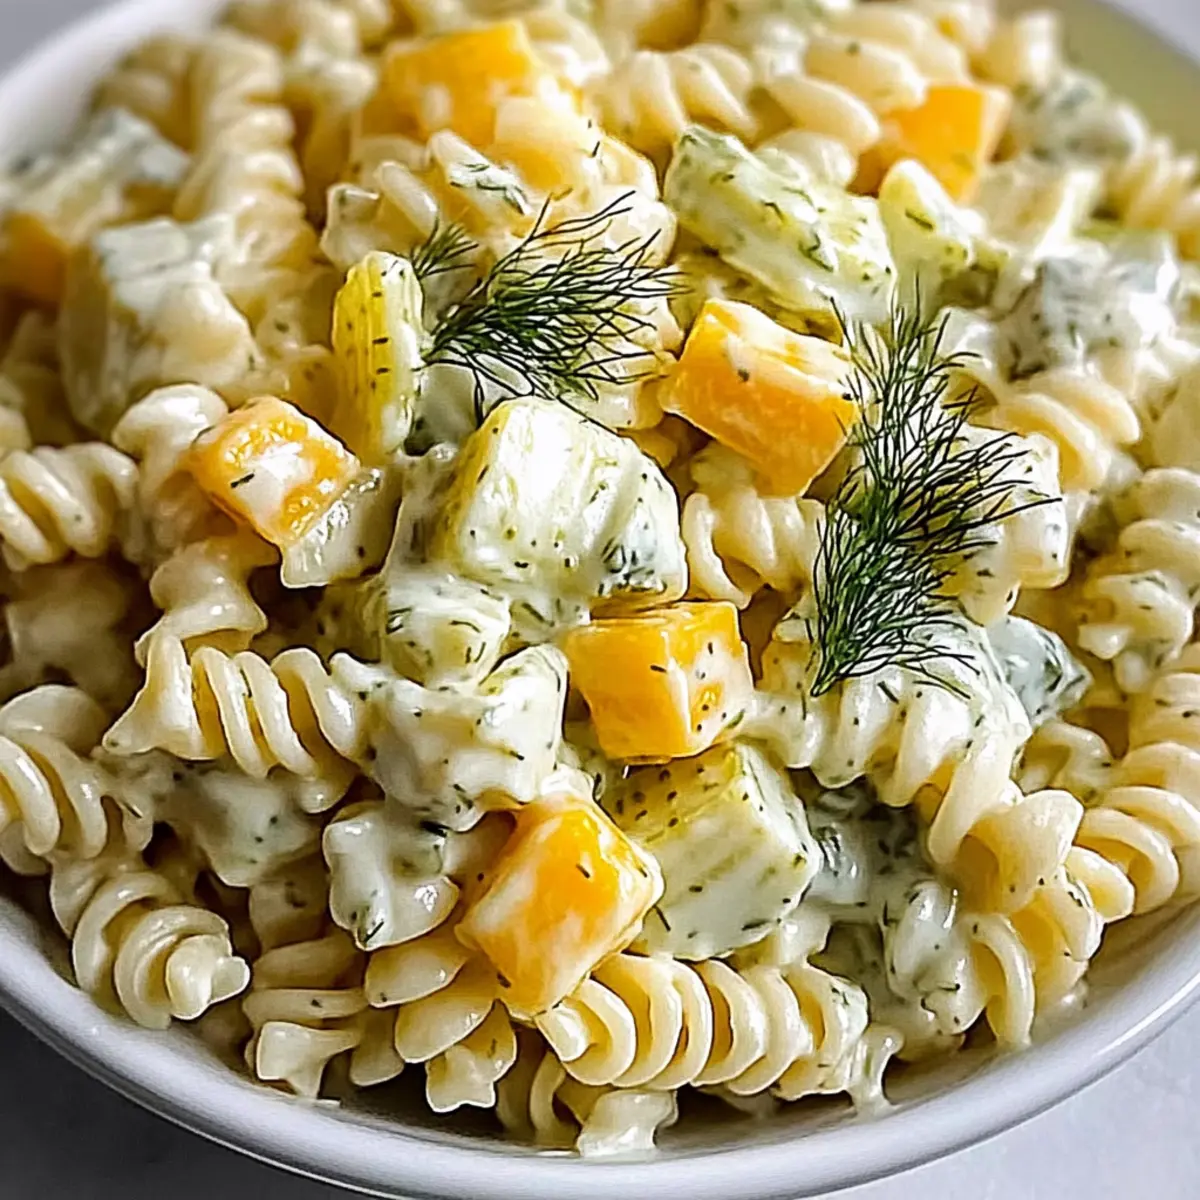
As I sift through my pantry in search of inspiration, I stumble upon a jar of dill pickles waiting for their moment to shine. This sparks a culinary vision: a Simple Dill Pickle Pasta Salad that could just become the star of my next family gathering. Perfect for those hectic weeknights when a satisfying meal feels out of reach, this dish whips together creamy goodness with a tangy crunch that everyone will adore. It’s not just flavorful; it’s a make-ahead marvel, ready for barbecues or lunchbox treats, ultimately serving up smiles all around. Are you curious about how to turn a few simple ingredients into this delightful salad? Let’s dive in!
Why You’ll Love This Dill Pickle Pasta Salad
Quick Preparation: This recipe comes together in just 30 minutes, making it a lifesaver for those busy evenings.
Family-Friendly Appeal: Packed with flavors kids and adults love, it’s perfect for barbecues or as a comforting side dish.
Customizable Delight: You can easily swap ingredients, such as using Cajun Chicken Pasta for a spicy twist or adding grilled chicken for protein.
Make-Ahead Marvel: Prepare it in advance – it tastes even better after chilling in the fridge for a few hours!
Texture Harmony: The combo of chewy pasta, crisp pickles, and creamy dressing makes every bite a satisfying experience.
Elevate your meal prep game and enjoy delicious sides that bring joy, just like this Simple Dill Pickle Pasta Salad!
Simple Dill Pickle Pasta Salad Ingredients
For the Salad
- Rotini Pasta – This shape holds the dressing beautifully; feel free to swap for penne or shell pasta if you prefer.
- Dill Pickles – Adds that signature tang and crunch; classic dill works best, but sweet pickles can offer a milder flavor.
- Fresh Dill – Enhances the salad’s freshness; if out of fresh, use dried dill (just a third of the amount).
- White Onion – Provides a delightful crunch and subtle sweetness; alternatively, green onions can add a fresh twist.
- Colby Jack Cheese – Creamy and rich; swapping it for cheddar gives a sharper flavor if desired.
For the Dressing
- Mayonnaise – Forms the creamy base; consider Greek yogurt for a lighter touch if you’re looking to cut calories.
- Sour Cream – Adds thickness to the dressing; plain yogurt makes a fine substitute.
- Dill Pickle Brine – Infuses extra tanginess; adjust according to your taste for the perfect balance.
- Salt – Brings all the flavors together; remember to season as per your preference.
- Black Pepper – Introduces a hint of warmth; adjust according to your taste.
This Simple Dill Pickle Pasta Salad is not only delicious but also versatile, allowing for various substitutes to cater to your personal preferences!
Step‑by‑Step Instructions for Simple Dill Pickle Pasta Salad
Step 1: Prep Ingredients
Begin by finely dicing the Colby Jack cheese and onion, and chop the dill pickles into bite-sized pieces. Measure out the fresh dill and set it aside. This preparation should take about 10 minutes and will ensure all components of your Simple Dill Pickle Pasta Salad are ready to combine seamlessly.
Step 2: Cook Pasta
In a large pot, bring salted water to a rolling boil. Once boiling, add the rotini pasta and cook for 7-8 minutes, stirring occasionally until al dente. You’ll know it’s ready when the pasta is firm yet tender. Drain the pasta in a colander, allowing the steam to escape while you prepare to cool it.
Step 3: Cool Pasta
Quickly rinse the drained rotini under cold running water for about 30 seconds to stop the cooking process. This will cool the pasta down and help prevent it from becoming mushy. Place the cooled pasta in a large mixing bowl, ready to soak up the flavorful dressing.
Step 4: Brine Pasta
While the rotini is still warm, pour a few tablespoons of dill pickle brine over the pasta. Gently toss to evenly coat the pasta in the tangy brine, allowing it to absorb the delightful flavor that’s characteristic of the Simple Dill Pickle Pasta Salad. Set it aside for a few moments while you make the dressing.
Step 5: Make Dressing
In a separate bowl, whisk together the mayonnaise, sour cream, and an additional splash of dill pickle brine. Taste and season with salt and pepper to enhance the overall flavor. The dressing should be creamy and tangy, complementing the crunch of the pickles and the heartiness of the pasta.
Step 6: Combine Ingredients
Add the diced cheese, chopped pickles, and minced onion to the brined pasta. Pour the prepared dressing over the mixture and use a spatula to gently fold everything together until all ingredients are well combined. This will create a beautiful, colorful base for your Simple Dill Pickle Pasta Salad.
Step 7: Chill
Cover the mixing bowl tightly with plastic wrap or a lid and refrigerate the pasta salad for at least 1 to 3 hours. This chilling time allows the flavors to meld together beautifully, resulting in a refreshing dish that’s perfect for any gathering. Remember, the longer it sits, the more flavorful it becomes!
Simple Dill Pickle Pasta Salad Variations
Feel free to let your creativity shine as you put your personal spin on this delightful salad!
-
Protein Boost: Add grilled chicken or chickpeas for an extra layer of heartiness.
-
Veggie Crunch: Toss in colorful bell peppers or halved cherry tomatoes for added freshness and texture.
-
Spicy Kick: Stir in a splash of sriracha or your favorite hot sauce for a flavorful punch.
-
Creamy Upgrade: Use ripe avocado for a buttery richness or substitute Colby Jack with feta or goat cheese for a gourmet twist.
-
Herb Swaps: Change the flavor notes by introducing fresh parsley or basil, amplifying the dish’s botanical essence.
-
Vegan Twist: Create a creamy vegan alternative with homemade cashew cream or a rich hummus dressing for a plant-based delight.
-
Nutritional Boost: Consider adding nutritious nuts like sunflower seeds or pecans for added crunch and health benefits.
For an even more refreshing experience, enjoy it alongside a crisp Quinoa Crunch Salad or serve it next to a hearty dish like Cheeseburger Alfredo Pasta.
How to Store and Freeze Simple Dill Pickle Pasta Salad
Fridge: Store in an airtight container for up to 4 days; the flavors will develop beautifully as they mingle over time.
Freezer: Although freezing is possible, it’s best enjoyed fresh. If you must, freeze for up to 2 months, but note that the creamy dressing may separate upon thawing.
Reheating: When ready to enjoy, let the salad thaw in the fridge overnight for the best texture, and consider stirring in fresh dressing if it seems dry.
Prep Ahead: Make your Simple Dill Pickle Pasta Salad a day in advance for optimal flavor, making it a perfect make-ahead dish for gatherings!
What to Serve with Simple Dill Pickle Pasta Salad
As you prepare this creamy delight, think about pairing it with dishes that elevate every bite into a harmonious feast.
-
Grilled Chicken: Juicy and tender, the smoky flavor complements the tangy pasta salad perfectly, creating a delicious contrast.
-
Corn on the Cob: Sweet and succulent, this summer staple adds a fresh crunch that elevates the overall meal experience.
-
Crusty Bread: A warm loaf provides a lovely texture, great for soaking up any creamy dressing that adds comfort to each meal.
-
Mixed Green Salad: Crisp and refreshing, a light salad brings vibrancy and balance while enhancing the flavors of the pasta dish.
-
Potato Chips: The extra crunch and saltiness from the chips are irresistible, making them a fun and savory sidekick to your salad.
-
Sparkling Lemonade: This fizzing citrus drink provides a refreshing contrast to the creaminess of the pasta, making every sip a delight.
Consider how these options intertwine with the flavors of your Simple Dill Pickle Pasta Salad, making a meal that feels both special and effortless.
Expert Tips for Simple Dill Pickle Pasta Salad
-
Don’t Overcook Pasta: Aim for al dente! Overcooking will lead to a mushy texture in your Simple Dill Pickle Pasta Salad.
-
Chill for Flavor: For the best taste, let the salad chill for at least one hour before serving. This enhances the tangy flavor fusion.
-
Adjust to Taste: Feel free to tweak the dressing. If your salad seems dry, add extra dill pickle brine or seasoning to achieve the desired creaminess.
-
Customize Crunch: Add colorful veggies like bell peppers or cherry tomatoes for extra crunch and flavor diversity, enhancing the overall appeal of the salad.
-
Storage Savvy: Store leftovers in an airtight container in the fridge for up to 4 days; the flavors will only improve as they mingle!
Make Ahead Options
Preparing the Simple Dill Pickle Pasta Salad ahead of time is a game-changer for busy cooks! You can cook the rotini pasta and chop the pickles, onions, and cheese up to 24 hours in advance, storing them separately in the refrigerator to maintain their freshness. Additionally, you can whisk together the creamy dressing and refrigerate it for up to 3 days. When you’re ready to serve, simply combine everything in a large bowl, drizzle the dressing over the salad, and give it a gentle stir to mix. This salad not only saves time but tastes even better after chilling, ensuring you’ll have a delicious make-ahead dish ready for any occasion!
Simple Dill Pickle Pasta Salad Recipe FAQs
What type of dill pickles should I use?
Absolutely! For the best results in your Simple Dill Pickle Pasta Salad, I recommend using classic dill pickles for that tangy crunch. However, if you’re looking for something sweeter, you can opt for sweet pickles. Just keep in mind that their flavor will be milder, so adjust the seasoning if needed!
How long can I store the salad in the refrigerator?
Very! You can store your Simple Dill Pickle Pasta Salad in an airtight container in the fridge for up to 4 days. The flavors will actually improve as they mingle over time, making it a fantastic make-ahead option. Just remember to give it a good stir before serving!
Can I freeze my pasta salad?
While freezing is possible, it’s best enjoyed fresh. If you must freeze your Simple Dill Pickle Pasta Salad, do so for up to 2 months. Keep in mind that the creamy dressing may separate upon thawing, resulting in a different texture. For the best results, let it thaw in the fridge overnight and add a splash of fresh dressing before serving.
What if my pasta salad seems dry when I’m ready to serve it?
No worries at all! If your Simple Dill Pickle Pasta Salad appears dry upon serving, simply stir in a bit of extra dill pickle brine or mayonnaise to moisten it up. This will enhance the creamy texture and keep the salad deliciously tangy!
Is this salad suitable for those with dietary restrictions?
Absolutely! This salad is customizable and can easily be adapted to cater to various dietary needs. If you’re preparing it for a vegetarian, it’s already suitable. For those with dairy allergies, consider substituting the cheese with a vegan alternative and the dressing with cashew cream or hummus. Just be mindful of any additional ingredients you incorporate!
Can I add additional ingredients to my pasta salad?
The more the merrier! Feel free to personalize your Simple Dill Pickle Pasta Salad by adding ingredients like grilled chicken, chickpeas, or a variety of colorful veggies such as bell peppers or cherry tomatoes for added crunch. This flexibility makes it a delightful dish for any occasion!
Simple Dill Pickle Pasta Salad: A Creamy Summer Side Delight
Ingredients
Equipment
Method
- Finely dice the Colby Jack cheese and onion, and chop the dill pickles into bite-sized pieces.
- Measure out the fresh dill and set it aside.
- In a large pot, bring salted water to a rolling boil. Add the rotini pasta and cook for 7-8 minutes until al dente.
- Drain the pasta in a colander.
- Rinse the drained rotini under cold running water for about 30 seconds to stop the cooking.
- Place cooled pasta in a large mixing bowl.
- While pasta is warm, pour dill pickle brine over the pasta and gently toss.
- In a separate bowl, whisk together mayonnaise, sour cream, and additional dill pickle brine. Season with salt and pepper.
- Add the diced cheese, chopped pickles, and minced onion to the brined pasta.
- Pour the dressing over and fold until well combined.
- Cover tightly with plastic wrap and refrigerate for at least 1 to 3 hours.
Leave a Reply