
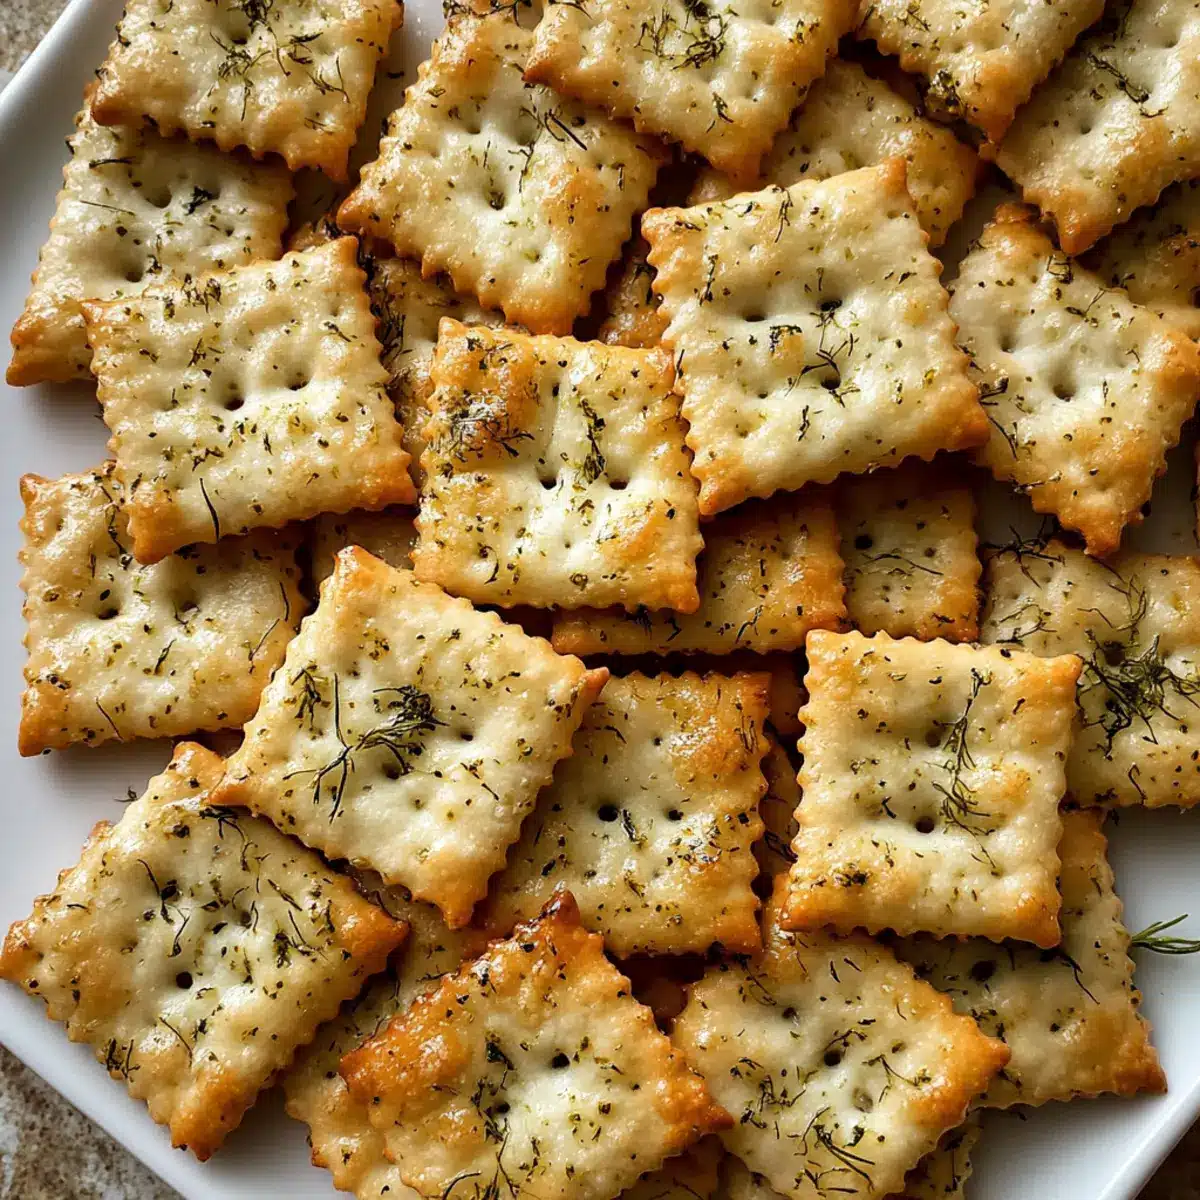
As I stood in my kitchen, the scent of dill wafting through the air, I couldn’t help but feel excited about my latest creation: Dill Pickle Saltines. This delightful no-bake snack turns ordinary saltine crackers into a zesty and bold treat that’s irresistibly crunchy. With just a handful of ingredients and minimal prep time, these quick snacks are perfect for game nights or a casual nibble on the couch. The best part? You can easily customize the flavor to suit your taste buds. Whether you like them spicy or garlicky, these Dill Pickle Saltines are bound to become your new go-to snack. Are you ready to transform your snack game? Let’s dive into this easy recipe!

Why are Dill Pickle Saltines Addictive?
Bold, Flavor-Packed Snack: These Dill Pickle Saltines burst with zesty goodness that tantalizes your taste buds, making them the perfect snack for any occasion.
No-Bake Convenience: No oven required means you can whip these up in a flash! Ideal for busy weeknights or spontaneous gatherings.
Customizable for You: Tailor the flavors to your preference; whether you crave extra spice or a richer garlic flavor, this recipe adapts to your needs.
Crowd Favorite: Whether you’re hosting a game night or just snacking at home, these crackers will impress friends and family alike!
Ultimate Crunch Factor: Enjoy the satisfying crunch that rivals any chip, making it difficult to stop at just one!
Dill Pickle Saltines Ingredients
-
For the Crackers
-
Saltine Crackers – The star of the show; these form the perfect crispy base that absorbs all the delightful flavors.
Substitution: Try using oyster crackers for a fun bite-sized option. -
For the Seasoning
-
Vegetable Oil – Helps the seasoning stick while elevating the overall taste.
Substitution: Canola or light olive oil works beautifully if you prefer a different flavor base. -
Dry Dill Seasoning Mix – Provides that iconic zesty dill flavor that makes these crackers so addictive.
Note: You can whip up a homemade version for a personal touch. -
Garlic Powder – Adds savory warmth to the mix without overpowering the dill essence.
-
Onion Powder – Enhances the flavor profile, making these crackers even more delightful.
-
Dried Dill (optional) – A dash for those who crave an extra burst of dill flavor.
-
Black Pepper – Just the right touch of seasoning to elevate the snacking experience.
-
Red Pepper Flakes (optional) – Spice them up according to your taste preferences; perfect for those who enjoy a little heat.
Step‑by‑Step Instructions for Dill Pickle Saltines
Step 1: Prepare Your Container
Start by grabbing a large zip-top bag or a lidded container to mix and toss your crackers. This will help in evenly distributing the flavors without breaking the delicate saltine crackers. Ensure that your container is spacious enough to accommodate the movement needed to coat every cracker nicely.
Step 2: Add the Crackers
Carefully place the saltine crackers into your chosen container. Allow them to rest in a single layer if possible, preventing any overlapping. This step is important to keep your Dill Pickle Saltines intact while they soak up the zesty seasonings you will soon be adding.
Step 3: Whisk the Seasoning Mixture
In a small bowl, whisk together the vegetable oil, dry dill seasoning mix, garlic powder, onion powder, black pepper, and red pepper flakes if you’re feeling bold. Ensure the mixture is well combined, creating a smooth and fragrant blend. This seasoned oil will give your crackers their signature tangy flavor.
Step 4: Coat the Crackers
Pour the seasoned oil mixture evenly over the crackers in the container. Seal the bag or container tightly and gently toss the crackers, ensuring each one is fully coated in the flavorful oil. This step is crucial to achieve that scrumptious taste that makes Dill Pickle Saltines so addictive.
Step 5: Let Them Rest
Allow the coated crackers to rest at room temperature for at least 1 hour. For the best flavor infusion, leave them sitting overnight. This waiting time lets the flavors meld beautifully, ensuring every bite is deliciously packed with that pickles-and-dill goodness.
Step 6: Serve and Enjoy
Once the waiting period is over, your delightful Dill Pickle Saltines are ready to be served. You can enjoy them straight from the container, or present them as part of a vibrant snack spread. Get ready for the compliments to roll in; these tangy crackers will be a hit!
Storage Tips for Dill Pickle Saltines
Room Temperature: Store your Dill Pickle Saltines in an airtight container at room temperature to maintain their delightful crunch, best enjoyed within 5 days.
Avoid Freezing: It’s best not to freeze these snacks, as doing so can alter their texture and result in a soggy bite when thawed.
Make-Ahead Convenience: These tangy crackers can be prepared ahead of time for parties. Just let them sit overnight to develop their flavors before serving!
Reheating: While there’s no need to reheat, if you prefer a fresh crunch, simply place them in a preheated oven at 300°F for about 5 minutes to restore some crispiness.
Dill Pickle Saltines: Customization Ideas
Feel free to take these Dill Pickle Saltines to the next level with fun and delicious variations that will tickle your taste buds.
-
Spicy Add-In: Mix in a pinch of cayenne pepper or extra red pepper flakes for a delightful heat that will make your taste buds dance.
-
Garlic Lovers Unite: Double the garlic powder for an extra punch of flavor that elevates the savoriness of each bite. You won’t regret it!
-
Citrusy Zest: Incorporate fresh lemon zest into the seasoning mix for a refreshing twist that complements the dill beautifully.
-
Ranch Fan’s Dream: Replace the dry dill mixture with ranch seasoning for a creamy twist, perfect for those who adore that classic ranch taste.
-
Cheesy Delight: Sprinkle powdered Parmesan over the crackers before sealing to add a delightful cheesy flair to your crunchy snack.
-
Herbaceous Upgrade: Toss in fresh herbs like chopped dill or parsley to bring a vibrant touch and elevate your snack to gourmet status.
-
Nacho Inspired: Mix in some taco seasoning for a nacho-flavored variety that pairs perfectly with your favorite dip or salsa.
-
Sweet Heat: For a unique twist, add a dash of honey or brown sugar to balance the dill with a hint of sweetness, creating a delightful contrast.
These variations are just the beginning; play around until you find the perfect combination that becomes your family’s favorite! Don’t forget to check out these serving suggestions to create an unforgettably tasty snack spread for your next gathering!
Make Ahead Options
These Dill Pickle Saltines are perfect for meal prep! You can mix the seasoned oil and coat the crackers up to 24 hours in advance for a quick and flavorful snack option. Just follow the recipe until the resting phase, then seal the container and refrigerate to let the flavors meld beautifully. To maintain their crunchiness, avoid stacking the crackers too closely and ensure the container is airtight. When you’re ready to serve, simply take them out of the fridge and enjoy! With this make-ahead approach, you’ll have a tasty treat ready to go whenever cravings strike, saving you precious time on busy days.
Expert Tips for Dill Pickle Saltines
-
Gentle Tossing: Ensure the oil mixture is evenly distributed by gently tossing the crackers; this avoids any soggy bites while keeping them intact.
-
Right Container Size: Use a large enough container to allow for tossing without crumbling the crackers; cramped containers lead to broken snacks.
-
Overnight Flavor: For maximum flavor impact, allow the crackers to rest overnight; this time allows the seasoning to fully penetrate every cracker.
-
Ingredient Variations: Don’t be afraid to customize your seasoning blend; try adding more red pepper flakes for a spicy kick or extra garlic for a richer taste.
-
Storage Practices: Store your Dill Pickle Saltines in an airtight container at room temperature to keep them fresh; avoid freezing as it may change their delightful crunch.
What to Serve with Dill Pickle Saltines
Satisfy your snack cravings by pairing these zesty crackers with delightful accompaniments that enhance every bite.
-
Creamy Hummus: This smooth dip adds a rich, nutty contrast to the tangy flavor of the saltines, making it a perfect match.
-
Veggie Platter: Fresh, crunchy vegetables like carrots and cucumbers provide a refreshing contrast and complement the salty, bold flavors beautifully.
-
Cheddar Cheese Slices: Melty, sharp cheddar balances the saltiness, creating a delightful combination that is sure to please cheese lovers.
-
Spicy Ranch Dip: A zesty addition that enhances the dill flavor while providing a creamy texture that keeps you reaching for more.
-
Pickled Vegetables: Keep the pickle theme alive with a variety of pickled veggies, offering a crunchy and tangy bite that snickering fans will adore.
-
Charcuterie Board: Nestle your Dill Pickle Saltines among cured meats, cheeses, and spreads to elevate your social gatherings and impress your guests.
-
Crispy Potato Chips: For those craving extra crunch, potato chips add a different texture, making snacking endlessly satisfying and playful.
-
Sweet Tea or Lemonade: Pair your snacks with refreshing beverages that harmonize with the salty and tangy elements of the Dill Pickle Saltines, rounding out the experience.
Dill Pickle Saltines Recipe FAQs
How do I choose the best saltine crackers for this recipe?
Absolutely! Look for saltine crackers that are fresh and free from any dark spots or cracks. This ensures that they will maintain the right texture and crunch after being seasoned. If you want a fun twist, try using oyster crackers for bite-sized variations.
How long can I store Dill Pickle Saltines?
These delightful crackers can be kept in an airtight container at room temperature for up to 5 days. To ensure they stay fresh, avoid exposing them to moisture. They are best enjoyed fresh, so try to consume them within this timeframe for maximum crunch!
Can I freeze Dill Pickle Saltines?
I recommend avoiding freezing these snacks, as freezing can significantly alter their texture and lead to a soggy outcome when thawed. A great alternative is to prepare them in advance, letting them sit overnight to develop flavor without freezing.
What should I do if my crackers become soggy?
To prevent sogginess, ensure you’re gently tossing the crackers with the oil mixture rather than oversaturating them. If by chance they do get soggy, place them in a preheated oven at 300°F for about 5 minutes to help restore some of that beloved crunch!
Are Dill Pickle Saltines safe for people with allergies?
Always read the labels of your ingredients if there are any allergies in your household. While the basic recipe is dairy-free and can be made gluten-free with appropriate crackers, be cautious of added seasonings which may contain allergens.
Can I customize the spice level in my Dill Pickle Saltines?
Very much! If you prefer more heat, simply increase the amount of red pepper flakes or cayenne pepper in the seasoning mix. For those who adore garlic, adding extra garlic powder can make this snack even more flavorful and irresistible!
Dill Pickle Saltines: A Tangy Snack You'll Crave Daily
Ingredients
Equipment
Method
- Start by grabbing a large zip-top bag or a lidded container to mix and toss your crackers. This will help in evenly distributing the flavors without breaking the delicate saltine crackers.
- Carefully place the saltine crackers into your chosen container. Allow them to rest in a single layer if possible, preventing any overlapping.
- In a small bowl, whisk together the vegetable oil, dry dill seasoning mix, garlic powder, onion powder, black pepper, and red pepper flakes if you're feeling bold.
- Pour the seasoned oil mixture evenly over the crackers in the container. Seal the bag or container tightly and gently toss the crackers.
- Allow the coated crackers to rest at room temperature for at least 1 hour. For the best flavor infusion, leave them sitting overnight.
- Once the waiting period is over, your delightful Dill Pickle Saltines are ready to be served.
Leave a Reply