
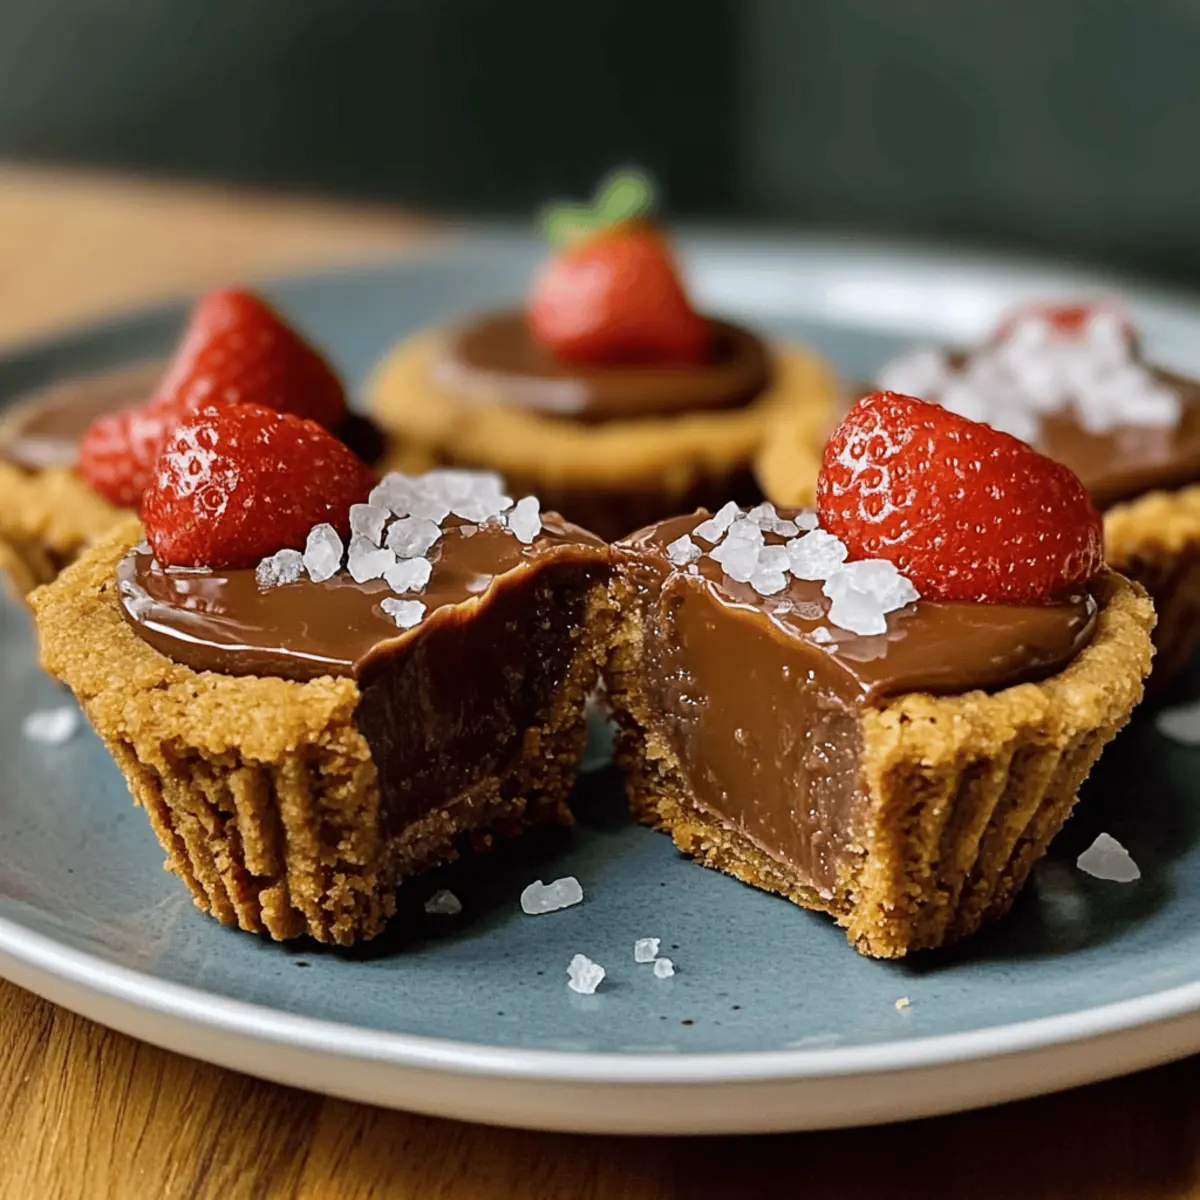
As I stood in my kitchen, the smell of melting chocolate wafting through the air, I couldn’t help but feel excited about my latest creation: Sea Salted Millionaire’s Cookie Cups. These little delights capture the essence of traditional millionaire’s shortbread in a fun, easy-to-eat cup form. They’re the perfect balance of chewy, buttery cookie, luxurious caramel, and smooth chocolate, all finished with a sprinkle of flaky sea salt. Not only are these cookie cups indulgent treats, but they’re also make-ahead friendly, ensuring you’re always prepared for unexpected visitors or spontaneous cravings. Plus, they’re an absolute crowd-pleaser at gatherings! Ready to dive into the world of decadent baking with me? Let’s create some magic!
Why Are These Cookie Cups Irresistible?
Decadent Sea Salted Millionaire’s Cookie Cups bring a twist to a classic dessert! Elevated Flavor comes from the harmony of buttery cookie, sweet caramel, and rich chocolate—each bite is pure bliss. Crowd-Pleasing and perfect for any occasion, your friends and family will be asking for seconds! Make-Ahead Friendly, you can whip them up ahead of time for stress-free entertaining. And if you love variations, check out how to sneak in some nuts or swap chocolate types for a fun upgrade!
Sea Salted Millionaire’s Cookie Cups Ingredients
Get ready to create something truly special with these Sea Salted Millionaire’s Cookie Cups!
For the Cookie Dough
- Plain Flour – Forms the base of the cookie dough, providing structure. Note: Substitute with a 1:1 gluten-free flour blend if desired.
- Bicarbonate of Soda – Helps the cookies rise and remain soft. No direct substitution needed.
- Cornflour – Keeps the cookies chewy and tender. Can use additional all-purpose flour as a substitute.
- Salt – Enhances the sweetness and balances flavors. Sea salt can be used for added flavor.
- Unsalted Butter – Adds richness to both the cookie dough and caramel. Salted butter can be used, just reduce added salt slightly.
- Light Brown Soft Sugar – Contributes moisture and a deep caramel flavor. Granulated sugar can be substituted for a less rich flavor.
- Granulated Sugar – For sweetness and texture. Use light brown sugar for additional depth.
- Egg – Binds the ingredients together and adds richness. No substitute recommended unless vegan alternatives are used.
- Vanilla Extract – Adds warm, aromatic flavor notes. Use pure extract for best results.
- Milk Chocolate Chips – Provide bursts of chocolate within the cookie. Substitute with dark or semi-sweet chocolate for a richer flavor.
For the Caramel
- Granulated Sugar (for caramel) – Essential for making the caramel sauce. No substitutions advised for the caramel process.
- Double Cream – Gives the caramel its luxurious creaminess. Heavy cream can be substituted.
- Yorkshire Sea Salt – Adds a finishing touch of flavor. Other flaky sea salts can be used if Yorkshire is unavailable.
For the Topping
- Milk Chocolate (for topping) – Smooth topping that enhances visual appeal. Dark or white chocolate can also be used for variations.
Step‑by‑Step Instructions for Sea Salted Millionaire’s Cookie Cups
Step 1: Preheat the Oven
Begin by preheating your oven to 180°C (350°F). While the oven heats up, take a moment to generously grease a standard muffin tin with butter or cooking spray. This will ensure that your Sea Salted Millionaire’s Cookie Cups come out easily once they’ve baked to a lightly golden perfection.
Step 2: Make the Cookie Dough
In a medium bowl, whisk together the plain flour, bicarbonate of soda, cornflour, and a pinch of salt until well combined. In a larger bowl, cream the unsalted butter with the light brown sugar and granulated sugar until the mixture becomes light and fluffy—this typically takes about 3-5 minutes. Next, add in the egg and vanilla extract, blending well, then gently fold in the dry ingredients along with the milk chocolate chips.
Step 3: Shape the Cookie Cups
Use a cookie scoop or a tablespoon to portion the cookie dough into your prepared muffin tin. Press the dough down gently into each cup to create a slight indentation in the center. Aim for an even layer to help create a perfect cup shape, making sure to leave some room for baking expansion.
Step 4: Bake
Place the muffin tin in the preheated oven and bake for 10-12 minutes. The Sea Salted Millionaire’s Cookie Cups are ready when they turn a light golden brown around the edges but remain soft in the center. Remove them from the oven and let them cool in the tin for a few minutes before transferring them to a cooling rack.
Step 5: Prepare the Caramel
For the luscious caramel layer, combine the granulated sugar, butter, and a splash of water in a medium saucepan over medium heat. Stir the mixture until the sugar dissolves and it turns a rich golden color, usually taking about 5-7 minutes. Carefully whisk in the double cream until smooth and rich, then add the Yorkshire sea salt to enhance the flavor.
Step 6: Fill the Cookie Cups
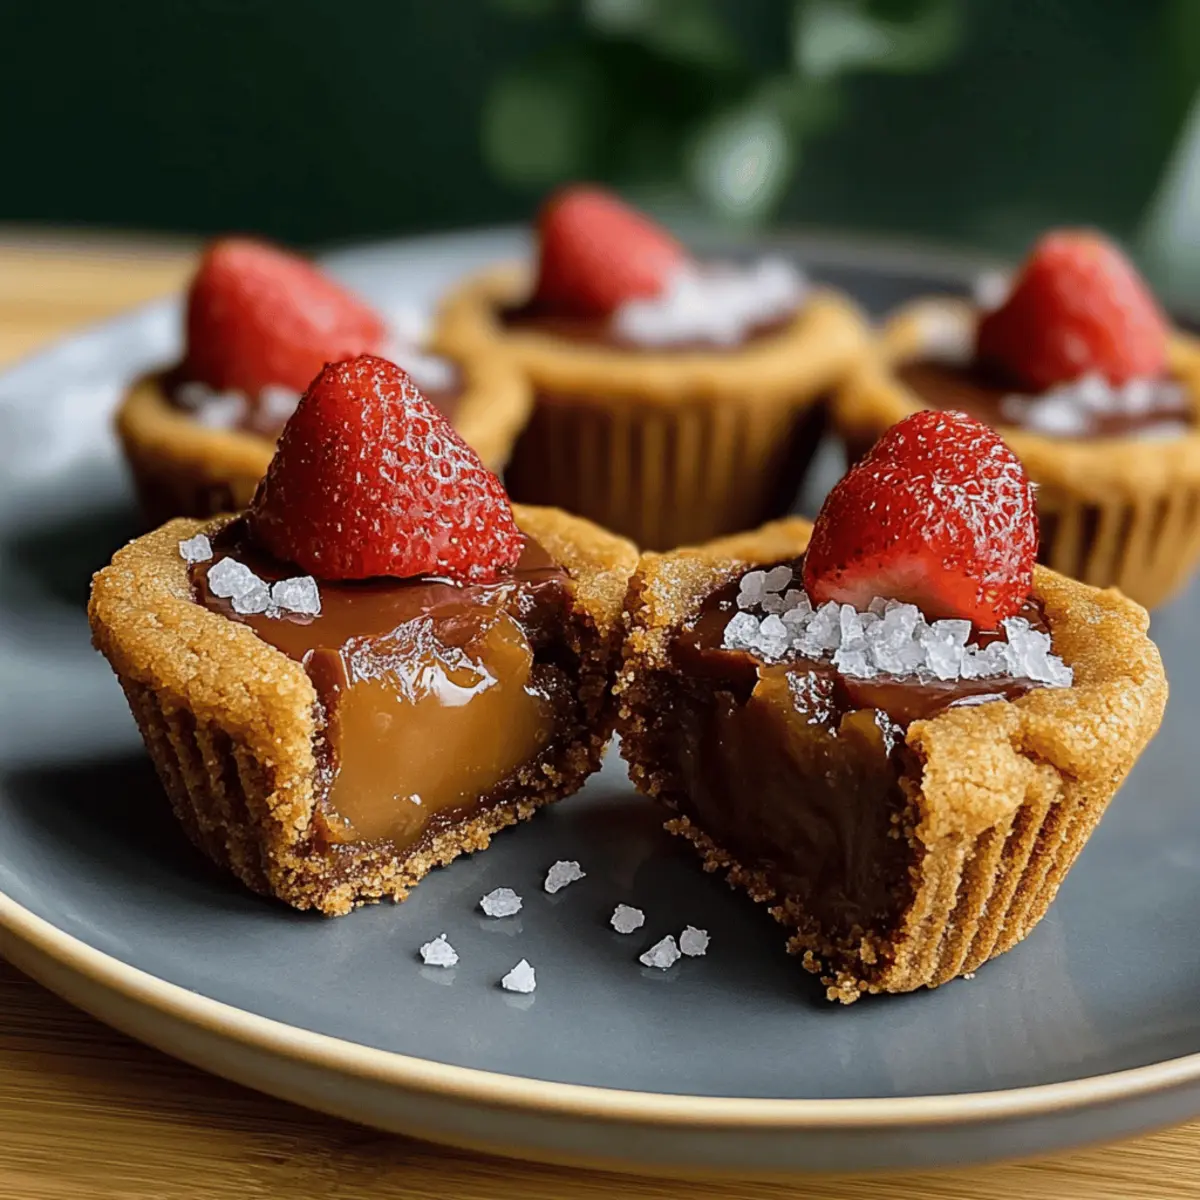
Once the cookie cups have cooled, it’s time to spoon the velvety caramel into the center of each cup. Be generous; filling them to the brim creates a delightful surprise in every bite. Let the caramel set for a few minutes at room temperature so that it thickens slightly before topping them with chocolate.
Step 7: Add the Chocolate Topping
Melt the milk chocolate in a microwave-safe bowl in 30-second intervals, stirring until smooth. Once melted, pour the chocolate over the caramel-filled cookie cups, ensuring an even layer. While the chocolate is still warm, sprinkle a pinch of sea salt on top for that perfect finish.
Step 8: Cool & Set
Allow the Sea Salted Millionaire’s Cookie Cups to cool at room temperature, or for a quicker set, place them in the refrigerator for about 30 minutes. This will help the chocolate to harden and create a lovely texture that complements the caramel and cookie base.
Step 9: Serve
Once set, arrange your decadent Sea Salted Millionaire’s Cookie Cups on a beautiful platter. These delightful treats are ready to be shared with friends and family, perfect for any occasion or simply as a well-deserved indulgence!
Expert Tips for Sea Salted Millionaire’s Cookie Cups
-
Perfect Cup Shape: Avoid overfilling the muffin cups with dough; this prevents collapsing and ensures beautiful, uniform shapes.
-
Chill for Texture: Chilling the caramel and chocolate before serving enhances their textures and allows the flavors to blend beautifully.
-
Shiny Chocolate Finish: For a glossy chocolate layer, mix in a teaspoon of coconut oil while melting the chocolate before pouring it over the caramel.
-
Texture Balance: Allow the cookie cups to cool slightly before filling with caramel to prevent melting; this creates that perfect chewy, caramel-filled center.
-
Use Quality Ingredients: Choosing high-quality chocolate and fresh ingredients will elevate the flavor of your Sea Salted Millionaire’s Cookie Cups, making them truly special.
What to Serve with Sea Salted Millionaire’s Cookie Cups
These delightful cookie cups are a sweet journey through flavor, perfect for creating a memorable dessert experience with your loved ones.
- Vanilla Bean Ice Cream: A classic pairing! The creamy, cool ice cream beautifully contrasts with the warm, chewy cookie cups for an indulgent treat.
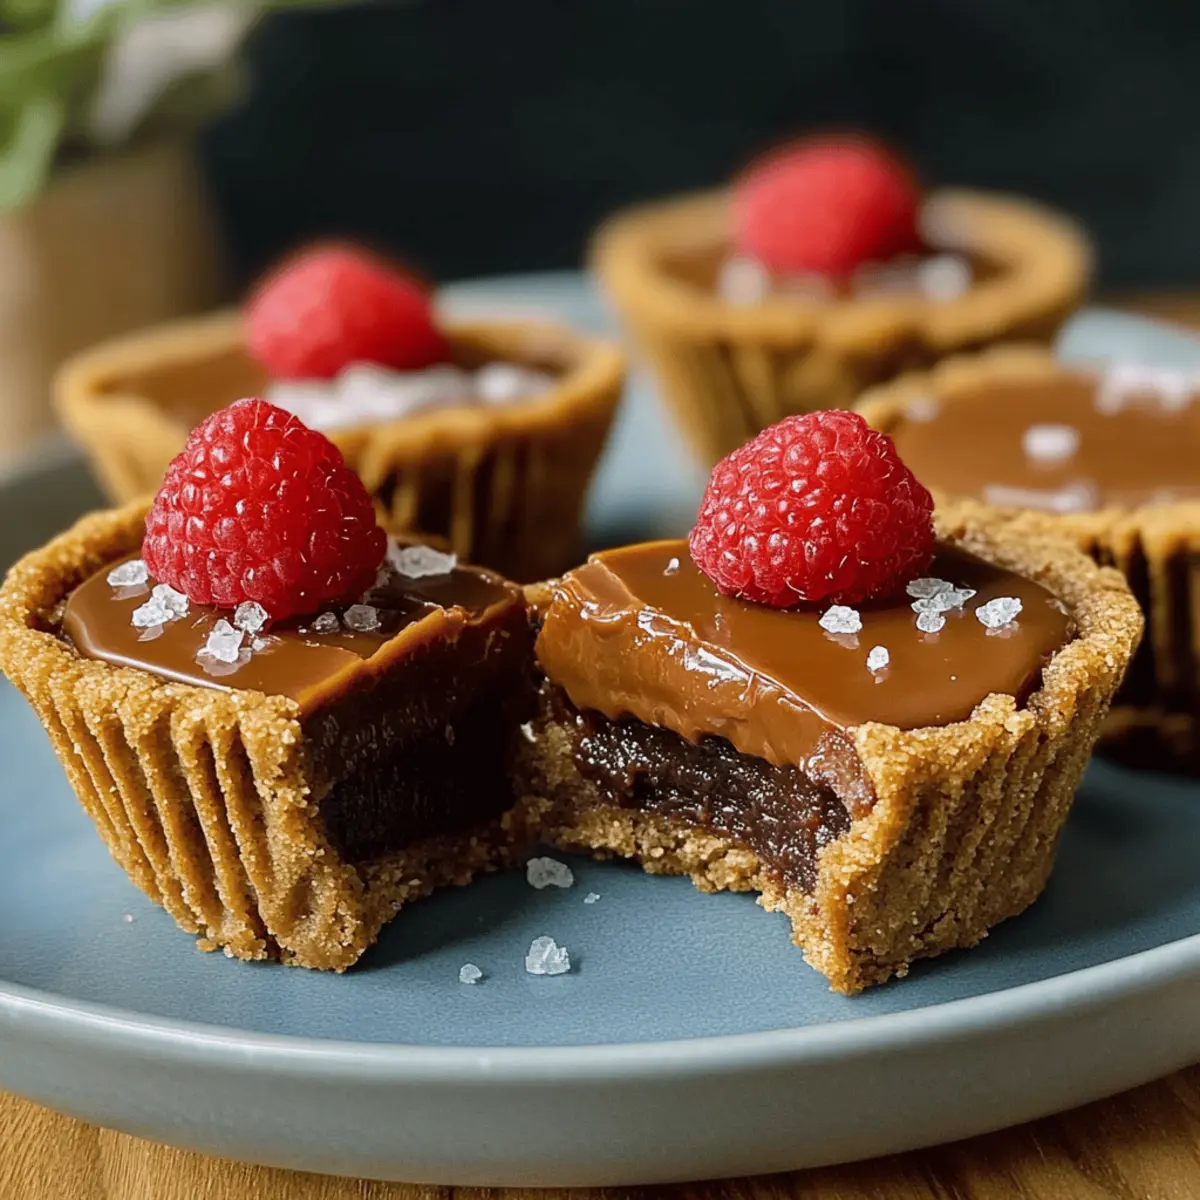
- Fresh Berries: Bright, tart berries like raspberries or strawberries add a refreshing balance to the rich flavors of the cookie cups and enhance presentation.
- Whipped Cream: Fluffy, sweetened whipped cream provides a light and airy texture that complements the dense cookie cups wonderfully. A perfect dollop can elevate your dessert!
- Espresso or Coffee: The rich flavors of a well-brewed cup can enhance the sweetness of these cookie cups, making for a cozy and comforting pairing.
- Chocolate Drizzle: For the ultimate chocolate lover, drizzling extra melted chocolate on your plate presents a decadent touch while enhancing the indulgent flavors of the cookie cups.
- Almond or Hazelnut Milk: If you’re looking for a lighter drink option, try nut milk. It adds a delightful nuttiness that works beautifully alongside the sweet, crunchy cups.
- Chocolate Dipped Pretzels: Serve these salty, sweet snacks on the side to create an exciting bridge between the sweet cookie cups and savory flavors, adding depth to your dessert experience.
Sea Salted Millionaire’s Cookie Cups Variations
Feel free to play with these delightful cookie cups and make them your own!
- Quick Caramel: Substitute homemade caramel with store-bought for a time-saving option, allowing you to whip these up in no time.
- Chocolate Swap: Use dark or semi-sweet chocolate for the topping to enhance the richness and create a deeper flavor profile. Rich flavors can elevate the cookie experience to new heights!
- Nutty Addition: Fold in chopped nuts or dried fruits into the cookie dough for texture and a burst of flavor. Nuts add a delightful crunch, while fruits can introduce a hint of tartness.
- Ice Cream Pairing: Serve these cookie cups with a scoop of vanilla ice cream to elevate your dessert experience. It’s a match made in heaven that brings a decadent creaminess.
- Gluten-Free: Substitute plain flour with a gluten-free flour blend for those with dietary restrictions, ensuring everyone can indulge in this treat.
- Flavored Salts: Experiment with flavored sea salts, like smoked or truffle, for a unique twist that enhances the overall taste experience.
- Stuffed Surprises: Add a dollop of peanut butter or Nutella just before the chocolate topping for a hidden layer of indulgence and surprise.
- Cute Mini Versions: Make mini cookie cups using a mini muffin tin; these bite-sized delights are perfect for parties and gatherings!
For even more delicious cookie ideas, be sure to check out my Chewy Pumpkin Cookies or the rich flavor of Thick Chewy Pumpkin Chocolate Chip Cookies. Enjoy exploring these variations—each one adds a new twist to your cookie magic!
How to Store and Freeze Sea Salted Millionaire’s Cookie Cups
Room Temperature: Keep cookie cups in an airtight container for up to 3 days, ensuring they stay soft and chewy without drying out.
Fridge: These cookie cups can be stored in the refrigerator for up to a week. Just make sure to seal them well to avoid absorbing any other odors.
Freezer: To freeze, wrap each cookie cup individually in plastic wrap, then store them in a freezer-safe bag for up to 2 months. Thaw at room temperature before enjoying.
Reheating: If you prefer warm cookie cups, simply pop them in the microwave for about 10-15 seconds, and they’ll be gloriously gooey again!
Make Ahead Options
These Sea Salted Millionaire’s Cookie Cups are a fantastic option for meal prep and can save you time when life gets busy! You can prepare the cookie dough and fill the muffin tin up to 24 hours in advance—just cover the muffin tin tightly with plastic wrap and refrigerate it. The caramel can also be made ahead and stored in the fridge for up to 3 days in an airtight container. To maintain quality, allow the caramel to come to room temperature before filling the cookie cups. When you’re ready to serve, simply bake the cookie bases, fill them with caramel, top with melted chocolate, and let them set. This way, you’ll have delicious treats on hand without the last-minute rush!

Sea Salted Millionaire’s Cookie Cups Recipe FAQs
What kind of flour should I use for the cookie cups?
You can use plain flour as the base for your Sea Salted Millionaire’s Cookie Cups, delivering the perfect structure. If you’re looking for a gluten-free option, simply substitute with a 1:1 gluten-free flour blend. This will keep the texture lovely and chewy!
How should I store the cookie cups once they’re made?
To keep your Sea Salted Millionaire’s Cookie Cups fresh, store them in an airtight container at room temperature for up to 3 days. If you want them to last even longer, you can refrigerate them for up to a week, just ensure they’re well-sealed to avoid absorbing other odors from the fridge.
Can I freeze these cookie cups?
Absolutely! To freeze your Sea Salted Millionaire’s Cookie Cups, wrap each one individually in plastic wrap, then place them in a freezer-safe bag. They can be stored this way for up to 2 months. When you’re ready to indulge, simply thaw them at room temperature, and they’re ready to enjoy.
What if my caramel sauce doesn’t thicken?
If your caramel sauce seems too thin, ensure that you are cooking it long enough for the sugars to dissolve and the water to evaporate, which usually takes about 5-7 minutes on medium heat. Stir continuously to prevent burning. If it’s still too runny after cooking, let it cool to room temperature for a few minutes; sometimes, it will thicken as it cools. For a thicker consistency, you could also consider cooking it slightly longer, keeping an eye on it to avoid burning.
Are these cookie cups suitable for people with allergies?
These delightful cookie cups contain common allergens such as eggs, dairy, and gluten. If you are cooking for someone with allergies, consider using egg substitutes (like flaxseed meal or applesauce) and a gluten-free flour blend. Always check the labels on your chocolate and caramel ingredients for any potential allergens.
Sea Salted Millionaire’s Cookie Cups: A Sweet, Salty Delight
Ingredients
Equipment
Method
- Preheat your oven to 180°C (350°F) and grease a standard muffin tin.
- In a medium bowl, whisk together the plain flour, bicarbonate of soda, cornflour, and salt. In a larger bowl, cream the unsalted butter with light brown sugar and granulated sugar until light and fluffy. Add the egg and vanilla extract, then fold in the dry ingredients and milk chocolate chips.
- Scoop cookie dough into prepared muffin tin and press down to create indentations.
- Bake for 10-12 minutes until lightly golden brown around the edges but soft in the center. Let cool in the tin.
- In a saucepan, combine granulated sugar, butter, and a splash of water; stir until sugar dissolves and turns golden. Whisk in double cream and add Yorkshire sea salt.
- Spoon caramel into cooled cookie cups and let set.
- Melt milk chocolate in a microwave-safe bowl. Pour over caramel in cookie cups and sprinkle with sea salt.
- Allow cookie cups to cool at room temperature or refrigerate for 30 minutes to set.
- Serve on a platter for sharing.
Leave a Reply