
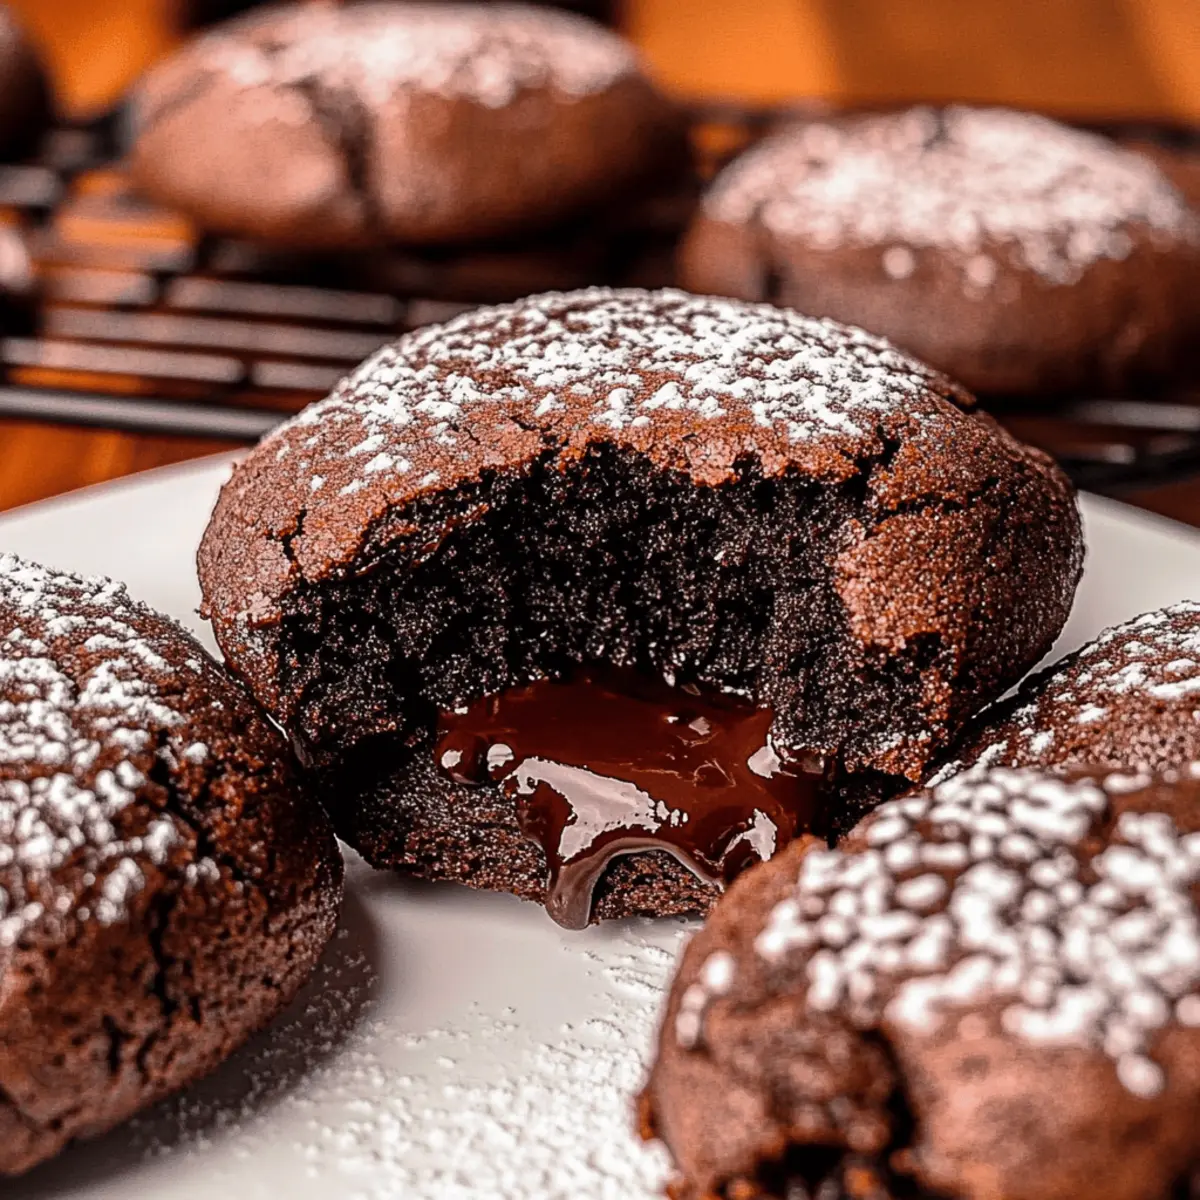
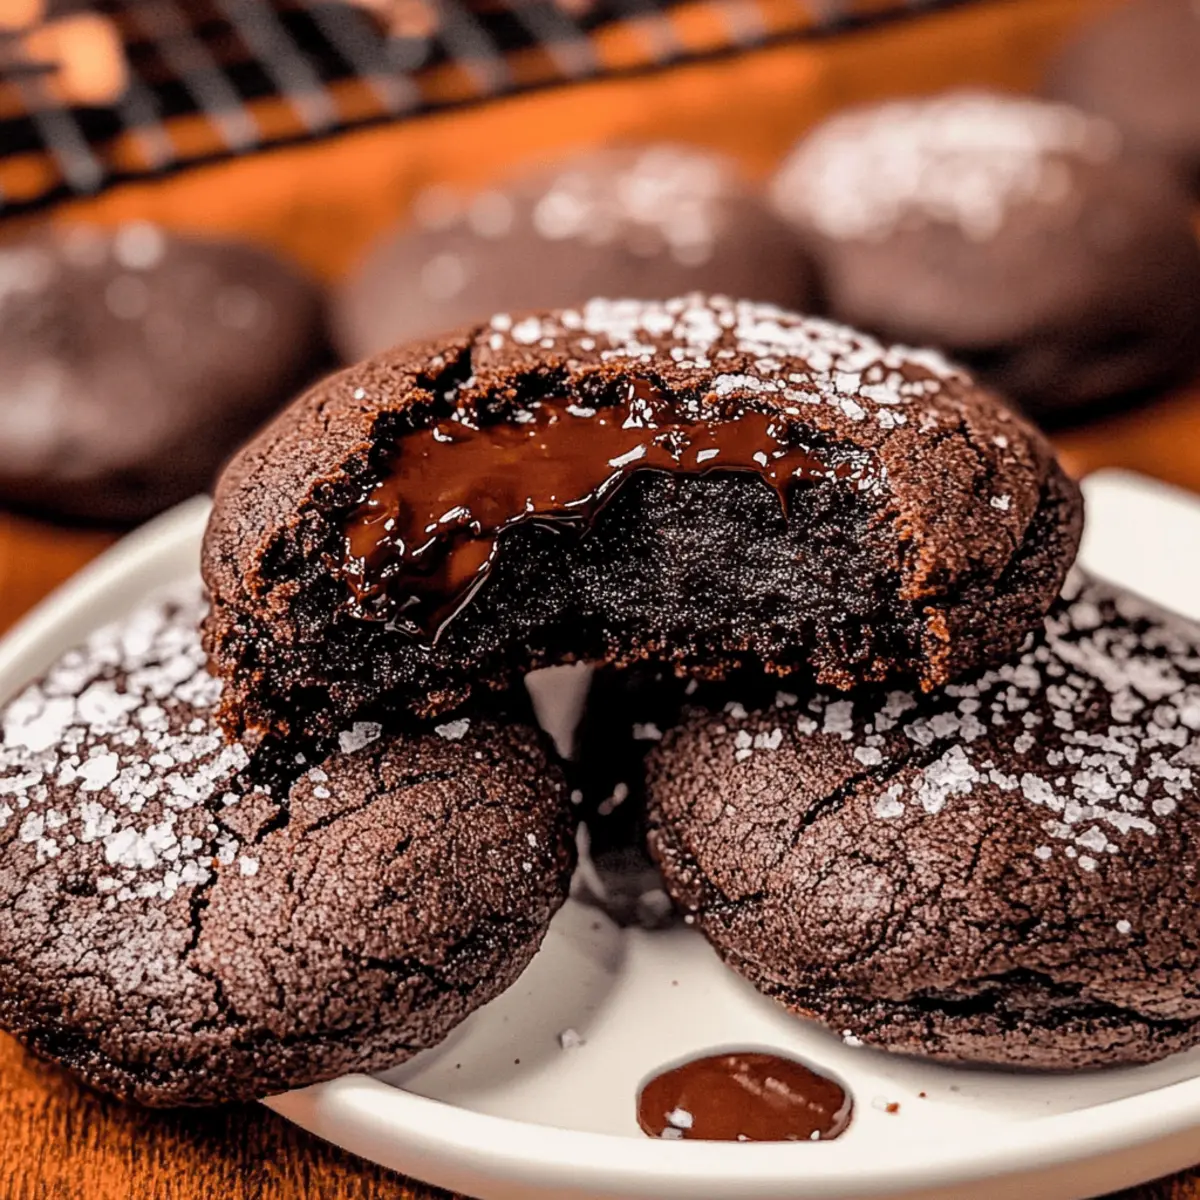
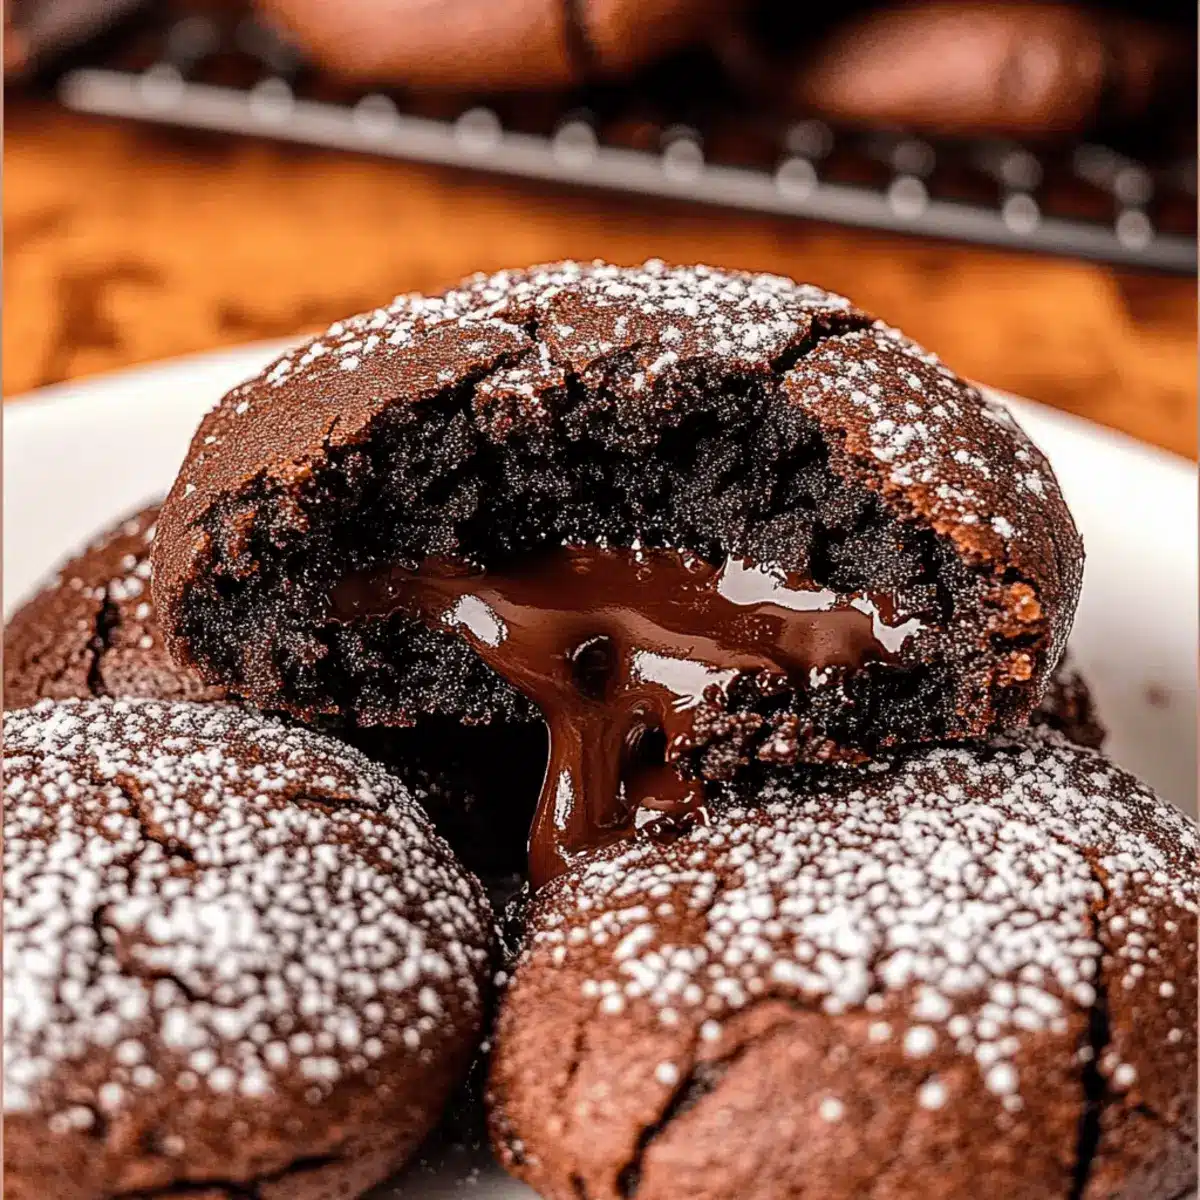
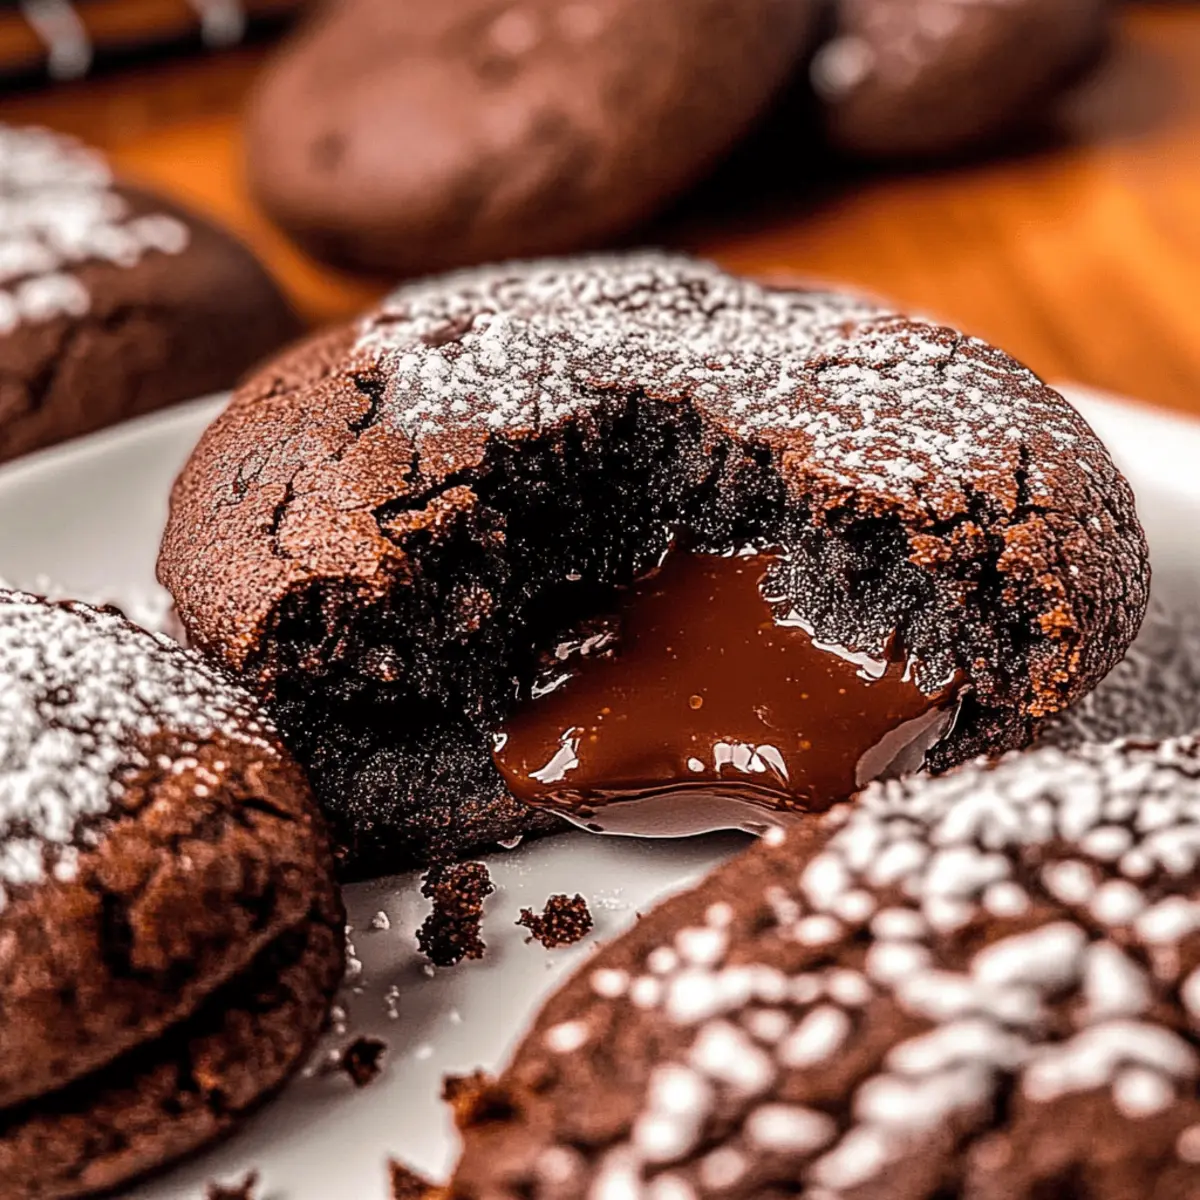
As the oven timer ticks down, anticipation fills the air—there’s nothing quite like the moment when the first batch of Chewy Chocolate Lava Cookies emerges, their edges just perfectly set, teasing at the molten treasure hidden within. If you’re a chocolate aficionado, these treats will steal your heart with their inviting crisp exterior and rich, gooey center that spills out like a warm hug in every bite. Whipping up these cookies is not only quick and easy, but they’re also a guaranteed crowd-pleaser, making them the perfect addition to any gathering or cozy night in. Imagine impressing friends and family with a treat that’s both irresistibly delicious and surprisingly simple to make. Are you ready to melt into chocolate bliss? Let’s dive into this decadent recipe together!
Why are Chocolate Lava Cookies so irresistible?
Decadent Ganache Center: A rich chocolate ganache fills the center, providing an explosion of flavor with every bite.
Quick and Easy: This recipe is a breeze, perfect for a weeknight treat without sacrificing taste.
Crowd-Pleasing Snack: Every batch guarantees joy and satisfaction, ideal for gatherings or a cozy movie night.
Versatile Delight: Swap the ganache for caramel or add a hint of espresso for a unique twist! If you love cookies, you might also enjoy Chewy Pumpkin Chocolate or Mint Chocolate Chip.
Warm Comfort: Best served fresh from the oven, these cookies are the ultimate comfort food when paired with vanilla ice cream.
Chocolate Lava Cookies Ingredients
For the Ganache
• Semi-sweet chocolate chips – Provides the rich chocolate flavor for the ganache; can be substituted with dark chocolate for a richer taste.
• Heavy whipping cream – Creates a luscious ganache consistency; use full-fat cream for the best results.
For the Cookie Dough
• All-purpose flour – Forms the structure of the cookies; measure accurately to avoid dense cookies.
• Dutch process cocoa powder – Enhances the deep chocolate flavor; avoid substitutions with natural cocoa to keep texture consistent.
• Baking powder – Acts as a leavening agent to keep cookies light.
• Salt – Balances sweetness and enhances flavor.
• Unsalted butter – Provides richness and moisture; ensure it’s softened for proper creaming with sugars.
• Light brown sugar – Adds moisture and a slight caramel flavor; can substitute with dark brown sugar for a deeper taste.
• Granulated white sugar – Contributes sweetness and aids in spreading.
• Egg yolks – Enriches the dough and adds moisture; use room temperature for better emulsification.
• Vanilla extract – Adds depth to flavor; swap for almond extract for a twist.
For Dusting
• Powdered sugar – Used for a light, sweet dusting on finished cookies.
Indulge in these Chocolate Lava Cookies and dive into the deliciousness of gooey chocolate at its best!
Step‑by‑Step Instructions for Chocolate Lava Cookies
Step 1: Prepare Ganache
Start by heating ½ cup of heavy whipping cream in a small saucepan over medium heat until it just begins to boil. Remove it from the heat and pour the hot cream over 1 cup of semi-sweet chocolate chips in a mixing bowl. Stir until the chocolate is completely melted and smooth. Allow the ganache to cool slightly before transferring it to the refrigerator to set for about 1-2 hours until firm enough to scoop.
Step 2: Mix Dry Ingredients
While the ganache is chilling, whisk together 1 cup of all-purpose flour, ¼ cup of Dutch process cocoa powder, ½ teaspoon of baking powder, and a pinch of salt in a separate bowl. This step will ensure an even distribution of the dry ingredients, which is essential for making chewy chocolate lava cookies. Set the bowl aside for later use.
Step 3: Cream Butter and Sugars
In a large mixing bowl, combine ½ cup of softened unsalted butter, ½ cup of light brown sugar, and ¼ cup of granulated white sugar. Using an electric mixer, beat the mixture on medium speed until it becomes light and fluffy, about 2-3 minutes. This helps to create a rich, moist texture for your cookie dough, which will complement the molten center.
Step 4: Add Egg Yolks and Vanilla
Now, it’s time to enrich the cookie dough! Add 2 large egg yolks and 1 teaspoon of vanilla extract to the creamed butter and sugars. Mix on low speed until thoroughly combined. You should see the mixture turn pale and fluffy, which indicates that the ingredients are well-emulsified and ready for the next step.
Step 5: Combine Ingredients
Gradually incorporate the dry ingredients into the wet mixture while mixing on low speed. Aim to mix until just combined, so you avoid overmixing, which could affect the chewy texture of your chocolate lava cookies. Scrape down the sides of the bowl with a spatula to ensure everything blends evenly.
Step 6: Form Cookies
With the dough ready, use a cookie scoop to portion out the mixture and flatten each portion slightly in your hands. Place a frozen ganache ball in the center of each flattened dough piece, then wrap the dough around the ganache to encase it completely. Roll the dough back into a ball to form the cookies, ensuring the ganache is sealed inside.
Step 7: Bake
Preheat your oven to 350°F (175°C) while you prepare a baking sheet lined with parchment paper. Arrange the formed cookie balls on the sheet, spacing them out to allow for spreading. Bake in the preheated oven for about 10-11 minutes, or until the edges are set while the centers remain slightly soft—a hallmark of perfect chocolate lava cookies.
Step 8: Cool and Serve
Once baked, remove the cookies from the oven and let them cool on the baking sheet for about 10 minutes. This allows them to firm up a bit while retaining gooey centers. After cooling, dust with powdered sugar for a sweet finish and serve warm to fully enjoy the delicious molten chocolate experience inside.
How to Store and Freeze Chocolate Lava Cookies
- Room Temperature: Store cooled cookies in an airtight container at room temperature for up to 3 days to maintain their chewy texture.
- Fridge: If you’d like to extend freshness, keep the cookies in the fridge for up to a week, but be aware they may lose some gooeyness.
- Freezer: Freeze unbaked cookie dough balls or baked cookies for up to 3 months. Wrap them tightly in plastic wrap and place in a freezer bag to prevent freezer burn.
- Reheating: To enjoy a warm chocolate lava cookie, reheat in the microwave for 10-15 seconds—this will restore their gooey molten center perfectly!
Variations & Substitutions for Chocolate Lava Cookies
Unleash your creativity and explore delicious twists to these delightful cookies that will tantalize your taste buds.
- Dairy-Free: Substitute heavy whipping cream with coconut cream and use dairy-free chocolate chips for a vegan option.
- Nutty Flavor: Incorporate 1/2 cup of chopped walnuts or pecans into the cookie dough for added crunch and heartiness.
- Espresso Boost: Add 1 teaspoon of espresso powder to the dry ingredients to elevate the chocolate flavor with a rich coffee undertone.
- Caramel Surprise: Swap out the chocolate ganache for homemade caramel or store-bought caramel sauce for a sweet, sticky treat.
- Peanut Butter Twist: Replace half of the ganache with creamy or crunchy peanut butter for a fantastic nutty chocolate blend.
- Spicy Kick: Add a pinch of cayenne pepper to the dry ingredients for a surprising spicy note that complements the sweetness.
- Fruity Addition: Mix in 1/2 cup of dried cherries or cranberries for a tart contrast to the chocolate richness.
- Spiced Delight: Incorporate a teaspoon of cinnamon or a hint of nutmeg for a warm, cozy flavor profile.
With these variations, your Chocolate Lava Cookies can transform into unique delights for every occasion. And if you’re a fan of cookies, don’t forget to check out my Chewy Pumpkin Cookies that are perfect for fall or the refreshing taste of Mint Chocolate Chip treats for a minty twist!
Make Ahead Options
These Chewy Chocolate Lava Cookies are perfect for busy weeknights or when you want to impress guests without the last-minute rush! You can prepare the ganache up to 24 hours in advance—just heat the cream, mix it with the chocolate chips, and refrigerate until firm. Additionally, you can form the cookie dough balls and refrigerate them for up to 3 days. Simply place a frozen ganache ball in each dough portion before rolling them back into a ball. When you’re ready to bake, just pop them directly from the fridge into your preheated oven. This way, you’ll enjoy warm, gooey cookies that are just as delicious as if they were made fresh!
What to Serve with Chewy Chocolate Lava Cookies?
Indulge in a meal experience that tantalizes the senses and pairs perfectly with the irresistible molten chocolate inside these delightful treats.
- Vanilla Ice Cream: A classic pairing that balances the warm, gooey cookie with creamy, cold sweetness, creating a blissful contrast.
- Espresso or Coffee: The bold flavor of coffee enhances the chocolate, bringing out deeper notes in each bite while providing an energizing kick.
- Fresh Berries: Tart raspberries or strawberries add a refreshing brightness that cuts through the richness, making each bite feel lighter.
- Coconut Whipped Cream: This airy, dairy-free alternative adds a tropical twist while emphasizing the cookies’ decadent, chocolatey essence.
- Chocolate Sauce Drizzle: For the ultimate chocolate lover, a drizzle of rich chocolate sauce elevates the dessert experience to another level.
- Salted Caramel Sauce: The sweet and salty notes of caramel complement the cookies beautifully, adding complexity and a burst of flavor.
- Mint Tea: A soothing herbal option that refreshes the palate, making it a delightful finish to your indulgent chocolate treat.
Pairing these delicious extras not only enhances your chocolate lava cookie experience but also transforms it into a truly memorable feast for the senses!
Expert Tips for Chocolate Lava Cookies
- Frozen Ganache: Ensure that your ganache balls are completely frozen before baking; this prevents any chocolate leakage during cooking and maintains the gooey center.
- Avoid Overmixing: Be mindful when mixing your dough after adding flour. Overmixing can lead to tough cookies instead of the desired chewy texture.
- Bake in Batches: For even heat distribution, bake only 6 cookies at a time to ensure each one gets that perfect crisp edge and soft center.
- Cookie Scoop: Use a cookie scoop for uniform sizes; this results in consistent baking, making it easier for your chocolate lava cookies to cook evenly.
- Check Doneness: Pull the cookies out of the oven when the edges are set but the centers are still soft. They’ll continue cooking on the tray and help achieve that heavenly molten center.
Chocolate Lava Cookies Recipe FAQs
What type of chocolate is best for the ganache?
I recommend using semi-sweet chocolate chips for a perfect balance of sweetness and richness. However, if you’re seeking a bolder flavor, feel free to substitute with dark chocolate. It creates a deeper, more intense ganache that chocolate lovers will adore!
How should I store my chocolate lava cookies?
Store your cooled cookies in an airtight container at room temperature for up to 3 days. If you’re looking to extend their life, place them in the fridge for up to a week; just keep in mind they’ll be a touch less gooey.
Can I freeze chocolate lava cookies?
Absolutely! You can freeze either unbaked cookie dough balls or baked cookies. Wrap the unbaked dough tightly in plastic wrap and place it inside a freezer bag—label it with the date. They can last up to 3 months in the freezer. For baked cookies, make sure they’ve cooled completely before freezing to avoid additional moisture; they’re best if enjoyed fresh from the oven!
What if my cookies don’t have a gooey center?
If your cookies come out without that wonderfully soft center, it may be due to baking them too long or not using fully frozen ganache balls. Make sure to bake until the edges are set but the centers remain soft, and always chill your ganache balls fully before using. If the dough is overmixed after adding flour, it could lead to a denser texture—so mix sparingly!
Are there any dietary considerations I should be aware of?
These chocolate lava cookies contain eggs and dairy, so they are not suitable for those with egg or lactose allergies. For a dairy-free version, consider using plant-based butter and dairy-free chocolate chips. Also, if serving to pets, keep in mind that chocolate can be harmful to animals, so make sure they don’t get any bites!
What can I do if I don’t have Dutch-process cocoa?
If Dutch-process cocoa is unavailable, I suggest either seeking it at your local store or online. Regular cocoa can be used, but note that it may alter the texture and depth of flavor. In a pinch, you can also add a small amount of baking soda to your recipe to mimic the alkalinity of Dutch cocoa.
Chewy Chocolate Lava Cookies with Decadent Ganache Center
Ingredients
Equipment
Method
- Start by heating ½ cup of heavy whipping cream in a small saucepan over medium heat until it just begins to boil. Remove it from the heat and pour the hot cream over 1 cup of semi-sweet chocolate chips in a mixing bowl. Stir until melted and smooth. Cool slightly, then refrigerate for 1-2 hours to set.
- Whisk together 1 cup of all-purpose flour, ¼ cup of Dutch process cocoa powder, ½ teaspoon of baking powder, and a pinch of salt in a separate bowl.
- Combine ½ cup of softened unsalted butter with ½ cup of light brown sugar and ¼ cup of granulated white sugar in a large mixing bowl. Beat on medium speed until light and fluffy, about 2-3 minutes.
- Add 2 large egg yolks and 1 teaspoon of vanilla extract to the creamed mixture. Mix on low speed until well combined.
- Gradually incorporate the dry ingredients into the wet mixture while mixing on low speed until just combined. Avoid overmixing.
- Use a cookie scoop to portion the dough, flatten slightly, and place a frozen ganache ball in the center. Wrap the dough around the ganache and roll into a ball.
- Preheat your oven to 350°F (175°C). Arrange the cookie balls on a baking sheet lined with parchment paper and bake for about 10-11 minutes until the edges are set, and centers are soft.
- Remove the cookies from the oven and let them cool on the baking sheet for about 10 minutes. Dust with powdered sugar before serving warm.
Leave a Reply