
The aroma of the ocean mingles with the warmth of home-cooked comfort as I pull a creamy Salmon Sushi Bake from the oven. This delightful casserole takes the beloved sushi experience and turns it into a cozy, crowd-pleasing dish perfect for busy weeknights. With layers of tender salmon, imitation crab, and spicy mayo all nestled atop seasoned sushi rice, it invites everyone to gather ’round the table. Not only is it quick to whip up, but it’s also completely customizable—perfect for adapting to whatever ingredients you have on hand. Have you ever dreamed of sushi that feels like a warm hug? Then you’re in for a treat with this Salmon Sushi Bake!
Why is this Salmon Sushi Bake unforgettable?
Flavor Explosion: The rich, creamy layers of salmon and imitation crab combined with spicy mayo and seasoned rice create a delightful symphony of flavors that dance on your palate.
Crowd-Pleasing Appeal: Perfect for gatherings, this dish turns sushi lovers and skeptics alike into fans, making it a must-have for potlucks and family dinners.
Quick & Easy: Ready in under an hour, this recipe is ideal for busy weeknights, saving you precious time while satisfying cravings.
Customizable Delight: Whether you want to swap the protein or mix in some veggies, this Salmon Sushi Bake adapts to your pantry—just like our Mango Teriyaki Salmon makes use of what you already have on hand.
Luxurious Comfort: Enjoy the warm, homey texture that makes this casserole not only a meal but an entire experience—just like our Pumpkin Apple Baked Oatmeal wraps you in cozy flavors.
Salmon Sushi Bake Ingredients
• Discover the key components of this delicious dish.
For the Casserole
- Salmon Fillet – Fresh and tender; crucial for that umami flavor.
- Salt & Pepper – Enhances the overall taste; adjust to your personal liking.
- Garlic Powder – Adds aromatic depth; can switch to minced fresh garlic for a different twist.
- Imitation Crab Meat – Offers a subtle sweetness; feel free to swap for real crab or canned tuna if desired.
- Japanese Mayonnaise – Rich base with a unique flavor profile; regular mayo works well too if you’re in a pinch.
- Cream Cheese – Brings rich creaminess; opt for low-fat cream cheese for a lighter version.
- Sriracha – Infuses a spicy kick; adjust the quantity based on your heat preference.
- Low Sodium Soy Sauce – Provides salty depth; regular soy sauce can be substituted, but watch for sodium levels.
- Calrose Sushi Rice – Key for texture and stickiness; substitute with short-grain rice if needed.
- Seasoned Rice Vinegar – Balances flavors with tang; use a mix of white vinegar and sugar as a substitute.
- Furikake – Sprinkled topping that adds umami and visual appeal; any available variety will do.
For Garnishing
- Green Onion – Fresh garnish that adds both crunch and brightness; adjust the amount as per your taste.
- Sesame Seeds (Black & White) – Delivers texture and nutty flavor; optional for an extra touch.
- Roasted Seaweed (Nori) – Optional accompaniment; great for scooping.
- Unagi Sauce – Adds a touch of sweetness; drizzle on top for added flavor.
- Cucumber & Avocado – Fresh additions that perfectly complement the bake’s richness.
Now that you have everything in hand, get ready to create a comforting Salmon Sushi Bake that will leave everyone wanting seconds!
Step‑by‑Step Instructions for Salmon Sushi Bake
Step 1: Prepare the Rice
Begin by rinsing 2 cups of Calrose sushi rice under cold water until the water runs clear. Then, cook the rice in a rice cooker according to the manufacturer’s instructions. Once the rice is fluffy, transfer it to a baking sheet, gently fold in seasoned rice vinegar, and spread it out to cool, ensuring it maintains its stickiness for the perfect Salmon Sushi Bake base.
Step 2: Season & Bake the Salmon
Preheat your oven to 400°F (200°C). While the oven heats up, season 1 pound of salmon fillet generously with salt, pepper, and garlic powder. Place the salmon on a baking sheet and bake for 15–20 minutes until it reaches an internal temperature of 145°F, flaking easily with a fork. Once cooked, let it cool slightly and then shred the salmon into bite-sized pieces.
Step 3: Mix the Filling
In a large mixing bowl, combine the shredded salmon with 8 ounces of imitation crab meat, ½ cup of Japanese mayonnaise, 4 ounces of cream cheese, 1–2 tablespoons of sriracha, and 2 tablespoons of low sodium soy sauce. Use a spatula to mix all the ingredients thoroughly, ensuring every bite is packed with flavor for your Salmon Sushi Bake.
Step 4: Assemble the Sushi Bake
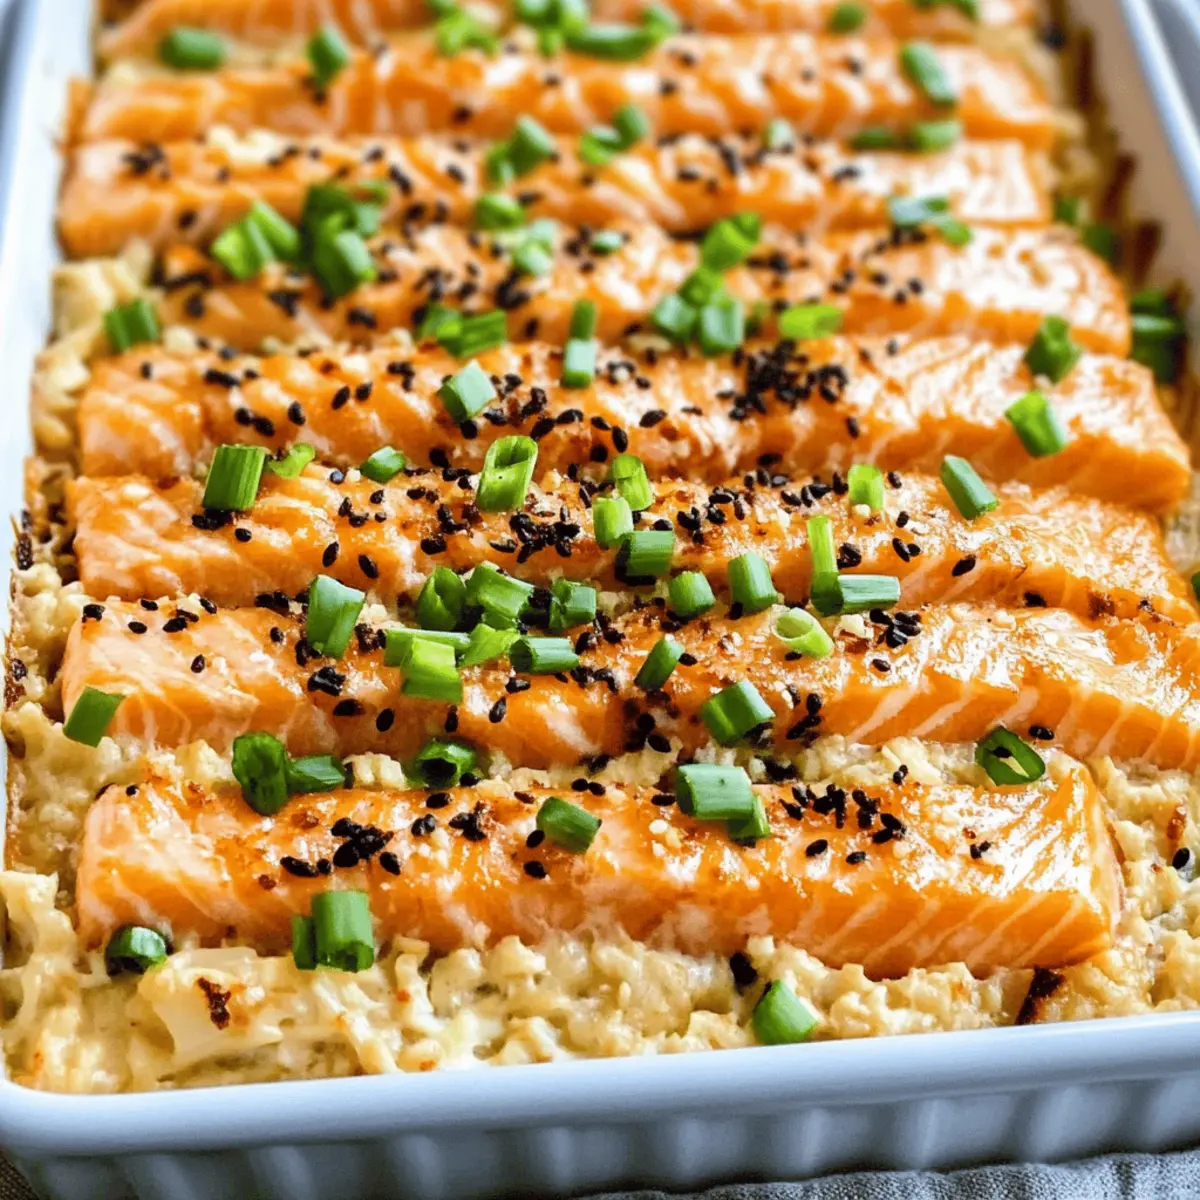
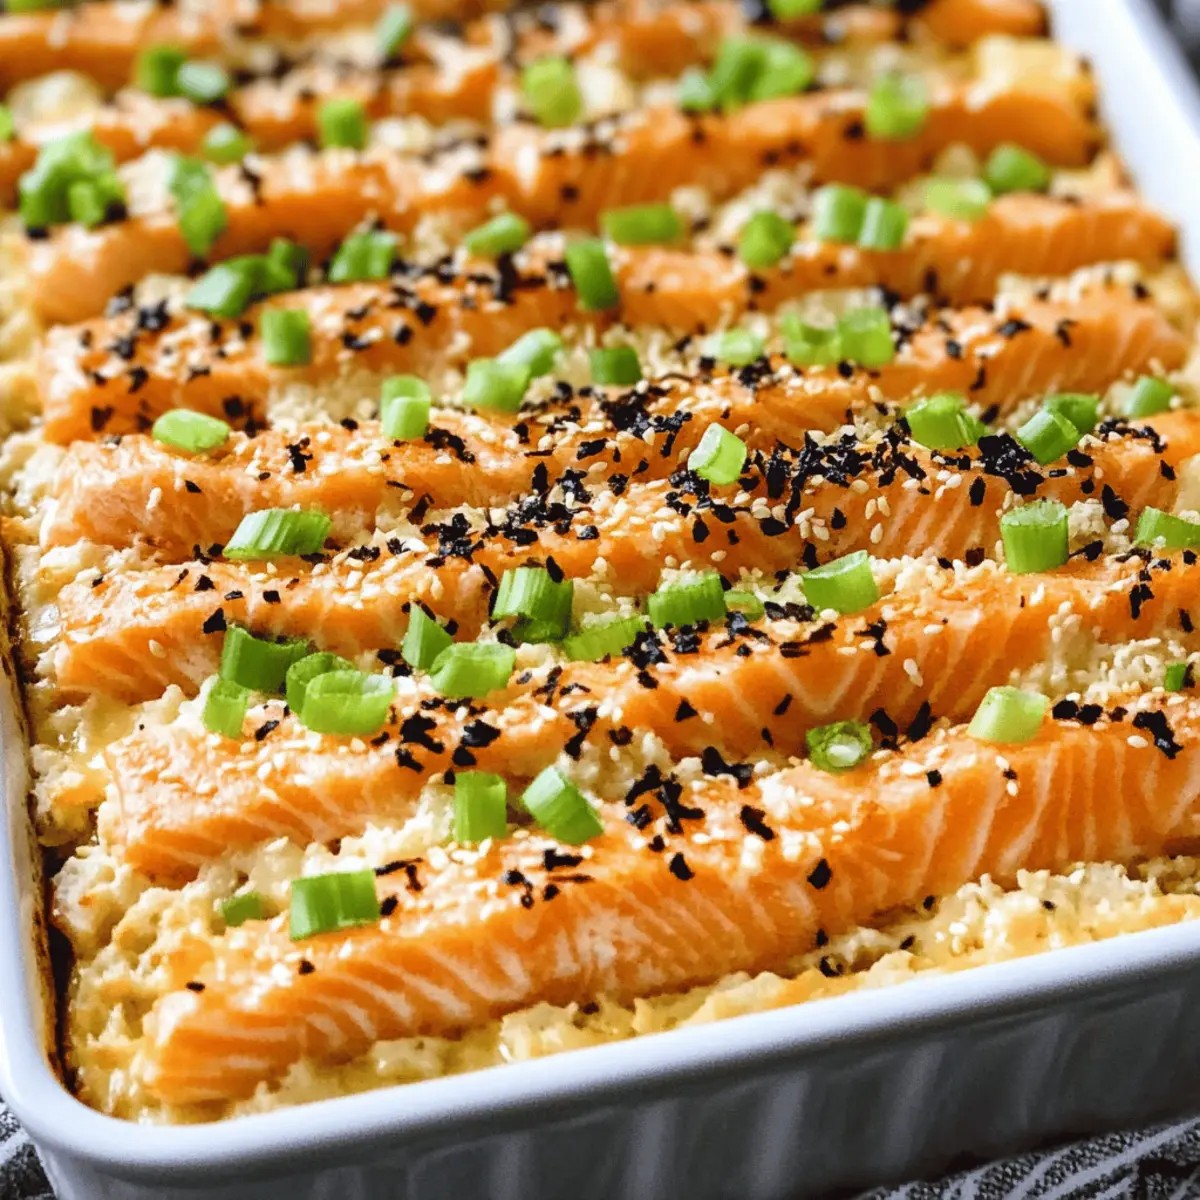
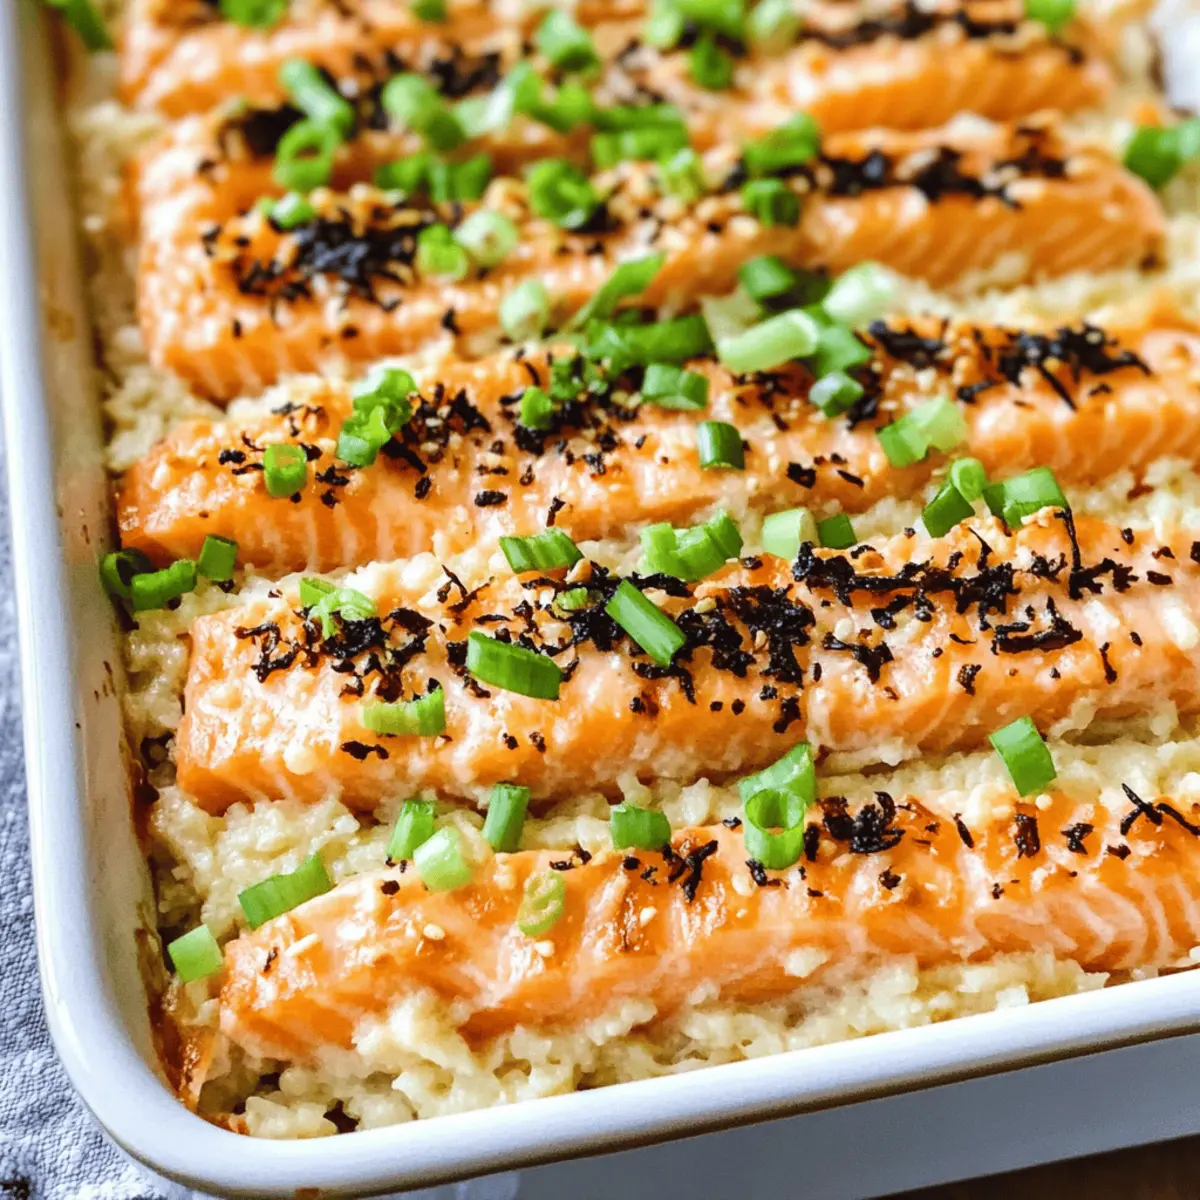
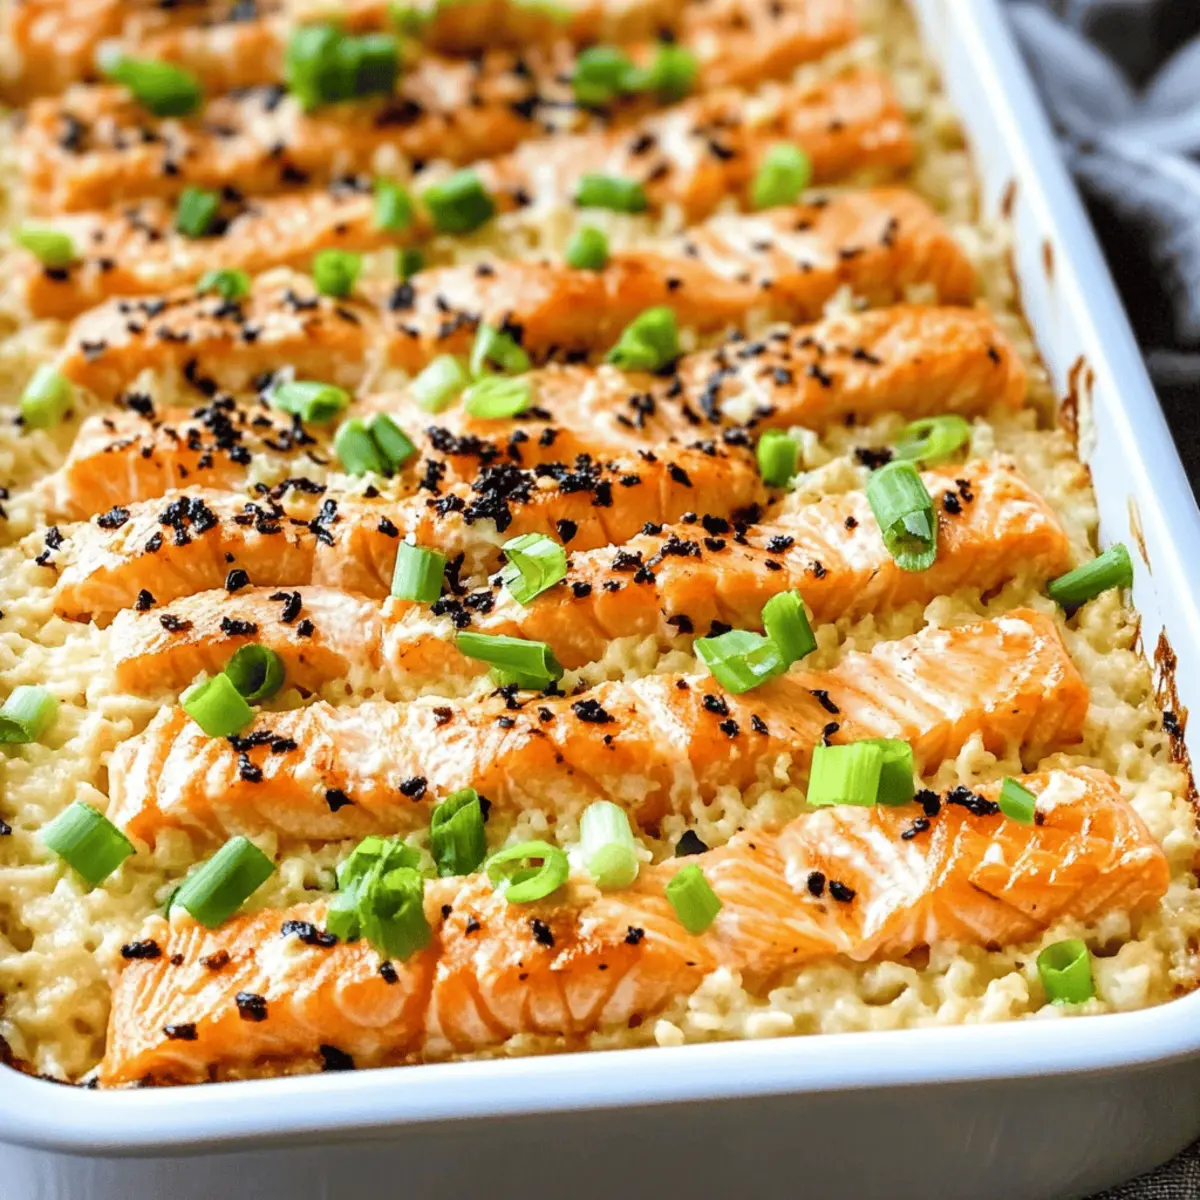
Grease a 9×13 baking dish and press the cooled rice evenly into the bottom to form a solid layer. Sprinkle a generous amount of furikake seasoning over the rice, allowing it to infuse the flavor. Next, spread the salmon and crab filling evenly over the rice layer, creating a beautiful contrast that will bake beautifully.
Step 5: Broil
Set your oven to broil and carefully place the assembled Salmon Sushi Bake on the top rack. Broil for about 4 minutes, monitoring closely, until the top is slightly browned and bubbly. This step adds a delightful crispiness to the casserole that contrasts beautifully with the creamy filling.
Step 6: Top & Serve
Once broiled to perfection, remove the baking dish from the oven and drizzle with extra spicy mayo. Garnish generously with sliced green onions and toasted sesame seeds for added crunch. Serve your warm Salmon Sushi Bake alongside roasted seaweed, sliced cucumbers, and avocado for a complete meal that’s sure to impress!
Salmon Sushi Bake Variations & Substitutions
Feel free to get creative and let your taste buds lead the way with these exciting variations for your Salmon Sushi Bake!
-
Seafood Swaps: Use real crab, scallops, or canned tuna as alternatives for a different oceanic flavor profile—each choice brings its own unique taste to the casserole.
-
Rice Alternatives: Experiment with brown rice or cauliflower rice for a lighter option. Brown rice adds a nutty depth, while cauliflower rice cuts calories without sacrificing texture.
-
Add-ins: Include diced avocado, scallions, or chopped jalapeño in the filling for added flavor. Fresh veggies can elevate the taste and provide delightful textures!
-
Topping Ideas: Garnish with tobiko, shredded nori, or additional vegetables for extra flavor and visual appeal. These toppings can add a lovely crunch and a pop of color.
-
Spice Level: Adjust the amount of Sriracha based on your heat preference, or swap it for chili garlic sauce for a different kick. Make it as spicy or mild as you love!
-
Dairy-Free Option: Substitute the cream cheese with cashew cream or a dairy-free version. This keeps the creaminess intact while accommodating dietary needs.
-
Flavor Boost: Mix in some wasabi into the mayo for a zesty twist, or top with a drizzle of unagi sauce for added sweetness, similar to our Mango Teriyaki Salmon.
-
Serving Suggestions: Pair your bake with a side of sliced cucumbers and avocado for a refreshing contrast, or enjoy with roasted seaweed for scooping, echoing flavors from the ocean!
Make Ahead Options
These Salmon Sushi Bake preparations are perfect for busy weeknights and can save you precious time! You can prepare the seasoned sushi rice (2 cups) and the filling (shredded salmon, imitation crab, mayonnaise, cream cheese, sriracha, and soy sauce) up to 24 hours in advance. Simply refrigerate the rice and filling separately in airtight containers to maintain freshness. When you’re ready to serve, layer the rice in your baking dish, add the filling, and broil for about 4 minutes until bubbly. This ensures that your Salmon Sushi Bake remains just as delicious and satisfying, capturing all the comforting flavors of homemade goodness without the last-minute rush!
What to Serve with Salmon Sushi Bake
Cozy up your dinner table with delightful sides that elevate your Salmon Sushi Bake experience!
- Steamed Edamame: Nutty and slightly sweet, these vibrant green pods add a fun texture and keep your meal wonderfully light.
- Crispy Seaweed Chips: These crunchy companions mirror the sushi theme perfectly, offering a delightful salty crunch that pairs wonderfully with each bite. Consider serving them with a drizzle of unagi sauce for extra flavor.
- Sliced Cucumbers: Fresh and cool, cucumber slices provide a refreshing contrast to the rich baked layers, enhancing the meal’s overall balance. They also make a great palate cleanser!
- Garlic Green Beans: Sautéed green beans with a hint of garlic add a vibrant pop of color and a crispy texture that complements the creaminess of the casserole.
- Chilled Sake or Iced Green Tea: A light drink option that complements the umami flavors of the Salmon Sushi Bake wonderfully. Consider serving with a sprig of mint for a touch of refreshment.
- Miso Soup: Warm and soothing, this classic Japanese soup is a comforting addition offering umami flavors that harmonize beautifully with your main dish.
Each of these pairings creates a well-rounded meal that turns an evening of enjoying Salmon Sushi Bake into an unforgettable dining experience!
Expert Tips for Salmon Sushi Bake
-
Perfect Salmon: Avoid overcooking the salmon. It should be flaky and moist for the best texture in your Salmon Sushi Bake.
-
Rice Is Key: Allow the cooked rice to cool completely before assembling. This prevents excess moisture from softening the top layer during baking.
-
Broiler Watch: Keep an eye on the broiler! Broil for a short time, about 4 minutes, to achieve a slight browning without drying out the filling.
-
Cream Cheese Choice: Use full-fat cream cheese for creaminess; whipped cream cheese is easier to mix and integrates beautifully into the filling.
-
Spicy Mayo Finish: Add spicy mayo as a drizzling finish for an extra layer of flavor in your Salmon Sushi Bake—it’s a delightful touch!
How to Store and Freeze Salmon Sushi Bake
Fridge: Store the Salmon Sushi Bake in an airtight container for up to 3 days. Reheat in the oven for the best texture or enjoy it cold.
Freezer: For longer storage, portion the Salmon Sushi Bake into individual servings and freeze for up to 3 months. Thaw in the refrigerator overnight before reheating.
Reheating: When ready to enjoy, reheat in the oven at 350°F (175°C) for about 20 minutes until heated through. Microwave for quicker options, using short intervals to avoid drying it out.
Make-Ahead: You can assemble the Salmon Sushi Bake a day in advance. Just cover and refrigerate; bake just before serving for a fresh, hot dish!
Salmon Sushi Bake Recipe FAQs
How do I select the best salmon fillet?
Absolutely! When choosing a salmon fillet, look for fresh, bright skin without any dark spots or signs of browning. The meat should feel firm to the touch and have a pleasant ocean smell—nothing overly fishy. If possible, opt for wild-caught salmon, as it typically has a richer flavor and firmer texture than farmed varieties.
How should I store leftovers of the Salmon Sushi Bake?
Very! Store any leftover Salmon Sushi Bake in an airtight container in the refrigerator for up to 3 days. Be sure to cover it tightly to keep it from absorbing any odors from the fridge. When you’re ready to enjoy it again, reheat it in the oven for the best texture or have it cold for a quick bite!
Can I freeze the Salmon Sushi Bake?
Absolutely! For freezing, I recommend portioning the Salmon Sushi Bake into individual servings first. Wrap each portion tightly with plastic wrap, then place them in freezer-safe bags or containers. This way, you can enjoy it any time! It will stay good for up to 3 months. When you’re ready to eat, simply thaw it in the refrigerator overnight, then reheat in the oven at 350°F (175°C) until heated through.
What if my sushi rice is too sticky?
Not to worry! If your sushi rice ends up too sticky, it may have been overcooked or not rinsed properly. For next time, rinse the rice thoroughly under cold water until the water runs clear to remove excess starch. If it still feels too sticky during cooking, consider adjusting the water ratio slightly. Adding a teaspoon of vinegar can also help separate the grains as they cool.
Is this recipe suitable for those with seafood allergies?
A great question! This recipe does contain seafood, so it’s not suitable for those with seafood allergies. However, you can customize this dish by swapping both the salmon and imitation crab with ingredients like shredded chicken or even roasted vegetables for a delightful non-seafood version. Explore what works for you while keeping that cozy comfort food vibe intact!
How long can I make the Salmon Sushi Bake ahead of time?
Certainly! You can assemble the Salmon Sushi Bake up to a day in advance. Just cover it with plastic wrap or foil and refrigerate it. When you’re ready to serve, pop it in the oven to bake right before meal time for a fresh and hot dish. It’s a fantastic way to save time without sacrificing taste!
Savory Salmon Sushi Bake: Easy, Comforting Weeknight Delight
Ingredients
Equipment
Method
- Prepare the rice by rinsing 2 cups of Calrose sushi rice under cold water until the water runs clear. Cook the rice in a rice cooker according to the manufacturer's instructions. Once fluffy, transfer to a baking sheet, gently fold in seasoned rice vinegar, and spread out to cool.
- Preheat your oven to 400°F (200°C). Season 1 pound of salmon fillet generously with salt, pepper, and garlic powder. Bake for 15–20 minutes until it reaches an internal temperature of 145°F.
- In a mixing bowl, combine the shredded salmon with 8 ounces of imitation crab meat, ½ cup of Japanese mayonnaise, 4 ounces of cream cheese, 1–2 tablespoons of sriracha, and 2 tablespoons of low sodium soy sauce. Mix thoroughly.
- Grease a 9×13 baking dish and press the cooled rice evenly into the bottom. Sprinkle furikake seasoning over the rice, then spread the salmon and crab filling evenly on top.
- Set your oven to broil and broil the assembled Salmon Sushi Bake for about 4 minutes until the top is slightly browned and bubbly.
- Remove from the oven, drizzle with extra spicy mayo, and garnish with sliced green onions and sesame seeds. Serve alongside roasted seaweed, sliced cucumbers, and avocado.
Leave a Reply