
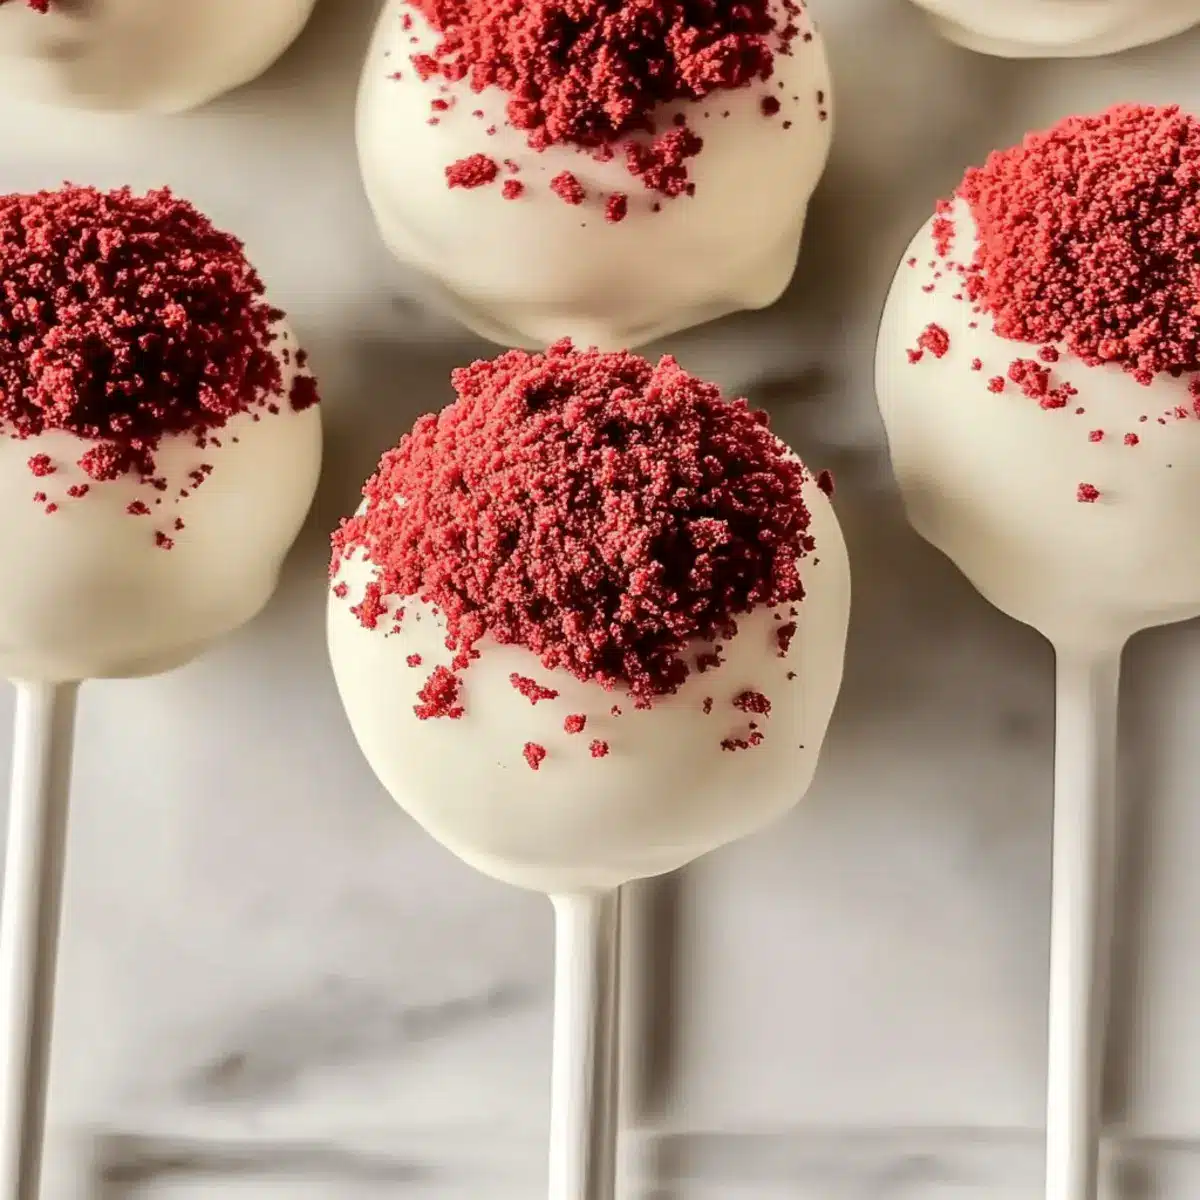
The kitchen was filled with the delightful aroma of freshly baked cake, reminding me that sometimes, the simplest treats bring the most joy. That’s exactly why I’m thrilled to share my recipe for Moist Red Velvet Cake Pops. These little delights are not only a fun twist on the classic red velvet cake but also incredibly easy to make, making them perfect for novice bakers and seasoned pros alike. With their soft, moist texture and chocolatey coating, they’re bound to be a hit at any gathering or cozy night in. Plus, the beauty of this recipe lies in its versatility—you can use your favorite box mix for a quick prep, ensuring you’ll have these delicious pops ready in no time. Curious to know how you can whip up these scrumptious bites? Let’s dive in!
Why You’ll Love Moist Red Velvet Cake Pops
Irresistibly Fun: These Moist Red Velvet Cake Pops are not only delightful to eat, but they’re also a playful alternative to traditional cake. Easy to Make: You can whip them up quickly using your favorite box mix, making this an ideal treat even for beginner bakers. Decadent Flavor: With their rich chocolate coating and soft cake center, each bite bursts with classic red velvet goodness. Versatile Designs: Combine different frosting and coating colors to match any occasion, just like with a Cinnamon Swirl Bundt Cake. Perfect for Sharing: These cake pops are perfect for gatherings, allowing everyone to indulge in a sweet treat without the mess. Make a batch, and get ready for compliments!
Moist Red Velvet Cake Pops Ingredients
For the Cake
- Red Velvet Cake Mix – The foundation of this recipe, providing the iconic velvet texture and flavor; any brand works well.
- Water – This adds moisture to the mix; follow the package instructions for the correct amount.
- Vegetable Oil – Essential for a moist cake; you can replace it with melted coconut oil for a hint of tropical flavor.
- Eggs – They act as a binding agent; make sure they are at room temperature for better blending.
For the Filling
- Frosting – Use cream cheese or buttercream for added flavor and to bind the crumbled cake; adjust the quantity to achieve the right consistency.
For the Coating
- Candy Coating (Chocolate Melts) – This sweet outer layer is what makes the cake pops irresistible; use any melting chocolate, but make sure not to overheat it. Add a little coconut oil for thinning if needed.
With these simple ingredients, you’re just a few steps away from indulging in homemade Moist Red Velvet Cake Pops that will surely impress!
Step‑by‑Step Instructions for Moist Red Velvet Cake Pops
Step 1: Prepare the Cake Mix
Begin by preheating your oven to 350°F (175°C). In a mixing bowl, combine the red velvet cake mix with the specified amount of water, vegetable oil, and eggs according to the package instructions. Whisk until the batter is smooth and well combined, free of lumps. This will create a rich, velvety mixture perfect for your Moist Red Velvet Cake Pops.
Step 2: Bake the Cake
Pour the prepared cake batter into a greased 9×9-inch baking dish, spreading it evenly. Bake in the preheated oven for 25 to 30 minutes, or until a toothpick inserted in the center comes out clean. Once baked, remove from the oven and allow the cake to cool completely in the dish, ensuring the texture is perfectly moist for forming pops.
Step 3: Crumble the Cake
Once the cake has cooled, transfer it to a large mixing bowl. Use your hands or a fork to crumble the cake into fine pieces, ensuring there are no large chunks left. Save about ½ cup of the crumbled cake for later decoration. The remaining crumbled cake will serve as the base for your delicious Moist Red Velvet Cake Pops.
Step 4: Mix with Frosting
Add your preferred frosting to the crumbled cake, starting with a small amount and mixing it in until the mixture holds together like play-dough. This should take about 3 to 5 minutes of mixing. Cover the bowl with plastic wrap and chill the mixture in the refrigerator for about 2 hours, or place it in the freezer for about 15 minutes if you’re short on time.
Step 5: Shape the Cake Balls
Once chilled, use your hands to roll the mixture into uniform ping pong-sized balls, about 1-inch in diameter. Place the formed cake balls onto a baking sheet lined with parchment paper. Ensure they are evenly spaced to avoid sticking together. Freeze the cake balls for about 30 minutes, allowing them to firm up before dipping.
Step 6: Prepare the Coating
In a microwave-safe bowl, melt the candy coating at 50% power in 30-second intervals, stirring after each interval until smooth. This should take about 1 to 2 minutes total. If the mixture is too thick, add a teaspoon of coconut oil to thin it out. The melted coating will give your Moist Red Velvet Cake Pops their sweet, glossy finish.
Step 7: Insert Sticks into Cake Balls
Dip the tip of each lollipop stick into the melted candy coating to prevent it from falling out of the cake balls. Carefully insert the stick into each chilled cake ball until it is halfway through, ensuring stability. This step prepares them for a perfect dip into the coating.
Step 8: Dip and Decorate
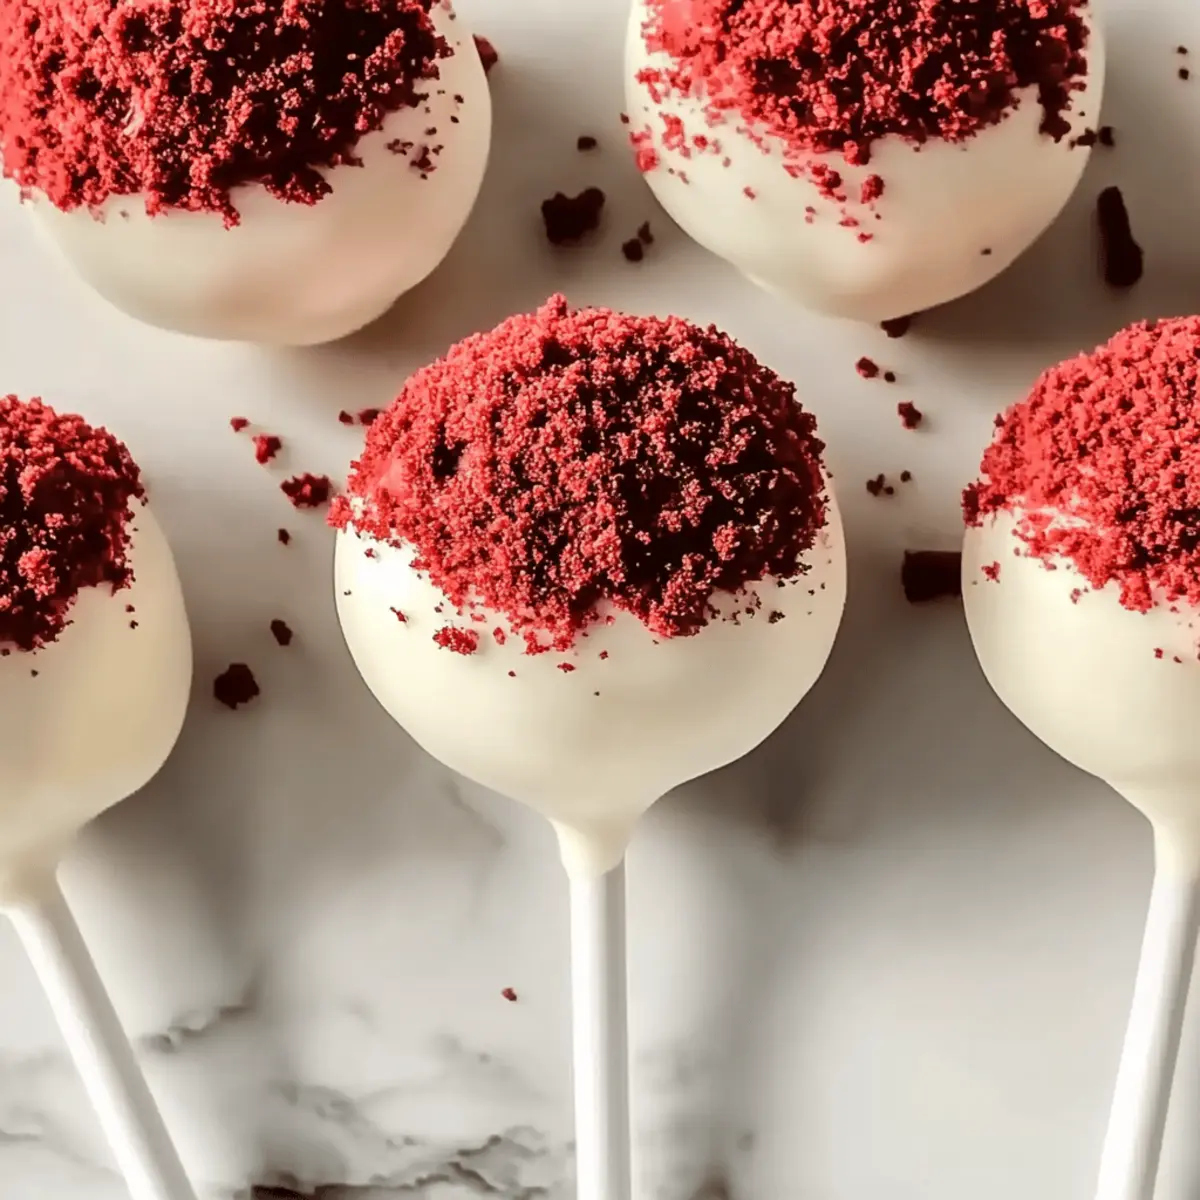
Dip each cake pop into the melted candy coating, ensuring it is fully covered. Gently tap off excess coating, then sprinkle or roll the dipped cake pop in the reserved crumbled cake to add a decorative touch. Place the decorated pops upright in a styrofoam block or a cupcake holder to allow them to set completely.
Step 9: Set and Serve
Let the Moist Red Velvet Cake Pops sit at room temperature for about 20-30 minutes, or until the coating hardens. Once set, they are ready to be enjoyed. Store any leftovers in an airtight container in the refrigerator for up to a week or freeze for longer storage, bringing a smile to every occasion!
Moist Red Velvet Cake Pops Variations
Get ready to make this delightful recipe your own with simple swaps and fun twists!
- Chocolate Swap: Use chocolate cake mix for a rich alternative; you’ll love the pairing with traditional cream cheese frosting.
- Vanilla Flavor: Switch to a vanilla cake mix for a lighter taste, perfect for serving kids or anyone preferring a classic flavor.
- Frosting Flavor: Go for flavored frosting like caramel or mint; they’ll bring an unexpected twist that enhances the cake pop experience.
- Festive Coating: Experiment with colored candy melts to match themed parties; it’s an easy way to add festive flair to any occasion.
- Nutty Crunch: Add crushed nuts into the cake mixture for a delightful texture contrast; pecans or walnuts complement the red velvet perfectly.
- Spicy Kick: Blend in a dash of cinnamon or nutmeg for a warm spice undertone, elevating your cake pops with a hint of warmth.
- Infused Chocolate: Choose white chocolate or dark chocolate coatings to surprise the palate; both variations can create an entirely new dessert experience.
- Reduced Sugar: Substitute sugar-free cake mix and frosting for a lighter option, while still enjoying the sweetness of your cake pops.
Don’t forget to pair these amazing cake pops with a warm drink like a homemade espresso, or try them alongside a slice of Espresso Cheesecake Decadent. Each variation opens up a world of flavors for your gatherings!
Expert Tips for Moist Red Velvet Cake Pops
- Frosting Balance: Start with a small amount of frosting and add gradually to achieve the right consistency for your Moist Red Velvet Cake Pops. Too much frosting can make the mixture too soft.
- Cool Completely: Ensure the cake balls are entirely cold before dipping in chocolate. This will prevent the chocolate from melting and ensures a smooth coating.
- Melt Carefully: Melt the candy coating in 30-second intervals at half power to avoid clumping. Stir frequently to maintain a silky texture.
- Avoid Excess Coating: After dipping, gently tap off excess chocolate to minimize bubble formations on your cake pops, leading to a neater finish.
Make Ahead Options
These Moist Red Velvet Cake Pops are perfect for busy home cooks who want to save time while indulging in a delicious treat! You can prepare the cake and crumble it up to 24 hours in advance, refrigerating it after crumbling to maintain its freshness. Additionally, you can shape the cake balls and freeze them for up to 3 days before dipping; just be sure they’re completely chilled before you start the coating process to prevent melting. When you’re ready to serve, simply melt the candy coating, dip the chilled cake balls, and let them set. With these prep tips, you’ll have scrumptious cake pops ready to delight your family or guests with minimal last-minute effort!
What to Serve with Moist Red Velvet Cake Pops
Indulging in sweet, velvety cake pops creates the perfect opportunity to elevate your gathering into a full-fledged dessert extravaganza.
- Creamy Vanilla Ice Cream: The cold, creamy texture complements the rich flavors of the cake pops, making each bite heavenly.
- Fresh Berries: A medley of strawberries and raspberries adds a tart contrast, balancing the sweetness beautifully for a refreshing twist.
- Hot Cocoa: Warm and comforting, a cup of hot cocoa enhances the indulgence, perfect for cozy nights in with family and friends.
- Whipped Cream: Light and airy whipped cream provides a delightful topping, amplifying the creamy elements of the red velvet flavor.
- Sparkling Lemonade: The zesty fizz of sparkling lemonade cuts through the richness, offering a refreshing sip that pairs wonderfully with each pop.
- Chocolate Dipped Pretzels: The sweet and salty combination creates a fun snack option, adding a crunchy texture to your dessert spread.
With these delightful pairings, your Moist Red Velvet Cake Pops can shine even brighter at your next gathering!
Storage Tips for Moist Red Velvet Cake Pops
Fridge: Store your cake pops in an airtight container for up to one week. This helps maintain their moistness while keeping them fresh for whenever a sweet tooth strikes.
Freezer: For longer storage, freeze the cake pops for up to six weeks. Make sure they’re well-wrapped or stored in a freezer-safe container to prevent freezer burn.
Thawing: When you’re ready to enjoy your Moist Red Velvet Cake Pops, simply transfer them to the fridge the night before serving. This ensures a gradual thaw, keeping them deliciously moist.
Reheating: If you prefer them slightly warm, microwave cake pops for about 10 seconds on low power to avoid melting the coating. Enjoy!
Moist Red Velvet Cake Pops Recipe FAQs
What kind of red velvet cake mix should I use?
Absolutely! Any brand of red velvet cake mix works well for this recipe, whether it’s a popular name brand like Betty Crocker or Duncan Hines, or a store brand. Just ensure that it’s fresh and hasn’t expired.
How should I store my Moist Red Velvet Cake Pops?
To keep your cake pops fresh, store them in an airtight container in the fridge for up to one week. If you want to save them longer, they can be frozen for up to six weeks. Make sure they are well-wrapped to avoid freezer burn.
Can I freeze Moist Red Velvet Cake Pops?
Yes! To freeze your cake pops, place them in a single layer on a baking sheet until they’re firm, then transfer them to a freezer-safe container or ziplock bag. They will last up to three months. When you’re ready to enjoy them, simply thaw them in the fridge overnight before serving.
What should I do if my cake pop mixture is too dry?
If your mixture seems too dry, simply add a bit more frosting, a teaspoon at a time, until you reach the desired consistency. It should resemble play-dough—easy to mold but not sticky. If it’s too soft, you might want to gently add more crumbled cake to balance it.
Are these cake pops suitable for people with allergies?
Always check the specific ingredients used in both the cake mix and frosting, as these can vary by brand. Common allergens include wheat, dairy, and eggs. If you’re concerned about dietary restrictions, many brands offer gluten-free or dairy-free options, so be mindful when selecting your ingredients.
What’s the best way to decorate my Moist Red Velvet Cake Pops?
For a lovely finish, sprinkle the reserved crumbled cake on top of your dipped pops while the coating is still wet—this creates a beautiful and flavorful touch. You can also use colored sprinkles or drizzle melted white chocolate for an elegant look. Enjoy getting creative!
Delight in Moist Red Velvet Cake Pops for Sweet Gatherings
Ingredients
Equipment
Method
- Preheat your oven to 350°F (175°C). In a mixing bowl, combine the cake mix with the specified amount of water, vegetable oil, and eggs according to the package instructions. Whisk until smooth.
- Pour the prepared cake batter into a greased 9x9-inch baking dish. Bake for 25 to 30 minutes until a toothpick comes out clean. Allow to cool completely.
- Crumble the cooled cake into fine pieces in a mixing bowl, saving about ½ cup for later decoration.
- Mix the crumbled cake with frosting until it holds together like play-dough. Chill for 2 hours or freeze for 15 minutes.
- Roll the mixture into 1-inch balls and place them on a baking sheet. Freeze for about 30 minutes.
- Melt the candy coating in a microwave-safe bowl at 50% power in 30-second intervals until smooth. If thick, add coconut oil.
- Dip each lollipop stick into the melted coating, then insert it halfway into each cake ball.
- Dip each cake ball into the coating, tap off excess, and sprinkle with reserved crumbled cake. Place upright to set.
- Allow the cake pops to sit at room temperature for 20-30 minutes until the coating hardens.
Leave a Reply