
The moment I took my first bite of Dill Pickle Chicken Wings, I knew I had stumbled onto something special. Picture this: crispy, baked wings soaking up tangy brine, delivering a burst of flavor that transports you straight to backyard barbecues and game day gatherings. This easy-to-make recipe is not just a crowd-pleaser; it features juicy meat with a satisfying crunch, making it the perfect appetizer for any occasion. With just a few simple ingredients, you can create a wholesome dish that redefines how we think about wings. Whether you’re serving them at your next party or enjoying them during a cozy night in, these wings are sure to become a family favorite. Ready to dive into the delightful world of Dill Pickle Chicken Wings? Let’s get cooking!

Why Dill Pickle Chicken Wings Rock?
Crispy Perfection: Enjoy wings that are both crispy on the outside and juicy on the inside, thanks to our unique brining process.
Zesty Flavor: The tangy dill pickle juice infuses incredible flavor, elevating your game day snacks or dinner gatherings.
Quick & Easy: With minimal ingredients and straightforward steps, you can whip these up in no time—perfect for busy evenings.
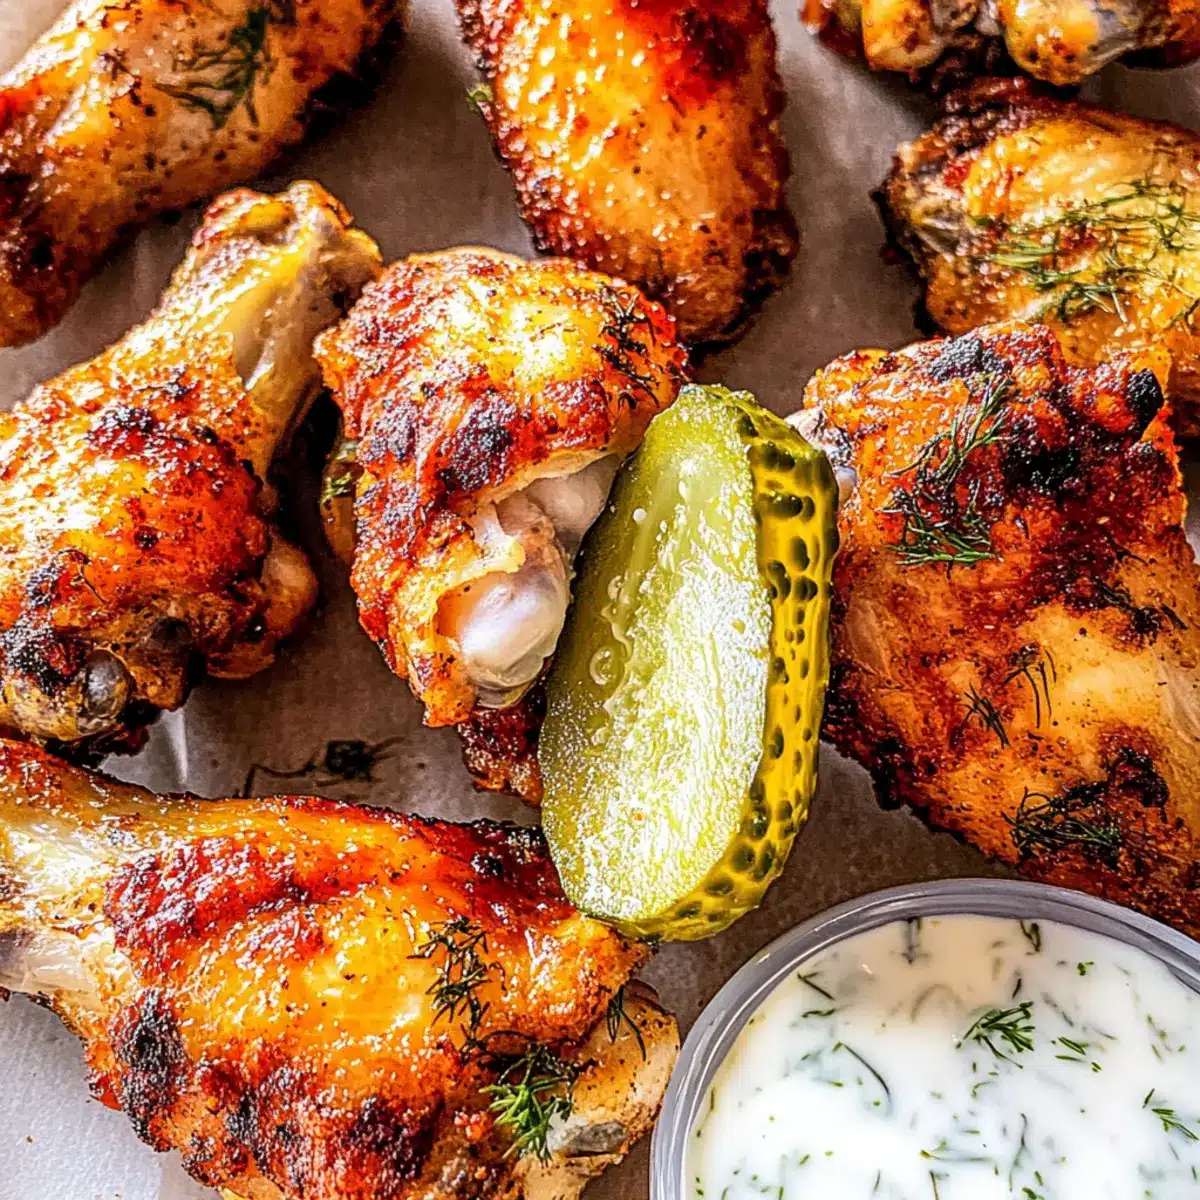
Crowd Favorite: These wings are guaranteed to impress guests at parties, making them a must-have for any gathering. Pair them with our creamy dill ranch dressing for the ultimate experience!
Versatile & Customizable: Adjust the spice level with a sprinkle of cayenne or smoked paprika to suit your taste.
Memory Maker: Every bite brings back the nostalgia of backyard barbecues and sports events—what’s not to love?
Dill Pickle Chicken Wings Ingredients
For the Chicken Wings
- Chicken Wings – The star of the dish; ensure they’re fresh for the best flavor and texture.
- Dill Pickle Juice – This tangy brine keeps the wings juicy and flavorful; homemade pickle brine can be a great substitute.
- Fresh Chopped Dill – Enhances the dill flavor; if fresh isn’t available, dried dill works too.
For the Coating
- Olive Oil – Adds moisture and helps achieve that crispy exterior; feel free to substitute with vegetable or canola oil if needed.
- Garlic Powder – Provides a wonderful seasoning; you can use fresh minced garlic for a stronger punch.
- Baking Powder – Essential for crispy wings; be sure it’s aluminum-free as it affects the texture.
- Salt – A key flavor enhancer; just adjust to taste since dill pickle juice is already salty.
- Freshly Cracked Black Pepper – Adds a hint of spice; skip it if you prefer milder flavors.
For Garnish
- Fresh or Dried Dill – Ideal for enhancing both presentation and taste just before serving.
With these simple, yet powerful ingredients, your Dill Pickle Chicken Wings will be a hit that everyone remembers!
Step‑by‑Step Instructions for DILL PICKLE CHICKEN WINGS
Step 1: Brine the Wings
In a large bowl, combine the chicken wings with dill pickle juice and fresh chopped dill. Toss until the wings are well coated. Cover the bowl with plastic wrap and refrigerate the mixture for 2 to 4 hours, allowing the wings to soak up the tangy flavor and moisture for extra juiciness.
Step 2: Preheat the Oven
Once the wings have brined, preheat your oven to 425°F (220°C). After preheating, carefully drain the wings and pat them dry with paper towels to remove excess moisture. This step is crucial for achieving that coveted crispy exterior on your Dill Pickle Chicken Wings.
Step 3: Coat the Wings
In a large mixing bowl, thoroughly toss the dried wings with olive oil, garlic powder, baking powder, salt, and freshly cracked black pepper. Ensure each wing is evenly coated in the mixture, as this will help create a flavorful and crispy crust during baking.
Step 4: Arrange on a Rack
Place a wire rack over a baking sheet and arrange the chicken wings in a single layer on the rack. This setup allows for optimal air circulation, ensuring that the wings become evenly cooked and golden brown. Make sure the wings are not touching to promote even crisping.
Step 5: Bake the Wings
Bake the wings in your preheated oven for 30 minutes. At the 15-minute mark, use tongs to flip the wings for consistent cooking and browning. The goal is to have them sizzling and lightly golden when the time is up.
Step 6: Broil for Crispiness
Once baked, switch your oven setting to broil on high. Broil the wings for an additional 5 minutes, keeping a close eye on them to avoid burning. This step will enhance the crispiness, giving your Dill Pickle Chicken Wings that perfect charred finish.
Step 7: Serve and Enjoy
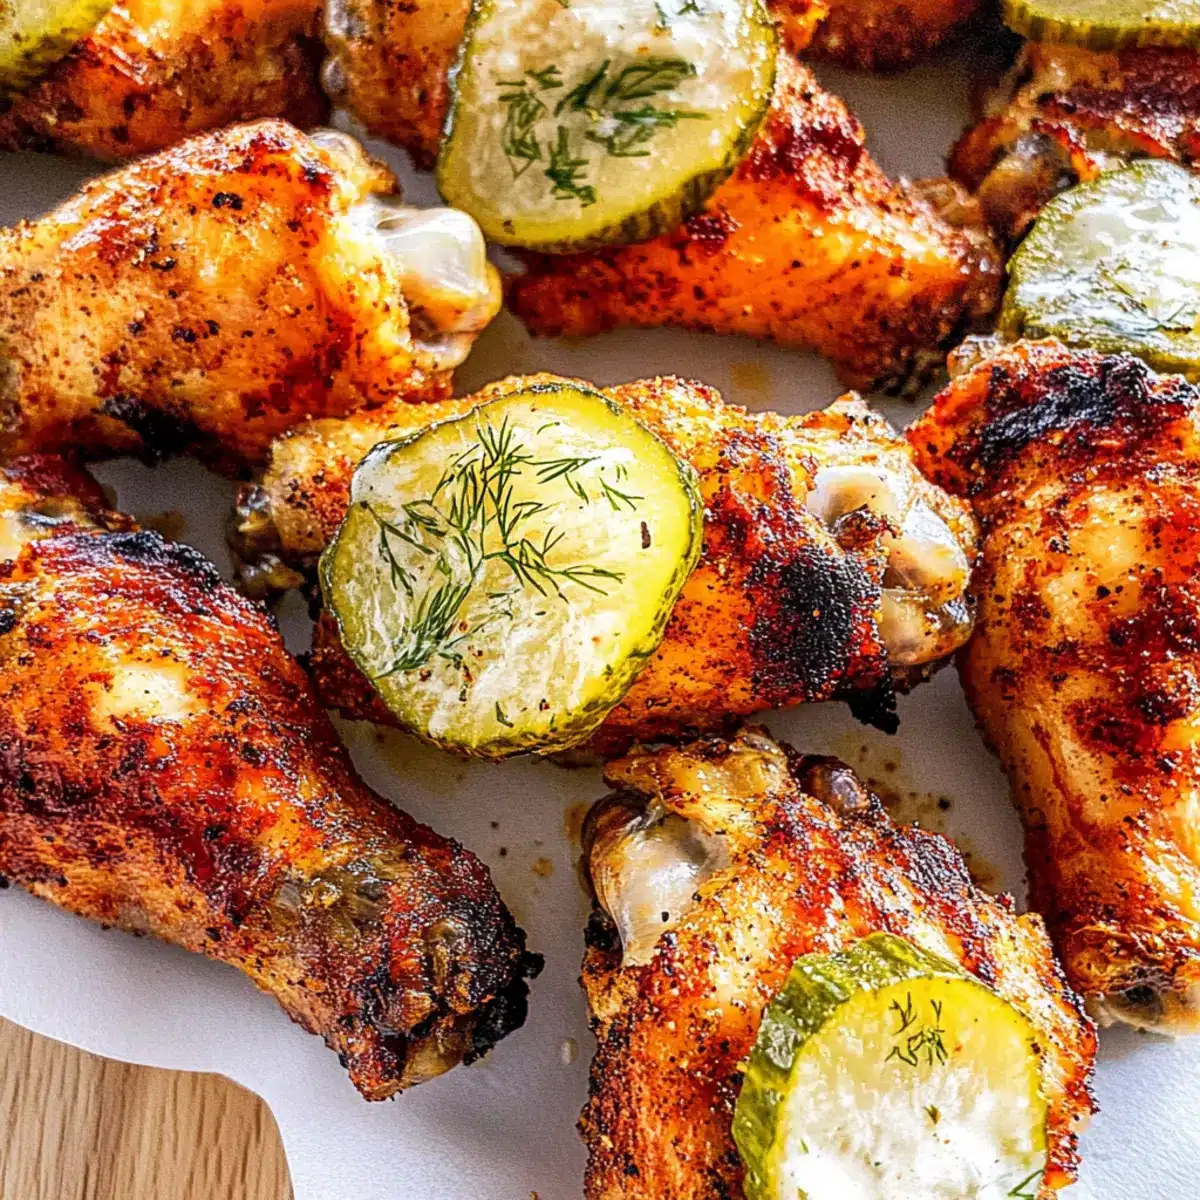
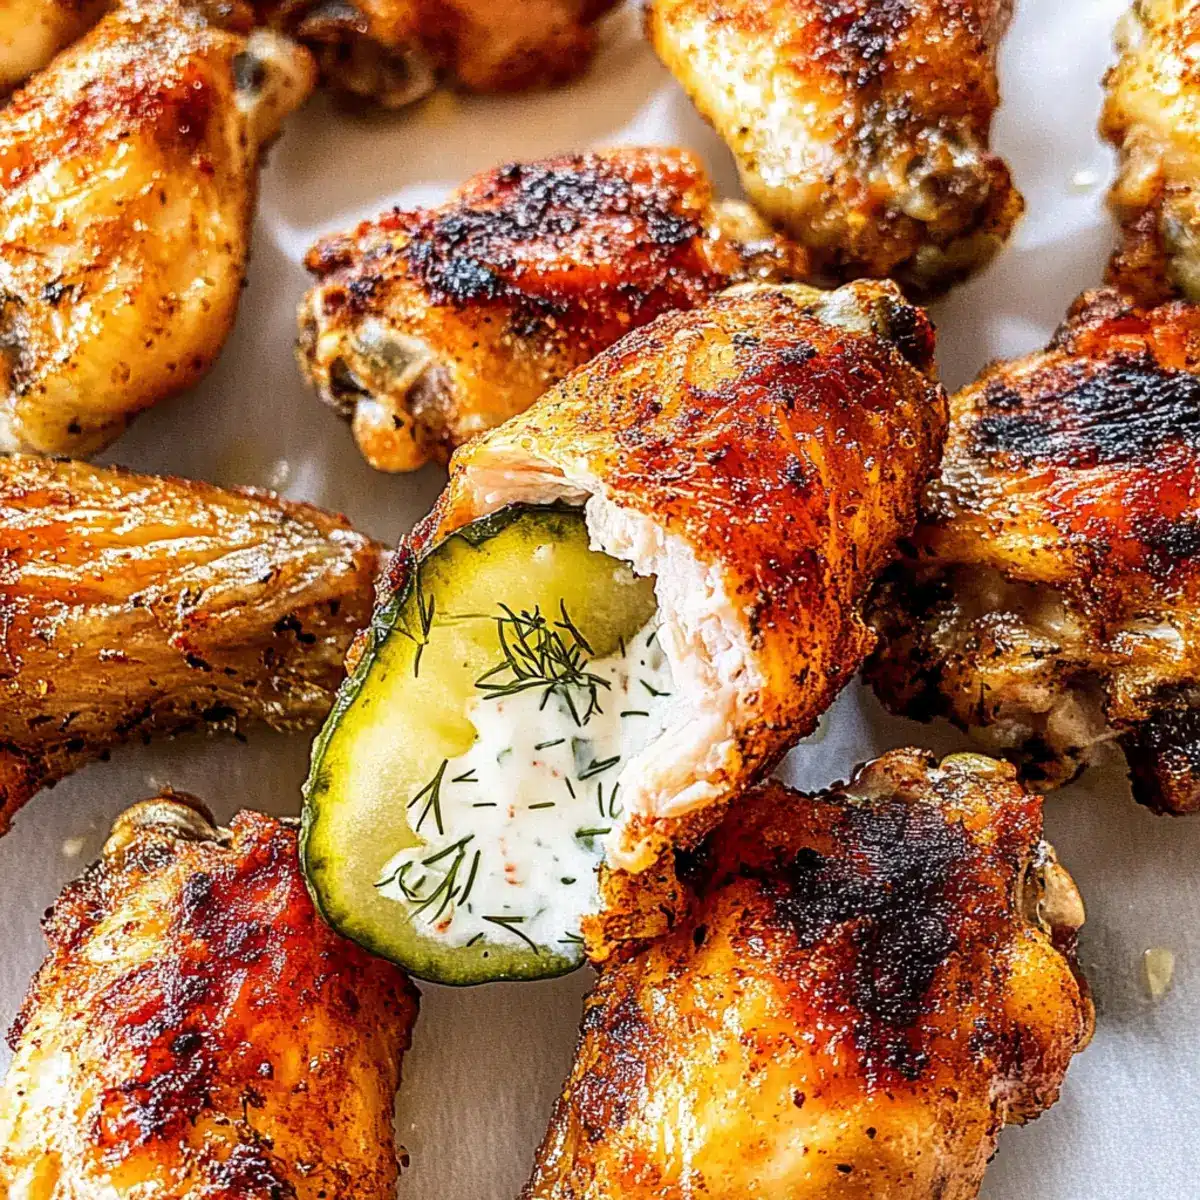
Remove the wings from the oven and let them cool for just a minute. Serve hot, garnished with extra dill if desired, alongside creamy dill ranch dressing for dipping. These flavorful Dill Pickle Chicken Wings are destined to be a hit at any gathering!
Expert Tips for Perfect Dill Pickle Chicken Wings
-
Dry Thoroughly: Ensure your chicken wings are completely dry before coating them with the seasoning mix. This step is crucial for achieving ultimate crispiness in your Dill Pickle Chicken Wings.
-
Use a Wire Rack: For even cooking and optimal crispiness, place the wings on a wire rack over the baking sheet. This allows hot air to circulate all around the wings.
-
Watch the Broiler: When broiling, keep a close eye on the wings to prevent them from burning. Just a few minutes can make the difference between crispy perfection and charred pieces.
-
Check Temperature: Use a meat thermometer to confirm that the wings hit an internal temperature of 165°F (75°C). It’s essential for both safety and juiciness.
-
Brining Time: For maximum flavor, don’t rush the brining process. Allowing the wings to soak in dill pickle juice for the full 2 to 4 hours makes a world of difference in taste and texture.
Make Ahead Options
These Dill Pickle Chicken Wings are a fantastic choice for meal prep lovers! You can brine the wings up to 24 hours in advance by combining them with dill pickle juice and fresh dill, then covering and refrigerating. This allows the wings to soak up the zesty flavor for extra juiciness. After brining, pat the wings dry and coat them with olive oil and seasoning; they can be stored in the fridge for up to 3 days before baking. When ready to serve, simply bake and broil as directed for that mouthwatering crunch. Following these steps will ensure your Dill Pickle Chicken Wings are just as delicious, alleviating stress during busy times!
DILL PICKLE CHICKEN WINGS Variations & Substitutions
Feel free to get creative with these Dill Pickle Chicken Wings and adapt them to your taste preferences!
- Spicy Kick: Add cayenne pepper or smoked paprika to the coating for an extra layer of heat that everyone will enjoy.
- Oven-Fried Style: Use panko breadcrumbs in the coating for an even crunchier texture that might just steal the show!
- Herbed Delight: Mix in fresh thyme or rosemary to the dill for a fragrant twist that brings a new dimension to each bite.
- Zesty Marinade: Swap the dill pickle juice for lemon juice or an Italian vinaigrette for a bright, tangy alternative.
- Thighs Instead: Substitute chicken wings with chicken thighs for a juicier, meatier option that adds a delightful twist to the classic recipe.
- BBQ Flavor: Brush on your favorite barbecue sauce during the last few minutes of broiling to add a sweet and tangy glaze.
- Crispy Skin Lovers: Use an air fryer instead, following the same seasoning and cooking instructions for a deliciously crispy batch that’s quick and easy.
- Vegetarian Option: For a plant-based twist, try cauliflower florets marinated in pickle juice and baked for a delightful appetizer that even meat-eaters will love.
These wings are a fantastic base; why not pair them with our homemade dill ranch dressing or try them as a part of an amazing spread featuring recipes like Mediterranean Chicken Gyros or Coconut Chicken Rice Bowl? Whatever you choose, your flavor journey with Dill Pickle Chicken Wings is just beginning!
What to Serve with Dill Pickle Chicken Wings
Create the ultimate snacking experience by complementing these flavorful wings with a variety of delicious sides.
-
Creamy Dill Ranch Dressing: This dressing pairs perfectly as a dipping sauce, enhancing the vibrant dill flavor while adding a cool, creamy texture.
-
Crunchy Celery Sticks: Fresh, crisp celery provides a refreshing contrast to the rich wings, making each bite even more satisfying.
-
Spicy Slaw: A zesty slaw with a kick can enhance the flavor profile, offering a crunchy, tangy side that complements the wings beautifully.
-
Baked Potato Wedges: Crispy potato wedges can soak up the flavors, providing a hearty option that kids and adults alike will love.
-
Fries with Garlic Aioli: Golden fries paired with a garlicky aioli create a comforting side, merging flavors and textures in a delightful way.
-
Beer or Cider: A cold beer or a refreshing hard cider works wonders, balancing the savory notes of the wings while elevating your party vibe.
-
Chilled Pickles: Add a punch of tanginess to your meal by serving dill pickles on the side, echoing the flavor theme in a fun way.
-
Mini Caprese Skewers: These skewers with mozzarella, tomatoes, and basil provide a fresh burst of flavor and texture, making them an elegant addition.
How to Store and Freeze Dill Pickle Chicken Wings
Fridge: Store your Dill Pickle Chicken Wings in an airtight container for up to 3 days. Ensure they are cooled down before sealing to preserve their crispiness.
Freezer: For longer storage, freeze cooked wings in a single layer on a baking sheet, then transfer to a freezer-safe bag for up to 2 months. Thaw in the fridge before reheating.
Reheating: To regain that delicious crispiness, reheat the wings in the oven at 375°F (190°C) for 10-15 minutes, flipping halfway through for even heat distribution.
Make-Ahead Tips: Prepare the wings by brining them a day ahead and keep them stored in the fridge. This way, you can quickly bake them fresh when you’re ready to serve!
Dill Pickle Chicken Wings Recipe FAQs
How should I select the chicken wings?
Absolutely! When selecting chicken wings, look for fresh wings that have a bright color and are plump. The meat should not have any dark spots or an unpleasant odor. If you’re at the market, opt for wings that are refrigerated rather than those that have been on display for long periods.
What’s the best way to store leftover Dill Pickle Chicken Wings?
Store your Dill Pickle Chicken Wings in an airtight container in the fridge for up to 3 days. Allow the wings to cool completely before sealing to maintain their crispiness. If you’re planning to keep them longer, consider freezing them.
Can I freeze the Dill Pickle Chicken Wings?
Certainly! To freeze, first, arrange your cooked wings in a single layer on a baking sheet and place them in the freezer until they’re firm. After about 1-2 hours, transfer the wings to a freezer-safe bag, squeezing out excess air. You can keep them frozen for up to 2 months. To reheat, thaw them in the refrigerator overnight and then warm them in the oven for 10-15 minutes at 375°F (190°C).
What if my wings aren’t crispy enough?
Very! If your wings aren’t as crispy as you’d like, make sure they are completely dry before you coat them in the seasoning mixture. Additionally, using a wire rack allows air to circulate, ensuring even cooking. If they still lack crispiness after baking, you can broil them for a few extra minutes while keeping an eye to prevent burning.
Are there alternatives for those with dietary restrictions?
Absolutely! For a gluten-free option, ensure you use gluten-free baking powder and check that your chicken wings are from a reliable source. If you have a salt-sensitive diet, consider using low-sodium dill pickle juice and adjust the added salt accordingly. Always ensure ingredients are free from allergens, especially when preparing for guests.
What can I serve with Dill Pickle Chicken Wings?
A sumptuous pairing is to serve these wings with homemade dill ranch dressing, fresh celery, and carrot sticks. This not only complements the tangy flavors but also adds freshness to your appetizer spread!
Dill Pickle Chicken Wings: Crispy, Zesty Party Delight
Ingredients
Equipment
Method
- In a large bowl, combine the chicken wings with dill pickle juice and fresh chopped dill. Toss until well coated. Cover with plastic wrap and refrigerate for 2 to 4 hours.
- Preheat your oven to 425°F (220°C). After preheating, drain the wings and pat them dry with paper towels.
- Toss the dried wings with olive oil, garlic powder, baking powder, salt, and freshly cracked black pepper until evenly coated.
- Place a wire rack over a baking sheet and arrange the wings in a single layer on the rack.
- Bake the wings for 30 minutes, flipping them at the 15-minute mark for even cooking.
- Switch the oven setting to broil on high and broil the wings for an additional 5 minutes, watching closely to prevent burning.
- Remove from the oven, let cool briefly, and serve hot, garnished with extra dill and alongside creamy dill ranch dressing.
Leave a Reply