
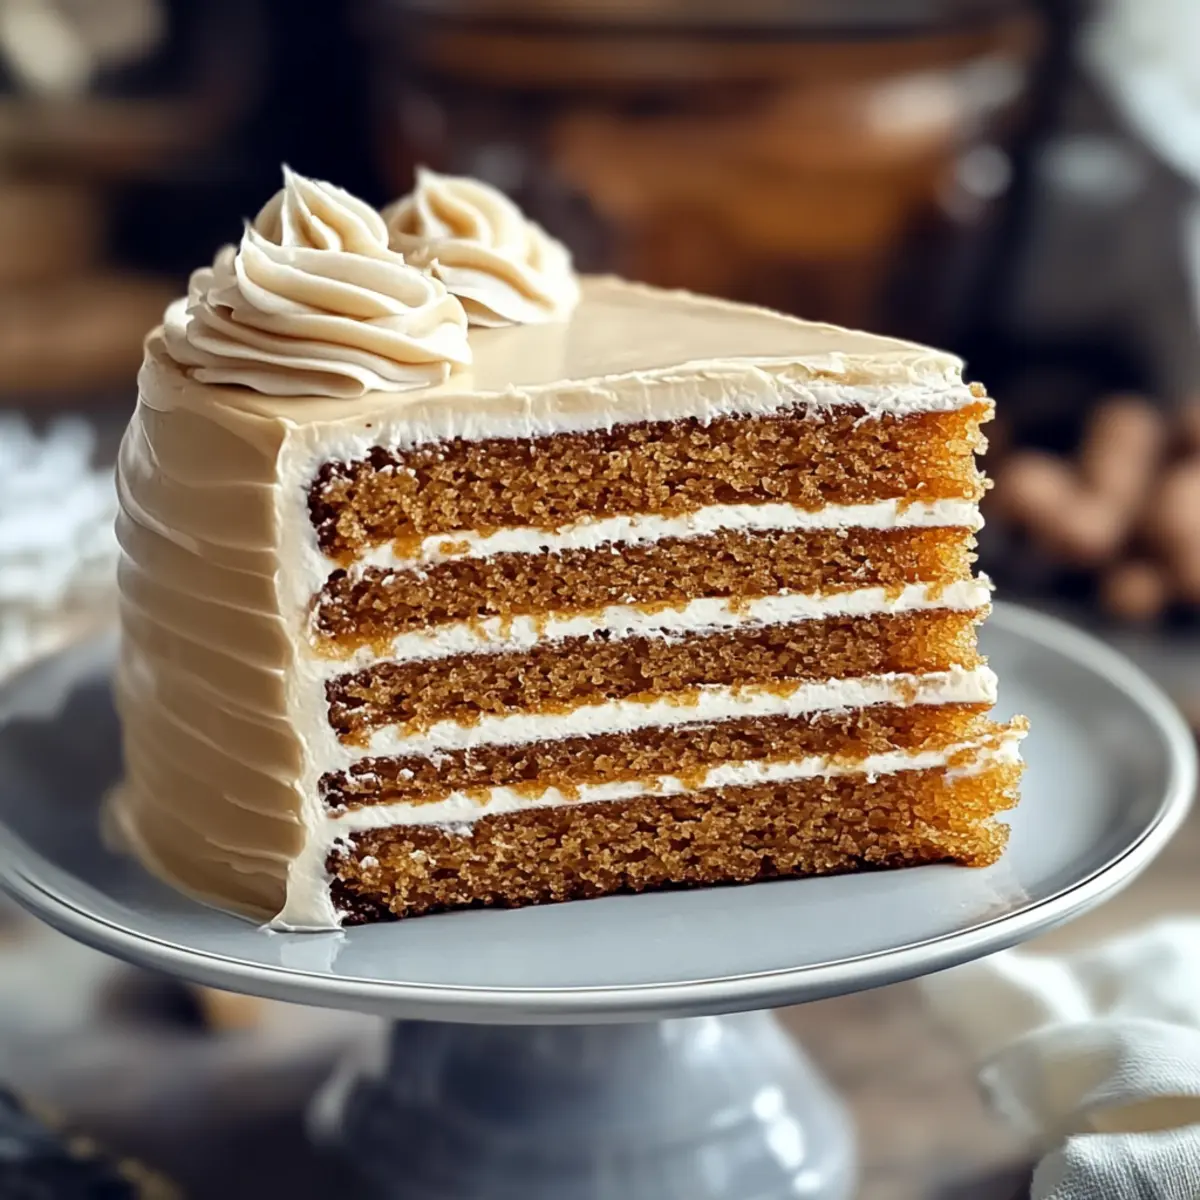
As the aroma of wildflower honey fills the kitchen, I can’t help but smile at the thought of indulging in a slice of Traditional Russian Honey Cake, or Medovik. This timeless dessert showcases a beautiful assembly of thin, honey-infused layers, lovingly crafted and filled with luxuriously creamy dulce de leche frosting. What I adore about this recipe is how effortlessly it elevates any gathering into a special occasion, bringing warmth and sweetness to the table. Plus, it captures the sweet nostalgia of homemade desserts with its unique complex texture and rich caramel notes. Have you ever thought about trying your hand at creating this delightful symphony of flavors? Let’s dive into the steps that turn this classic treat into a cherished moment in your kitchen.
Why is Medovik a must-try dessert?
Irresistible Flavor: The blend of wildflower honey and creamy dulce de leche makes every bite a decadent experience.
Unique Texture: Enjoy the contrast of soft layers and luscious frosting that create an unforgettable mouthfeel.
Showstopper Presentation: This layered beauty not only tastes amazing but also looks stunning on any dessert table, perfect for gatherings.
Nostalgic Appeal: Each slice tells a story, reminiscent of cherished family gatherings, making it a sweet connection to tradition.
Easy to Customize: Feel free to add your own twist—like berry layers or flavored extracts—similar to the variations in Honey Pepper Chicken or Sweet Potatoes Honey for a personal touch!
Perfect for Special Occasions: Elevate any celebration with this rich dessert that’s sure to impress friends and family alike.
Russian Honey Cake Ingredients
For the Cake Layers
- Wildflower Honey – Provides natural sweetness and depth of flavor; substitute with clover honey for a milder taste.
- Water – Used to balance the honey during preparation; no substitutions necessary.
- Granulated Sugar – Sweetens the batter and aids in the texture of the cake layers; coconut sugar can be used for a different flavor profile.
- Unsalted Butter – Adds richness and moisture to the cake; use vegan butter for a dairy-free option.
- Large Eggs – Contribute to the cake’s structure and moisture; no substitutions recommended for best results.
- Baking Soda – Acts as a leavening agent to help the cake rise; no substitution needed.
- Kosher Salt or Fine Sea Salt – Enhances flavor; no substitutions necessary.
- Ground Cinnamon – Adds warmth and spice to the cake; nutmeg can be used for a different flavor note.
- All-Purpose Flour – Forms the structure of the cake layers; substitute with a gluten-free flour blend for a gluten-free option.
For the Frosting
- Dulce de Leche – Provides a rich caramel flavor in the frosting; caramel sauce can be used as an alternative.
- Heavy Cream – Essential for making a light, whipped frosting; coconut cream can be used for a dairy-free frosting.
Ready to embark on your journey to creating this delightful Russian Honey Cake? With its luscious flavors and layered elegance, it’s bound to become a cherished treat in your home!
Step‑by‑Step Instructions for Russian Honey Cake
Step 1: Prepare for Baking
Begin by preheating your oven to 375°F (190°C). While the oven heats, take a sheet of parchment paper and trace 9-inch circles onto it; these will serve as templates for your cake layers. Place the parchment circles on two baking sheets, ensuring they are ready to hold the honey cake batter.
Step 2: Honey Water Bath
In a medium saucepan, gently heat 3/4 cup of wildflower honey over medium heat until it starts to smoke and bubble, about 5 minutes. Carefully whisk in 1/4 cup of water until fully combined and smooth. Keep the honey-water mixture warm to ensure it blends easily with the other ingredients in your Russian Honey Cake.
Step 3: Make Honey-Sugar Mixture
In a large mixing bowl set over a pot of simmering water, melt 1 stick of unsalted butter with 1/2 cup of granulated sugar and the warm honey mixture. Stir continuously for about 5 minutes until everything is well-combined and smooth. This step infuses your batter with rich, sweet flavors and sets the base for your honey cake.
Step 4: Add Eggs and Spices
Once your butter-sugar mixture is cooled slightly, whisk in 2 large eggs until fully incorporated. Then, add 1 teaspoon of baking soda, 1/2 teaspoon of kosher salt, and 1 teaspoon of ground cinnamon. Mix thoroughly until all ingredients are well blended, creating a creamy and fragrant batter for your Russian Honey Cake.
Step 5: Incorporate Flour
Gradually add 3 cups of all-purpose flour into the egg mixture in three parts, whisking after each addition until the batter is smooth and lump-free. The batter will be thick and slightly sticky, which is ideal for achieving those lovely, soft layers in the final cake.
Step 6: Bake Layers
Spoon the batter evenly onto the prepared parchment circles, spreading it out gently with a spatula to ensure it reaches the edges. Bake the layers in the preheated oven for 6-7 minutes, or until the edges are golden and the tops spring back when lightly pressed. Once baked, allow them to cool on the baking sheets.
Step 7: Toast Layers
If any layers are slightly imperfect, don’t worry! Bake them at a lower temperature of 250°F (120°C) for about 15 minutes to dry out the cake. Afterward, let them cool completely and grind these layers into fine crumbs, which will add a lovely texture when decorating your Russian Honey Cake.
Step 8: Make Frosting
To prepare the frosting, whisk together 1 cup of dulce de leche and 1 cup of heavy cream in a mixing bowl until well combined. Chill the mixture in the refrigerator for 30 minutes. Once chilled, whip the mixture until medium-stiff peaks form, resulting in a rich and creamy frosting perfect for layering.
Step 9: Assemble Cake
Start assembling your Russian Honey Cake by placing one cake layer on a serving platter. Spread a generous amount of the dulce de leche frosting between each layer as you stack them, ensuring the topping is smooth and even. Once all layers are stacked, cover the top and sides of the cake with the remaining frosting.
Step 10: Chill
Finally, to allow the flavors to meld beautifully, cover the assembled Russian Honey Cake with plastic wrap and refrigerate it overnight. This resting period enhances the taste and texture, making every slice a delight to enjoy when you’re ready to serve.
What to Serve with Traditional Russian Honey Cake
Indulging in a slice of this honey-soaked delight feels like a warm hug, so why not create a full meal around it?
-
Fresh Berries: Their vibrant flavor and juicy texture create a refreshing contrast to the sweetness of the cake.
-
Whipped Cream: A dollop of lightly sweetened whipped cream pairs beautifully, adding a light and airy element to each rich bite.
For a delightful twist, consider making berry compote. The tartness of berries cooked down with sugar balances the honey cake’s sweetness. Simply simmer berries with a bit of sugar until they’ve burst, and serve warm or chilled on top of your cake!
-
Coffee or Tea: A warm cup of coffee or herbal tea intensifies the flavors, making each bite a moment of happiness.
-
Chocolate Ganache: Drizzling warm chocolate ganache over each slice adds a luxurious touch that enhances the cake’s rich texture.
-
Spiced Nuts: A handful of cinnamon-roasted nuts brings crunch and a burst of warmth, complementing the cake’s honey notes.
-
Vanilla Ice Cream: Melting vanilla ice cream creates a heavenly contrast with the cake, adding creaminess and a delightful chill to the dessert experience.
With these delicious accompaniments, your dessert will not only shine, but create lasting memories with every bite shared!
How to Store and Freeze Russian Honey Cake
Fridge: Store leftovers in an airtight container in the refrigerator for up to 3 days. The flavors will deepen and improve as the cake sits, making each slice even more delightful!
Freezer: Wrap individual slices or the whole cake in plastic wrap and then in aluminum foil to protect against freezer burn. This Russian Honey Cake can be frozen for up to 3 months.
Thawing: When you’re ready to enjoy a slice, transfer it to the fridge to thaw overnight. For a quick option, let it sit at room temperature for about 1–2 hours.
Reheating: If you prefer a warm dessert, gently warm slices in the microwave for about 15-20 seconds, but be careful not to overdo it to retain the cake’s wonderful texture.
Russian Honey Cake Variations & Substitutions
Feel free to explore delicious twists on this classic dessert and make it truly your own!
-
Dairy-Free: Substitute heavy cream with coconut cream for a luscious, dairy-free frosting that retains all the creaminess.
-
Gluten-Free: Use a gluten-free flour blend instead of all-purpose flour to create a cake that everyone can enjoy, regardless of dietary needs.
-
Fruit Layers: Add fresh berries, like raspberries or strawberries, between the layers for a fruity burst that complements the honey beautifully.
-
Spice It Up: Experiment with cardamom or allspice in the cake batter to introduce warm, aromatic notes that delight the senses.
-
Sweetener Swap: Try using maple syrup in place of wildflower honey for a unique flavor profile that enriches the cake’s sweetness.
-
Nutty Flavor: Fold in finely chopped nuts, such as walnuts or pecans, into the frosting for an added crunch that enhances the overall texture.
-
Chocolate Drizzle: For a decadent touch, drizzle melted chocolate over the assembled cake before serving, adding a delightful richness to each bite.
-
Citrus Zest: Infuse the frosting with lemon or orange zest for a refreshing zing that perfectly cuts through the sweetness.
These variations not only add exciting layers of flavor but also allow you to customize the cake to fit occasions and personal tastes, just like Sweet Potatoes Honey or the delightful Hot Honey Chicken you might enjoy. Let your creativity soar!
Make Ahead Options
These traditional Russian Honey Cake layers are an ideal choice for meal prep enthusiasts! You can bake the cake layers and store them tightly wrapped in plastic wrap for up to 3 days in the refrigerator to maintain their freshness and flavor. Additionally, the frosting can be prepared and kept in an airtight container in the fridge for up to 24 hours to save time. When it’s time to serve, simply layer the chilled frosting between the cooled cake layers and allow the assembled cake to refrigerate overnight; this resting period helps enhance the flavors, ensuring that your Medovik is just as delicious when served as freshly made!
Expert Tips for Russian Honey Cake
-
Measure Precisely: Honey is key to the cake’s texture and flavor; ensure you measure carefully to achieve the perfect consistency.
-
Avoid Overmixing: Gently fold in the flour to keep the cake layers soft and tender; overmixing can lead to a dense texture.
-
Cool Layers Properly: Allow the baked layers to cool completely on parchment; this prevents them from breaking as you assemble the Russian Honey Cake.
-
Chill the Frosting: Chilling the frosting before whipping gives it the perfect consistency for spreading between layers and on top.
-
Refrigerate Overnight: This resting period is crucial for allowing the flavors of the cake and frosting to meld beautifully; don’t skip it!
Russian Honey Cake Recipe FAQs
What type of honey is best for Russian Honey Cake?
Absolutely! Wildflower honey is ideal for this recipe as it adds natural sweetness and depth of flavor. If you prefer a milder taste, you can also use clover honey without any problem.
How should I store leftover Russian Honey Cake?
I often recommend storing leftovers in an airtight container in the refrigerator for up to 3 days. The flavors will blend and improve as the cake sits, so every slice gets even tastier!
Can I freeze Russian Honey Cake?
Yes, you can! To freeze, wrap individual slices or the entire cake in plastic wrap and then in aluminum foil to protect against freezer burn. It can be frozen for up to 3 months. Just remember to allow it to thaw in the fridge overnight or at room temperature for about 1–2 hours before enjoying it.
What should I do if my cake layers are uneven?
Don’t worry if your layers aren’t perfect! You can bake any imperfect layers at 250°F for about 15 minutes to dry them out. Once cooled, grind them into crumbs and sprinkle these on top of your assembled cake for a beautiful finish!
Are there any allergy considerations for Russian Honey Cake?
Definitely! Since this cake contains eggs and dairy, it’s not suitable for those with egg or dairy allergies. You can use vegan butter and coconut cream for a dairy-free version, but be sure to double-check all ingredients if you’re accommodating specific allergies.
Decadent Russian Honey Cake: A Sweet Celebration Treat
Ingredients
Equipment
Method
- Preheat your oven to 375°F (190°C) and prepare parchment paper with 9-inch circles as templates.
- In a medium saucepan, heat 3/4 cup of wildflower honey over medium heat for about 5 minutes.
- In a large mixing bowl over simmering water, melt 1 stick of unsalted butter with 1/2 cup of granulated sugar and the honey mixture.
- Once cooled slightly, whisk in 2 large eggs, then add 1 teaspoon of baking soda, 1/2 teaspoon of kosher salt, and 1 teaspoon of ground cinnamon.
- Gradually add 3 cups of all-purpose flour until the batter is smooth.
- Spoon the batter onto the parchment circles and bake for 6-7 minutes.
- If layers are imperfect, bake them at 250°F (120°C) for 15 minutes and let cool.
- Whisk 1 cup of dulce de leche and 1 cup of heavy cream, chill for 30 minutes, then whip until medium-stiff peaks form.
- Assemble the cake by stacking layers with frosting in between and covering the entire cake.
- Cover the cake with plastic wrap and refrigerate overnight.
Leave a Reply