
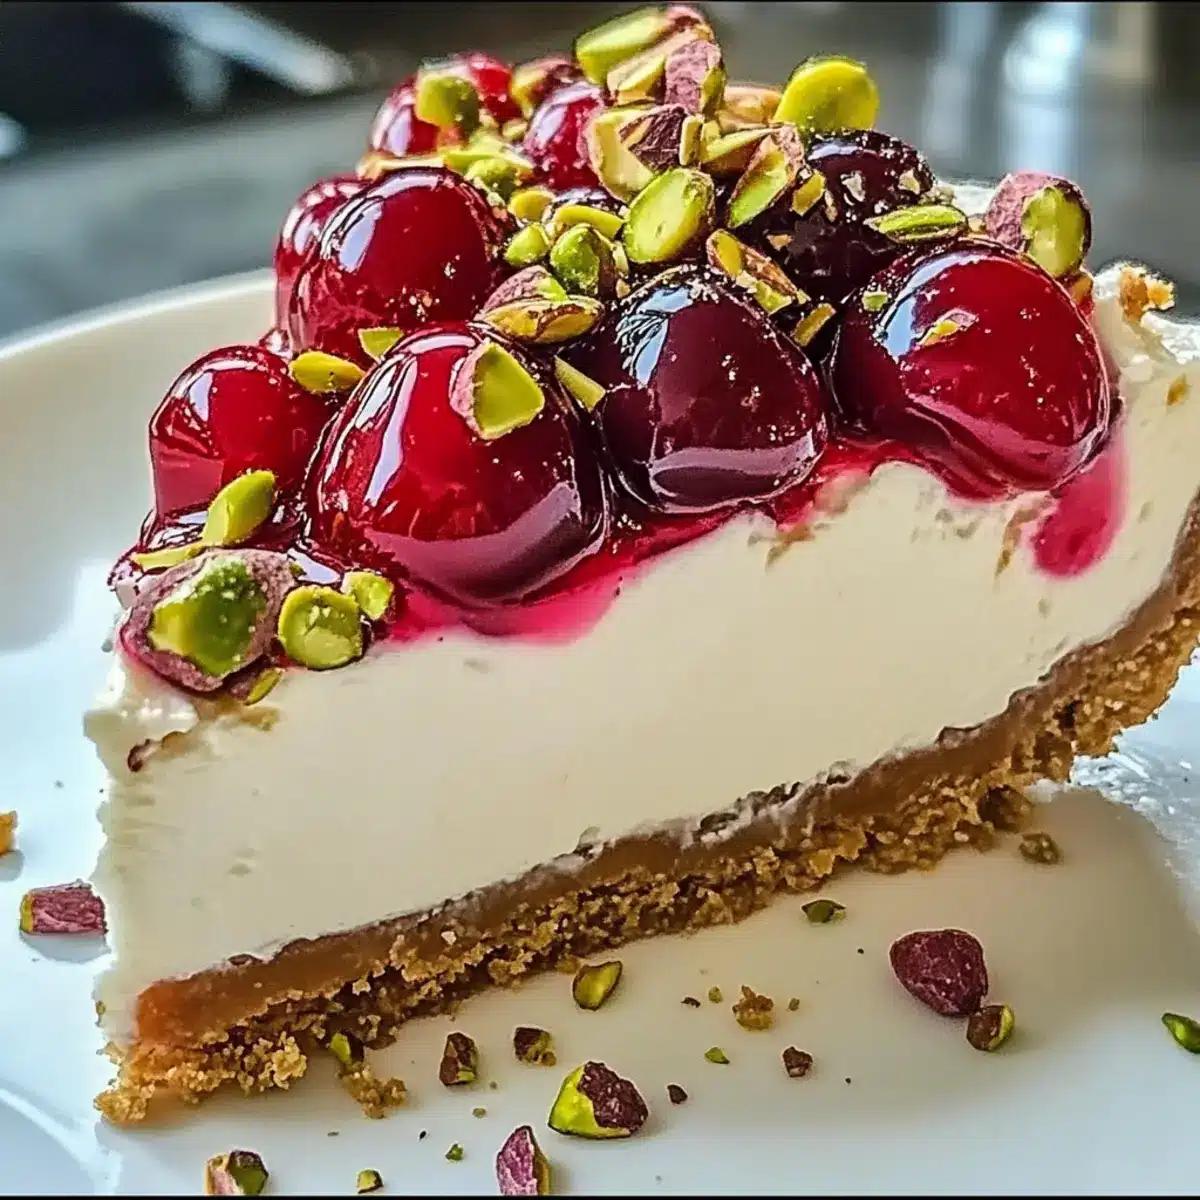
A hint of tart cherry over a luscious blanket of cream, with a whisper of nutty crunch—what could be better than that? The Cherry Pistachio Cheesecake has stolen my heart and become my go-to showstopper dessert. It’s the kind of treat that feels special yet remarkably simple, allowing me to impress friends or enjoy a sweet moment at home without breaking a sweat. With a creamy filling that can be prepped ahead and a vibrant mix of flavors, this cheesecake marries lively maraschino cherries and crunchy pistachios into every delightful bite. Whether you’re celebrating a special occasion or just craving a slice of homemade goodness, this recipe is sure to please. Ready to elevate your dessert game? Let’s dive into the deliciousness!
Why is this cheesecake a must-try?
Irresistible Flavor: The combination of tangy cherries and nutty pistachios creates a well-balanced dessert that bursts with flavor in every bite.
Effortless Preparation: Creating this cheesecake is a breeze, making it perfect for both novice bakers and seasoned chefs looking for an easy yet impressive treat.
Make-Ahead Magic: You can prepare this delicious dessert in advance, saving time and stress on your special day. Just chill and serve!
Crowd-Pleasing Delight: It’s a showstopper at any gathering, and its vibrant colors are sure to charm your guests. Pair it with some whipped cream or extra cherries for that extra touch!
Versatile Base: Feel free to adjust the recipe to your liking—try using fresh cherries or swapping pistachios for almonds for a different twist.
For an extra special touch, you might also enjoy a slice of Vanilla Bean Cheesecake alongside this gem!
Cherry Pistachio Cheesecake Ingredients
For the Crust
• Graham Cracker Crumbs – Provides the base for the crust; substitute with crushed cookies or gluten-free alternatives for a different flavor.
• Ground Pistachios – Adds nutty flavor and texture to both the crust and filling; substitute with chopped almonds or omit for a nut-free version.
• Sugar – Sweetens the cheesecake filling and crust; coconut sugar or a sugar substitute can be used depending on dietary needs.
• Melted Butter – Binds crust ingredients together and adds richness; replace with coconut oil for a dairy-free version.
For the Filling
• Cream Cheese – The main ingredient for filling, creating a smooth and creamy texture; ensure it’s softened to room temperature to avoid lumps.
• Sour Cream – Adds tang and creaminess to the filling; Greek yogurt can be a substitute.
• Eggs – Provide structure and stability to the cheesecake; substitute with flax eggs for a vegan option.
• Pistachio Pudding Mix (dry powder) – Infuses pistachio flavor into the filling; skip if unavailable but the flavor will be less pronounced.
• Vanilla Extract – Enhances flavor; use pure vanilla for the best results.
For the Topping
• Canned Cherry Pie Filling – Topping for the cheesecake; fresh or frozen cherries can be a substitute—ensure to drain excess moisture if using fresh.
Let’s get ready to create this cherry pistachio cheesecake and enjoy every luscious bite of this delightful dessert!
Step‑by‑Step Instructions for Cherry Pistachio Cheesecake
Step 1: Preheat the Oven
Begin by preheating your oven to 325°F (160°C). While the oven warms, prepare a 9-inch springform pan by lightly greasing it or lining the bottom with parchment paper. This will ensure that your luscious Cherry Pistachio Cheesecake releases easily once baked.
Step 2: Make the Crust
In a mixing bowl, combine graham cracker crumbs, ground pistachios, sugar, and melted butter. Mix until the ingredients are evenly moistened. Press this mixture firmly into the bottom of your prepared pan, creating an even layer, and bake for 8 minutes. The crust should become slightly golden, invitingly crunchy.
Step 3: Prepare the Filling
In a large bowl, beat the softened cream cheese and sugar together until the mixture is smooth and creamy, using a hand mixer or stand mixer. Gradually incorporate the eggs, one at a time, making sure to mix well after each addition. Then, add in sour cream, pistachio pudding mix, and vanilla extract, mixing until just combined for your rich Cherry Pistachio Cheesecake filling.
Step 4: Bake the Cheesecake
Pour the creamy filling over the cooled crust, spreading it evenly with a spatula. Carefully transfer the cheesecake into the preheated oven and bake for 45 to 50 minutes. The center should still be slightly jiggly when you gently shake the pan; this ensures a creamy consistency once cooled.
Step 5: Cool Gradually
After baking, turn off the oven and crack the door open. Allow the Cherry Pistachio Cheesecake to cool in the oven for 1 hour, which helps to prevent cracks. The gradual cooling process is key for a smooth, velvety texture in your cheesecake.
Step 6: Chill the Cheesecake
Once the cheesecake has cooled to room temperature, transfer it to the refrigerator and chill for at least 4 hours, though overnight is best. This chilling time allows the flavors to meld together, enhancing the creamy richness that makes this dessert irresistible.
Step 7: Top and Serve
Before serving, spread the cherry pie filling over the top of the chilled cheesecake, letting it cascade beautifully. For an extra touch, sprinkle with chopped pistachios. Slice and serve this delightful Cherry Pistachio Cheesecake cold, impressing your guests with its vibrant flavors and gorgeous presentation.
Expert Tips for Cherry Pistachio Cheesecake
-
Softened Cheese: Ensure cream cheese is at room temperature to avoid lumps in your filling; this creates that perfectly smooth texture.
-
Gentle Mixing: When folding in the cherries and pistachios, do it gently to prevent overmixing, helping maintain a creamy texture in the cheesecake.
-
Avoid Overbaking: Keep an eye on your cheesecake while it bakes; the center should remain slightly jiggly to avoid cracks and ensure a luscious consistency.
-
Proper Cooling: Remember to cool your cheesecake gradually in the oven to lessen the risk of cracking. This step is crucial for achieving a velvety finish.
-
Chill Well: Let your Cherry Pistachio Cheesecake chill overnight if possible, as this enhances both the flavor and texture, making each slice even more delightful.
Make Ahead Options
Preparing the Cherry Pistachio Cheesecake ahead of time is a fantastic way to streamline your dessert planning! You can make the cheesecake filling and crust up to 24 hours in advance; simply refrigerate them separately in airtight containers to maintain their fresh quality. Once baked and cooled, store the cheesecake covered in the refrigerator for up to 3 days. This allows the flavors to meld beautifully, making it even more delightful! When you’re ready to serve, just top it with the cherry pie filling, garnish with crushed pistachios, and slice—giving you a show-stopping dessert with minimal last-minute fuss! Enjoy the luxury of having this exquisite treat ready ahead of time!
What to Serve with Cherry Pistachio Cheesecake
Elevate your dessert experience with delightful pairings that enhance the lusciousness of this showstopper cheesecake.
-
Fresh Berries: Bright and juicy berries add a refreshing tartness that complements the rich cheesecake beautifully.
-
Whipped Cream: Light, airy whipped cream provides a dreamy contrast to the creamy texture of the cheesecake, making each bite a delight.
-
Dark Chocolate Shavings: Sprinkle some dark chocolate over the top for an elegant touch. The slight bitterness enhances the dessert’s sweetness, harmonizing flavors wonderfully.
-
Coffee or Espresso: A warm cup of coffee or a bold espresso balances the sweetness of the cheesecake and awakens your palate with its robust flavor.
-
Lemon Sorbet: This sorbet adds a chilled, zesty flavor that cuts through the creaminess, refreshing your taste buds between bites.
-
Almond Biscotti: The crunch of almond biscotti offers a contrasting texture and nutty flavor that pairs perfectly with the cheesecake, making for a memorable crunch.
How to Store and Freeze Cherry Pistachio Cheesecake
Fridge: Keep your cheesecake covered in the refrigerator for up to 5 days. This helps maintain its creamy texture and flavor while preventing it from absorbing odors.
Freezer: For longer storage, wrap your cheesecake tightly in plastic wrap and then aluminum foil. It can be frozen for up to 3 months. Thaw in the fridge overnight before serving.
Make-Ahead: This cheesecake can be made up to 2 days in advance. Baking it ahead of time allows the flavors to deepen and meld together beautifully.
Reheating: If you’d like to serve it slightly warm, remove from the fridge and let it sit at room temperature for about 30 minutes before slicing. Enjoy your Cherry Pistachio Cheesecake to the fullest!
Cherry Pistachio Cheesecake Variations
Feel free to get creative with this delicious dessert and tailor it to your personal taste!
-
Fresh Cherries: Swap canned pie filling for fresh cherries for a vibrant, seasonal twist. Just be sure to pat them dry to avoid excess moisture.
-
Nuts: Substitute ground pistachios with chopped almonds or walnuts for a different nutty flavor and texture. Each nut brings its own delightful crunch!
-
Sugar-Free Option: Use a sugar substitute to lower the sweetness while still enjoying that creamy texture. Balanced sweetness allows the cheesecake’s flavors to shine.
-
Dairy-Free Delight: Replace cream cheese with a dairy-free alternative like cashew cream. This variation keeps the cheesecake creamy while catering to lactose sensitivities.
-
Flavored Pudding Mix: Experiment with vanilla or chocolate pudding mix instead of pistachio for an unexpected flavor adventure. Each variation offers a unique take on this scrumptious dessert.
-
Zesty Citrus: Add a teaspoon of lemon or lime zest into the filling for a bright, citrusy kick that cuts through the sweetness beautifully. It’s a refreshing twist!
-
Chocolate Drizzle: Top each slice with dark chocolate ganache for a rich addition. The contrast of flavors will elevate your dessert experience to a whole new level!
For more delightful inspirations, consider pairing this cheesecake with an elegant Espresso Cheesecake Decadent for a coffee lovers’ paradise!
Cherry Pistachio Cheesecake Recipe FAQs
How do I select ripe cherries for my cheesecake?
Absolutely! When choosing cherries, look for ones that are plump, shiny, and have a vibrant color. If they have a slight sheen, they are likely fresh. Avoid cherries with dark spots all over, as these can indicate overripeness.
What’s the best way to store leftover cheesecake?
To keep your Cherry Pistachio Cheesecake fresh, store it in the refrigerator covered with plastic wrap or in an airtight container for up to 5 days. This keeps the texture creamy and prevents it from absorbing any odors.
Can I freeze this cheesecake?
Yes! For freezing, wrap your cheesecake tightly in plastic wrap and then in aluminum foil to prevent freezer burn. It will stay good for up to 3 months. To serve, thaw it in the refrigerator overnight before indulging in its creamy goodness.
What should I do if my cheesecake cracks while baking?
Very! If cracks do appear, don’t fret too much—they can still be delicious! To minimize cracking, avoid overbaking. When the center remains a bit jiggly, it’s a sign that it will set properly once cooled. Always cool the cheesecake gradually in the oven after baking as well!
Are there any dietary concerns I should consider?
Absolutely! If you’re preparing this Cherry Pistachio Cheesecake for someone with nut allergies, substitute the pistachios with crushed cookies or omit nuts entirely for a nut-free version. Always check the labels of your ingredients for potential allergens!
Delicious Cherry Pistachio Cheesecake for Sweet Celebrations
Ingredients
Equipment
Method
- Preheat the oven to 325°F (160°C) and prepare a 9-inch springform pan.
- In a mixing bowl, combine graham cracker crumbs, ground pistachios, sugar, and melted butter. Press firmly into the pan and bake for 8 minutes.
- Beat the softened cream cheese and sugar until smooth, then incorporate the eggs one at a time, followed by sour cream, pistachio pudding mix, and vanilla extract.
- Pour the filling over the cooled crust and bake for 45-50 minutes until slightly jiggly.
- Turn off the oven and crack the door open, allowing the cheesecake to cool for 1 hour.
- Chill the cheesecake in the refrigerator for at least 4 hours, preferably overnight.
- Spread cherry pie filling over the cheescake before serving and garnish with chopped pistachios.
Leave a Reply