
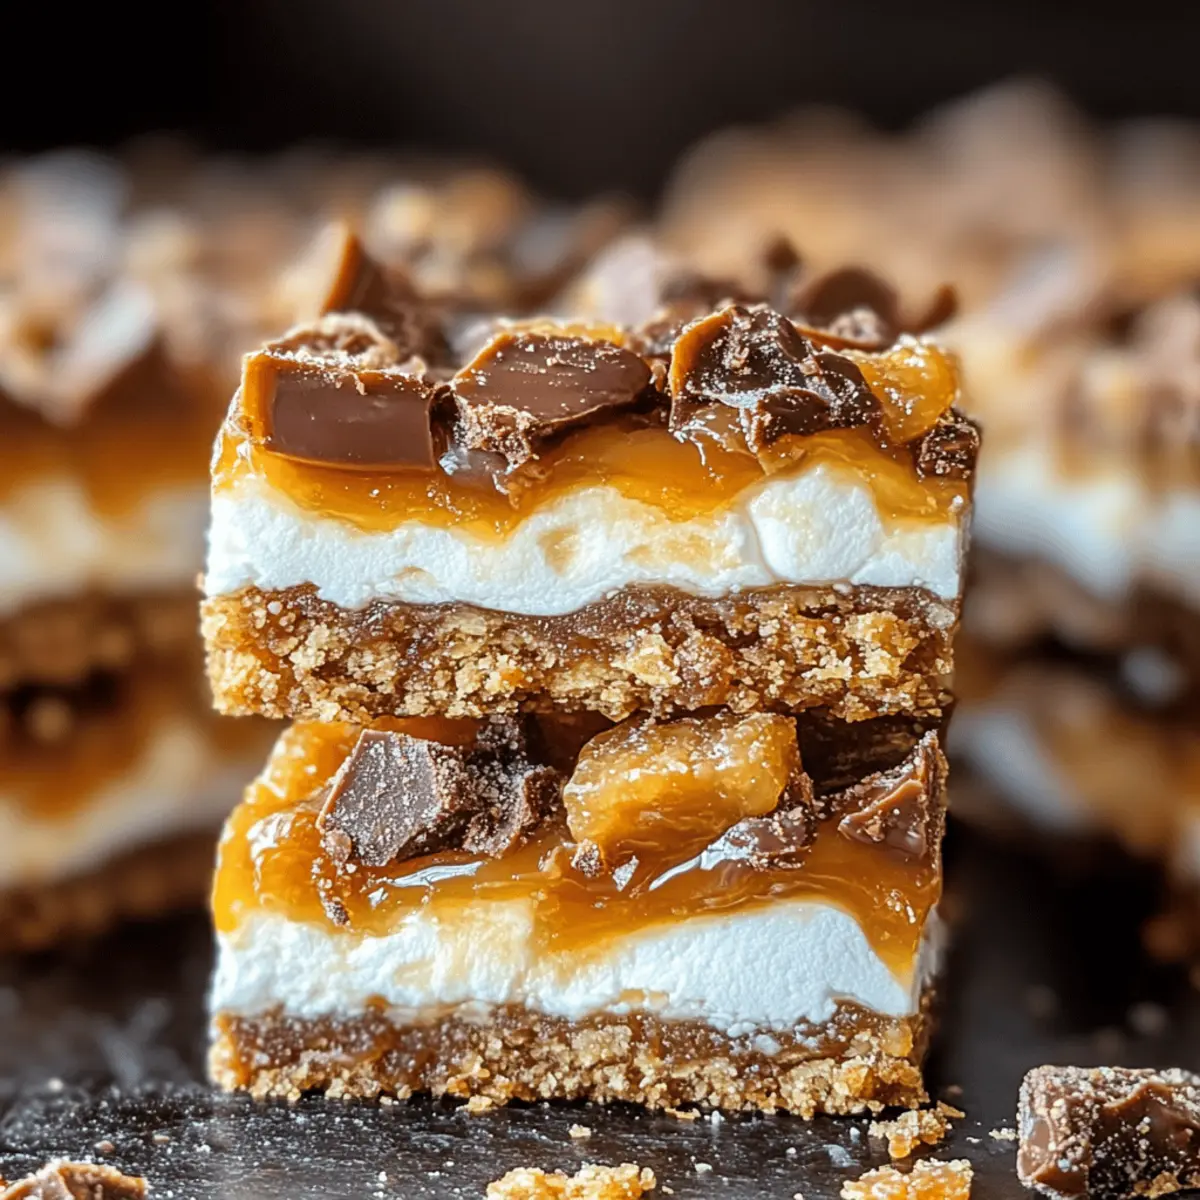
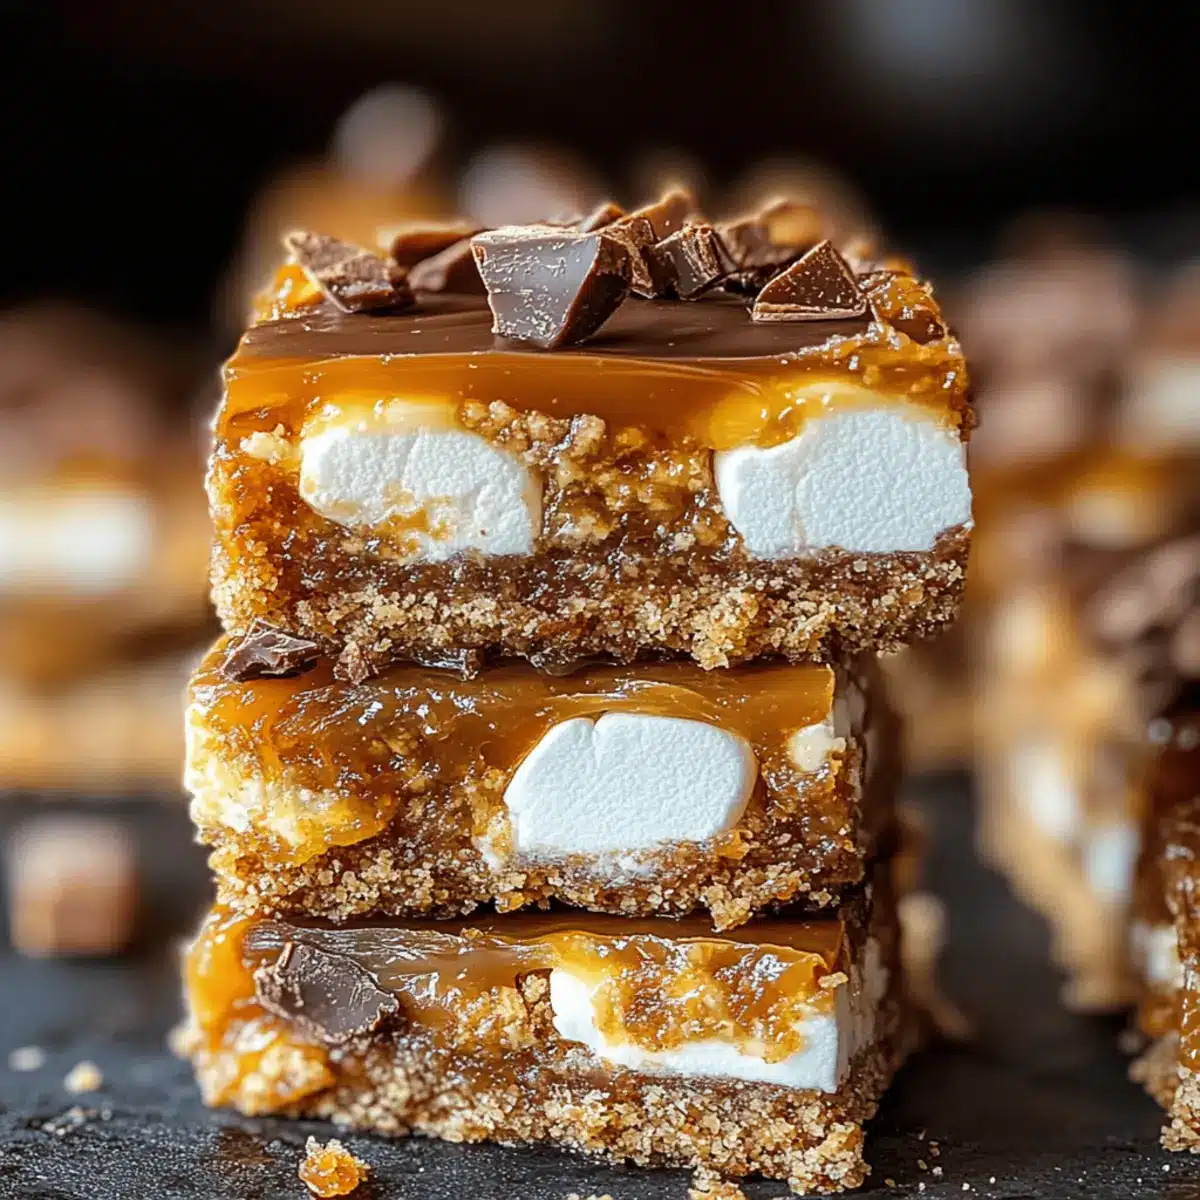
As I stood in my kitchen, the tantalizing scent of melting caramel wafted through the air, transporting me back to my childhood when candy bars were the highlight of my day. That nostalgic feeling inspired my No-Bake Butterfinger Caramel Bars, a delightful dessert that combines gooey caramel and crunchy Butterfinger pieces in a treat that’s as easy to make as it is to devour. With no baking required, these bars are perfect for those balmy summer evenings when you want to impress your guests without spending hours in the kitchen. Not only are they a crowd-pleaser, but they also allow everyone to partake in the fun of assembling this charming dessert. Ready to create some sweet memories? Let’s dive into the recipe!

Why are Butterfinger Caramel Bars irresistible?
Unparalleled Convenience: These No-Bake Butterfinger Caramel Bars require minimal effort, making them the perfect dessert for anyone pressed for time.
Childhood Nostalgia: With every bite, you’ll be transported back to carefree days filled with sweet treats, making these bars a great way to share memories with friends and family.
Customizable Delight: Feel free to experiment with variations—try adding chopped nuts for a crunchy twist or swap in milk chocolate for even more sweetness.
Crowd Favorite: Whether it’s a summer BBQ or a cozy movie night, these bars are bound to be the highlight of any gathering.
Easily Shareable: Cut into squares, they make for a perfect portable treat! You can even pair them with a warm drink or serve them alongside a hearty meal like my Burger Bowls Caramelized for an unexpected yet delightful contrast.
Dive into making these bars and let the deliciousness begin!
Butterfinger Caramel Bars Ingredients
For the Base
• Graham Crackers – Provide structure and a buttery flavor; substitute with gluten-free graham crackers for a gluten-free version.
• Mini Marshmallows – Adds delightful texture and sweetness; can substitute with larger marshmallows, cut to size.
For the Filling
• Caramel Bits – The main sweet component that melts down beautifully; you can use homemade caramel for an extra touch.
• Milk – Helps achieve a smooth caramel consistency; any milk variety, including plant-based options, will work well.
• Butterfinger Bites – The signature crunchy candy that adds flavor and texture; use chopped Butterfinger bars if bites are unavailable.
For the Topping
• Semi-Sweet Chocolate – Drizzled on top for added flavor and decoration; dark chocolate can provide a richer taste to enhance the Butterfinger Caramel Bars experience.
Step‑by‑Step Instructions for No-Bake Butterfinger Caramel Bars
Step 1: Prepare the Pan
Line a 9×9 inch baking pan with aluminum foil, ensuring it hangs over the edges for easy removal later. Lightly spray the foil with cooking spray to prevent sticking, setting the stage for your delicious No-Bake Butterfinger Caramel Bars. This preparation will ensure your bars come out easily and retain their shape.
Step 2: Layer the Base
Break graham crackers into pieces and arrange them snugly at the bottom of the prepared pan. Make sure the entire bottom is covered, creating a sturdy and buttery base for your bars. This step will form the foundation for the layers to come, providing a satisfying crunch with each bite.
Step 3: Add Marshmallows
Evenly distribute mini marshmallows on top of the graham cracker base, making sure they are spread out for consistency. The marshmallows will soften as they heat, adding a delightful chewy texture that contrasts beautifully with the crunchy base. This colorful layer is essential for the charm of your Butterfinger Caramel Bars.
Step 4: Melt Caramel
In a microwave-safe bowl, combine caramel bits and milk. Heat in the microwave in 30-second intervals, stirring in between, until fully melted and smooth—this typically takes about 1-2 minutes. The caramel should be glossy and pourable, creating the luscious filling for your bars.
Step 5: Spread Caramel
Drizzle the melted caramel evenly over the layer of marshmallows, using a spatula to ensure every marshmallow is covered. This gooey layer is key to achieving the rich flavor of the No-Bake Butterfinger Caramel Bars. Allow it to set for just a moment to thicken slightly before adding the next layer.
Step 6: Butterfinger Layer
Sprinkle the chopped Butterfinger pieces generously over the caramel layer, gently pressing them in with your fingers. This step adds the signature crunchy texture that makes these bars irresistible. Make sure to distribute the Butterfinger pieces evenly for maximum flavor in every bite.
Step 7: Melt Chocolate
Melt the semi-sweet chocolate in the microwave, using 30-second bursts, stirring until smooth and melted—this usually takes about 1 minute. Once melted, drizzle the silky chocolate over the Butterfinger layer, allowing it to cascade down the sides for a beautiful finish. This rich topping enhances the overall sweetness of the Butterfinger Caramel Bars.
Step 8: Chill
Place the pan in the refrigerator and let the bars chill for about 1 hour, or until fully set and firm. This cooling period allows all the layers to meld together beautifully, ensuring your No-Bake Butterfinger Caramel Bars hold their shape. Keep an eye on them as they solidify!
Step 9: Slice and Serve
Once set, lift the bars from the pan using the overhanging foil edges. Cut into squares or rectangles with a sharp knife; you may want to let them sit at room temperature for a few minutes for easier slicing. Your Butterfinger Caramel Bars are now ready to be enjoyed—perfect for sharing or savoring all on your own!
How to Store and Freeze Butterfinger Caramel Bars
Room Temperature: Store your Butterfinger Caramel Bars in an airtight container at room temperature for up to 2-3 days; this keeps them soft and chewy.
Fridge: For longer freshness, refrigerate your bars in a sealed container; they can last up to 3-4 months while retaining their delicious flavor and texture.
Freezer: If you need to keep them even longer, wrap individual bars in plastic wrap and place them in a freezer-safe bag; they can be frozen for up to a year without sacrificing quality.
Reheating: For a delightful treat, allow bars to sit at room temperature for several minutes before enjoying, as this softens the caramel and enhances the overall experience.
What to Serve with No-Bake Butterfinger Caramel Bars
The perfect accompaniment can elevate your dessert experience to sheer bliss, inviting everyone to indulge in a joyous spread.
-
Fresh Berries: Juicy strawberries, raspberries, or blueberries add a burst of tartness that beautifully balances the sweetness of the bars.
-
Whipped Cream: Light and airy, a dollop of whipped cream will enhance the rich flavors, providing a creamy contrast that everyone will love.
-
Vanilla Ice Cream: Creamy vanilla ice cream creates a delightful temperature contrast, melting softly over the bars for a decadent finish.
-
Coffee or Espresso: A robust cup of coffee or a shot of espresso will cut through the sweetness while enhancing the dessert’s delightful caramel notes.
-
Chocolate Sauce Drizzle: For chocolate lovers, an extra drizzle of warm chocolate sauce over the bars amps up the indulgence, making each bite a rich delight.
-
Nutty Caramel Flavored Latte: Pairing your bars with a frothy caramel latte adds a cozy, café-inspired touch and enhances the flavor profile harmoniously.
-
Peanut Butter Dipping Sauce: A silky peanut butter sauce for dipping brings a nutty richness that complements the Butterfinger flavor, adding an exciting twist.
-
Almond Milkshake: A chilled almond milkshake offers a refreshing beverage pairing, allowing the bars to shine as a delightful sweet treat contrast.
Serve these thoughtful additions alongside your No-Bake Butterfinger Caramel Bars for an unforgettable dessert spread that delights both the eyes and taste buds!
Make Ahead Options
These No-Bake Butterfinger Caramel Bars are fantastic for meal prep, allowing you to enjoy their delightful flavors without last-minute fuss! You can prepare the graham cracker base and layer of marshmallows up to 24 hours in advance, storing them in the fridge to maintain their texture. Additionally, you can melt the caramel and Butterfinger pieces ahead of time and refrigerate them separately for up to 3 days. Just remember to let the caramel soften slightly before spreading it over the marshmallows when you’re ready to finish the bars. For the chocolate drizzle, melt it fresh before serving to ensure a luscious finish. With these make ahead tips, you’ll have these irresistible Butterfinger Caramel Bars ready for any occasion with minimal stress!
Butterfinger Caramel Bars Variations
Feel free to get creative with these Butterfinger Caramel Bars, tailoring them to your taste buds and dietary needs!
- Gluten-Free: Use gluten-free graham crackers to maintain that wonderful crunchy base without any gluten.
- Nutty Crunch: Incorporate chopped nuts, like peanuts or walnuts, to add an unexpected, satisfying crunch to your bars.
- Dairy-Free: Swap out regular butter and milk for plant-based alternatives to create a delicious dairy-free treat.
- Dark Chocolate Twist: Opt for dark chocolate instead of semi-sweet for a richer, more intense chocolate layer that balances the sweetness beautifully.
- Choco-Peanut Butter Remix: Drizzle creamy peanut butter over the chocolate layer for an unforgettable flavor combination that every peanut butter lover will adore.
- Caramel Alternative: If you want to keep it homemade, use your own caramel sauce for a fresher taste and control over the sweetness.
- S’mores Style: Add crushed graham crackers and mini chocolate chips between the layers for a delightful twist reminiscent of your favorite campfire treat.
- Spicy Kick: Sprinkle a pinch of cayenne pepper or sea salt over the chocolate drizzle for a surprising flavor explosion.
Don’t forget, these delightful bars are perfect for sharing at gatherings or serving alongside a warm drink. They make a stunning addition to any barbecue or dessert table, especially when paired with fabulous recipes like my Brown Butter Bars. Enjoy experimenting!
Expert Tips for Butterfinger Caramel Bars
-
Let Them Cool: Make sure to chill the bars for at least an hour before slicing; this helps the layers set properly for clean cuts.
-
Use Fresh Ingredients: For the best flavor and texture, use fresh graham crackers and quality Butterfinger pieces—stale ingredients can affect the final result.
-
Adjust Sweetness: If you prefer less sweetness, consider using dark chocolate instead of semi-sweet; it balances well with the caramel in these Butterfinger Caramel Bars.
-
Prevent Sticking: Lightly grease the foil before adding the ingredients; this prevents the bars from sticking and makes removal a breeze.
-
Storage Wisdom: Keep the bars in an airtight container at room temperature to retain their delicious chewy texture; avoid exposing them to moisture.
Butterfinger Caramel Bars Recipe FAQs
What type of graham crackers should I use?
Absolutely! Any standard graham crackers will do, but for a gluten-free version, I recommend using gluten-free graham crackers. They provide the same buttery flavor and crunchy texture that makes the base so delightful.
How should I store Butterfinger Caramel Bars?
Keep your Butterfinger Caramel Bars stored in an airtight container at room temperature for up to 2-3 days. If you want them to stay fresh longer, refrigerate them for up to 3-4 months. Just make sure they’re sealed well to avoid any moisture getting in!
Can I freeze Butterfinger Caramel Bars, and if so, how?
Yes, you can freeze them! Wrap each bar individually in plastic wrap, then place them in a freezer-safe bag or container. They can be preserved for up to a year. When you want to enjoy them, simply thaw them at room temperature for about 10-15 minutes to soften the caramel slightly.
What should I do if my caramel isn’t melting smoothly?
If your caramel bits aren’t melting smoothly, try adding a little extra milk—about a tablespoon at a time—as you heat them in the microwave. Stir well between intervals, and ensure you’re not overheating, as this can lead to a gritty texture. Aim for a glossy, pourable consistency!
Are there any dietary considerations for Butterfinger Caramel Bars?
Yes, definitely! If you’re concerned about allergies, ensure you check the ingredients of each component. Butterfingers contain peanuts, so they’re not suitable for those with peanut allergies. You can also substitute with nut-free chocolate or other candy options to accommodate different dietary needs.

Butterfinger Caramel Bars That Will Wow Your Guests
Ingredients
Equipment
Method
- Line a 9x9 inch baking pan with aluminum foil, ensuring it hangs over the edges for easy removal later. Lightly spray the foil with cooking spray.
- Break graham crackers into pieces and arrange them snugly at the bottom of the prepared pan.
- Evenly distribute mini marshmallows on top of the graham cracker base.
- In a microwave-safe bowl, combine caramel bits and milk. Heat in 30-second intervals, stirring in between, until fully melted and smooth.
- Drizzle the melted caramel evenly over the layer of marshmallows.
- Sprinkle the chopped Butterfinger pieces generously over the caramel layer.
- Melt the semi-sweet chocolate in the microwave, using 30-second bursts until smooth and melted.
- Drizzle the melted chocolate over the Butterfinger layer.
- Place the pan in the refrigerator and let the bars chill for about 1 hour, or until fully set and firm.
- Once set, lift the bars from the pan using the overhanging foil edges and cut into squares or rectangles.
Leave a Reply