
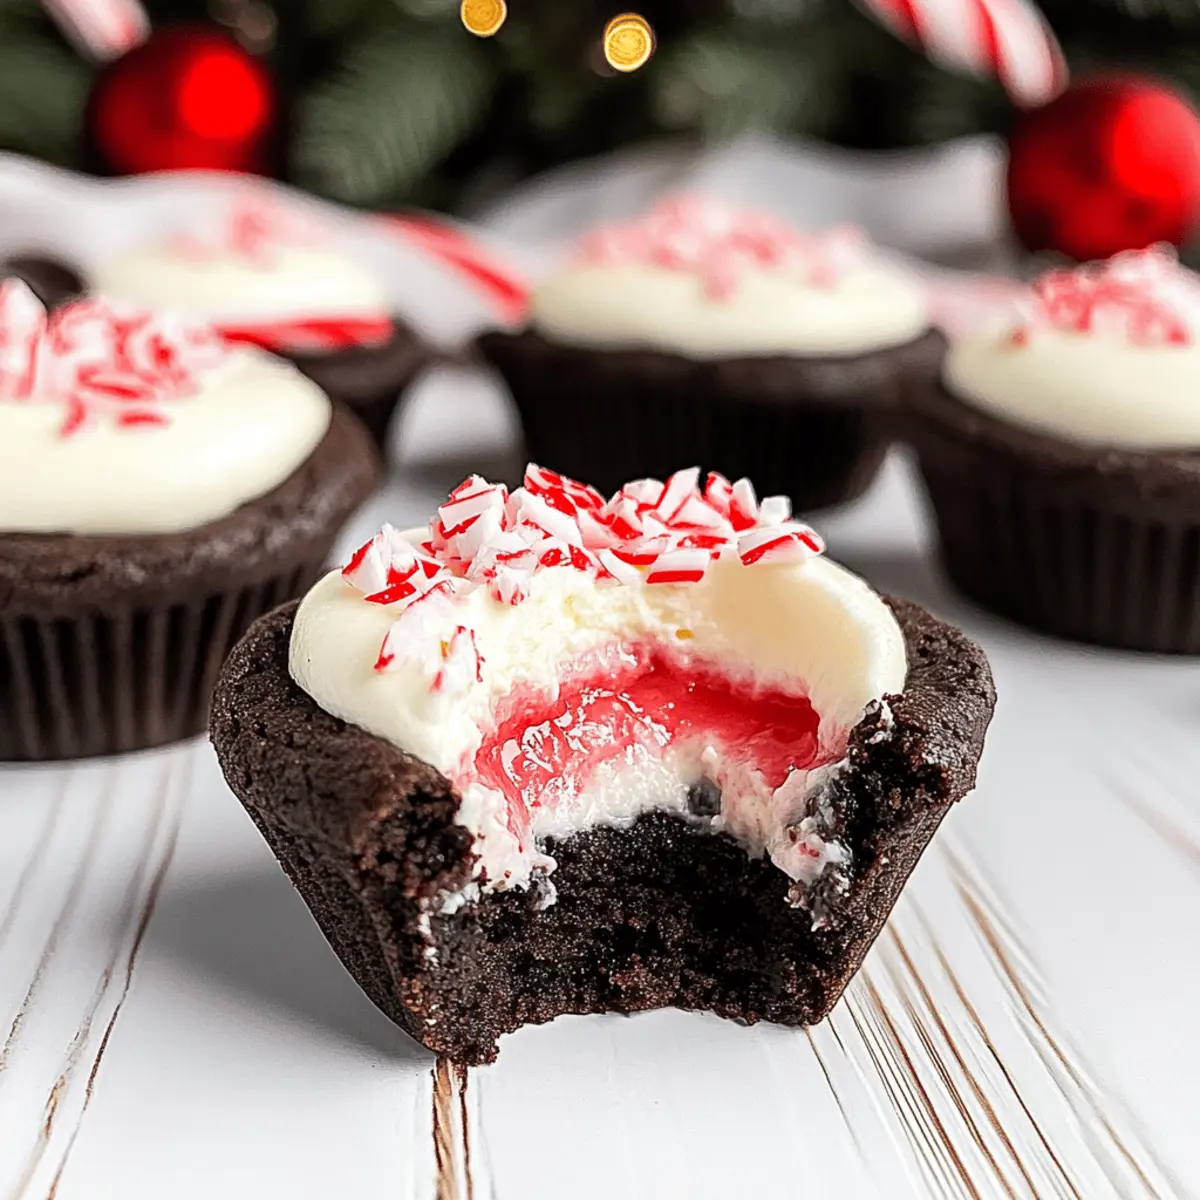
As the holidays approach, the scent of sugar and spice begins to fill my kitchen—a sign that it’s time for some serious baking. One of my go-to favorites during this festive season are Chocolate Peppermint Cookie Cups. These delightful treats feature a rich chocolate cookie base, lovingly filled with a light and fluffy peppermint cheesecake that captures the joy of the holidays in every bite. What makes these cookies even more irresistible is their make-ahead potential; you can whip them up and freeze them for those unexpected gatherings or last-minute cravings. Plus, the combination of chocolate and peppermint adds a refreshing twist that excites the taste buds! Are you ready to dive into a batch of these dreamy cookie cups and impress your friends and family?
Why are these cookie cups a must-try?
Decadent Flavors: The luscious blend of chocolate and peppermint creates a festive delight that embodies holiday spirit.
Make-Ahead Marvel: Easily prepare these treats in advance, so you can enjoy the festivities without the stress!
Crowd-Pleasing Treat: Perfect for holiday parties, these cookie cups are sure to impress guests—everyone will be reaching for seconds!
Unique Presentation: Delightful little cups filled with creamy cheesecake offer a fresh twist on your traditional cookie platter.
Versatile Options: Feel free to customize by swapping flavors or toppings, like Mint Chocolate Chip or crushed chocolate for added flair.
When you’re ready to indulge in something truly special this season, these Chocolate Peppermint Cookie Cups are a treat you won’t want to miss!
Chocolate Peppermint Cookie Cups Ingredients
For the Cookie Cups
- All-Purpose Flour – Provides structure to the cookie; substitute with gluten-free flour for a gluten-free option.
- Dutch-Processed Cocoa Powder – Adds rich chocolate flavor and vibrant color; you can use regular cocoa powder for a lighter flavor.
- Black Cocoa Powder – Enhances chocolate intensity and gives a dark hue; if unavailable, add more Dutch-processed cocoa for a lighter result.
- Baking Soda – Serves as a leavening agent, ensuring the cookie rises beautifully.
- Salt – Balances sweetness and highlights the overall flavor profile.
- Unsalted Butter – Adds rich moisture and flavor; ensure it’s at room temperature for easier mixing.
- Granulated Sugar – Sweetens the cookie and contributes to its delightful texture.
- Light Brown Sugar – Provides a hint of caramel flavor and moisture.
- Eggs – Bind the ingredients together and add moisture; use room temperature eggs for best results.
- Vanilla Extract – Boosts the overall flavor; opt for pure vanilla for increased depth.
For the Cheesecake Filling
- Heavy Whipping Cream – Key to making the cheesecake filling light and airy; make sure it’s cold for better results.
- Cream Cheese – The base of the cheesecake; using full-fat ensures the best creamy texture.
- Granulated Sugar (for filling) – Sweetens the cheesecake filling for a delightful taste.
- Peppermint Extract – Infuses refreshing minty flavor; use it sparingly to avoid overpowering.
- Red Color Gel – Optional for decorative piping; omit if you prefer a simpler look.
For Garnishing
- Candy Canes (chopped) – Adds a crunchy festive flair; sprinkle just before serving to retain crispness.
Get ready to create some unforgettable Chocolate Peppermint Cookie Cups that will elevate your holiday gatherings!
Step‑by‑Step Instructions for Chocolate Peppermint Cookie Cups
Step 1: Prepare Cookie Cups
Preheat your oven to 350°F (175°C) and grease two regular-sized cupcake tins. In a large mixing bowl, whisk together all-purpose flour, Dutch-processed cocoa powder, black cocoa powder, baking soda, and salt until well combined. The mixture should be a rich chocolate color that signals you’re ready to create your delicious Chocolate Peppermint Cookie Cups.
Step 2: Mix Dough
In a separate bowl, beat room temperature unsalted butter with granulated and light brown sugars for 2-3 minutes, until light and fluffy. Add eggs one at a time, mixing each until fully incorporated, followed by the vanilla extract. Gradually blend in the dry ingredients, ensuring a smooth cookie dough forms, rich in flavor and ready for the next step.
Step 3: Shape Cookies
Using a large cookie scoop, fill the greased muffin tins with the cookie dough, ensuring each is level and packed. Bake in the preheated oven for 10-13 minutes, or until they appear mostly set but still slightly soft in the center. Watch for cracks on the surface; they indicate a perfect bake for your cookie cups.
Step 4: Create Wells
Immediately after baking, take a small container or the back of a measuring tablespoon and press gently into the center of each cookie to form wells. This is where the fluffy cheesecake filling will go. Let them cool in the muffin tins for about 10 minutes before transferring to a wire rack to cool completely, ensuring they maintain their shape.
Step 5: Make Cheesecake Filling
For the delightful filling, whip the heavy cream in a cold bowl until stiff peaks form, achieving that light and airy texture. In another bowl, mix the cream cheese, granulated sugar for filling, and peppermint extract until smooth. Carefully fold in the whipped cream until fully combined, giving you a beautifully fluffy peppermint cheesecake filling for your cookie cups.
Step 6: Pipe Filling
Prepare a piping bag, optionally with colorful stripes if using red color gel for a festive touch. Fill the piping bag with the cheesecake mixture and carefully pipe into the cooled cookie cups, filling each well generously. Refrigerate the filled cookie cups for 1-2 hours, allowing the filling to set properly and become even more indulgent.
Step 7: Serve
Before serving your Chocolate Peppermint Cookie Cups, sprinkle the tops with chopped candy canes for that perfect crunch and festive look. These delightful treats are best enjoyed fresh within 2-3 days, although they can be frozen for up to 4 weeks—just remember to add the candy canes right before you serve them for that delightful crunch!

How to Store and Freeze Chocolate Peppermint Cookie Cups
-
Room Temperature: Keep the cookie cups in an airtight container at room temperature for up to 3 days to maintain their softness and flavor.
-
Fridge: If you prefer a longer storage option, these delightful treats can be stored in the fridge for up to a week. Just ensure they are sealed tightly to prevent them from drying out.
-
Freezer: Freeze the cookie cups without the candy cane topping for up to 4 weeks. Wrap them individually or store them in an airtight container to keep them fresh.
-
Reheating: When ready to enjoy your frozen Chocolate Peppermint Cookie Cups, simply thaw them in the fridge overnight and add candy canes just before serving for the best texture and flavor.
Make Ahead Options
These Chocolate Peppermint Cookie Cups are a fantastic option for busy home cooks looking to simplify their holiday baking! You can prepare the cookie cups up to 3 days in advance by baking them and allowing them to cool completely. Once cooled, store them in an airtight container at room temperature to maintain their softness. The cheesecake filling can be whipped and stored in the refrigerator for up to 24 hours before assembling; just give it a quick stir to re-fluff before piping it into the cookie cups. When you’re ready to serve, simply fill the prepared cookie cups and add the crushed candy canes right before enjoying to ensure they stay crunchy. With these make-ahead tips, you’ll have delicious treats with minimal last-minute fuss!
Chocolate Peppermint Cookie Cups Variations
Feel free to get creative and personalize your cookie cups with these exciting twists that will tantalize your taste buds!
-
Almond Twist: Substitute peppermint extract with almond extract for a nutty flavor that adds warmth.
-
Chocolate Lovers: Swap the candy canes for crushed chocolate bars or chocolate-covered toffee pieces for an extra rich topping. The combination of textures will be irresistible!
-
Gluten-Free Delight: Use gluten-free flour in place of all-purpose flour, allowing everyone to indulge without worry.
-
Brownie Base: Replace the cookie dough with your favorite brownie mix for a fudgier, gooey dessert. This gives a completely different yet deliciously rich texture.
-
Festive Red Velvet: Add red velvet cake mix to the cookie base for visually stunning cups that taste fabulous too. Festive and flavorful, they are sure to impress.
-
Spicy Kick: Incorporate a pinch of cayenne pepper or ground ginger into the cookie dough for a warm, spicy sensation that pairs surprisingly well with chocolate and peppermint.
-
Minty Mini Cups: Use mini muffin tins for smaller, bite-sized versions. Just remember to reduce baking time and keep an eye on them—they’re perfect for snacking or sharing!
-
Vegan Option: Replace eggs with flaxseed eggs and use coconut cream in place of heavy cream for the cheesecake filling, ensuring a creamy delight that fits into a plant-based diet.
Feel free to explore and mix your choice of flavors! For more sweet inspirations, check out these delightful treats like Chewy Pumpkin Chocolate or create unique cookies with Gingerbread Thumbprint Cookies that will blow your mind!
Expert Tips for Chocolate Peppermint Cookie Cups
- Keep Ingredients Cold: Ensure your heavy cream and mixing bowls are chilled before whipping for stable peaks in the cheesecake filling.
- Perfect Baking Time: Bake until the cookie cups are mostly set. They will continue to firm up as they cool, so avoid overbaking.
- Room Temperature Eggs: Use room temperature eggs for better incorporation into the dough, resulting in a smoother cookie texture.
- Avoid Overmixing: When combining wet and dry ingredients, mix until just combined to prevent tough cookie cups.
- Adapt Size with Care: If using mini muffin tins, reduce baking time to 8-10 minutes to prevent overbaking; start checking around the 8-minute mark.
Enjoy creating your delightful Chocolate Peppermint Cookie Cups with these expert tips!
What to Serve with Chocolate Peppermint Cookie Cups
Looking to create a complete holiday meal that dazzles the senses while incorporating these dreamy cookie cups?
- Festive Hot Cocoa: Enhances the warm chocolatey flavors of the cookies while adding a cozy, nostalgic touch to your holiday festivities.
- Creamy Mashed Potatoes: The buttery texture pairs wonderfully with the rich chocolate, offering a savory contrast to the sweet cookies.
- Roasted Brussels Sprouts: Their slight bitterness and crunch balance the sweetness of the cookie cups, making for a well-rounded holiday spread.
- Peppermint Tea: This refreshing drink not only complements the peppermint flavor but also adds a soothing element to your meal.
- Holiday Fruit Salad: A mix of citrus, apples, and pomegranate adds brightness and freshness, perfectly balancing the indulgence of the cookie cups.
- Cheesecake Bites: For true dessert lovers, these mini bites provide another decadent experience without overshadowing the signature chocolate peppermint cookie cups.
- Gingerbread Cookies: This classic holiday treat echoes the season, offering a spicy crunch that enhances the festive experience.
- Spiced Apple Cider: Warm and aromatic, it brings comforting flavors to the table and pairs beautifully with the creamy filling of the cookie cups.
- Chocolate Mint Brownies: For those who cannot resist chocolate, these fudgy treats echo the flavors of your cookie cups while providing a different texture.
Chocolate Peppermint Cookie Cups Recipe FAQs
What is the best way to select ripe ingredients for these cookie cups?
Absolutely! For the best-flavored Chocolate Peppermint Cookie Cups, use unsalted butter that’s softened to room temperature, which will mix more easily and create a fluffier cookie. Ensure your cream cheese is also at room temperature for smooth blending; this helps the filling achieve its light and airy texture.
How should I store Chocolate Peppermint Cookie Cups?
You can store these delightful cookie cups in an airtight container at room temperature for up to 3 days. If you want to extend their freshness, keep them in the refrigerator for up to a week. Just make sure they’re well-sealed to prevent drying out.
Can I freeze Chocolate Peppermint Cookie Cups?
Yes, you can! Freeze the cookie cups without any toppings for up to 4 weeks. Grab an airtight container or wrap them individually in plastic wrap to keep them fresh. When you’re ready to enjoy, thaw them in the fridge overnight, and add the chopped candy canes just before serving to keep that delightful crunch!
What should I do if my cookie cups are overbaked?
If your cookie cups come out of the oven too dry, you’re not alone; it happens to the best of us! To fix this, you could try removing them from the oven a minute earlier next time. For a delicious fix, you can serve them with a scoop of ice cream or whipped cream to add moisture back to the dish.
Are there any allergy considerations with these cookie cups?
Definitely! These cookie cups contain several common allergens, including dairy (in butter and cream cheese) and eggs. For a gluten-free option, substitute all-purpose flour with a gluten-free blend. If you’re making them for someone with allergies, double-check all packaging to ensure the ingredients do not contain traces of the allergens in question.
What if I want to customize the flavor of the cheesecake filling?
The more the merrier! You can swap the peppermint extract with almond or orange extract for a unique twist. If you’re feeling adventurous, you could also add a touch of espresso powder for a mocha flavor that pairs beautifully with the chocolate base.
Chocolate Peppermint Cookie Cups Recipe FAQs
Decadent Chocolate Peppermint Cookie Cups for a Festive Treat
Ingredients
Equipment
Method
- Preheat your oven to 350°F (175°C) and grease two regular-sized cupcake tins.
- In a large mixing bowl, whisk together all-purpose flour, Dutch-processed cocoa powder, black cocoa powder, baking soda, and salt until well combined.
- In a separate bowl, beat room temperature unsalted butter with granulated and light brown sugars for 2-3 minutes, until light and fluffy.
- Add eggs one at a time, mixing each until fully incorporated, followed by the vanilla extract.
- Gradually blend in the dry ingredients until a smooth cookie dough forms.
- Using a large cookie scoop, fill the greased muffin tins with the cookie dough, ensuring each is level and packed.
- Bake in the preheated oven for 10-13 minutes, or until they appear mostly set but still slightly soft in the center.
- Immediately press into the center of each cookie to form wells.
- Let them cool in the muffin tins for about 10 minutes before transferring to a wire rack.
- Whip the heavy cream in a cold bowl until stiff peaks form.
- In another bowl, mix the cream cheese, granulated sugar for filling, and peppermint extract until smooth.
- Carefully fold in the whipped cream until fully combined.
- Fill a piping bag with the cheesecake mixture and pipe into the cooled cookie cups.
- Refrigerate the filled cookie cups for 1-2 hours.
- Before serving, sprinkle the tops with chopped candy canes.
Leave a Reply