
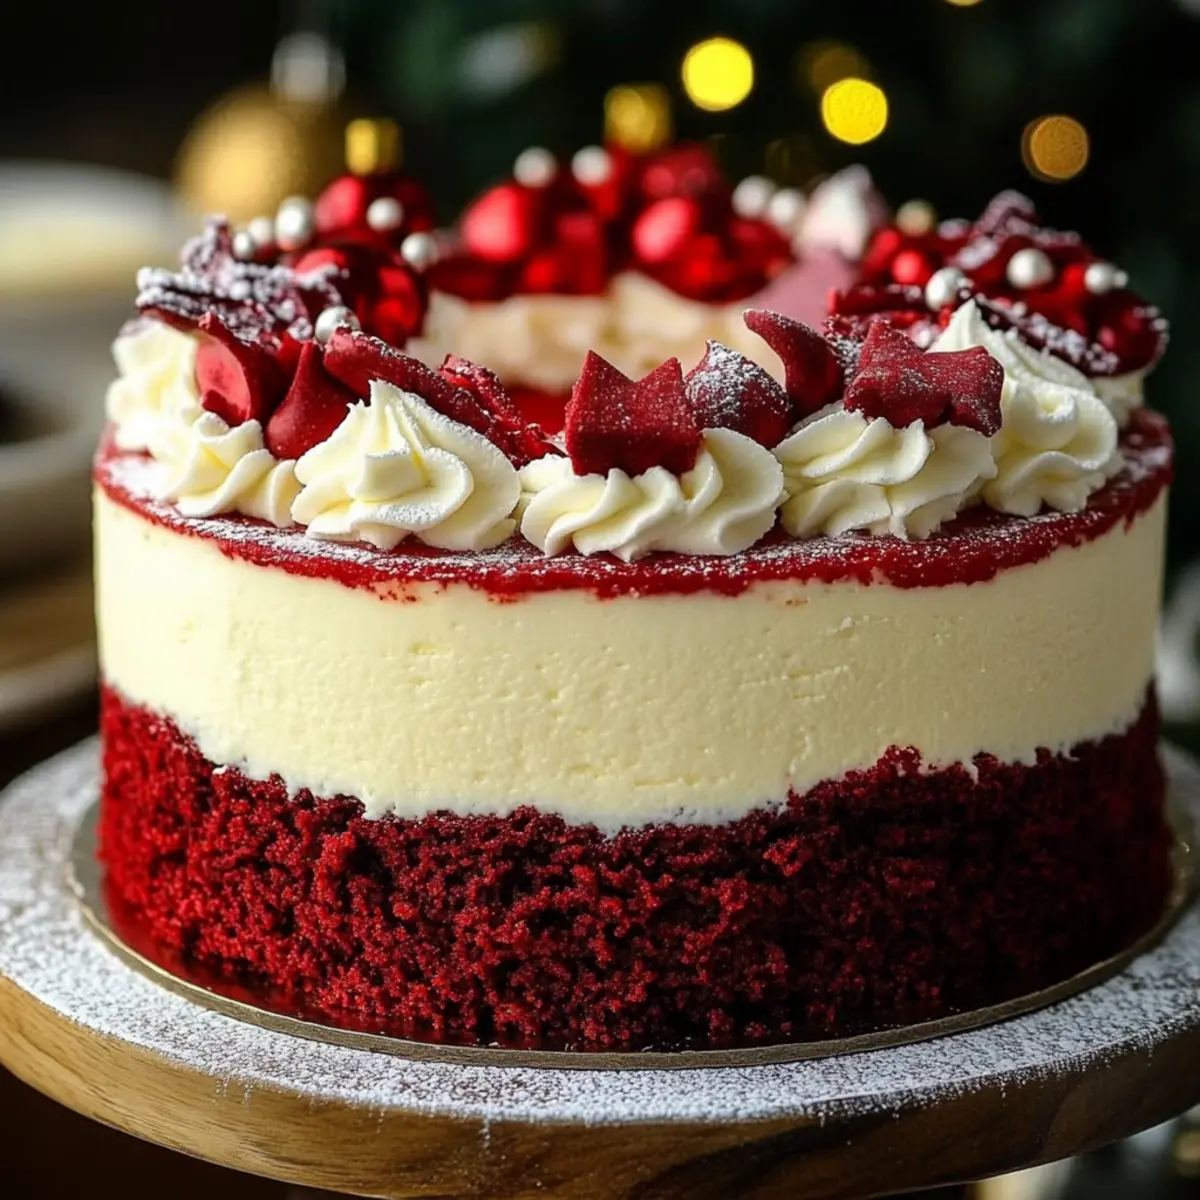
As the aroma of freshly baked goodies wafts through the house, the festive spirit starts to swirl. Christmas is a time to celebrate, indulge, and share special moments with loved ones, and what better way to make a statement than with a stunning Christmas Red Velvet Cheesecake? This recipe combines the luxurious depth of classic red velvet with the creamy allure of cheesecake, making it the ideal centerpiece for any holiday gathering. Not only does it dazzle with its eye-catching red and white layers, but it also offers the perfect balance of flavor and texture that leaves every guest wanting more. Plus, it’s surprisingly easy to whip up, leaving you more time to toast to the season. Ready to create a showstopper that’ll steal the spotlight on your dessert table? Let’s dive into this delightful recipe!
Why is this cheesecake a must-have?
Indulgent Delight: This Christmas Red Velvet Cheesecake boasts a luxurious combination of rich red velvet cake and creamy cheesecake that’s sure to impress at any festive gathering.
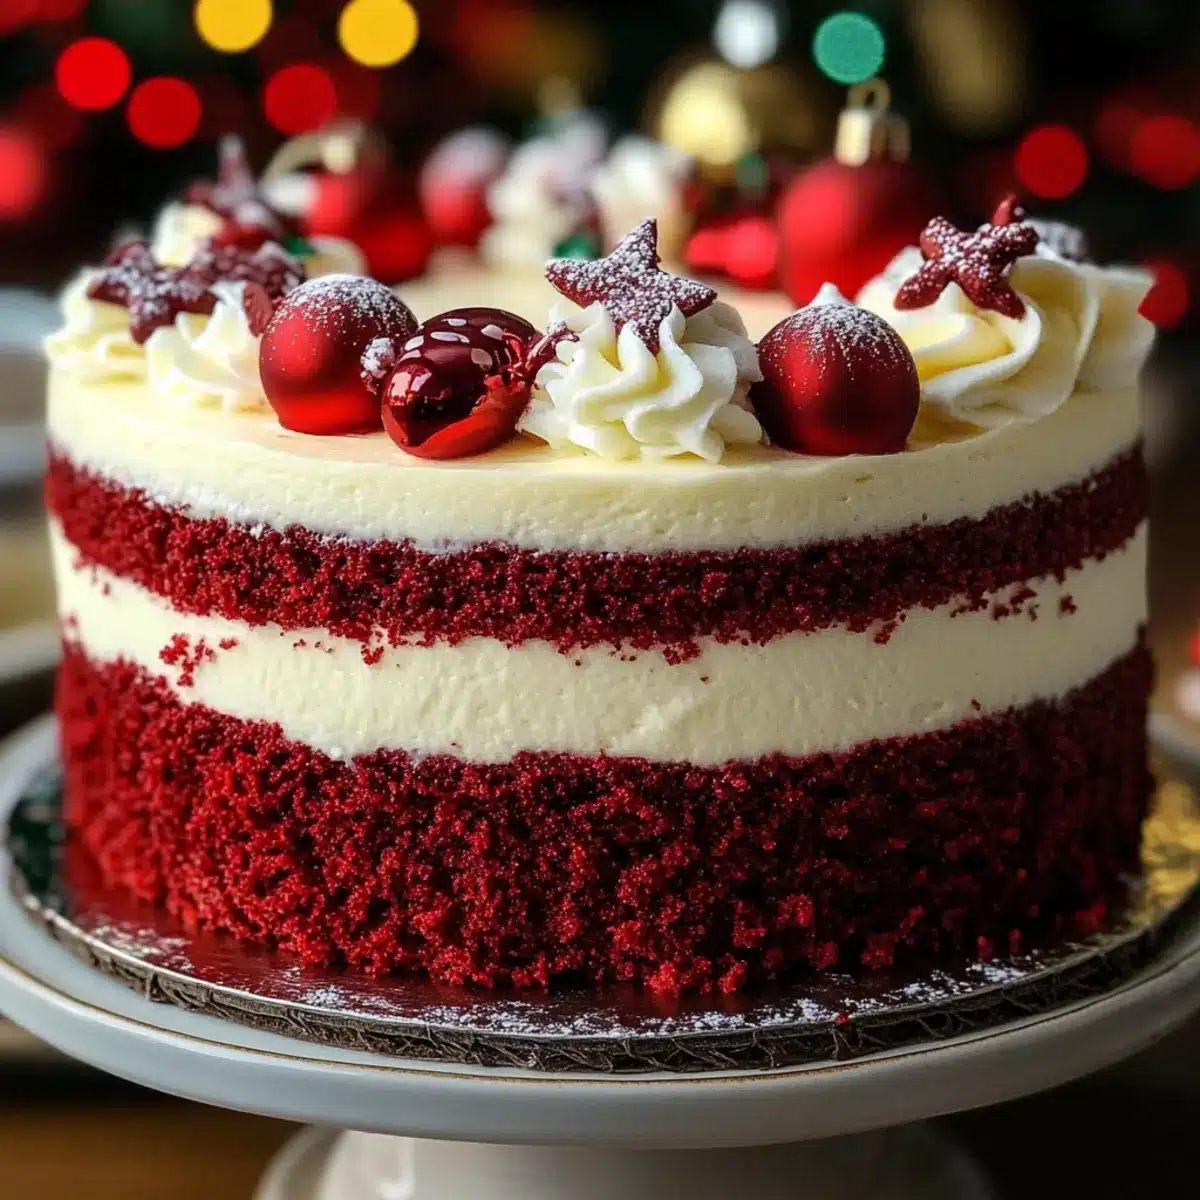
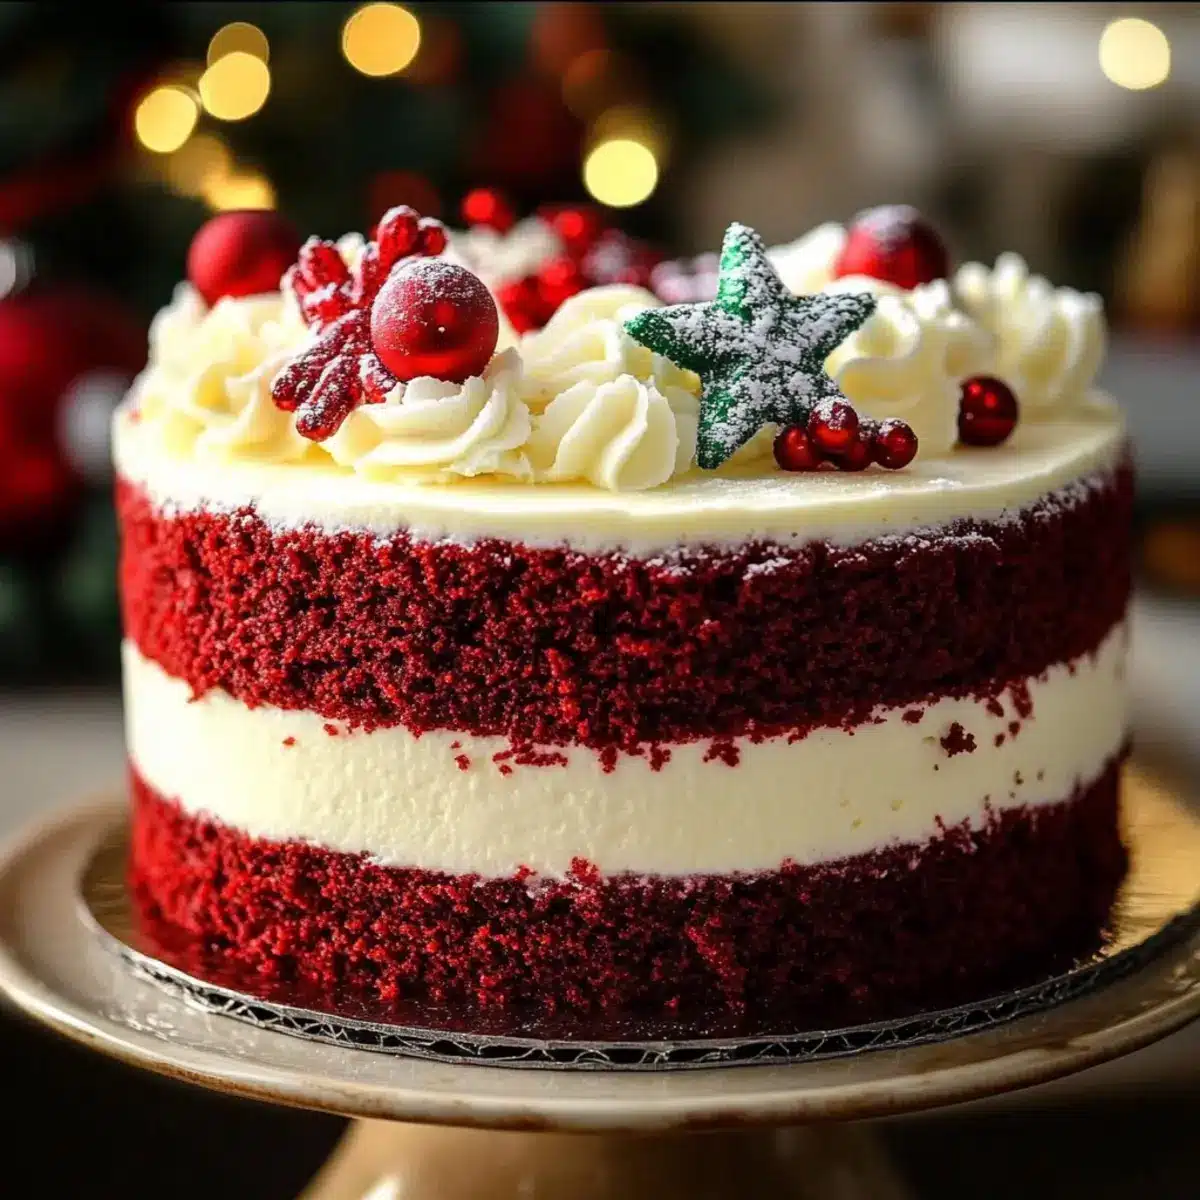
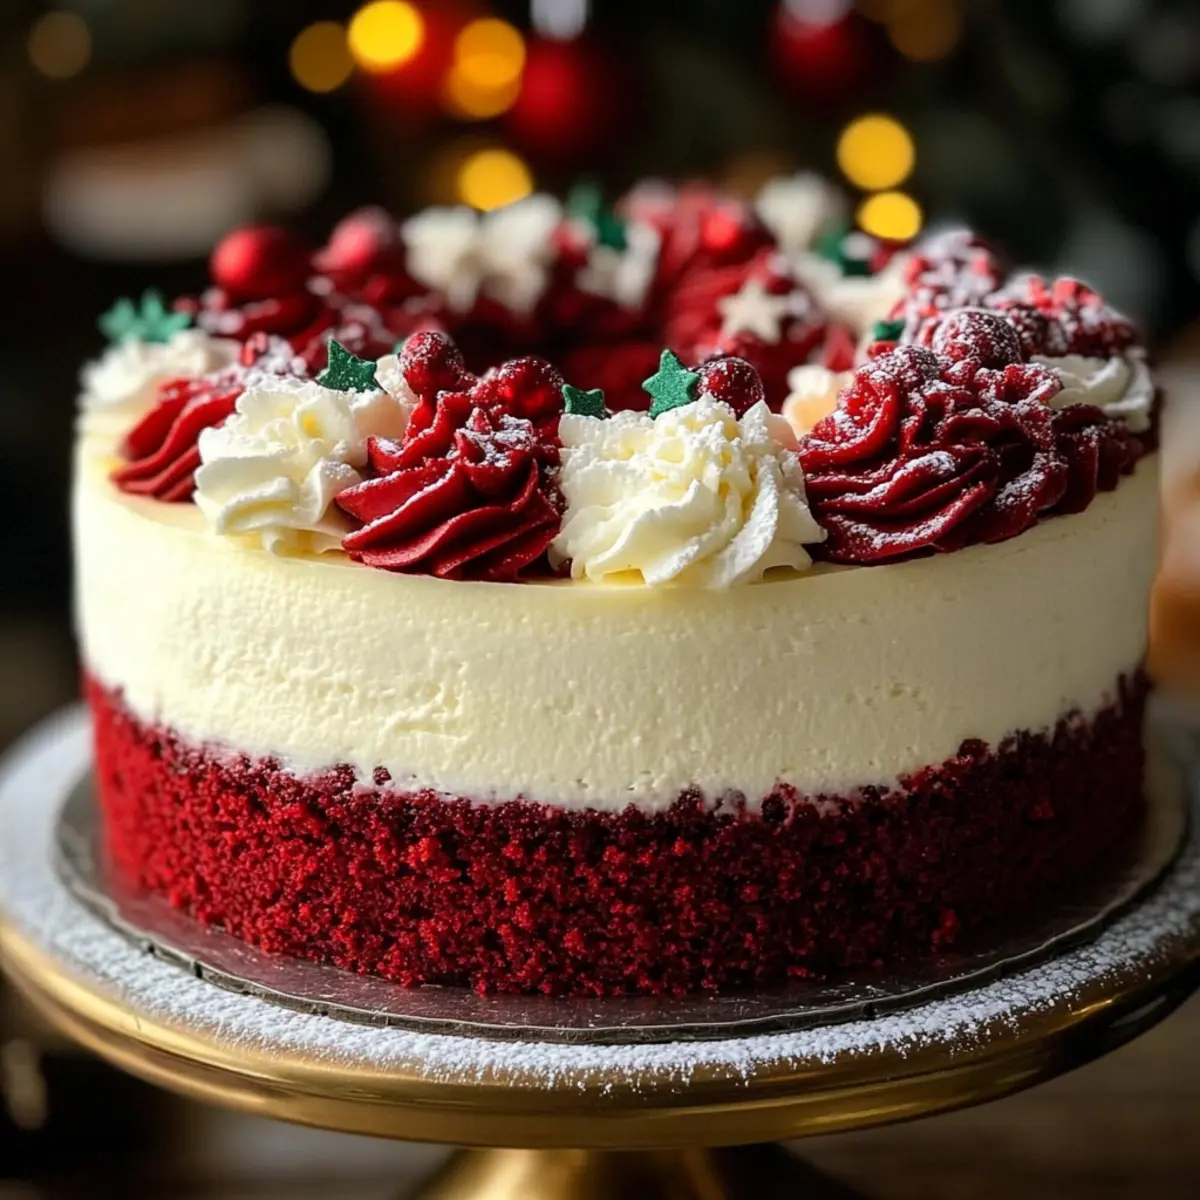
Eye-Catching Presentation: The striking red and white layers create a festive masterpiece that’s perfect for holiday tables.
Easy to Make: With straightforward instructions, even novice bakers can execute this showstopper with ease.
Versatile Treat: Add a sprinkle of crushed peppermint on top for a flavor twist or pair it with hot cocoa for a warm holiday experience.
Memorable Flavor: Each bite offers a delightful balance of sweetness and richness that leaves everyone wanting seconds.
In the spirit of holiday indulgence, you might also enjoy our Vanilla Bean Cheesecake or the delightful Espresso Cheesecake Decadent for an additional festive treat.
Christmas Red Velvet Cheesecake Ingredients
For the Cake Layer
- All-purpose flour – Provides structure; whole wheat flour can be used for a denser texture.
- Unsweetened cocoa powder – Adds depth of flavor; ensure it’s high-quality for optimal results.
- Baking powder – Essential for the rise; no substitutes.
- Baking soda – Enhances flavor and aids in rising; no substitutions allowed.
- Salt – Balances sweetness and enhances flavor.
- Granulated sugar – Sweetens and adds moisture; substitute with coconut sugar for a healthier option.
- Vegetable oil – Keeps the cake moist and tender; melted coconut oil works well as a substitute.
- Buttermilk – Provides necessary acidity for tenderness; replace with milk mixed with vinegar if needed.
- Eggs (large) – Adds richness and structure; flax eggs can be used for a vegan option.
- Red food coloring – Enhances the cake’s vibrant hue; opt for gel for intense color without changing texture.
- Vanilla extract – Boosts flavor; pure extract is preferred for the best taste.
- White vinegar – Helps the cake rise; no substitutes here.
For the Cheesecake Layer
- Cream cheese – Provides the creamy texture and rich flavor; full-fat is recommended for richness.
- Sour cream – Adds moisture and tang; Greek yogurt can be substituted.
- Eggs (large) – Essential for binding the cheesecake together; use the same substitution as above.
- Granulated sugar – Sweetens the cheesecake layer; no alternatives necessary.
- Vanilla extract – Elevates flavor in the cheesecake; pure extract is always best.
For the Frosting
- Unsalted butter – Adds creaminess to the frosting; vegan butter can be used for a dairy-free option.
- Powdered sugar – Provides sweetness and desired texture for frosting; no substitutes as it’s essential for decoration.
- Vanilla extract – Flavors the frosting; opt for pure to amplify taste.
With this collection of ingredients, you’re one step closer to creating your stunning Christmas Red Velvet Cheesecake! Just imagine the festive joy it will bring to your holiday gatherings!
Step‑by‑Step Instructions for Christmas Red Velvet Cheesecake
Step 1: Preheat the Oven
Begin by preheating your oven to 350°F (175°C). While the oven warms up, prepare two 9-inch round cake pans by greasing them and lining the bottom with parchment paper to prevent sticking. This preparation ensures your Christmas Red Velvet Cheesecake will come out of the pans smoothly after baking.
Step 2: Mix the Dry Ingredients
In a large mixing bowl, whisk together 2 cups of all-purpose flour, ½ cup of unsweetened cocoa powder, 1 teaspoon of baking powder, 1 teaspoon of baking soda, and ½ teaspoon of salt. This step incorporates the leavening agents evenly and adds a lovely depth to your red velvet cake layer. Set this dry mixture aside as you move on to mixing the wet ingredients.
Step 3: Combine Wet Ingredients
In a separate bowl, blend 1 ½ cups of granulated sugar with 1 cup of vegetable oil, 1 cup of buttermilk, 2 large eggs, 1 tablespoon of red food coloring, 2 teaspoons of vanilla extract, and 1 teaspoon of white vinegar until smooth and well combined. This rich mixture is key to achieving that classic velvety texture in your Christmas Red Velvet Cheesecake.
Step 4: Combine Mixes
Gradually add the dry ingredient mixture to the wet mixture, stirring gently until just combined. Avoid overmixing, as this can lead to a denser cake. The batter should be velvety and slightly thick, with no visible streaks of flour remaining. Now it’s ready to be poured into your prepared cake pans.
Step 5: Bake the Cake Layers
Pour the batter evenly into the prepared cake pans and place them in the preheated oven. Bake for 25 to 30 minutes, or until a toothpick inserted in the center comes out clean. Keep an eye on them: the cake layers should spring back when lightly pressed. Once baked, remove them from the oven and allow them to cool in the pans for 10 minutes.
Step 6: Prepare the Cheesecake Layer
While the cake layers are cooling, prepare the cheesecake layer. In a large bowl, beat 16 ounces of cream cheese with ¾ cup of granulated sugar and ½ cup of sour cream until smooth and creamy. Add 2 large eggs and 1 teaspoon of vanilla extract, mixing until just combined for a delectable cheesecake filling.
Step 7: Assemble and Bake Cheesecake
Once the red velvet cake layers have cooled, place one layer in the bottom of each cake pan. Pour the prepared cheesecake mixture over the top of the first layer. Place both pans back in the oven and bake for an additional 30 to 35 minutes, until the cheesecake is set around the edges and slightly wobbly in the center.
Step 8: Chill the Cheesecake
After baking, remove the cheesecakes from the oven and let them cool in the pans on a wire rack for about an hour. Once they reach room temperature, cover and refrigerate for at least 4 hours or overnight. This chilling step is crucial for achieving the perfect slice of your Christmas Red Velvet Cheesecake.
Step 9: Make the Frosting
When ready to frost, beat together 8 ounces of unsalted butter, 8 ounces of cream cheese, 3 cups of powdered sugar, and 2 teaspoons of vanilla extract until light and fluffy. This deliciously creamy frosting will add the finishing touch to your beautiful cheesecake.
Step 10: Frost and Serve
Once the cheesecakes have chilled thoroughly and set, remove them from the pans. Spread the creamy frosting generously over the top of the second layer and smooth it out beautifully. Slice your stunning Christmas Red Velvet Cheesecake and get ready to share this festive delight with family and friends!
Christmas Red Velvet Cheesecake Variations
Feel free to unleash your creativity and make this festive cheesecake truly your own!
-
Chocolate Chip Delight:
Fold in chocolate chips into the cheesecake layer for added richness and a gooey surprise in every bite. -
Peppermint Crunch:
Top the cheesecake with crushed peppermint candy canes for a refreshing and festive touch that adds a delightful crunch. -
Mascarpone Twist:
Swap half the cream cheese with mascarpone for a lighter, creamier cheesecake that brings a sophisticated flavor twist. -
Spiced Rum Infusion:
Add a splash of spiced rum to the cheesecake layer for a warm, aromatic flavor that perfectly complements the holiday spirit. -
Nutty Flavor Boost:
Incorporate finely chopped nuts like walnuts or pecans into the cake batter for added texture and a delicious nutty crunch. -
Fruit Garnish:
Serve with fresh berries or a berry sauce drizzled on top for a pop of color and an extra layer of flavor. -
Vegan Option:
Replace cream cheese and eggs with plant-based alternatives to create a vegan-friendly version while keeping it delicious!
In case you’re in the mood for more delicious recipes, don’t miss out on our rich Espresso Cheesecake Decadent and the classic Vanilla Bean Cheesecake to delight your guests this holiday season!
What to Serve with Christmas Red Velvet Cheesecake?
Warm your hearts and initiate joyful conversations with these delightful pairings that will beautifully complement your festive centerpiece.
-
Hot Cocoa: The rich, chocolatey flavor of hot cocoa enhances the dessert’s indulgence while providing a cozy atmosphere.
-
Spiced Chai: A warm cup of spiced chai adds an aromatic touch, perfectly balancing the sweetness of the cheesecake with its subtle spices.
-
Fresh Berries: Juicy strawberries, raspberries, or blueberries bring a refreshing tartness that contrasts wonderfully with the creamy layers of the cheesecake.
-
Whipped Cream: A dollop of freshly whipped cream adds an airy lightness, enticing guests to indulge even more.
-
Minty Lemonade: This zesty drink offers a refreshing pop of flavor, cleansing the palate and complementing the rich cheesecake without overpowering it.
-
Crushed Peppermint Topping: Sprinkle some crushed peppermint candy canes on top for a festive crunch that elevates both the visual appeal and flavor of the cheesecake.
-
Chocolate Stout Cake: For a decadent duo, pair with moist chocolate stout cake, creating a rich flavor experience that chocolate lovers will adore.
Each of these offerings allows your guests to savor the holiday together while enjoying that showstopping Christmas Red Velvet Cheesecake!
Tips for the Best Christmas Red Velvet Cheesecake
-
Room Temperature Ingredients: Ensure all your ingredients, especially cream cheese and eggs, are at room temperature for smoother mixing and a fluffier texture in your Christmas Red Velvet Cheesecake.
-
Mixing Caution: Avoid overmixing the cake batter; stop when just combined. This tip helps maintain a light, airy cake that’s a pleasure to eat.
-
Water Bath Trick: For a creamier cheesecake layer and to prevent cracks, place your cheesecake pans in a larger baking dish with hot water while baking.
-
Chill Time is Key: Allow the cheesecake to cool completely before refrigerating. Chilling for at least 4 hours helps achieve clean, beautiful slices.
-
Fun Toppings: Consider adding festive toppings like crushed peppermint or chocolate shavings for an extra flair that enhances both flavor and presentation.
Make Ahead Options
These Christmas Red Velvet Cheesecakes are perfect for busy holiday schedules! You can prepare the cake layers up to 24 hours in advance; simply bake them, cool, and wrap tightly in plastic wrap before refrigerating. The cheesecake filling can also be made ahead and stored in the fridge for up to 3 days. When you’re ready to finish, assemble the layers and bake as directed, ensuring you chill the assembled cheesecake for at least 4 hours or overnight to achieve that perfect texture. Just remember, chilling is essential for quality—it makes slicing easy and keeps each bite creamy and delightful!
How to Store and Freeze Christmas Red Velvet Cheesecake
Fridge: Keep leftover Christmas Red Velvet Cheesecake in an airtight container in the refrigerator for up to 1 week. This helps maintain its creamy texture and flavor.
Freezer: For longer storage, wrap individual slices tightly in plastic wrap and place them in a freezer-safe container. Enjoy within 2-3 months for optimal taste.
Thawing: To thaw, simply transfer the cheesecake to the fridge overnight. This gentle method preserves texture and flavor, ensuring a delightful treat when you’re ready to indulge again.
Reheating: If you prefer a warm slice, heat it gently in the microwave for about 15-20 seconds. This will give it a fresh-out-of-the-oven feel while keeping it creamy.
Christmas Red Velvet Cheesecake Recipe FAQs
What type of cocoa powder should I use for the cake layer?
Always opt for high-quality unsweetened cocoa powder for the best flavor depth. Dutch-processed cocoa can provide a smoother taste, while natural cocoa powder will bring a bit more acidity, enhancing the red color of your cake!
How do I store leftover cheesecake?
Leftover Christmas Red Velvet Cheesecake should be stored in an airtight container in the refrigerator, where it will stay fresh for up to 1 week. If you’d like to make it last longer, consider freezing! Wrap individual slices tightly in plastic wrap and place them in a freezer-safe container to avoid freezer burn.
Can I freeze the cheesecake? If so, how?
Absolutely! To freeze your Christmas Red Velvet Cheesecake, follow these steps:
- Allow the cheesecake to chill completely in the refrigerator first.
- Once chilled, slice it into individual portions for easier thawing later.
- Wrap each slice tightly in plastic wrap, ensuring no air is trapped.
- Place the wrapped slices in a freezer-safe container.
This method will protect the cheesecake’s creamy texture and flavor, letting you enjoy it for up to 2-3 months! For thawing, just place it in the refrigerator overnight.
What should I do if my cheesecake cracks during baking?
If you notice cracks in your cheesecake, don’t worry! This can often happen, especially if there’s extra heat. To prevent cracks in the future, consider using a water bath while baking. Simply place your cheesecake pan into a larger baking dish filled with hot water. This helps maintain a stable temperature and moisture level, resulting in a smoother cheesecake finish.
Is this cheesecake suitable for those with dietary restrictions?
While the Christmas Red Velvet Cheesecake contains dairy and gluten, there are easy substitutions! To make it dairy-free, use vegan cream cheese and dairy-free butter for the frosting. For a gluten-free option, substitute all-purpose flour with a 1:1 gluten-free flour blend. As always, check all ingredients for allergens that may affect family or guests.
Can I prepare the cheesecake a day ahead?
Yes! In fact, preparing your Christmas Red Velvet Cheesecake the day before is highly recommended. This not only saves you time but also allows the flavors to meld beautifully overnight, leading to a richer taste. Just be sure to refrigerate and allow it to chill completely before serving for the best texture.
Decadent Christmas Red Velvet Cheesecake for Festive Joy
Ingredients
Equipment
Method
- Preheat the oven to 350°F (175°C). Prepare two 9-inch round cake pans by greasing them and lining the bottom with parchment paper.
- In a large mixing bowl, whisk together the dry ingredients: 2 cups of all-purpose flour, ½ cup of unsweetened cocoa powder, 1 teaspoon of baking powder, 1 teaspoon of baking soda, and ½ teaspoon of salt. Set aside.
- In a separate bowl, blend 1 ½ cups of granulated sugar, 1 cup of vegetable oil, 1 cup of buttermilk, 2 large eggs, 1 tablespoon of red food coloring, 2 teaspoons of vanilla extract, and 1 teaspoon of white vinegar until smooth and well combined.
- Gradually add the dry mixture to the wet mixture, stirring gently until just combined. Pour into prepared cake pans.
- Bake for 25 to 30 minutes, or until a toothpick inserted comes out clean. Allow to cool in pans for 10 minutes before transferring to a wire rack.
- Prepare the cheesecake layer by beating together 16 ounces of cream cheese, ¾ cup of granulated sugar, and ½ cup of sour cream until smooth. Add 2 large eggs and 1 teaspoon of vanilla extract.
- Assemble by placing one red velvet layer in each pan, pouring the cheesecake mixture over the top, and baking for an additional 30 to 35 minutes until set.
- Let the cheesecakes cool in the pans on a wire rack for about an hour, then refrigerate for at least 4 hours or overnight.
- Make the frosting by beating 8 ounces of unsalted butter, 8 ounces of cream cheese, 3 cups of powdered sugar, and 2 teaspoons of vanilla extract until light and fluffy.
- Once chilled, frost the second layer of the cheesecake with the creamy frosting and serve immediately.
Leave a Reply