
As I stood in the kitchen, the heavenly scent of baked ham began to swirl around me, instantly transporting me to the heart of past Easter celebrations. This Homemade Easter Ham, with its sweet and tangy pineapple glaze, isn’t just another dish—it’s a centerpiece that brings family and friends together. The beauty of this recipe lies in its easy preparation while delivering a crowd-pleasing feast that radiates warmth and nostalgia. Each slice reveals a moist, tender texture, perfectly complemented by a glossy caramelized exterior that promises to delight your guests. Whether you’re a seasoned home chef or someone looking to elevate your holiday meal, this recipe will surely become a cherished tradition. Are you ready to discover the secret to a festive feast that will have everyone requesting seconds?

Why is this Easter ham a must-try?
Tender, Flavorful Delight: Every slice of this Homemade Easter Ham is infused with a mouthwatering pineapple glaze that balances sweetness with a tangy kick, making it a standout choice for any holiday table.
Ease of Preparation: With simple steps and minimal fuss, this recipe ensures that even novice cooks can impress their guests effortlessly.
Festive Tradition: The aroma of sweet spices and caramelization fills your kitchen, creating an inviting atmosphere that evokes fond memories and treasured family moments.
Versatile Side Pairings: Serve it up alongside creamy mashed potatoes or Birria Tacos Homemade for a delicious holiday spread everyone will love!
Impressive Presentation: With its glossy finish and decorative pineapple slices, this ham is not just a dish; it’s a showstopper that draws everyone to the dinner table.
Homemade Easter Ham Ingredients
For the Ham
• 7 lb Ham – A spiral-sliced ham simplifies serving, ensuring you’ll enjoy each flavorful bite.
For the Glaze
• 2.25 cups Brown Sugar – Provides sweetness and caramelization; pack it firmly to deepen the flavors.
• 4 tbsp Mustard – Adds a sharp contrast to the glaze; opt for Grey Poupon Dijon for its robust taste.
• 1.25 cups Honey – Introduces rich sweetness, helping the glaze to adhere beautifully.
• 0.25 tsp Ground Cloves – Offers warm spice notes that enhance the glaze’s complexity.
For the Topping
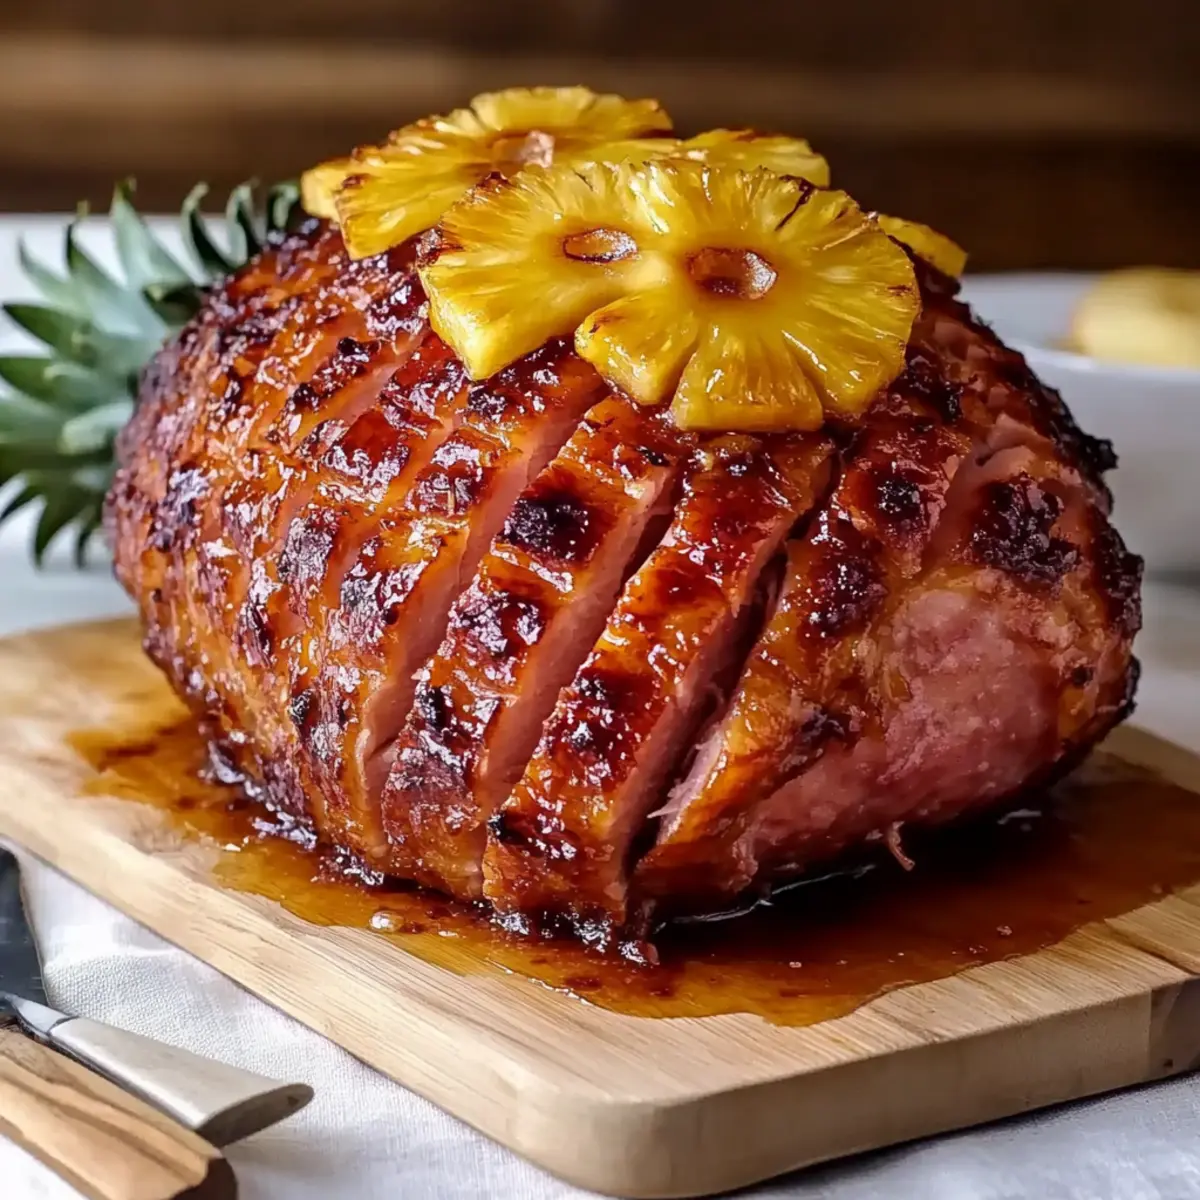
• 8 oz Pineapple Slices – This decorative touch brings added sweetness and moisture as the ham bakes, making your Homemade Easter Ham visually appealing!
Step‑by‑Step Instructions for Homemade Easter Ham
Step 1: Preheat the Oven
Begin by preheating your oven to 350°F (175°C). This ensures a proper cooking environment for your Homemade Easter Ham. A well-heated oven will help develop the delicious caramelization that enhances the ham’s flavor and texture. Prepare a roasting pan lined with aluminum foil for easy cleanup later on.
Step 2: Prepare the Ham
Carefully pat the 7 lb ham dry with paper towels, ensuring it’s ready to absorb the glaze. Place the ham, cut-side down, in the prepared roasting pan. This position helps to lock in moisture during cooking, resulting in a tender and juicy ham that’s the star of your holiday table.
Step 3: Score the Surface
Using a sharp knife, score the surface of the ham in a diamond pattern, cutting about 1/2-inch deep. This step allows the glaze to penetrate the meat more effectively, enhancing flavor throughout your Homemade Easter Ham. Take your time to create evenly spaced cuts, which will also make for a beautiful presentation later.
Step 4: Whisk the Glaze Ingredients
In a mixing bowl, combine 2.25 cups of firmly packed brown sugar, 4 tablespoons of mustard, and 0.25 teaspoons of ground cloves. Whisk these ingredients together until they form a smooth paste. This mixture will serve as the sweet and tangy glaze that envelops your ham, providing rich flavors that develop as it bakes.
Step 5: Add Honey and Pineapple Juice
Pour 1.25 cups of honey over the scored ham, letting it drip into the cuts made earlier. Then, pour some pineapple juice over the ham as well for additional moisture and sweetness. This melding of flavors is what transforms your ham into a succulent centerpiece for your Easter feast.
Step 6: Apply the Glaze
Evenly spread the prepared glaze mixture on top of the ham, ensuring every cut is generously coated. The glaze will begin to caramelize beautifully as the ham bakes, giving your Homemade Easter Ham its signature glossy finish. Be sure to cover the entire surface for maximum flavor.
Step 7: Decorate with Pineapple Slices
Arrange the 8 oz of pineapple slices decoratively on top of the ham, securing them with toothpicks if necessary. This not only enhances the visual appeal of your ham but also contributes to its sweetness as it bakes, leading to a delightful balance with the tangy glaze.
Step 8: Bake the Ham
Place the ham in the preheated oven and bake for 1 to 1.5 hours, basting it every 15 minutes with pan juices. This consistent basting keeps the ham moist and ensures the glaze develops a beautiful caramelized color. Watch for the glaze to turn shiny and caramelized, signaling that your ham is nearly done.
Step 9: Rest and Slice
Once baked to perfection, remove the ham from the oven and let it rest for 10 minutes before slicing. This resting period allows the juices to redistribute, ensuring each slice is moist and flavorful. Now you can savor the delicious juices that will make your Homemade Easter Ham truly irresistible.
Step 10: Serve with Pan Drippings
Carefully slice the ham and serve it with pan drippings for an additional layer of flavor. The drippings can act as a flavorful glaze sauce, perfectly complementing the already mouthwatering ham. Your traditional Easter feast is complete, ready to be enjoyed with family and friends!
How to Store and Freeze Homemade Easter Ham
Refrigerator: Wrap leftovers tightly in aluminum foil or plastic wrap and store in the fridge for up to 5 days to maintain freshness.
Freezer: If you want to keep your Homemade Easter Ham for a longer period, slice and freeze in airtight containers or freezer bags for up to 2 months.
Reheating: When ready to enjoy, cover the ham and reheat in a 325°F oven until warmed through, or microwave individual slices with a splash of water to keep them moist.
Avoid Drying: Always ensure the ham is covered during reheating to prevent it from drying out and to retain that tender, flavorful texture.
Make Ahead Options
These Homemade Easter Ham preparations are ideal for busy cooks looking to save time during the holidays! You can prepare the glaze by mixing the brown sugar, mustard, ground cloves, and honey up to 24 hours in advance. Store it in an airtight container in the refrigerator to maintain its freshness. Additionally, you can score the ham and place it in the roasting pan, covering it tightly with plastic wrap, for up to 3 days ahead. When it’s time to cook, simply remove the wrap, apply the glaze, add the pineapple slices, and bake. This way, you’ll have a delicious centerpiece ready to impress with minimal last-minute effort!
Expert Tips for Homemade Easter Ham
-
Perfect Glaze Timing: Apply the glaze in the last 30-45 minutes of baking to prevent it from burning while ensuring your Homemade Easter Ham gets that irresistible caramelized finish.
-
Frequent Basting: Baste every 15 minutes with pan juices; this keeps the ham moist and enhances the flavor of your glaze.
-
No Shallow Scoring: Score the ham deeply enough—about 1/2-inch—so the glaze penetrates adequately for maximum flavor without drying out during cooking.
-
Avoid High Temps: Resist the urge to crank up the oven temperature, as it may dry out the ham. A steady 350°F is just right for juicy results.
-
Use Bone-in Ham: Choose a bone-in ham for richer flavor; it enhances moisture during cooking, making your Homemade Easter Ham even more delicious!
Homemade Easter Ham Variations
Feel free to explore delightful twists to make this Homemade Easter Ham uniquely yours!
-
Boneless Option: Use a boneless ham for easier slicing and serving, perfect for smaller gatherings. It simplifies the process while still delivering amazing flavor.
-
Sweet Maple Glaze: Substitute honey with maple syrup for a different sweet note that pairs beautifully with the savory ham. This premium glaze adds a new layer of depth that family and friends will rave about!
-
Herb-Infused Version: Incorporate fresh herbs like rosemary or thyme into your glaze for an aromatic twist. This addition elevates the flavor profile, bringing a delightful freshness to your ham.
-
Spicy Kick: Add a dash of cayenne pepper or red pepper flakes to the glaze for a hint of heat that beautifully contrasts the sweetness. It’s a simple way to bring some excitement to your holiday table!
-
Citrusy Brightness: Toss in some fresh orange or lemon juice to the glaze. The citrus notes will brighten the flavors, making your Homemade Easter Ham oh-so-refreshing!
-
Fruit Medley Topping: Replace pineapple slices with a medley of fruits like peaches and apricots. This fruity topping not only looks gorgeous but also delivers a symphony of sweetness that your guests will love.
-
Smoky Flavor: Brush the ham with a bit of smoked paprika in the glaze for a captivating smoky flavor. It adds an unexpected depth that will have your guests guessing your secret!
-
Gluten-Free Adjustment: Ensure all ingredients are gluten-free and use a gluten-free mustard option. This way, everyone can enjoy the deliciousness without worry!
For even more delightful dishes, consider pairing your ham with creamy mashed potatoes or try making Birria Tacos Homemade. Each variation and pairing enhances your holiday celebration with diverse flavors and textures. Enjoy your cooking adventure!
What to Serve with Homemade Easter Ham
As the delicious aroma of your ham fills the kitchen, it’s time to think about the delightful accompaniments that will complete your festive meal.
-
Creamy Mashed Potatoes: This classic side adds a rich, buttery texture that balances the sweet glaze of the ham perfectly.
-
Green Beans Almondine: Crisp-tender green beans with toasted almonds bring a fresh and crunchy element, enhancing the meal’s overall balance.
-
Warm Dinner Rolls: Soft, fluffy rolls are perfect for soaking up the savory glaze and add a comforting touch to your dinner plate.
-
Fresh Garden Salad: A light salad with mixed greens, cherry tomatoes, and a vinaigrette provides a refreshing contrast to the rich flavors of the ham.
-
Roasted Brussels Sprouts: Seasoned with olive oil and garlic, these caramelized sprouts offer an earthy flavor that pairs beautifully with the ham’s sweetness.
-
Apple Cider: A glass of this delightful drink echoes the ham’s flavors, providing a festive and refreshing sip to complement your meal.
-
Pineapple Upside-Down Cake: For dessert, this nostalgic cake mirrors the glaze on the ham, delivering a harmonious sweet end to your Easter feast.
By thoughtfully choosing your sides and drinks, you’ll create a memorable dining experience that will have everyone at the table reminiscing about this special day.

Homemade Easter Ham Recipe FAQs
How do I choose the right ham?
Absolutely! When selecting your ham, look for a bone-in, spiral-sliced variety. Bone-in hams provide enhanced flavor and moisture, while spiral slicing makes serving a breeze. Aim for hams that have a nice marbling, which indicates juiciness. It’s best to choose a ham that is bright pink to deep rose in color, avoiding any that have dark spots or dryness on the surface.
How should I store leftovers from my Homemade Easter Ham?
Wrap any leftover ham tightly with aluminum foil or plastic wrap and refrigerate them for up to 5 days. If you prefer to keep it longer, slicing and freezing in airtight containers or freezer bags is a great option. Just make sure to remove as much air as possible to prevent freezer burn. Properly stored, it can last up to 2 months in the freezer.
Can I freeze my Homemade Easter Ham?
Yes, indeed! Freezing leftover Homemade Easter Ham is an excellent way to preserve its flavor and texture. To do this, slice the ham into portion sizes suitable for meals, and then wrap it tightly in plastic wrap before placing it into an airtight freezer bag. Label the bag with the date and consume it within 2 months for the best quality.
What should I do if my ham is drying out while cooking?
If your Homemade Easter Ham starts to dry out, there are a few things to do. First, ensure you’re basting it every 15 minutes during cooking to keep it moist. If you notice it browning too quickly, cover it loosely with aluminum foil to protect the surface from direct heat while it continues cooking. Lastly, keeping the oven temperature at 350°F prevents the meat from drying out.
Is there anything I should know about allergies or dietary restrictions?
Very! If you or your guests have specific dietary restrictions, always check the labels on your ingredients. Some mustards contain gluten or other allergens. For a gluten-free option, select a mustard specifically labeled as such. Additionally, be cautious with the honey, as it can cause reactions for those with allergies. It’s also a good idea to inform guests about the presence of cloves in the glaze in case of spice sensitivities.
How do I reheat leftover ham?
To reheat your leftover Homemade Easter Ham, preheat your oven to 325°F. Cover the ham with aluminum foil to keep the moisture in and prevent it from drying out. Reheat for 15 to 20 minutes, or until warmed through. For individual slices, microwave them with a splash of water in a covered dish to steam them, ensuring they stay juicy and delicious.

Delicious Homemade Easter Ham with Sweet Pineapple Glaze
Ingredients
Equipment
Method
- Preheat the oven to 350°F (175°C) and prepare a roasting pan lined with aluminum foil for easy cleanup.
- Pat the ham dry with paper towels and place it cut-side down in the roasting pan.
- Score the surface of the ham in a diamond pattern about 1/2-inch deep.
- In a mixing bowl, whisk together brown sugar, mustard, and ground cloves until smooth.
- Pour honey over the scored ham and drizzle with pineapple juice.
- Spread the glaze mixture evenly over the ham, covering every cut.
- Arrange pineapple slices decoratively on top of the ham, securing if necessary.
- Bake the ham for 1 to 1.5 hours, basting every 15 minutes with pan juices.
- Let the ham rest for 10 minutes before slicing to allow juices to redistribute.
- Serve slices with pan drippings for added flavor.
Leave a Reply