
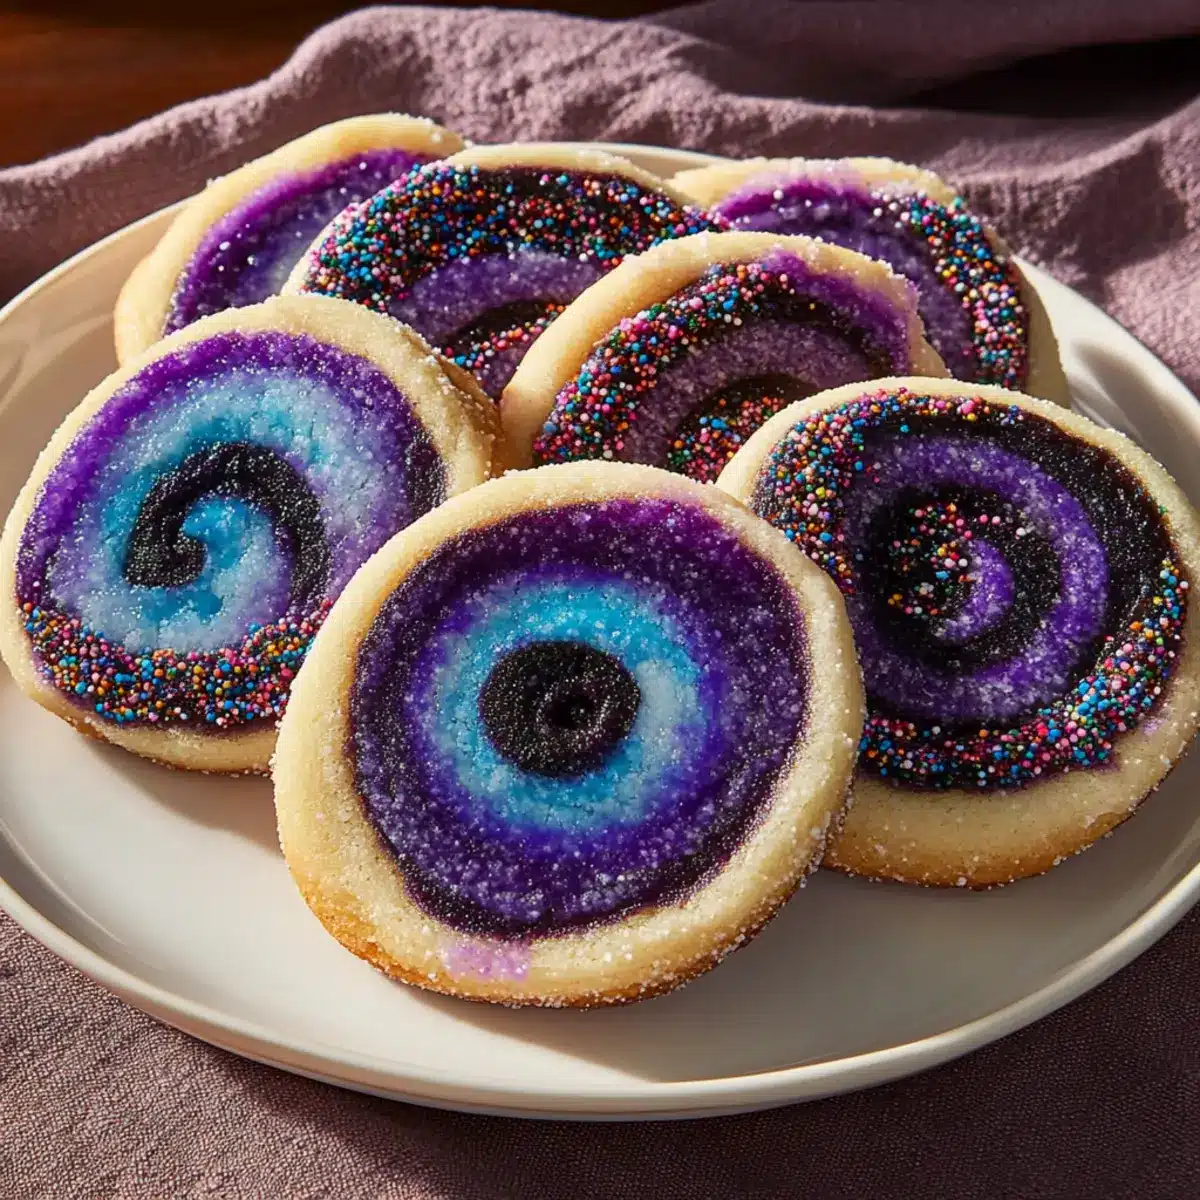
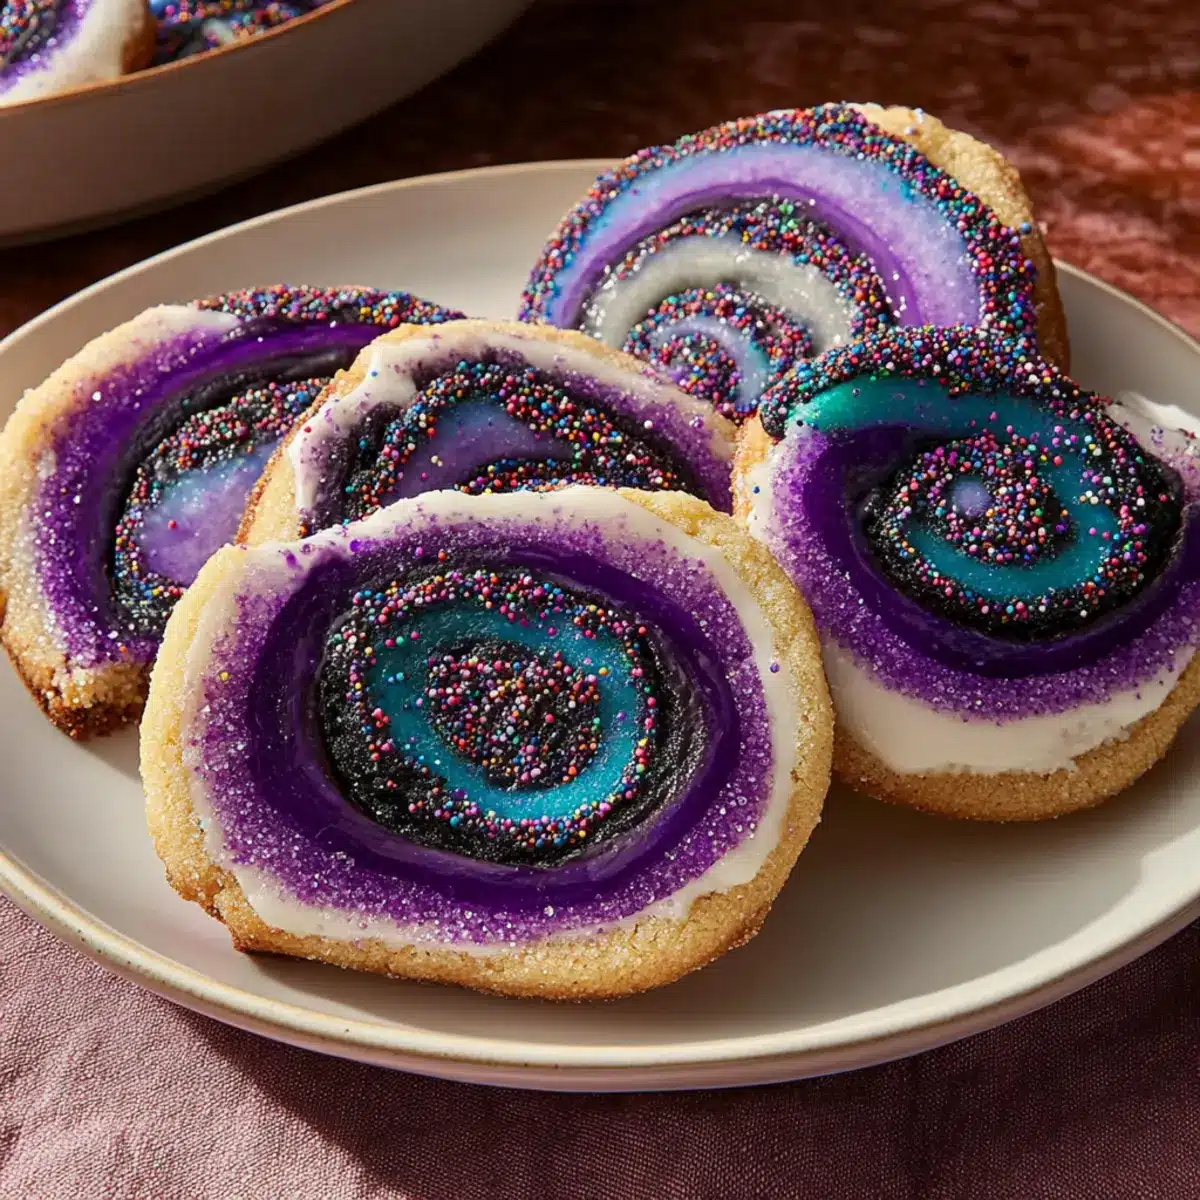
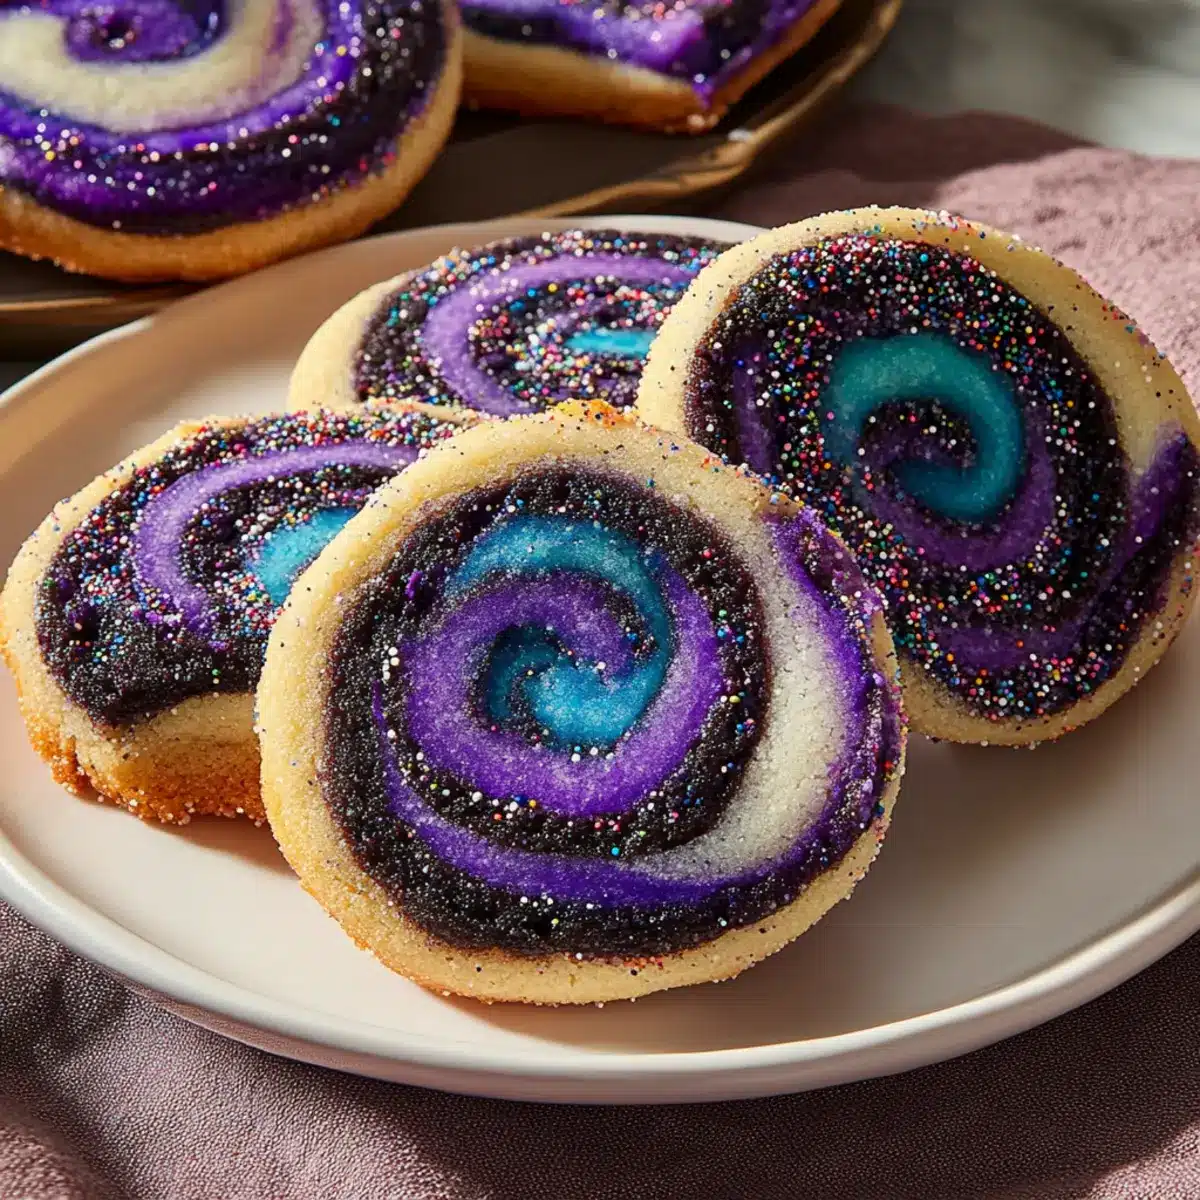
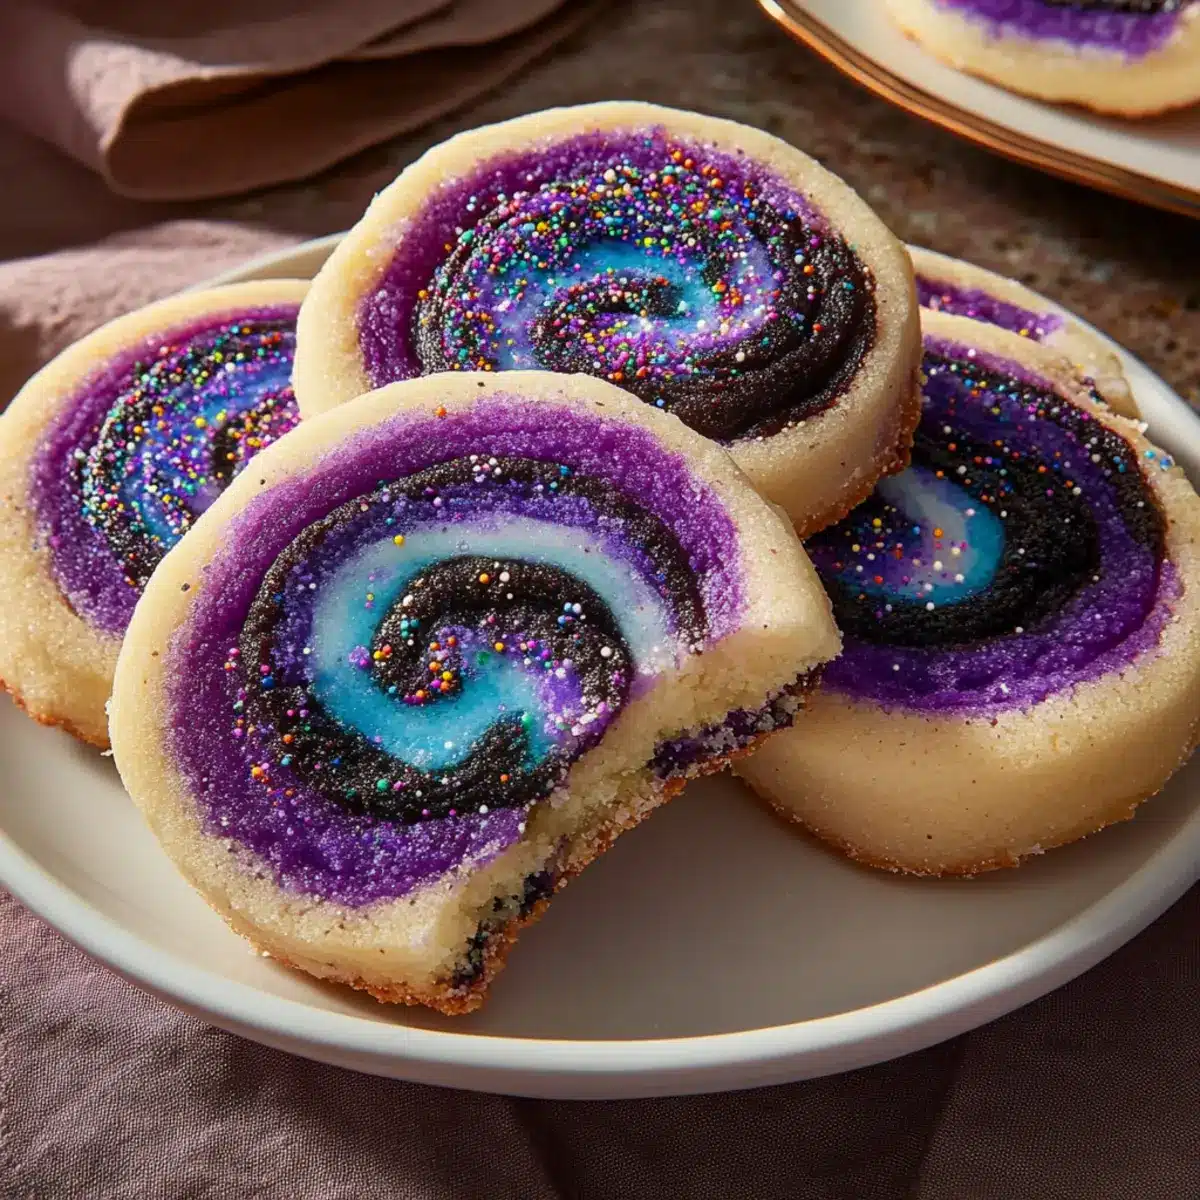
As I stood in my kitchen, colorful sprinkles scattered across the counter, I couldn’t help but smile at the joyful chaos surrounding me. That’s the magic of baking—especially when it comes to creating these Magical Spiral Cookies! With their mesmerizing swirls of purple, black, and white, these cookies are not just a feast for the eyes; they’re also a delightful treat for the taste buds. Perfect for any occasion, they’re incredibly easy to whip up, making them a fantastic choice for family baking days or festive gatherings. Not only do their vibrant colors make them kid-friendly and fun, but they are also soft and buttery, ensuring that every bite brings a moment of bliss. Are you ready to add some enchantment to your cookie jar? Let’s dive into the world of Magical Spiral Cookies together!
Why Are Magical Spiral Cookies So Special?
Endless Creativity: Each batch of these cookies becomes a canvas for your creativity, allowing you to customize colors and flavors for any holiday or occasion.
Kid-Friendly Fun: Kids will love helping mix colors and creating unique swirls, making these cookies a perfect family activity that sparks joy.
Melt-in-Your-Mouth Texture: The irresistible soft and buttery texture of these cookies ensures they’re a hit with people of all ages—everyone will be coming back for more!
Easily Storable: You can store these cookies for up to a week, or keep unbaked dough logs in the freezer, ensuring you have a delicious surprise ready when needed.
Perfect Party Treat: With their stunning appearance and delightful taste, Magical Spiral Cookies are sure to impress at potlucks, cookie exchanges, or holiday gatherings, complementing beverages like hot cocoa or tea beautifully!
Magical Spiral Cookies Ingredients
For the Dough
• Unsalted Butter – Adds richness and creates a soft texture; make sure it’s at room temperature for easy creaming.
• Powdered Sugar – Provides sweetness and a smooth texture; avoid using granulated sugar as it will change the final texture.
• Eggs – Introduces moisture and binds the dough; large eggs are recommended for consistent results.
• Milk – Adds extra moisture; feel free to use dairy or non-dairy milk as a substitute.
• Vanilla Extract – Enhances the flavor; can be swapped for almond extract if you prefer a nutty note.
• Almond Extract – Provides a delightful hint of nuttiness; optional if you want to stick to vanilla flavor.
• All-Purpose Flour – Provides structure; ensure you measure accurately for the best results.
• Salt – Balances sweetness and enhances flavors.
For the Colors
• Purple Gel Food Coloring – Gives vibrant color without altering the dough’s consistency; steer clear of liquid food coloring.
• Black Gel Food Coloring – Similar purpose as purple, helping define the cookie’s look.
For the Decorations
• Purple Sprinkles – Adds a fun crunch and visual appeal; consider themed sprinkles for different holidays.
• Black or Chocolate Sprinkles – Used to coat the cookie log, adding delightful texture.
With the ingredients gathered, you’re all set to create these stunning Magical Spiral Cookies that will undoubtedly dazzle everyone around you!
Step‑by‑Step Instructions for Magical Spiral Cookies
Step 1: Make the Dough
In a large bowl, cream together 1 cup of room temperature unsalted butter and 2 cups of powdered sugar using an electric mixer on medium speed until the mixture is light and fluffy, about 3 minutes. Beat in 2 large eggs and 2 tablespoons of milk until just combined. Gradually add 4 cups of all-purpose flour, ½ teaspoon of salt, 2 teaspoons of vanilla extract, and if desired, 1 teaspoon of almond extract, mixing until a soft dough forms.
Step 2: Divide and Color
Carefully split your freshly made dough in half, setting one portion aside. Add purple gel food coloring to the first half, mixing thoroughly until the color is even and vibrant. For the second half, divide it into two equal sections, tinting one portion black and leaving the other plain white. This creates the colorful base for your Magical Spiral Cookies.
Step 3: Roll and Stack Layers
Roll out the black dough into a 6×12 inch rectangle on a lightly floured surface, applying even pressure. Repeat the process with the white dough, carefully matching the dimensions. Once both are rolled out, layer the white dough on top of the black dough. Gently roll them together, pressing lightly to form a compact mixture, which will contribute to the beautiful spiral effect.
Step 4: Make the Purple Center
Next, roll out the purple dough into a rectangle that matches the previous layers. Before finishing, sprinkle purple sprinkles evenly over the surface while leaving a small border around the edges. Carefully roll the purple dough tightly into a log, ensuring that the sprinkles are well-incorporated, creating a delightful surprise in the center of your cookies.
Step 5: Assemble the Full Spiral
Position the purple log at one end of the rolled black-and-white layers. Starting from that end, carefully roll the layers around the purple log. As you roll, squeeze it gently to maintain the spiral shape and ensure the layers adhere well. This beautiful formation will ultimately give your Magical Spiral Cookies their signature look.
Step 6: Chill and Coat
Transfer the completed log to a piece of plastic wrap. Roll it tightly and then wrap securely, refrigerating for at least 1 hour or until firm. This chilling process allows for easier slicing and helps maintain the defined spiral shape. Before slicing, roll the chilled log in black or chocolate sprinkles for added texture and a festive touch.
Step 7: Slice and Bake
Preheat your oven to 375°F (190°C). Once the dough log has chilled, remove it from the wrap and slice it into ¼-inch rounds using a sharp knife. Place the cookie rounds on parchment-lined baking sheets, ensuring they are spaced 2 inches apart. Top each cookie with extra purple sprinkles for an eye-catching finish before baking.
Step 8: Cool and Serve
Bake the cookies in your preheated oven for about 10 minutes, or until their edges are just set and the bottoms are lightly golden. Once baked, allow the Magical Spiral Cookies to cool on the pan for 10 minutes. Afterward, transfer them to a wire rack to cool completely before serving, enjoying their whimsical swirls and delightful texture.
What to Serve with Magical Spiral Cookies
Imagine the joy of gathering with friends and family as you savor these vibrant treats alongside delightful accompaniments.
- Hot Cocoa: A warm cup of rich cocoa complements the sweetness perfectly, creating a cozy treat experience for any celebration.
- Vanilla Ice Cream: The creamy coldness of vanilla ice cream serves as a delightful contrast to the buttery texture of the cookies, making each bite a moment of bliss.
- Fruit Salad: A zesty fruit salad adds freshness and a pop of color, elevating the dessert experience while balancing the richness of the cookies.
- Festive Fruit Punch: Serve with a vibrant, fruity punch to enhance the whimsical vibe of your Magical Spiral Cookies, making them a hit at parties.
- Milk: The classic pairing of a cold glass of milk brings out the buttery flavors, providing the ultimate nostalgic treat experience everyone will love.
- Cheese Platter: Pairing with a light cheese platter adds a savory element, allowing the delightful sweetness of the cookies to shine amid varying flavors.
- Spiced Chai: The warmth of spiced chai tea perfectly compliments the cookies, offering a delightful mix of spices that enhance their whimsical flavors.
Expert Tips for Magical Spiral Cookies
- Use Gel Colors: Gel food coloring ensures vibrant hues without changing the dough’s moisture. Avoid liquid colors that can lead to a sticky texture.
- Chill for Precision: Chilling the dough is vital for clean, beautiful slices. This step helps maintain the spiral shape and prevents spreading while baking.
- Evenly Roll Layers: Consistent thickness in dough layers promotes uniform baking. Take your time rolling to avoid uneven cookies that may bake at different rates.
- Sharp Knife Matters: A sharp knife is crucial for making clean, defined cuts in your cookie log. Dull knives may squish the beautiful spirals, ruining the design.
- Storage Tips: Store baked Magical Spiral Cookies in an airtight container to keep them soft and fresh. For unbaked dough, refrigerate or freeze for a quick treat later!
Magical Spiral Cookies Variations & Substitutions
Feel free to let your creativity shine by customizing these cookies to suit your taste and upcoming celebrations!
- Color Theme: Choose seasonal colors like red and green for Christmas or orange and black for Halloween to match your festive spirit.
- Flavor Substitute: Swap almond extract for peppermint or lemon to create a fresh twist that perfectly complements the colorful appearance.
- Dye-Free Version: Skip the food coloring for a beautifully natural marbled effect that’s just as delightful and elegant.
- Bite-Sized Twist: Roll smaller logs to create adorable bite-sized cookies that are perfect for little hands and party platters.
- Dairy-Free Option: Use coconut oil or a dairy-free butter alternative in place of unsalted butter for a creamy, plant-based version.
- Nut-Free Choice: Omit almond extract entirely or replace it with vanilla to ensure these cookies remain nut-free for those with allergies.
- Extra Crunch: For added texture, mix in chopped nuts, seeds, or gluten-free oats to create a unique spin on classic flavor.
- Spicy Kick: Incorporate a dash of cinnamon or nutmeg into the dough for a warm, cozy flavor that pairs beautifully with holiday gatherings.
These Magical Spiral Cookies are not just enchanting; they’re versatile! Pair them with a comforting cup of cocoa or serve them alongside a platter of Gingerbread Thumbprint Cookies for a delightful treat selection.
How to Store and Freeze Magical Spiral Cookies
Airtight Container: Store baked Magical Spiral Cookies in an airtight container at room temperature for up to 1 week. This helps maintain their soft texture and delightful flavor.
Chilling Dough Logs: Keep unbaked dough logs in the fridge for up to 3 days. Wrap them tightly in plastic wrap to prevent drying out and losing shape.
Freezing: For longer storage, freeze unbaked dough logs for up to 2 months. Ensure they are well-wrapped to avoid freezer burn. Thaw at room temperature before slicing and baking.
Serving Frozen Cookies: Allow any frozen baked cookies to thaw at room temperature before serving. Enjoy their magical swirls and soft textures fresh!
Make Ahead Options
These Magical Spiral Cookies are perfect for meal prep, making your baking plans incredibly easy! You can prepare the dough and shape it into a log up to 3 days in advance. Simply follow the initial steps to make your dough, then roll it into a log, wrap it tightly in plastic, and refrigerate. To maintain their whimsical appearance and flavor, ensure the log is securely wrapped to avoid any drying out or absorption of odors. When you’re ready to bake, just slice the chilled log into rounds and bake them fresh; your delightful cookies will be just as magical as if you made them the same day. Enjoy the saved time and the wonderful aroma that will fill your kitchen with each batch!
Magical Spiral Cookies Recipe FAQs
What type of butter is best for Magical Spiral Cookies?
Absolutely! Unsalted butter is recommended, as it adds richness and creates a soft texture that’s perfect for these cookies. Make sure it’s at room temperature for easy creaming with the powdered sugar!
How should I store leftover Magical Spiral Cookies?
You can store baked cookies in an airtight container at room temperature for up to 1 week. This keeps them soft and tasty. If you have unbaked dough, keep the logs wrapped tightly in plastic wrap in the fridge for up to 3 days to maintain their shape and moisture.
Can I freeze Magical Spiral Cookies?
Yes, you can! For the best results, wrap unbaked dough logs well in plastic wrap and freeze them for up to 2 months. When you’re ready to bake, simply thaw the logs at room temperature, slice, and then bake as per the recipe instructions. This way, you’ll have fresh cookies whenever the craving hits!
What should I do if my dough is too sticky?
Very! If your dough feels sticky during preparation, dust your work surface with a little extra flour while rolling. If the dough is incredibly soft, adding 1 to 2 tablespoons of flour may help achieve the right consistency without affecting the final product. Rolling and chilling the dough will also make it easier to handle.
Are there any allergens in Magical Spiral Cookies?
Definitely, it’s important to note that these cookies contain common allergens like gluten (from flour), dairy (from butter and milk), and eggs. If you’re baking for someone with food allergies, consider using gluten-free all-purpose flour, dairy-free butter, and egg substitutes like flaxseed meal or applesauce for a kid-friendly, safe alternative.
How can I customize the color and flavor for different holidays?
You can get as creative as you want! For a festive touch, consider using red and green gel food coloring for Christmas, or orange and black for Halloween. Swap almond extract for peppermint for holiday flavors, or even use lemon extract for a fresh twist. I often make mini versions for fun and variety!
Magical Spiral Cookies That Dazzle and Delight Everyone
Ingredients
Equipment
Method
- In a large bowl, cream together the unsalted butter and powdered sugar until fluffy. Beat in eggs and milk until combined. Gradually add flour, salt, vanilla, and almond extract, mixing until a soft dough forms.
- Split the dough in half. Color one half purple and the other into two sections—one black and one left plain.
- Roll out the black dough into a rectangle. Roll the white dough separately. Layer the white on top of the black and roll together.
- Roll out the purple dough and sprinkle with purple sprinkles. Roll tightly into a log.
- Position the purple log at one end of the rolled dough layers and roll around it, squeezing gently.
- Wrap the log in plastic wrap and refrigerate for at least 1 hour.
- Preheat the oven to 375°F (190°C). Slice the chilled log into ¼-inch rounds, place on parchment-lined sheets, and top with sprinkles.
- Bake for about 10 minutes until edges are set. Cool on the pan for 10 minutes, then place on a wire rack.
Leave a Reply