
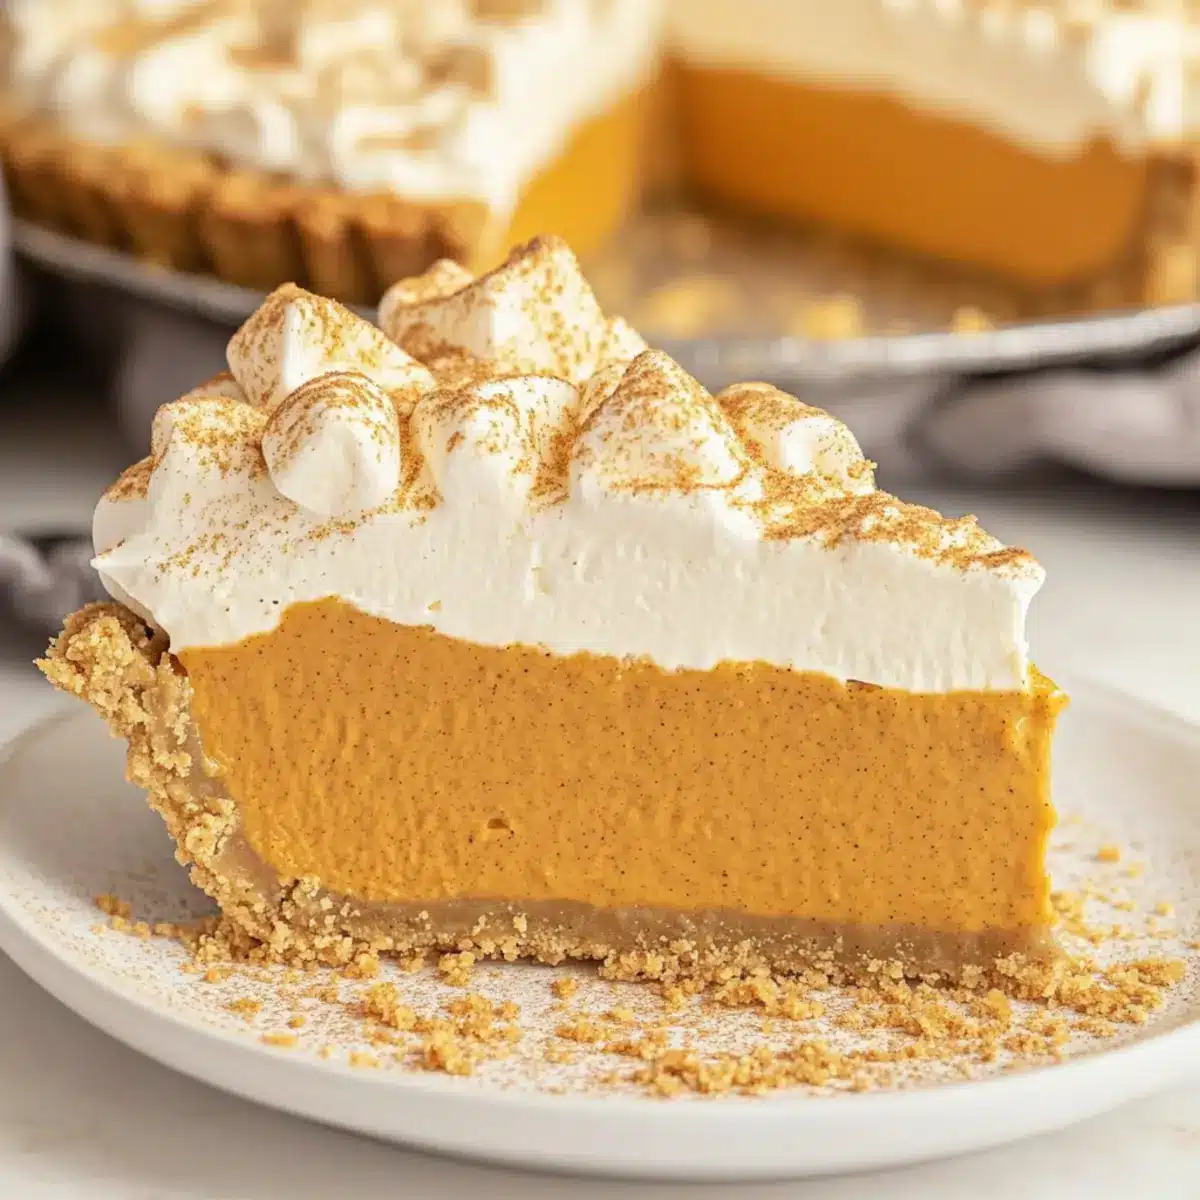
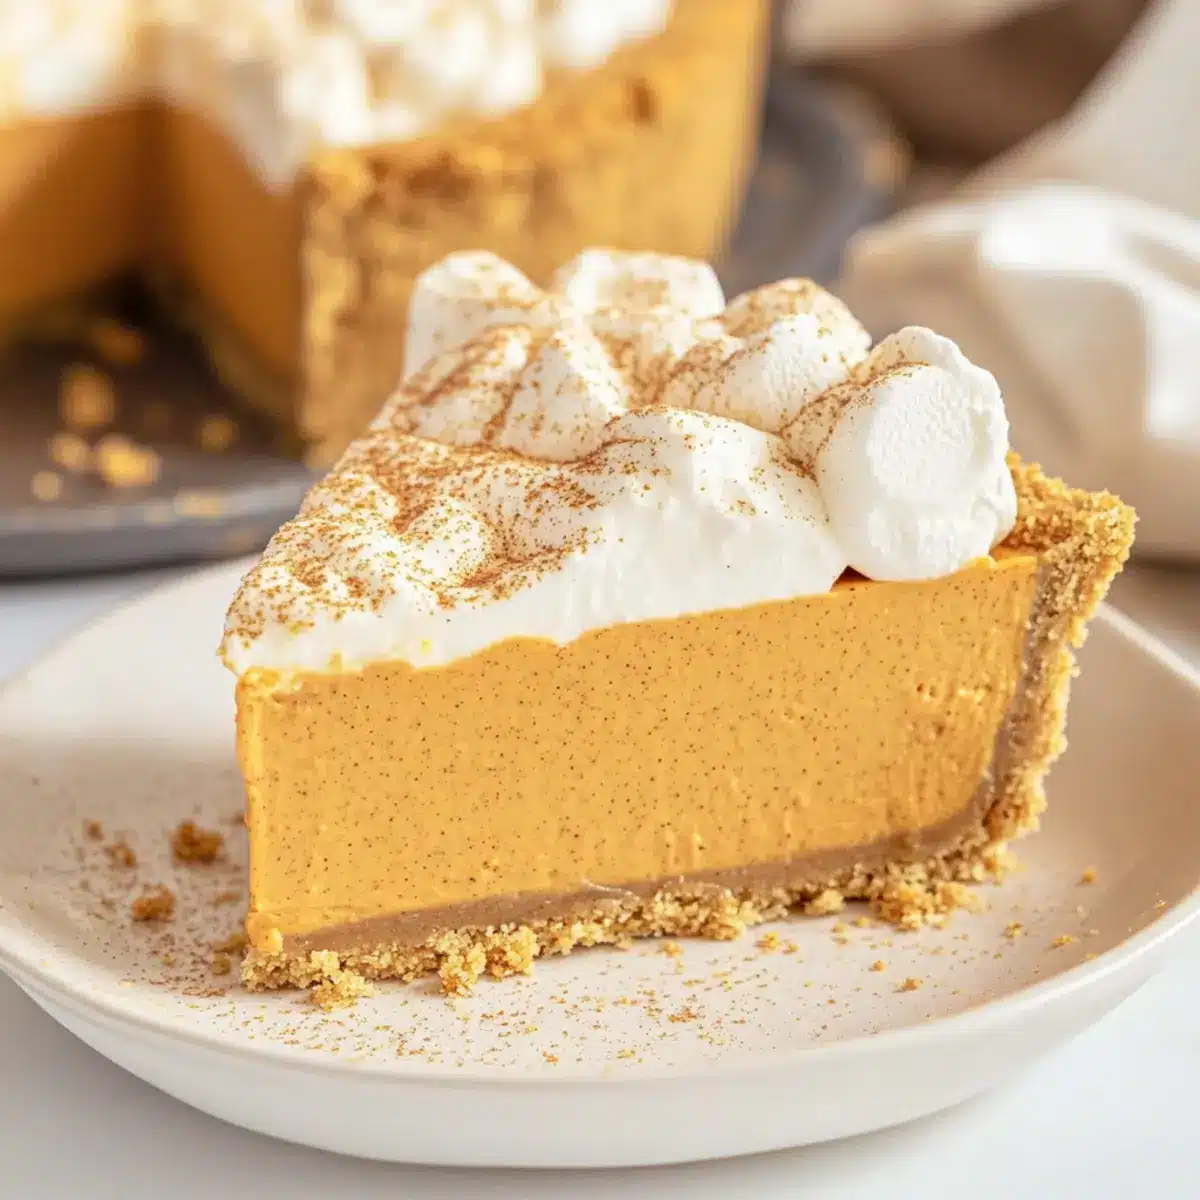
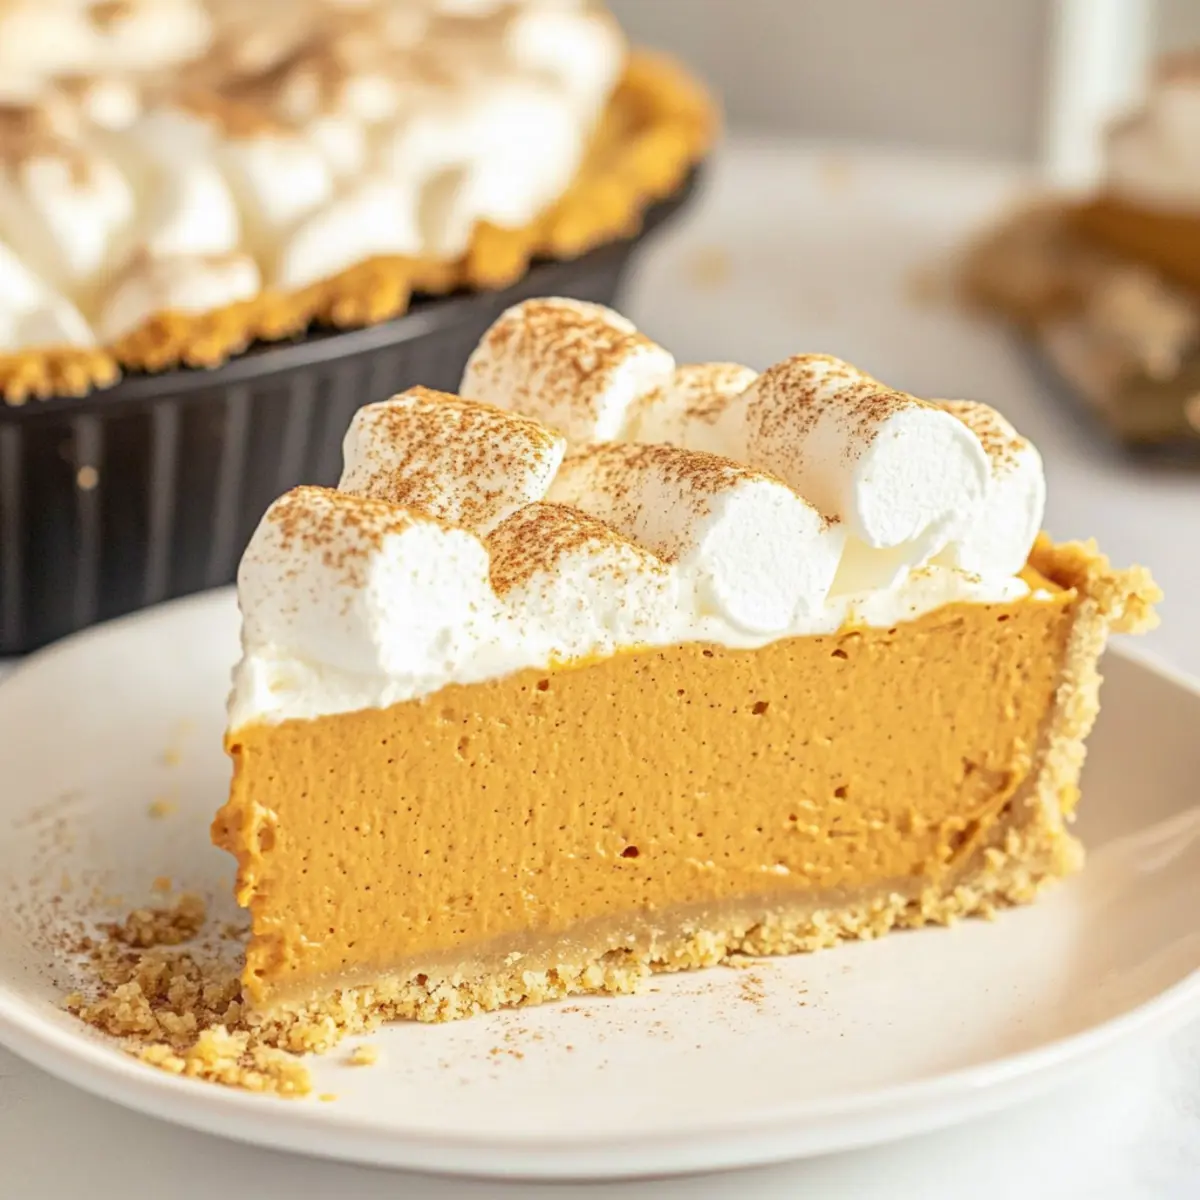
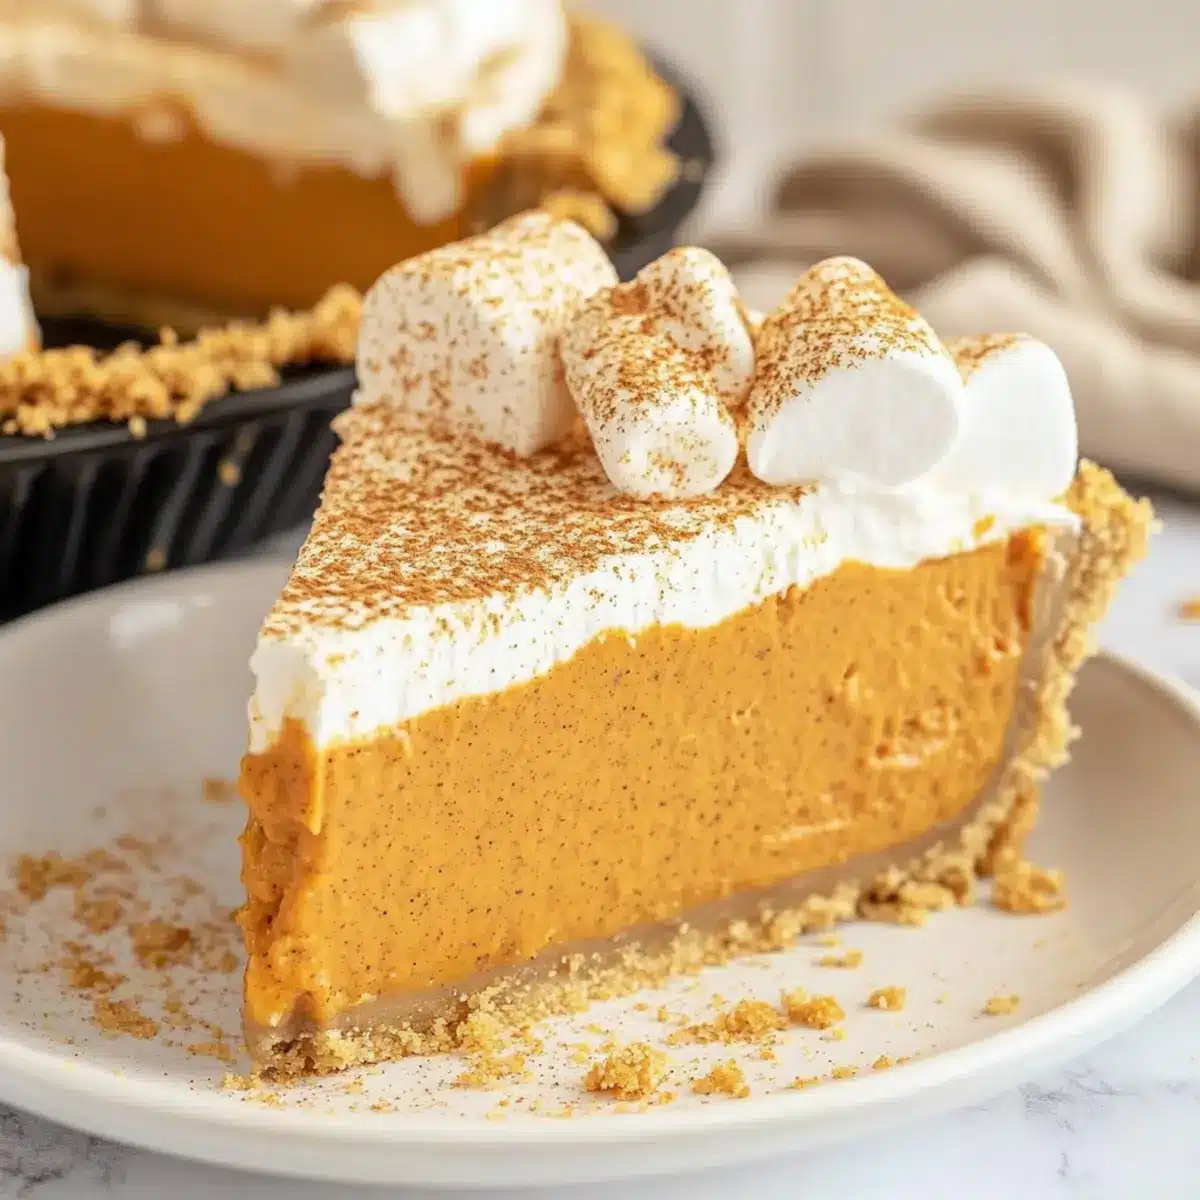
As a kid, there was nothing like the first bite of pumpkin pie during the holidays—sweet, creamy, and oh-so-comforting. Fast forward to today, and I’ve discovered a twist that makes this traditional dessert not just easier, but even more delightful: the No Bake Marshmallow Pumpkin Pie. This indulgent recipe mixes the nostalgic flavors of fall with the fluffy texture of marshmallows, resulting in a light dessert that’s as easy to whip up as it is to devour. In just 10 minutes of prep time and a little patience overnight, you can serve up a guilt-free, gluten-free treat that will steal the show at your Thanksgiving table. Are you ready to elevate your dessert game this season? Let’s dive into this airy recipe that will leave your guests asking for seconds!
Why is This Pie a Must-Try?
No Bake Convenience: Ditch the oven for this effortless dessert that requires just 10 minutes of prep.
Fluffy Texture: The marshmallows create a light, airy filling that melts in your mouth and offers a delightful twist on tradition.
Classic Flavors: Rich pumpkin paired with warm spices delivers all the cozy fall vibes without the heaviness of typical pies.
Crowd-Pleasing Appeal: Perfect for any gathering, this pie is guaranteed to impress your guests, whether it’s Thanksgiving or a casual family dinner.
Diet-Friendly: This recipe can easily be made gluten-free with a simple crust swap, inviting everyone to enjoy a slice! For even more delightful pumpkin recipes, check out my Chewy Pumpkin Oatmeal or Pumpkin Gnocchi Cozy.
No Bake Marshmallow Pumpkin Pie Ingredients
For the Filling
- Large Marshmallows – Provides sweetness and fluffy texture; use a 10 oz bag for best results.
- Pure Pumpkin – Adds the classic pumpkin flavor; ensure it’s 100% pure pumpkin, not pie filling.
- Cinnamon – Enhances warmth and aroma; freshly ground is ideal but pre-ground works well too.
- Pumpkin Pie Spice – Complements pumpkin flavor with nutty and spicy notes; substitute with a mix of nutmeg and ginger if unavailable.
- Salt – Balances sweetness; regular table salt is suitable.
- Cool Whip (thawed) – Used for creaminess and fluffy texture; substitute with homemade whipped cream for a fresher taste.
For the Crust
- Store-Bought Graham Cracker Crust (6 oz) – Provides a sweet, crumbly base; can swap for a gluten-free crust if necessary.
This delightful No Bake Marshmallow Pumpkin Pie will not only impress your family but also become a beloved staple in your holiday gatherings.
Step‑by‑Step Instructions for No Bake Marshmallow Pumpkin Pie
Step 1: Melt the Mixture
In a medium saucepan, combine the large marshmallows, pure pumpkin, cinnamon, pumpkin pie spice, and salt. Over low heat, stir the mixture continuously for about 5-7 minutes, or until the marshmallows have completely melted and the mixture becomes smooth and well combined. You’ll know it’s ready when you see a glossy consistency.
Step 2: Cool the Filling
Once melted, remove the saucepan from heat and carefully transfer the mixture into a large mixing bowl. Allow it to cool to room temperature for approximately 30 minutes. This step is crucial; if the mixture is too hot, it can cause the Cool Whip to melt and lose its airy texture when added.
Step 3: Fold in the Cool Whip
After your mixture has cooled, gently fold in the thawed Cool Whip using a spatula. Aim for a light and airy texture, mixing until you can no longer see the white of the Cool Whip and the filling turns a lighter shade of orange. This will create the fluffy filling for your No Bake Marshmallow Pumpkin Pie.
Step 4: Prepare the Crust
Take your store-bought graham cracker crust and ensure it’s ready for filling. With a spatula, carefully spoon the fluffy pumpkin filling into the crust, spreading it evenly to ensure a beautiful presentation. Press gently to fill in any gaps without compressing the mixture too much.
Step 5: Chill the Pie
Cover the filled crust with a lid or plastic wrap, and place it in the refrigerator. Allow the No Bake Marshmallow Pumpkin Pie to chill for at least 8 hours, or preferably overnight. This time is essential for the filling to firm up and achieve its ideal creamy consistency.
Step 6: Serve and Enjoy
When ready to serve, remove the pie from the refrigerator and use a sharp knife to slice it into wedges. For an extra touch, top each piece with a dollop of whipped cream before serving. This refreshing No Bake Marshmallow Pumpkin Pie is best enjoyed chilled, making it a delightful ending to any meal.
No Bake Marshmallow Pumpkin Pie Variations
Feel free to take this delightful dessert to new heights with these fun twists and substitutions!
- Gluten-Free Crust: Swap out the graham cracker crust for a gluten-free version, ensuring everyone can indulge without worry.
- Whipped Cream Alternative: Use homemade whipped cream instead of Cool Whip for a fresher, richer flavor that elevates the pie’s creaminess.
- Add Chocolate: Incorporate chocolate chips into the filling for a delicious contrast that perfectly balances the pumpkin’s sweetness. A hint of chocolate adds an exciting depth of flavor!
- Ginger Snap Crust: Change things up by using a ginger snap crust for a spicier, zesty bite that complements the pumpkin beautifully. It’s a unique twist that you and your guests will love!
- Pumpkin Spice Latte: Drizzle some pumpkin spice latte flavor by adding a splash of espresso or coffee extract into the filling—a cozy combination for coffee lovers!
- Extra Spices: Enhance the warmth of your pie by adding an extra bit of nutmeg or a sprinkle of cloves. This warm spice blend will embrace the essence of fall.
- Caramel Drizzle: Top your pie with a drizzle of caramel sauce for a sweet finish that ties together all those autumn flavors. Each bite becomes a decadent experience!
- Pumpkin Pie Cupcakes: Turn this filling into decadent cupcakes instead! Place the filling in mini graham cracker crusts, bake for 10 minutes, and create delightful mini treats!
For more pumpkin-inspired recipes, be sure to explore my Pumpkin Oatmeal and treat yourself to some delicious Cheesy Pumpkin Spicy favorites!
Expert Tips for No Bake Marshmallow Pumpkin Pie
-
Cooling Time Matters: Allow the pumpkin mixture to cool fully before adding Cool Whip; this prevents melting and maintains a light filling.
-
Graham Cracker Quality: Use fresh, high-quality graham crackers for the crust; stale ones can lead to a crumbly texture and affect the pie’s overall integrity.
-
Folding Technique: When combining the filling with Cool Whip, fold gently to preserve airiness; overmixing can negate the fluffy texture that defines this No Bake Marshmallow Pumpkin Pie.
-
Flavor Enhancements: Consider adding a dash of nutmeg or a swirl of caramel to complement the pumpkin flavor; just be mindful not to overwhelm the original taste.
-
Storage Wisely: Keep leftovers covered in the refrigerator for up to 4-5 days; for the best experience, consume within the first couple of days to maintain texture.
What to Serve with No Bake Marshmallow Pumpkin Pie
Imagine the joyful laughter of friends and family gathered around the table, savoring delightful dishes that perfectly complement this dreamy dessert.
-
Savory Roasted Turkey: A classic Thanksgiving centerpiece that enhances the sweet flavors of the pie while offering a hearty contrast.
-
Crispy Brussels Sprouts: Their nutty crunch pairs wonderfully with the creamy pie, adding a delightful texture and earthy flavor.
-
Sweet Potato Casserole: The warm spices in this dish create a harmonizing flavor profile that echoes the essence of fall, enhancing the pumpkin experience.
-
Apple Cider: Served chilled or hot, this refreshing beverage complements the pie’s sweetness and brings a festive touch to the table.
-
Maple Glazed Carrots: Their sweetness and slight crunch beautifully balance the rich creaminess of the pie, creating a blissful harmony.
-
Pecan Pie: For the dessert lovers, this nutty classic offers a delightful contrast to the fluffy pumpkin delight, making it a two-pie celebration.
-
Whipped Cream or Cool Whip: A light dollop on each slice not only adds a creamy texture but also enhances the flavors of your No Bake Marshmallow Pumpkin Pie.
-
Pumpkin Spice Latte: Infuse your gathering with cozy vibes; this beloved fall beverage complements the flavors of the pie while warming everyone’s hearts.
Each of these ideas creates a flavorful, memorable meal that keeps every guest smiling while indulging in the irresistible No Bake Marshmallow Pumpkin Pie.
How to Store and Freeze No Bake Marshmallow Pumpkin Pie
Fridge: Store the pie covered in the refrigerator for up to 4-5 days. It’s best enjoyed within the first couple of days to maintain its airy texture.
Freezer: For longer storage, wrap individual slices in plastic wrap and place them in an airtight container. They can be frozen for up to 2 months.
Thawing: To enjoy frozen slices, simply remove them from the freezer and let them thaw in the fridge for several hours, or overnight for best results.
Reheating: This No Bake Marshmallow Pumpkin Pie is best served chilled, so there’s no reheating needed. Just slice and serve straight from the fridge!
Make Ahead Options
This No Bake Marshmallow Pumpkin Pie is an excellent candidate for meal prep, allowing busy home cooks to save time during the holiday rush! You can prepare the marshmallow filling up to 24 hours in advance; simply melt the ingredients and let it cool before folding in the Cool Whip. Once assembled in the graham cracker crust, refrigerate the pie overnight to achieve optimal creamy consistency. For the best quality, cover it tightly with plastic wrap to prevent any absorption of smells from the fridge. When you’re ready to serve, just slice and top with whipped cream for a delightful dessert that will impress your guests without the stress!
No Bake Marshmallow Pumpkin Pie Recipe FAQs
What type of marshmallows should I use for the filling?
I recommend using large marshmallows, specifically a 10 oz bag, as they provide the sweetness and fluffy texture that are essential for the pie’s filling.
How can I tell if my pumpkin is fresh enough?
Always ensure you’re using 100% pure pumpkin, not pumpkin pie filling, for the best flavor. Look for deep orange color without any dark spots or off smells; this indicates freshness and quality.
How should I store my No Bake Marshmallow Pumpkin Pie?
Store the pie covered in the refrigerator for up to 4-5 days. It’s best enjoyed within the first couple of days for optimal texture.
Can I freeze leftover pie? How?
Absolutely! To freeze, wrap individual slices in plastic wrap and place them in an airtight container. They can be frozen for up to 2 months. When you’re ready to enjoy, simply move them to the fridge to thaw for several hours or overnight.
What if my filling is too runny?
If you find your filling is runny, it might be due to insufficient cooling time after melting the marshmallows. Make sure you allow it to cool to room temperature for about 30 minutes before folding in the Cool Whip. This helps retain that fluffy texture.
Is this pie gluten-free?
Yes, you can easily make this No Bake Marshmallow Pumpkin Pie gluten-free by swapping the store-bought graham cracker crust for a gluten-free crust option, allowing everyone to enjoy a slice!
No Bake Marshmallow Pumpkin Pie - Effortlessly Creamy Delight
Ingredients
Equipment
Method
- In a medium saucepan, combine the large marshmallows, pure pumpkin, cinnamon, pumpkin pie spice, and salt. Over low heat, stir the mixture continuously for about 5-7 minutes, or until the marshmallows have completely melted and the mixture becomes smooth and well combined.
- Once melted, remove the saucepan from heat and carefully transfer the mixture into a large mixing bowl. Allow it to cool to room temperature for approximately 30 minutes.
- After your mixture has cooled, gently fold in the thawed Cool Whip using a spatula until the filling turns a lighter shade of orange.
- Take your store-bought graham cracker crust and spoon the fluffy pumpkin filling into the crust, spreading it evenly.
- Cover the filled crust with a lid or plastic wrap, and place it in the refrigerator. Allow the pie to chill for at least 8 hours, or preferably overnight.
- When ready to serve, remove the pie from the refrigerator and use a sharp knife to slice it into wedges. Top each piece with a dollop of whipped cream before serving.
Leave a Reply