
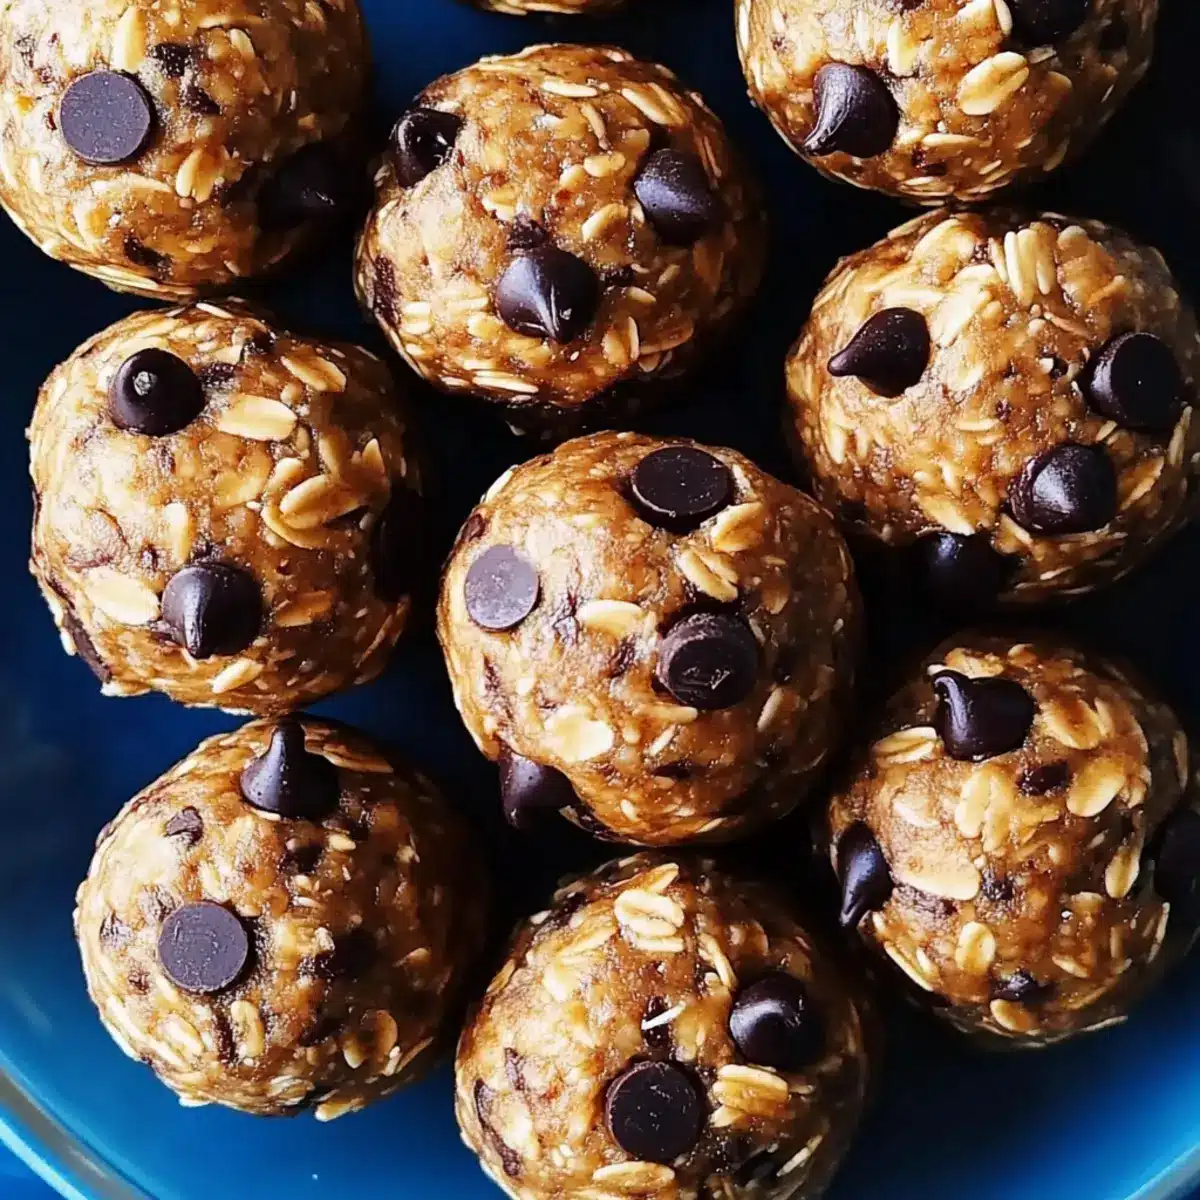
With each bite of these No-Bake Protein Balls, you’ll be transported to a carefree afternoon filled with laughter and good company. These delightful snacks are not just about great taste; they’re a quick and easy solution to your energy needs. Whether you’re looking for a satisfying post-workout boost or prepping healthy snacks for a busy week, these protein-packed gems are your new best friend. Made in under 15 minutes, they’re guilt-free indulgence that won’t keep you chained to the kitchen. The blend of wholesome oats, creamy peanut butter, and a touch of sweetness makes for a chewy treat that’s as nourishing as it is delicious. Have you ever tried making your own snack balls? It’s time to get excited about healthy snacking!
Why You’ll Love These Protein Balls
Quick and Easy: These no-bake protein balls come together in just under 15 minutes, allowing you to skip the long prep times and enjoy your snacks sooner.
Nutritious and Wholesome: Packed with protein from vanilla protein powder and filled with fiber-rich rolled oats, they provide the perfect energy boost.
Customizable: Tailor them to your taste! Swap peanut butter for sunflower seed butter, or mix in dried fruits for a fun twist.
Perfect for Meal Prep: Great for busy days, these balls can be prepped ahead and stored in the fridge, ready for when you need a quick snack.
Ideal for Everyone: Whether you’re fueling up after a workout or looking for lunchbox treats, these protein balls cater to all dietary needs. You might also want to check out our Pumpkin Protein Balls or Chocolate Chip Protein Balls for delicious variations!
No-Bake Protein Balls Ingredients
For the Base
• Rolled Oats – Provides structure and chewiness; gluten-free options available for a wider audience.
• Natural Peanut Butter – Acts as a binding agent and adds creaminess; consider almond butter for a nut-free version.
• Honey or Maple Syrup – Sweetens the mixture and helps bind ingredients together; agave syrup can be used as a vegan alternative.
• Vanilla Protein Powder – Increases protein content significantly, perfect for those seeking a boost.
For Flavor & Texture
• Mini Chocolate Chips – Adds a delightful touch of sweetness and indulgence; swap for dark chocolate for lower sugar.
• Chia Seeds – Provides fiber and omega-3 fatty acids; can be omitted if you’re in a pinch.
• Vanilla Extract – Enhances flavor for a more aromatic experience; optional but recommended for depth.
• Pinch of Salt – Balances sweetness and elevates overall flavor profile in these no-bake protein balls.
Step‑by‑Step Instructions for No-Bake Protein Balls
Step 1: Combine Dry Ingredients
In a large mixing bowl, add the rolled oats, vanilla protein powder, chia seeds, and a pinch of salt. Use a spoon to mix these dry ingredients thoroughly until they are evenly distributed, creating a solid base for your No-Bake Protein Balls. This step should take about 2 minutes, ensuring no lumps remain.
Step 2: Add Wet Ingredients
Next, incorporate the natural peanut butter, honey (or maple syrup), and vanilla extract into the dry mixture. Using a spatula or wooden spoon, blend all the ingredients together until the mixture is cohesive and sticky, which will take about 3 minutes. The goal is to achieve a thick dough that hugs together nicely but isn’t too dry.
Step 3: Assess Consistency
At this point, evaluate the dough; if it feels too crumbly, add a bit more honey or peanut butter. Stir until the consistency is firm yet pliable, resembling cookie dough. This step is crucial, as the right texture will ensure your No-Bake Protein Balls hold their shape after chilling.
Step 4: Fold in Chocolate Chips
Once your dough is ready, fold in the mini chocolate chips gently using the spatula. Ensure they are evenly distributed throughout the mixture, imparting delightful bursts of sweetness in each bite. This should take about 1–2 minutes, and the chocolate will provide a lovely contrast to the protein-rich snack.
Step 5: Shape the Balls
Begin shaping the mixture into bite-sized balls, roughly 1 inch in diameter. Use your hands to scoop about a tablespoon of dough from the bowl, rolling it into a ball shape. Aim to form 12–15 evenly sized No-Bake Protein Balls, ensuring they are compact and nicely rounded for an appealing finish.
Step 6: Chill to Set
Finally, place the formed balls on a parchment-lined baking sheet, spacing them apart to avoid sticking. Refrigerate them for at least 30 minutes to firm up, allowing the flavors to meld beautifully. After chilling, you’ll have perfectly shaped No-Bake Protein Balls, ready to energize your day!
How to Store and Freeze No-Bake Protein Balls
Fridge: Store your No-Bake Protein Balls in an airtight container in the refrigerator for up to one week, ensuring they stay fresh and delicious.
Freezer: For longer storage, freeze the protein balls in a single layer on a baking sheet. Once solid, transfer them to a freezer bag, where they’ll keep well for up to 3 months.
Thawing: When you’re ready to enjoy, simply thaw the frozen balls in the refrigerator overnight or at room temperature for a couple of hours before consuming.
Meal Prep: These delights are perfect for meal prepping! Have them on hand for a quick snack or energy boost anytime you need it.
Expert Tips for No-Bake Protein Balls
-
Moisture Balance: Ensure the dough is sticky enough; if it feels too dry, add an additional tablespoon of peanut butter or honey for the right consistency.
-
Chill Time: Refrigerate the protein balls for at least 30 minutes. Skipping this step may lead to crumbly balls that won’t hold their shape.
-
Ingredient Substitutions: Don’t hesitate to customize; swap peanut butter for almond or sunflower seed butter to accommodate dietary restrictions while keeping these no-bake protein balls satisfying.
-
Mess-Free Rolling: For easy handling, dampen your hands slightly before rolling the mixture into balls. This will prevent sticking and make shaping a breeze.
-
Storage Tips: Keep your protein balls fresh by storing them in an airtight container in the refrigerator. They last up to a week, perfect for easy grabbing!
-
Add-Ins Galore: Experiment with extras like dried fruits, nuts, or seeds to elevate the flavor and nutrition of your no-bake protein balls!
Make Ahead Options
These No-Bake Protein Balls are a fantastic choice for meal prep, making them perfect for busy weeks ahead! You can prepare the dough up to 24 hours in advance and refrigerate it, ensuring all the flavors meld perfectly. Just follow the initial steps of combining the ingredients and forming the dough, then leave the balls to chill overnight. For storage, place them in an airtight container in the fridge for up to 1 week. When you’re ready to enjoy, simply grab a protein ball and indulge—it’ll be just as delicious, soft, and chewy! This way, you’ll always have a nutritious snack on hand, saving you time and keeping you energized throughout your day.
No-Bake Protein Balls Variations
Feel free to put your own spin on these delicious No-Bake Protein Balls and explore new flavors and textures!
-
Nut-Free Option: Substitute peanut butter with sunflower seed butter for a safe, nut-free version. Your friends with nut allergies will love you for this!
-
Sweet & Tart: Add dried cranberries or raisins for a burst of sweetness and a delightful chewy texture. They’ll provide a refreshing contrast to the nuttiness.
-
Tropical Vibes: Incorporate shredded coconut for a beachy twist that pairs beautifully with the oats and coconut’s natural sweetness. Feel the sunshine in every bite!
-
Protein-Packed Boost: Dive into flavor by swapping out half the oats for protein-rich quinoa flakes. This will enhance the protein without sacrificing any chewiness.
-
Spicy Kick: Sprinkle in a dash of cayenne pepper or cinnamon for an unexpected warmth. This twist adds a lovely heat to contrast the sweetness.
-
Decadent Chocolate: Use dark chocolate chips instead of mini chocolate chips for a richer flavor. Who doesn’t love a chocolatey treat that’s also good for you?
-
Nutty Bliss: Stir in chopped nuts like almonds or walnuts for extra crunch and healthy fats. It’s a delightful texture boost that makes every bite more interesting!
-
Cacao Nibs Adventure: Exchange chocolate chips for cacao nibs for an intense chocolate hit with less sugar. The bitterness of cacao will mesmerize dark chocolate lovers!
For more fun variations, don’t forget to explore our delightful Pumpkin Protein Balls and other tasty options like Chocolate Chip Protein Balls. Enjoy experimenting!
What to Serve with No-Bake Protein Balls
Transform your snack time into a delightful experience with these quick and nutritious bites!
-
Fresh Fruit Platter: Bright, juicy fruits like apple slices and berries add a refreshing contrast, enhancing the natural sweetness of the protein balls.
-
Greek Yogurt Dip: A creamy yogurt dip provides a cool and tangy accompaniment. Mix in honey and a sprinkle of cinnamon for extra flavor!
-
Nutty Granola: Crunchy granola not only complements the chewy texture of the protein balls but also adds an extra protein kick, perfect for a satisfying snack.
-
Smoothie Bowl: Pair your protein balls with a vibrant smoothie bowl topped with granola and seeds. This colorful dish not only looks amazing but also boosts your nutritional intake.
-
Dark Chocolate Square: A piece of rich dark chocolate—a luscious treat that balances the flavors, allowing for a moment of indulgence with your healthy snacks.
-
Sparkling Water with Fruit: For a refreshing beverage, try sparkling water infused with fresh citrus slices or berries. It’s a delightful way to stay hydrated while enjoying your protein balls.
-
Nut Butter Dip: A small dish of your favorite nut butter complements the protein balls beautifully. It adds extra richness and makes for an enjoyable snack experience.
-
Trail Mix: A handful of trail mix with nuts and dried fruits provides a textural contrast and adds complexity to your snack time. Enjoy different flavors and textures with each mouthful!
No-Bake Protein Balls Recipe FAQs
What kind of oats should I use for No-Bake Protein Balls?
For these No-Bake Protein Balls, rolled oats are ideal as they provide the necessary structure and chewiness. If you’re looking for a gluten-free option, ensure you choose certified gluten-free oats. Steel-cut oats are too coarse and won’t mix well, so stick with rolled oats for that perfect texture.
How should I store my No-Bake Protein Balls?
Store your No-Bake Protein Balls in an airtight container in the refrigerator, where they’ll stay fresh for up to 1 week. If you’d like to keep them longer, you can freeze them in a single layer on a baking sheet; once solid, transfer them to a freezer bag for up to 3 months. Just remember to thaw them in the refrigerator overnight before enjoying!
Can I substitute ingredients in No-Bake Protein Balls?
Absolutely! You can substitute natural peanut butter with almond butter or sunflower seed butter for a nut-free option. If you prefer to keep things vegan, use agave syrup instead of honey. You can also add different mix-ins like dried fruits or nuts to elevate the flavor and nutrition.
How do I know if my protein ball mixture is too dry?
If the mixture feels crumbly and doesn’t hold together when rolled, it’s too dry. To fix this, simply add an extra tablespoon of honey or peanut butter and mix until you achieve a thick, sticky dough. It should resemble cookie dough and easily form into balls without falling apart.
Are No-Bake Protein Balls safe for children or those with allergies?
These protein balls can be a healthy snack for kids, but be sure to consider any allergies. If you’re making them for someone with nut allergies, use sunflower seed butter instead of peanut butter and check that all other ingredients, like protein powder, are safe for their dietary needs.
Can I make No-Bake Protein Balls ahead of time?
Certainly! These make-ahead snacks are perfect for meal prep. Just whip up a batch and store them in the fridge for quick grab-and-go bites throughout the week. They’ll keep you energized and satisfied—ideal for busy days!
Delicious No-Bake Protein Balls: Quick Fuel for Your Day
Ingredients
Equipment
Method
- Combine dry ingredients: In a large mixing bowl, add rolled oats, protein powder, chia seeds, and salt. Mix thoroughly for about 2 minutes.
- Add wet ingredients: Incorporate peanut butter, honey (or maple syrup), and vanilla extract into the dry mixture, blend until cohesive and sticky for 3 minutes.
- Assess consistency: Evaluate dough; if too crumbly, add a bit more honey or peanut butter until firm yet pliable.
- Fold in chocolate chips: Gently fold in mini chocolate chips until evenly distributed for about 1–2 minutes.
- Shape the balls: Roll about a tablespoon of dough into balls, aiming for 12–15 evenly sized No-Bake Protein Balls.
- Chill to set: Place balls on a parchment-lined baking sheet and refrigerate for at least 30 minutes.
Leave a Reply