
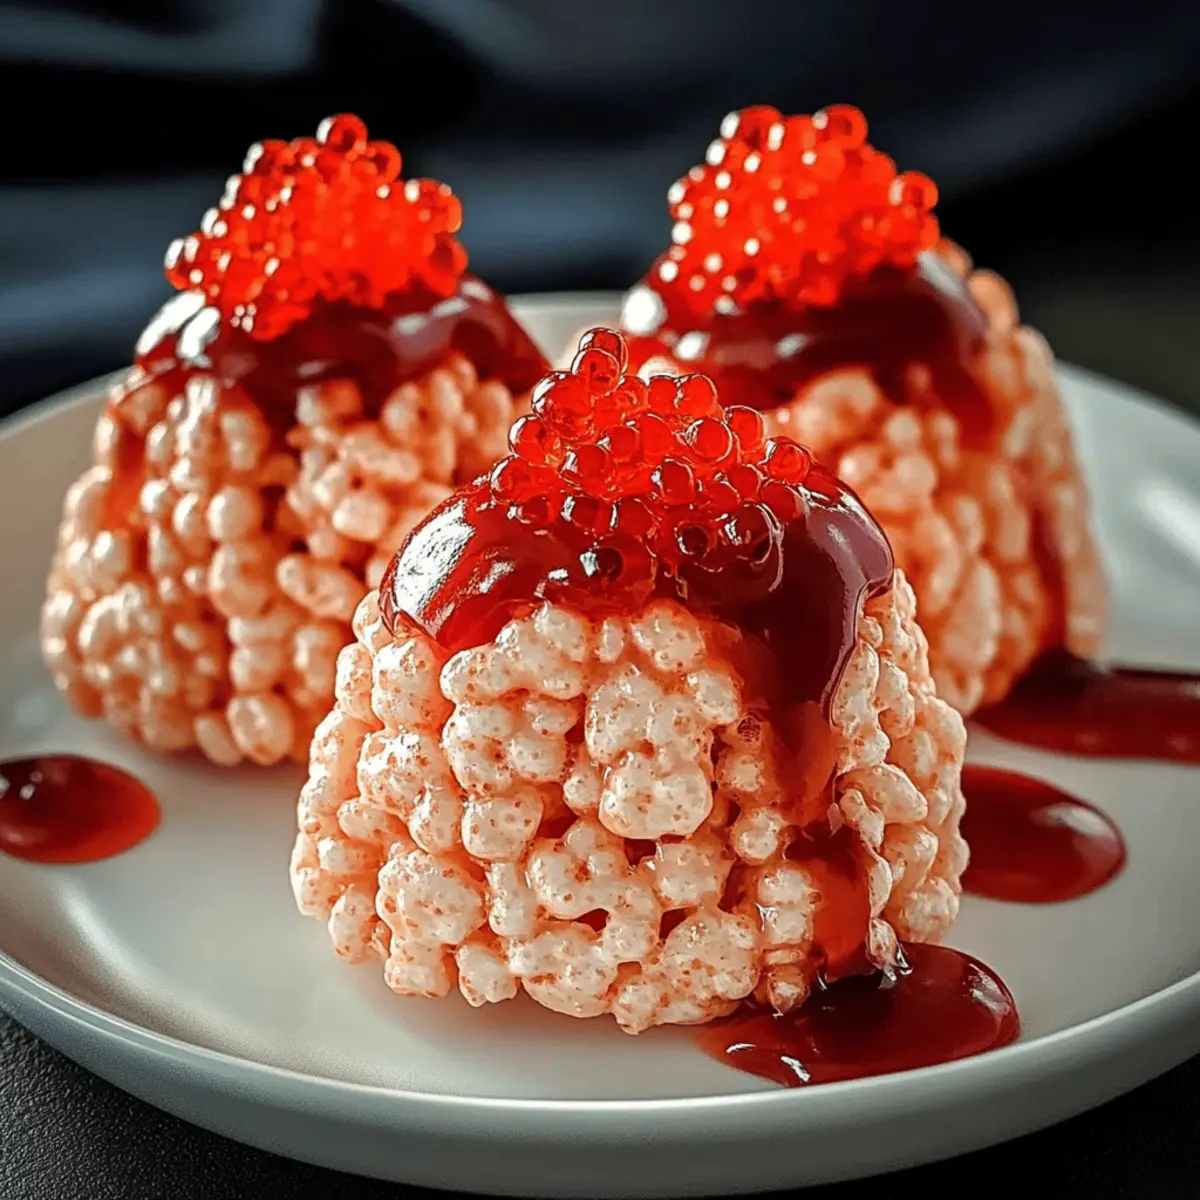
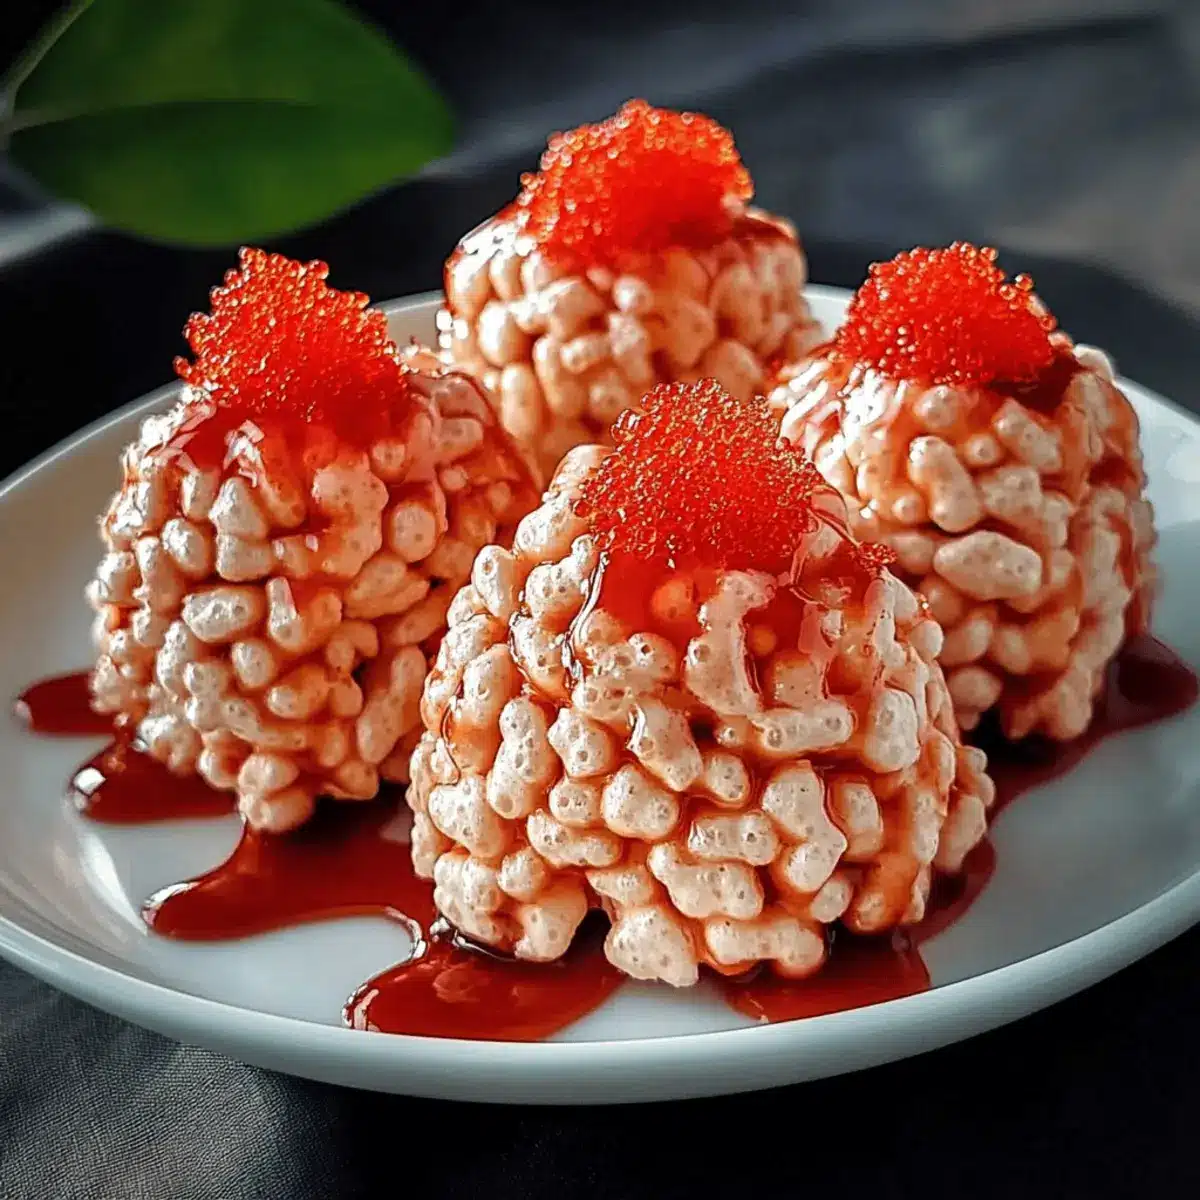
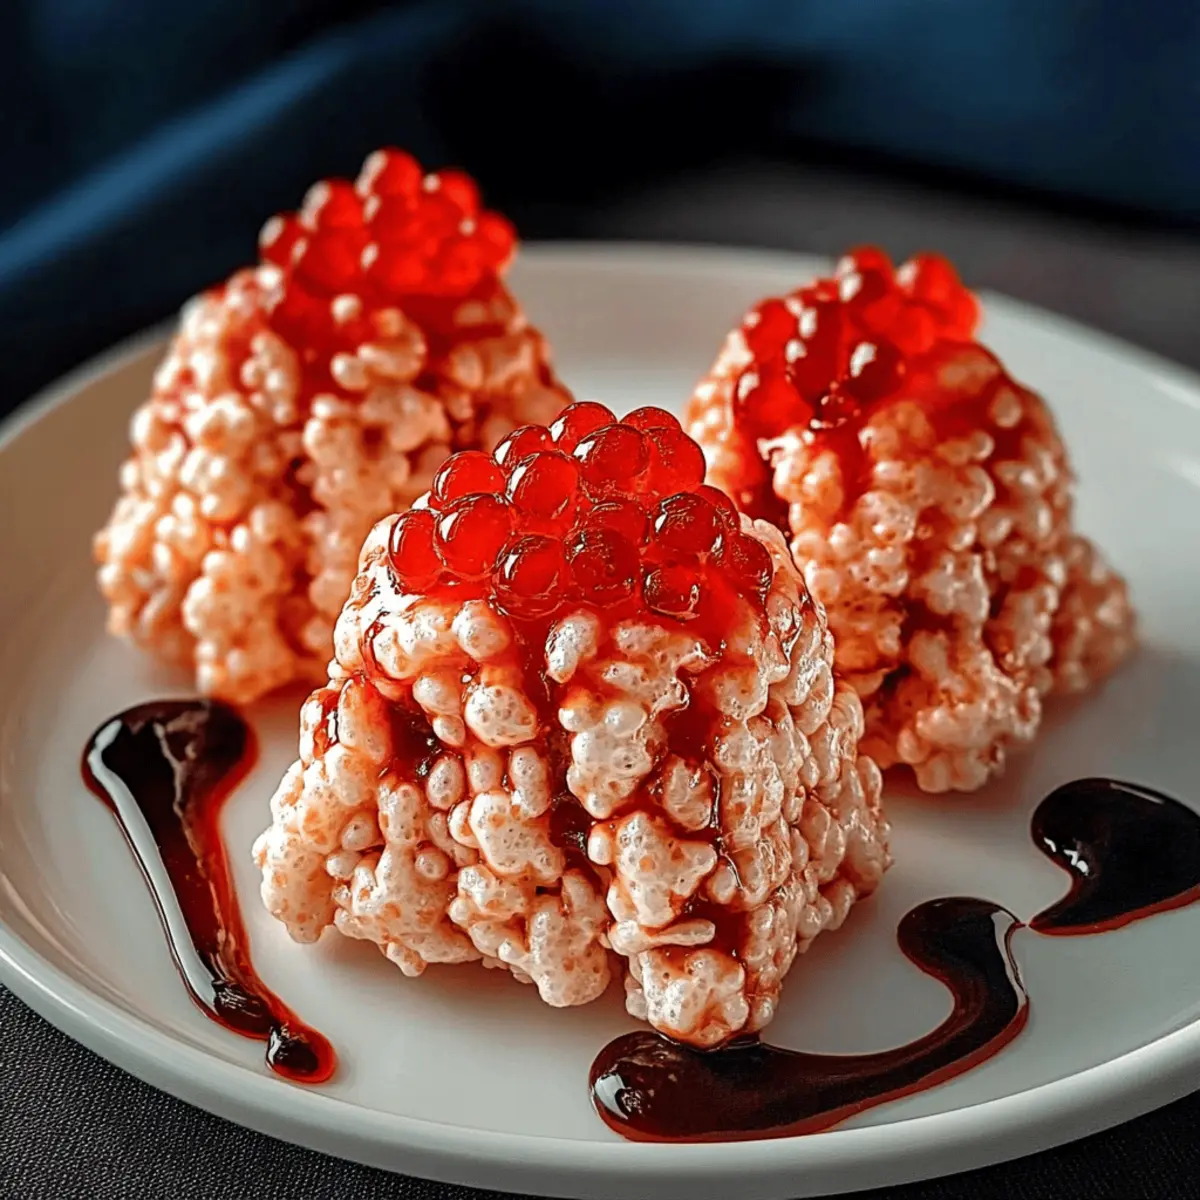
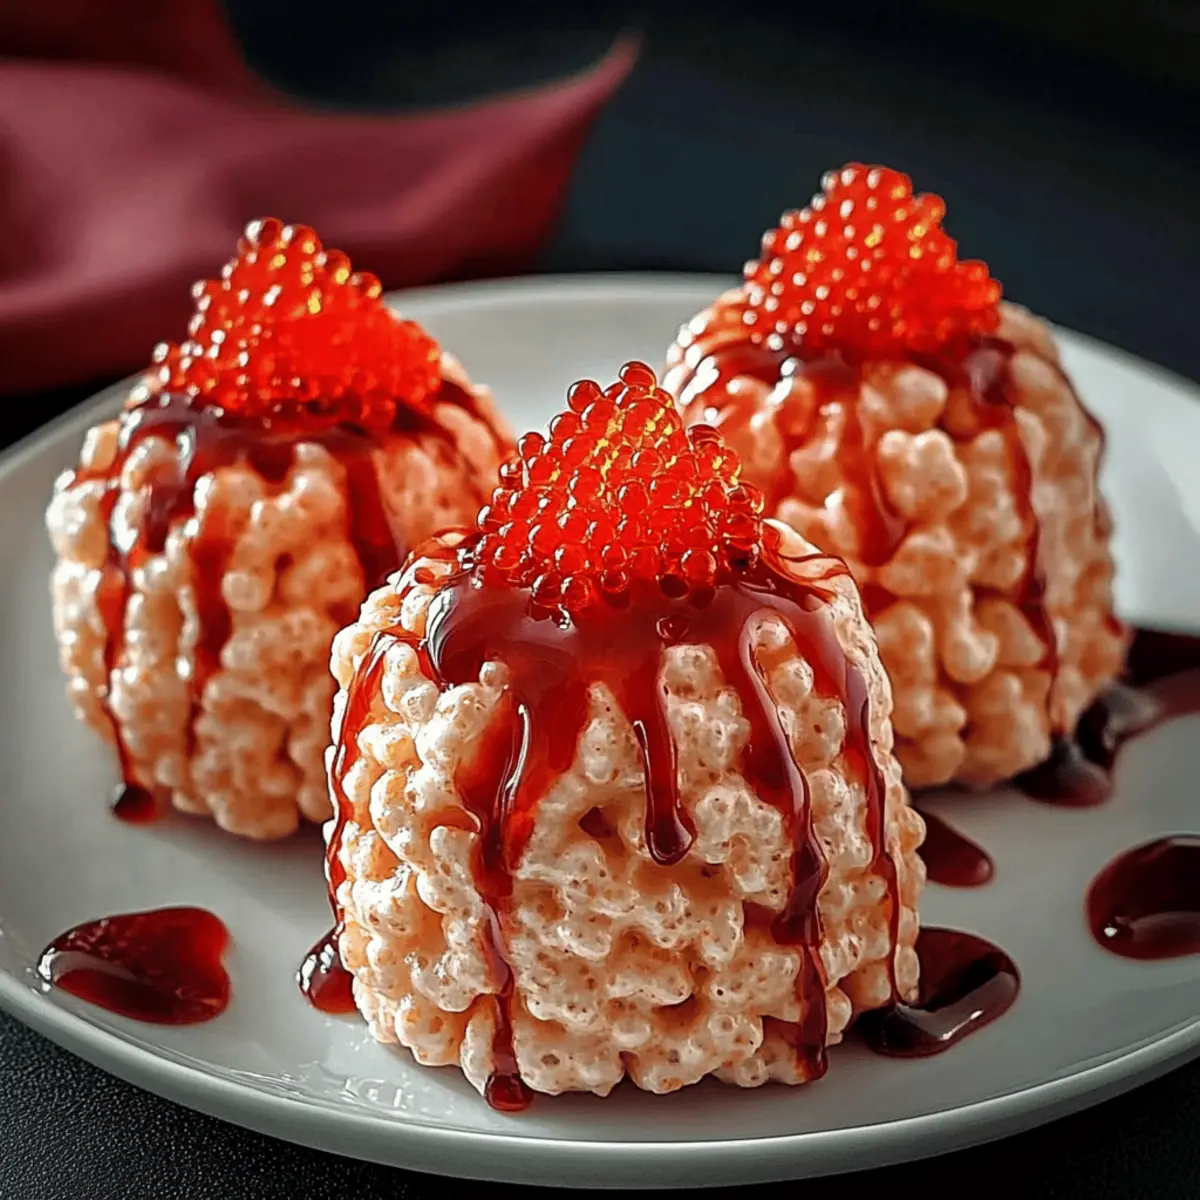
As the autumn air turns crisp and the days grow shorter, there’s something magical about crafting spooky treats for Halloween. One of my all-time favorites has to be Rice Krispies Brains, a whimsical twist on a classic that never fails to delight. These no-bake, vegetarian bites are not only incredibly easy to whip up but also serve as a crowd-pleasing centerpiece at any Halloween gathering. With a hint of gooey marshmallow and a playful brain shape, they bring an element of fun and creativity to your festive spread. Whether you’re hosting a ghoulish get-together or simply seeking a delightful project with the kids, these treats are bound to leave everyone bewitched and craving more. Are you ready to dive into the spooky season with a deliciously creepy culinary adventure?
Why Are Rice Krispies Brains a Must-Try?
Fun and Festive: Rice Krispies Brains add a delightful twist to your Halloween dessert table, making them an eye-catching treat that appeals to all ages.
No-Bake Convenience: With minimal effort and time, you can whip up these spooky snacks, letting you enjoy the holiday without the fuss of extensive baking.
Endless Variations: Feel free to get creative—add candy eyes, mix in flavored marshmallows, or play with different colors to cater to your party’s theme.
Gooey Goodness: The combination of marshmallows and Rice Krispies creates that irresistible chewy texture that keeps everyone coming back for more.
Perfect for Sharing: Rice Krispies Brains are easy to portion, making them ideal for sharing at Halloween parties or as fun treats for friends and family.
Elevate your Halloween with these spooky bites and serve them alongside other fun treats like Onion Butter Rice for a festive feast!
Rice Krispies Brains Ingredients
For the Base
• Rice Krispies – This provides unique texture and crunch; puffed rice can serve as a fun substitute if needed.
• Unsalted Butter – Adds richness and binds the ingredients together; margarine or coconut oil works in a pinch.
• Mini Marshmallows – Essential for that gooey goodness; using regular marshmallows may change the texture slightly.
For the Creepy Color
• Red Food Coloring – Gives the treats their spine-chilling look; natural alternatives like beet juice or raspberry puree can be used for a healthier twist.
Creating these Rice Krispies Brains is a delightful, no-bake treat that will be the highlight of your spooky festivities!
Step‑by‑Step Instructions for Rice Krispies Brains
Step 1: Prepare Your Workspace
Start by lining a large baking sheet with parchment paper or a silicone mat to prevent sticking. This will make shaping the Rice Krispies Brains easier later on. Gather your ingredients and equipment, including a large mixing bowl, a spatula, and a stove for melting the ingredients.
Step 2: Mix the Rice Krispies
In your large mixing bowl, pour in the Rice Krispies. This step sets the foundation for your spooky treat. Make sure the bowl is big enough to accommodate all the ingredients once they’re combined. A quick swish of the cereal helps loosen it before adding the melted mixture later.
Step 3: Melt the Butter and Marshmallows
In a medium saucepan, melt 4 tablespoons of unsalted butter over low heat. Once fully melted, stir in 10 ounces of mini marshmallows. Keep stirring gently for about 3-4 minutes until the marshmallows are completely melted and smooth. This will ensure a deliciously gooey texture for your Rice Krispies Brains.
Step 4: Add the Food Coloring
Remove the melted marshmallow mixture from heat and add a few drops of red food coloring. Stir well until the mixture reaches a deep, spooky red hue. This coloring will give your Rice Krispies Brains that iconic creepy look. Adjust the color to achieve your desired level of spookiness.
Step 5: Combine Everything Together
Pour the marshmallow mixture over the Rice Krispies in your mixing bowl. Stir continuously for about 2-3 minutes, making sure all the cereal is coated evenly. The goal is to ensure that every piece of Rice Krispies is enveloped in that gooey marshmallow mixture to create an even texture for your treats.
Step 6: Shape the Brains
Using an ice cream scoop, portion out the mixture onto your prepared baking sheet. Shape each portion gently into a brain form, using your hands if necessary. Aim for about 10-12 shapes. The heat from the mixture may be a bit warm, so handle it carefully to create well-defined shapes.
Step 7: Detail the Brains
With a butter knife, create indents on top of each molded brain to add detail and texture. For an extra spine-chilling effect, dip a small brush in red food coloring and lightly add drops for a ‘bloody’ look. This will enhance the spooky appearance of your Rice Krispies Brains and impress your friends!
Step 8: Let Them Set
Allow the Rice Krispies Brains to cool completely at room temperature for at least 30 minutes. This will help the treats firm up. Make sure to resist the temptation to sample them too soon, as they’ll taste even better once they’ve set and held their shape.
Step 9: Store or Serve
Once cooled and set, you can either serve the Rice Krispies Brains immediately or store them in an airtight container at room temperature for up to one week. They are great for sharing at Halloween gatherings, so enjoy these spooky treats with friends and family!
Rice Krispies Brains Variations
Feel free to unleash your creativity with these spooky treats, enhancing their flavor and presentation in ways that thrill your Halloween spirit!
-
Flavor Boost: Mix in flavored marshmallows, like strawberry or raspberry, for a fruity twist that complements the spooky look.
-
Gummy Additions: Top each brain with gummy worms or candy eyes for an extra creepy visual that will delight kids and adults alike. They’ll be an unexpected surprise!
-
Chocolate Drizzle: Drizzle melted chocolate over the cooled brains for a rich, decadent contrast that adds both flavor and elegance.
-
Colorful Brain Matter: Use different food colorings for vibrant brains—think green for a Frankenstein effect or orange for a pumpkin twist, celebrating the festive season!
-
Nutty Texture: Incorporate crushed nuts or nut butter into the mixture for an exciting crunch that adds a new layer of flavor.
-
Spicy Kick: Add a pinch of cayenne or chili powder to the melted marshmallow for a surprising spicy element that will definitely catch people off-guard.
-
Themed Shapes: Use Halloween-themed cookie cutters for different shapes such as pumpkins or ghosts, making the treats even more festive!
Experiment with these variations to make your Rice Krispies Brains stand out at your Halloween gathering. And if you’re in the mood for other creative meals, check out my Philly Cheesesteak Rice or try spicing things up with Korean BBQ Steak Rice Bowls with Spicy Cream Sauce. Happy haunting!
What to Serve with Rice Krispies Brains?
As Halloween treats take center stage, imagine an enchanting spread that evokes both joy and a hint of mischief.
- Wormy Gummy Snack: These colorful gummy worms make a playful and chewy side dish that looks great on your dessert table.
- Spooky Cupcakes: Decorated with eerie frosting and candy embellishments, these sweet bites complement the fun feel of your Rice Krispies Brains perfectly.
- Crispy Veggie Platter: Fresh and crunchy vegetables like carrots, cucumbers, and bell peppers add a refreshing contrast, balancing the sweetness of the treats. Keep a dip nearby for a savory twist.
- Apple Slices with Caramel Dip: The crisp and juicy apples paired with warm caramel create a delightful combination that’s both sweet and tart, enhancing your Halloween spread.
- Cheesy Garlic Breadsticks: Savory and warm, these will provide a comforting contrast to the sweetness of the Rice Krispies treat, making it a well-rounded feast.
- Blood Orange Punch: This vibrant drink, bursting with citrusy flavor and its spooky name, will surely thrill both kids and adults alike, tying in beautifully to the Halloween theme.
- Chocolate Ghosts: These delightful chocolate-covered marshmallows make perfect companions for your Rice Krispies Brains, adding an extra layer of sweetness to your ghoulish gathering.
- Pumpkin Spice Cookies: With their seasonal flavor, these soft bites will enhance the festive spirit of your Halloween bash, adding a warm, cozy element to your treat table.
- Monster Munch: A crunchy, sweet snack mix with pretzels, popcorn, and candy corn, it adds a fun textural contrast that everyone will enjoy.
- Hot Chocolate With Marshmallows: Serve this cozy drink topped with mini marshmallows to create a warm and festive atmosphere, ensuring your guests feel right at home.
How to Store and Freeze Rice Krispies Brains
Room Temperature: Keep your Rice Krispies Brains in an airtight container at room temperature for up to 1 week. This will help maintain their delightful texture and flavor.
Fridge: For extended freshness, store them in the refrigerator where they can last for up to 2 weeks. Just remember, refrigeration can make them a tad firmer.
Freezer: If you want to save some for later, you can freeze them for up to 3 months. Wrap tightly in plastic wrap and place in an airtight container to prevent freezer burn.
Reheating: When ready to enjoy, allow them to thaw in the fridge overnight. For a softer texture, you can microwave briefly (about 10 seconds) before serving.
Expert Tips for Rice Krispies Brains
-
Be Patient with Melting: Ensure marshmallows melt slowly over low heat for the perfect gooey consistency. Rushing this step can lead to tough treats.
-
Keep It Cool: Allow the mixture to cool slightly before shaping to prevent sticky hands and ensure defined brain shapes.
-
Use Parchment Paper: Always line your baking sheet with parchment to make it easier to remove the Rice Krispies Brains after they’ve set, avoiding any unwanted sticking.
-
Adjust the Color: Don’t hesitate to tweak the amount of red food coloring to match your Halloween theme—more color can create extra spookiness!
-
Store Wisely: For optimal freshness, keep treats in an airtight container at room temperature, but be mindful that refrigeration can toughen their texture.
Get ready to impress your family and friends with these delicious Rice Krispies Brains!
Make Ahead Options
These Rice Krispies Brains are an excellent choice for meal prep, allowing you to save time during the busy Halloween season! You can prepare the mixture up to 24 hours in advance and shape the brains, placing them on the baking sheet. Simply cover the baking sheet with plastic wrap and refrigerate until you’re ready to detail and serve. For best results, allow them to sit at room temperature for about 30 minutes before adding the finishing touches, as this brings back their delightful chewiness and texture. Storing them properly in an airtight container at room temperature will keep them fresh for up to one week, ensuring your spooky treats remain just as delicious and fun for Halloween gatherings!
Rice Krispies Brains Recipe FAQs
How do I know if my Rice Krispies are fresh enough?
Absolutely! Fresh Rice Krispies should be crisp without any signs of moisture or stale flavor. If they feel soft or have an off smell, it’s best to get a new box for optimal crunch in your brains.
What’s the best way to store leftover Rice Krispies Brains?
To keep your Rice Krispies Brains fresh, store them in an airtight container at room temperature for up to 1 week. If you want them to last longer, refrigerate them for up to 2 weeks. Just be aware that refrigeration can make them firmer.
Can I freeze Rice Krispies Brains?
Very! You can absolutely freeze your Rice Krispies Brains for up to 3 months. Here’s how: First, wrap each piece tightly in plastic wrap to prevent freezer burn. Next, place them in an airtight container or a resealable freezer bag. When you’re ready to enjoy them again, thaw them in the fridge overnight. To restore some softness, you can microwave them for about 10 seconds before serving.
What if my Marshmallows don’t melt properly?
No worries! If your marshmallows aren’t melting smoothly, try keeping the heat on low and stirring continuously until they are completely smooth. If they’re becoming too hot, remove the pot from the heat, let it cool slightly, and keep stirring. Avoid high heat, as it can cause the marshmallows to become hard instead of gooey!
Are there any dietary considerations for Rice Krispies Brains?
Absolutely! These treats are vegetarian, but if you have dietary restrictions, always check the labels of your rice cereal and marshmallows for allergens. If you need gluten-free options, there are gluten-free rice cereal varieties available. Additionally, remember to consider any food coloring alternatives if allergies are a concern, opting for natural options like beet juice or raspberry puree.
Can I change the color of my Rice Krispies Brains?
Of course! Feel free to experiment with different food colors to match your Halloween theme or create fun variations for different occasions. Instead of red, try green for a zombie look or purple for a witchy flair! Just be mindful to mix until you reach your desired hue for that perfect spooky effect.
Rice Krispies Brains: Creepy Treats for Halloween Fun
Ingredients
Equipment
Method
- Start by lining a large baking sheet with parchment paper or a silicone mat to prevent sticking.
- In your large mixing bowl, pour in the Rice Krispies.
- In a medium saucepan, melt 4 tablespoons of unsalted butter over low heat. Stir in 10 ounces of mini marshmallows until melted and smooth.
- Remove from heat and add a few drops of red food coloring, stirring well.
- Pour the marshmallow mixture over the Rice Krispies and stir continuously until all cereal is coated.
- Using an ice cream scoop, portion out the mixture onto the prepared baking sheet and shape each into a brain form.
- Create indents on top of each mold with a butter knife for texture.
- Allow the Rice Krispies Brains to cool for at least 30 minutes.
- Serve immediately or store in an airtight container at room temperature.
Leave a Reply