
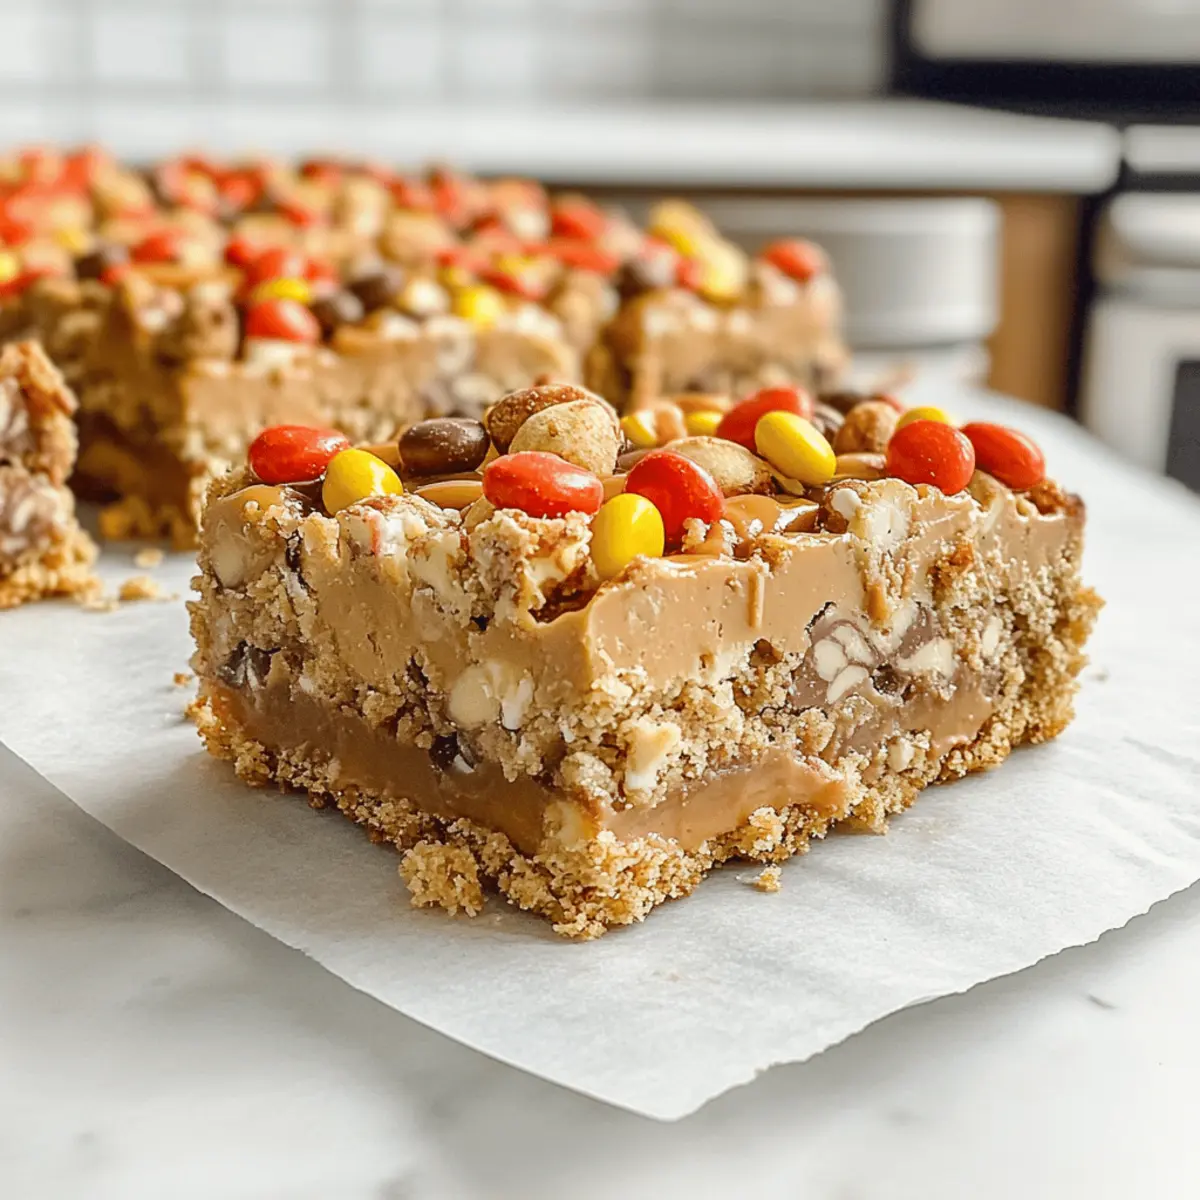
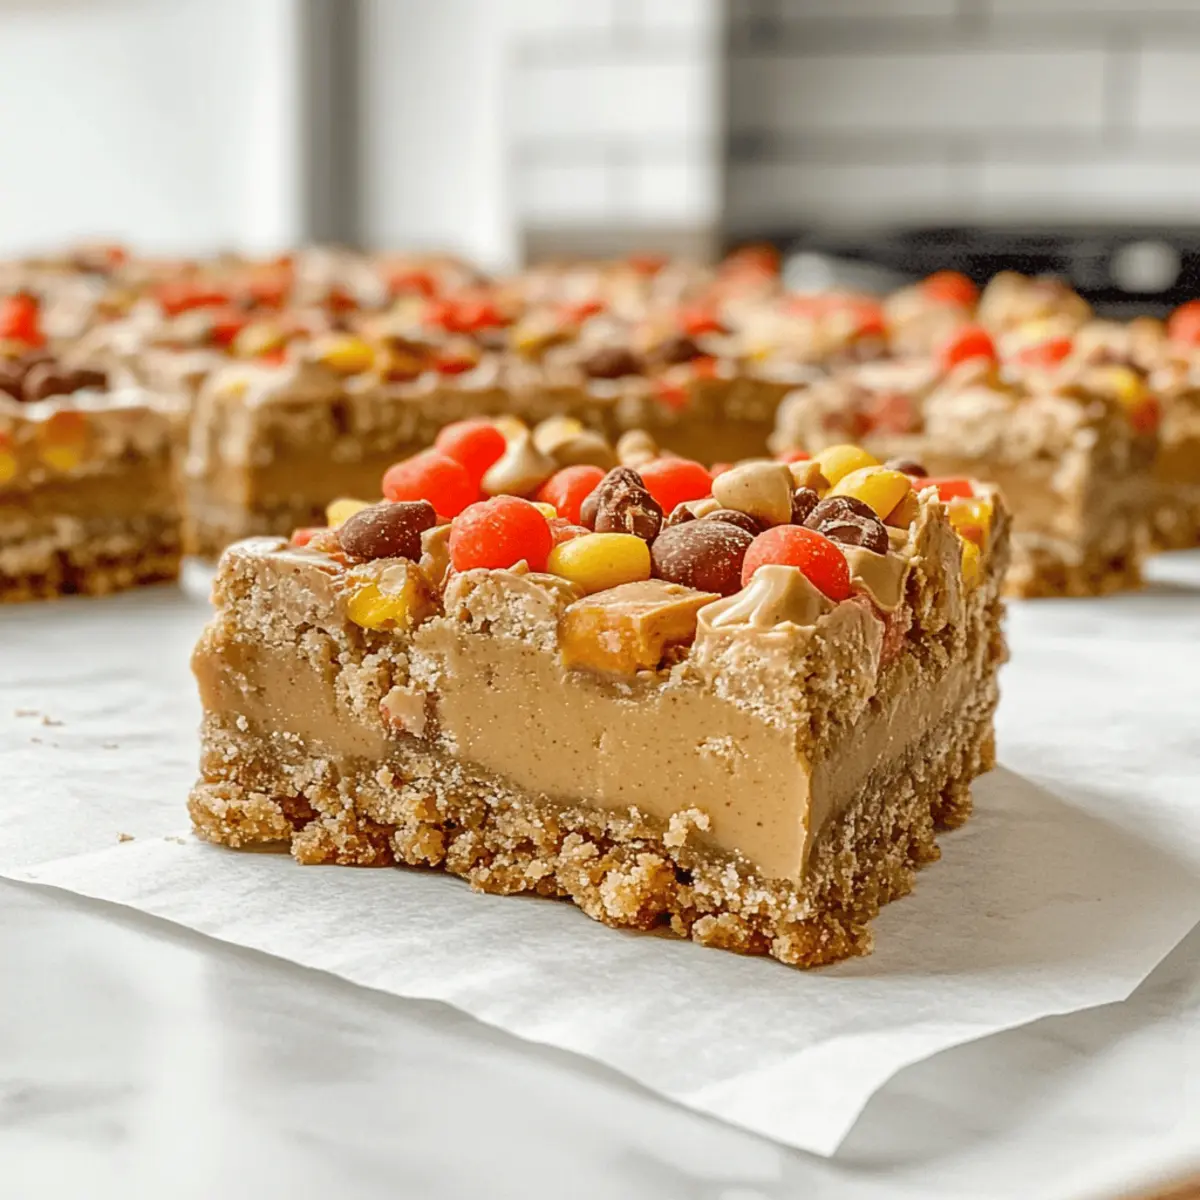
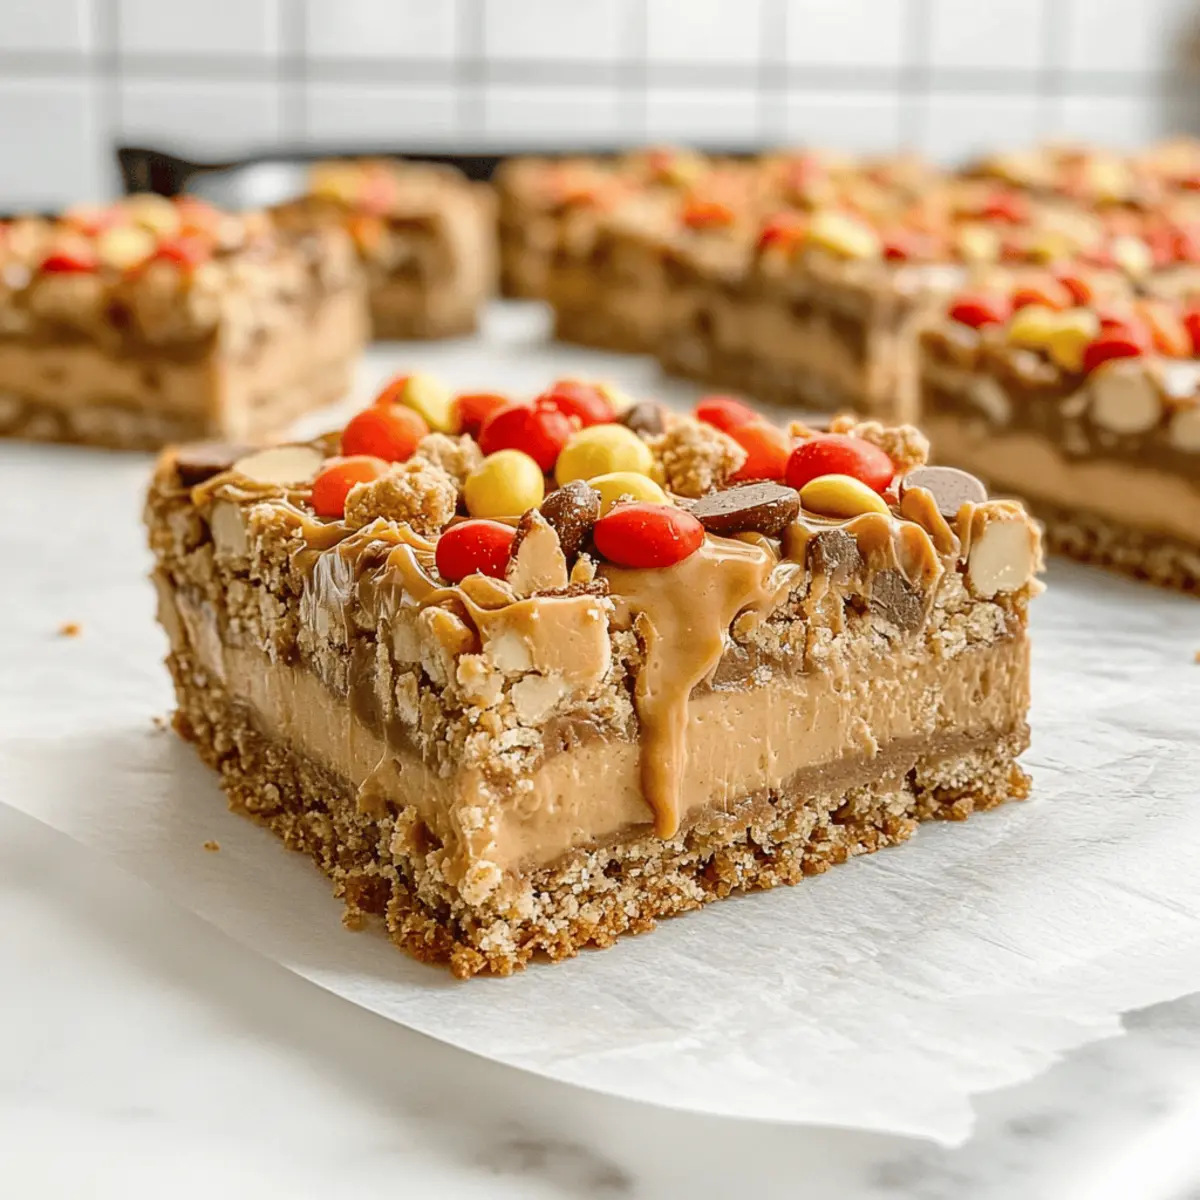
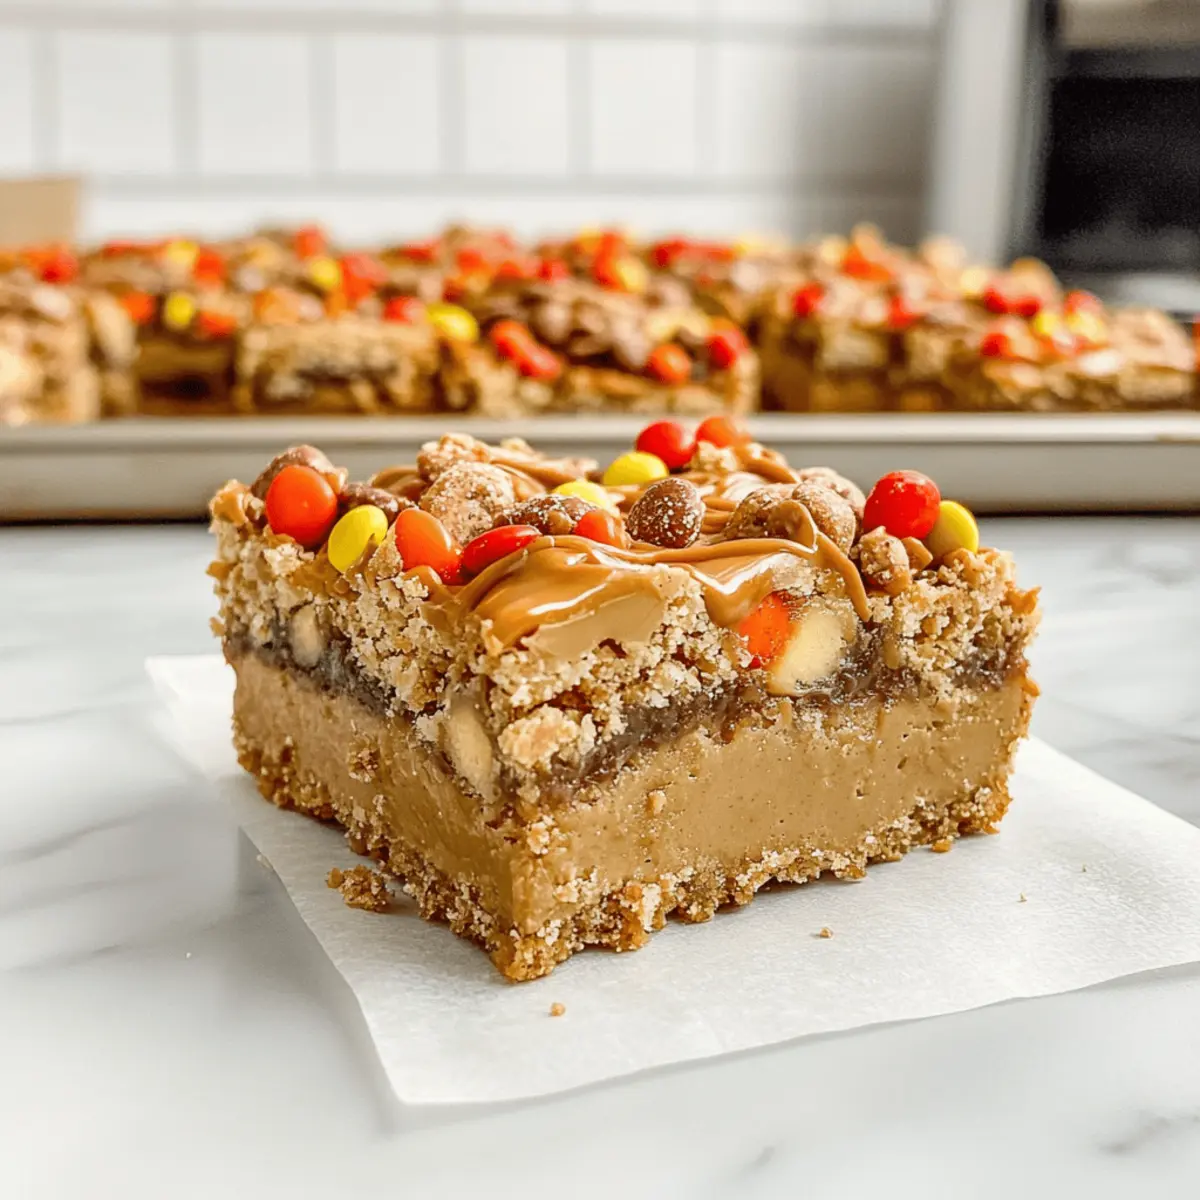
“Did you hear what Lisa made for the potluck?” Just like that, a single question ignited my curiosity and whetted my appetite for something truly delightful. Today, I’m excited to share a recipe that guarantees the same kind of buzz—a homemade treat that will have everyone asking for seconds: The BEST Nutter Butter Bars! These bars are a dream come true for peanut butter lovers, boasting a buttery cookie crust layered with a creamy filling made from sweetened condensed milk and a generous drizzle of peanut butter. The best part? They’re quick to whip up and perfect for any occasion, whether you’re hosting a gathering or simply indulging in a comforting snack. Intrigued yet? Let’s dive into the sweet world of these decadent bars together!
Why Are These Nutter Butter Bars Irresistible?
Deliciously Decadent: Each bite offers a rich peanut butter flavor that is simply addictive, perfect for satisfying your sweet tooth.
Effortless Preparation: With just a few simple steps, you can whip up these delightful bars in no time, making them an ideal choice for busy bakers.
Crowd-Pleasing Treat: Whether at a potluck or just a family gathering, these bars are sure to steal the show and have everyone begging for the recipe.
Versatile Enjoyment: Pair them with a chilled glass of milk or a scoop of vanilla ice cream, and you’re in for an ultimate treat experience.
Uniquely Textured: The combination of chewy filling, buttery crust, and crunchy toppings creates an irresistible contrast that you won’t find in store-bought options.
If you’re intrigued, check out my Bowl Peanut Butter Cup Dump Cake for another peanut butter delight if you’re looking for variety!
The BEST Nutter Butter Bars Ingredients
For the Crust
- Nutter Butter cookies – The base for the crust that provides a unique peanut butter flavor; substitute with similar sandwich cookies if needed.
- Melted butter – Binds the crust together and adds richness; margarine can be used as a dairy-free alternative.
- Brown sugar – Adds sweetness and moisture, enhancing the flavor depth; white sugar works in a pinch.
- Salt – Balances sweetness and enhances flavors; flaky sea salt is preferable for texture.
For the Filling
- Sweetened condensed milk – Ensures creaminess in the filling; swap with coconut milk for a non-dairy version, but expect texture changes.
- Creamy peanut butter – The star of the filling, ensuring rich flavor; natural peanut butter can be a healthier option.
For the Toppings
- Peanut butter chips – Adds texture and additional flavor; consider swapping half for chocolate chips or white chocolate chips.
- Roasted peanuts – Provides a delightful crunch; feel free to substitute with almonds or walnuts.
- Chopped Nutter Butters – Enhances the texture when added to the topping; additional peanut butter cookies can work as substitutes.
- Reese’s Pieces – Optional but recommended for an extra sweet crunch that enhances the peanut butter flavor; use chocolate candies if preferred.
- Flaky sea salt – An optional garnish to accentuate flavors; coarse sea salt is a suitable alternative.
Embrace the joy of making The BEST Nutter Butter Bars, and let your kitchen fill with the heavenly aroma of peanut butter bliss!
Step‑by‑Step Instructions for The BEST Nutter Butter Bars
Step 1: Preheat & Prepare Pan
Begin by preheating your oven to 350°F (175°C). While the oven warms, line a 9×13-inch baking pan with parchment paper, allowing the edges to hang over for easy removal later. This will help ensure your Nutter Butter Bars come out perfectly without sticking to the pan.
Step 2: Make the Crust
Crush 32 Nutter Butter cookies into fine crumbs using a food processor or a rolling pin. In a mixing bowl, combine the cookie crumbs with brown sugar and a pinch of salt, then drizzle in the melted butter. Mix thoroughly until the crumbs are well coated, then press this mixture firmly into the bottom of the prepared pan to form a solid crust.
Step 3: Prepare the Filling
In a microwave-safe bowl, melt ¼ cup of creamy peanut butter for about 20-30 seconds until just soft. Stir in a can of sweetened condensed milk until smooth and well combined. The filling should be rich and creamy, ready to add a delicious layer on top of your crust in the next step.
Step 4: Assemble Bars
Sprinkle peanut butter chips and roasted peanuts evenly over the pressed crust. Carefully pour the rich peanut butter filling on top, spreading it out to create an even layer. To finish, add chopped Nutter Butters and Reese’s Pieces on top, gently pressing them into the filling to ensure an even distribution for each bite of The BEST Nutter Butter Bars.
Step 5: Bake
Place your assembled bars in the preheated oven and bake for 30-35 minutes. Keep an eye out for the edges turning golden brown, which signals they are nearly done. Once baked, remove the pan from the oven and set it on a wire rack to cool completely, allowing the filling to set perfectly.
Step 6: Finish & Serve
After cooling, drizzle any remaining melted peanut butter over the top of the bars for an extra treat. Cut into squares or bars, and enjoy the delightful blend of flavors and textures that make The BEST Nutter Butter Bars irresistible. Serve them fresh or chill in the refrigerator for a firmer texture.
The BEST Nutter Butter Bars Variations
Make these Nutter Butter Bars your own by exploring exciting variations that will tickle your taste buds and warm your heart!
- Nut-Free: Swap peanut butter for sunbutter to create a deliciously safe nut-free alternative, perfect for school events or gatherings.
- Dairy-Free: Use coconut cream instead of sweetened condensed milk and swap butter with margarine for a fully dairy-free delight.
- Chocolate Boost: Incorporate dark chocolate chips in place of peanut butter chips to elevate the flavor and satisfy chocolate cravings.
- Crunchy Twist: Add some crushed pretzels to the topping for a salty crunch that beautifully contrasts the sweet peanut butter filling.
- Banana Flavor: Mix in pureed banana into the filling for a fruity twist that adds natural sweetness and moisture.
- Spicy Kick: For a little heat, sprinkle cayenne pepper or chili powder into the butter drizzle before pouring it over the bars.
- Protein Power: Blend protein powder into the peanut butter filling to create a more filling, nutritious option that’s great for an afternoon snack.
- Different Nuts: Try replacing roasted peanuts with a combination of chopped pecans and walnuts for a new texture and flavor experience.
These delightful variations will keep your Nutter Butter Bars exciting and are perfect for your next gathering or cozy night in! If you’re a peanut butter lover, don’t forget to check out my Homemade Butter Chicken for another delicious adventure!
Storage Tips for The BEST Nutter Butter Bars
Room Temperature: Store your Nutter Butter Bars in an airtight container at room temperature for up to 1 week. This keeps them soft and chewy, ready to delight your taste buds anytime.
Fridge: For longer freshness, keep the bars in the refrigerator, where they can last up to 2 weeks. Just be sure to wrap them or keep them in an airtight container to maintain taste and texture.
Freezer: If you want to extend their life even further, freeze the bars for up to 3 months. Wrap them tightly in plastic wrap and then in aluminum foil. Thaw overnight in the fridge before serving.
Reheating: Enjoy your Nutter Butter Bars at room temperature; however, if you prefer them warm, pop them in the microwave for about 10-15 seconds for that delightful gooey texture!
What to Serve with The BEST Nutter Butter Bars
Indulge in a delightful pairing that enhances the creamy, crunchy bliss of your Nutter Butter Bars and elevates your dessert experience.
-
Cold Glass of Milk: The classic pairing, a cold glass of whole milk beautifully complements the rich peanut butter flavor, balancing sweetness with creamy smoothness.
-
Vanilla Ice Cream: A scoop of creamy vanilla ice cream adds a luscious contrast to the chewy bars, creating an irresistible dessert combo that melts in your mouth.
-
Fresh Strawberries: The sweetness and slight tartness of fresh strawberries provide a refreshing contrast, cutting through the richness of the bars and adding a vibrant splash of color.
-
Chocolate Drizzle: Enhance the peanut butter flavor with a warm chocolate drizzle on top, adding a luxurious touch that chocolate lovers won’t be able to resist.
-
Coffee: A rich, brewed coffee or an espresso pairs wonderfully, the slightly bitter notes balancing the sweetness while adding warmth and depth to your dessert experience.
-
Caramel Sauce: Drizzle warm caramel sauce over each square for a touch of decadence; its buttery notes meld beautifully with the nutty flavors, creating a dessert lover’s dream.
-
Chopped Nuts and Whipped Cream: Serve with a dollop of fluffy whipped cream topped with crushed nuts to add crunch and a light touch, making for a delightful texture contrast with your bars.
-
Chai Latte: Enjoy these bars with a spiced chai latte, where the warm spices create a cozy atmosphere, enhancing the comfort of every peanut buttery bite.
Savor these delightful pairings while enjoying your delicious homemade treat!
Expert Tips for The BEST Nutter Butter Bars
-
Crust Consistency: Ensure your Nutter Butter crumbs are finely crushed to create a cohesive crust. A food processor is ideal for this task.
-
Pressing Firmly: Prevent a crumbling crust by pressing the mixture firmly into the pan. Use a flat-bottomed measuring cup to get even pressure.
-
Cooling Time: Allow the bars to cool completely before cutting. This ensures cleaner edges and a beautiful presentation for The BEST Nutter Butter Bars.
-
Adjust Toppings: Feel free to customize your toppings! Swapping in chocolate chips or using your favorite nut can give a personal twist to the recipe.
-
Storage Savvy: Keep your Nutter Butter Bars fresh by storing them in an airtight container. They’ll last up to a week at room temperature or longer in the fridge.
Make Ahead Options
These delicious Nutter Butter Bars are perfect for meal prep enthusiasts! You can make the crust and filling up to 24 hours in advance, allowing you to save time on busy days. Simply prepare the crust by crushing 32 Nutter Butter cookies and mixing them with brown sugar and melted butter, then press it into your baking pan. For the filling, melt the peanut butter and mix it with sweetened condensed milk; cover and refrigerate the filling separately to maintain its creamy texture. When you’re ready to serve, just layer the filling over the crust, add your toppings, and bake. These bars will be just as delicious and satisfying, keeping your peanut butter cravings at bay!
The BEST Nutter Butter Bars Recipe FAQs
How do I choose ripe ingredients for The BEST Nutter Butter Bars?
Absolutely! When it comes to selecting ingredients like peanut butter, opt for a creamy variety without added sugars or oils to ensure rich flavor. For Nutter Butter cookies, look for packages without any visible damage or dark spots, indicating spoilage.
How do I store The BEST Nutter Butter Bars?
To keep your bars fresh, store them in an airtight container at room temperature for up to 1 week for the best chewy texture. If you prefer longer storage, place them in the refrigerator where they can last up to 2 weeks. Just remember to wrap them well or utilize a sealed container.
Can I freeze The BEST Nutter Butter Bars?
Yes, indeed! To freeze these delightful bars, first, let them cool completely. Then, wrap each bar individually in plastic wrap and place them in a freezer-safe bag. They can be stored for up to 3 months. When you’re ready to enjoy, just take them out and thaw overnight in the fridge before serving.
What should I do if my crust crumbles?
If your crust crumbles, don’t worry! It’s important to ensure that the Nutter Butter crumbs are finely crushed and well-mixed with melted butter. When pressing the crust into the pan, use a flat-bottomed measuring cup to apply even pressure. If it still doesn’t hold together, try adding a bit more melted butter until it sticks together better.
Are The BEST Nutter Butter Bars safe for those with allergies?
While these bars are a delightful treat, they do contain peanuts and gluten, so they may not be suitable for those with peanut allergies or gluten sensitivities. If you need to adjust for allergies, consider using gluten-free sandwich cookies and almond or sunbutter instead of peanut butter.
How can I ensure my Nutter Butter Bars turn out perfectly?
To ensure perfect bars, make sure all ingredients are at room temperature before mixing, as this creates a smoother filling. Follow the baking time closely and look for golden edges. After cooling, allowing the bars to chill in the fridge will help them set and make cutting easier, ensuring you get beautiful squares every time.
The BEST Nutter Butter Bars You'll Crave Again and Again
Ingredients
Equipment
Method
- Preheat your oven to 350°F (175°C) and line a 9x13-inch baking pan with parchment paper.
- Crush 32 Nutter Butter cookies into fine crumbs and mix with brown sugar and salt. Add melted butter and press firmly into the bottom of the pan to form the crust.
- Melt ¼ cup of creamy peanut butter in a microwave-safe bowl for 20-30 seconds. Stir in sweetened condensed milk until smooth and pour over the crust.
- Sprinkle peanut butter chips and roasted peanuts on the crust, then pour the peanut butter filling on top, spreading evenly.
- Bake for 30-35 minutes until edges are golden brown, then cool on a wire rack.
- Drizzle melted peanut butter over the cooled bars. Cut into squares and serve.
Leave a Reply