
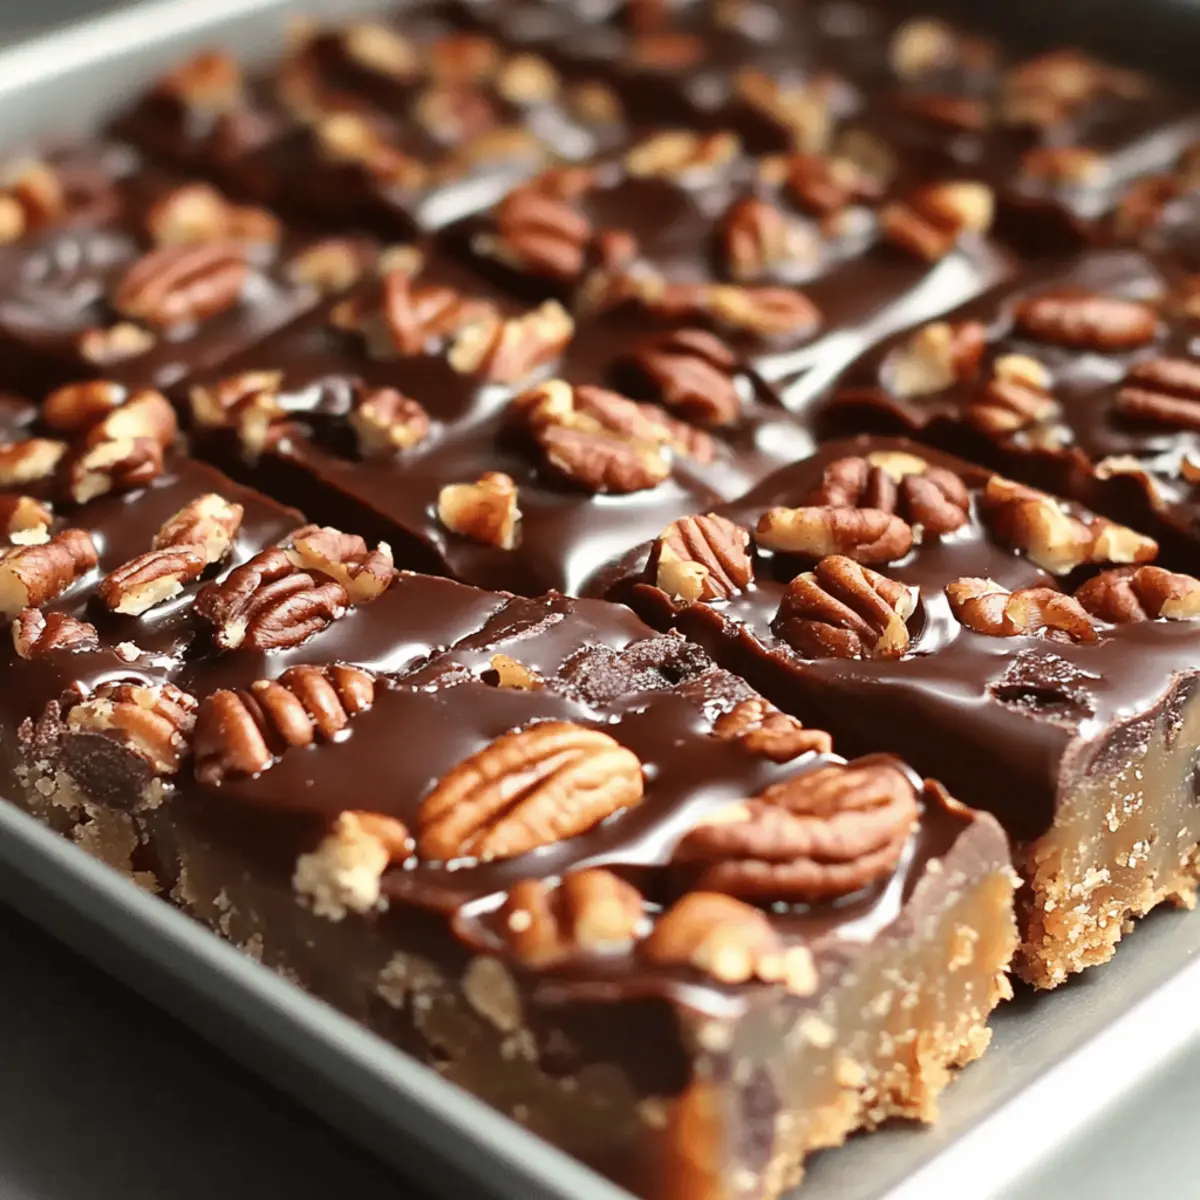
As I stood in my kitchen, the heavenly aroma of melting chocolate and caramel wafted through the air, instantly transporting me to my childhood candy shop. Let me tell you, these Easy Turtle Bars are not just a dessert; they’re a delightful journey of flavor that masterfully combines rich chocolate, gooey caramel, and crunchy pecans. This simple dessert is an absolute crowd-pleaser, perfect for gatherings or just a cozy night in. With their quick prep time, you’ll be able to whip up a batch even on your busiest days. Trust me, once you’ve taken that first bite, you’ll wonder how you ever lived without this indulgent treat in your life! Are you ready to dive into this sweet adventure?
Why Are These Turtle Bars So Irresistible?
Simplicity: With just a few basic ingredients, you can create a dessert that looks and tastes gourmet. Crowd-Pleaser: Perfect for parties or quiet evenings, these Turtle Bars guarantee smiles from all who taste them. Indulgent Flavor: The rich blend of caramel, chocolate, and pecans offers a decadent experience. Quick Prep: Ready in about an hour, they’re an easy option for a busy lifestyle. Versatile: Swap pecans for walnuts or almonds to vary the flavor and keep things exciting! For more delightful ideas, don’t miss my Brown Butter Bars. Dive in and make these Turtle Bars an unforgettable treat!
Turtle Bars Ingredients
Unlock the secrets to these irresistible bars with just a few simple ingredients!
For the Crust
- Butter – Provides richness and helps form the crust; use cold for the flakiest texture.
- Brown Sugar – Adds sweetness and contributes to the caramel effect; can substitute with coconut sugar for a lower glycemic index.
- All-Purpose Flour – Forms the structure of the crust; gluten-free flour may be used as an alternative.
For the Topping
- Pecans – Offers crunch and flavor; feel free to use walnuts or almonds for a delightful twist.
- Caramel Sauce – The gooey layer that ties the components together; store-bought can be used for convenience.
- Chocolate Chips – Adds a smooth, sweet topping; dark chocolate is a great substitute for a richer taste.
- Salt – Enhances overall flavor and balances sweetness.
With these key ingredients, you’ll create Turtle Bars that are sure to impress family and friends!
Step‑by‑Step Instructions for Turtle Bars
Step 1: Crust Preparation
Preheat your oven to 350°F (175°C) and grease an 8×8 inch baking pan with butter or cooking spray. In a mixing bowl, combine cold butter, brown sugar, and all-purpose flour. Mix until the mixture resembles coarse crumbs. Press this crust mixture evenly into the bottom of the prepared baking pan to create a firm base for your Turtle Bars.
Step 2: Bake the Crust
Place the crust in the preheated oven and bake for about 15 minutes, or until it turns lightly golden at the edges. Keep an eye on it, as you want that beautiful golden hue but not overcooked. Once baked, remove the pan from the oven and let it cool slightly while you prepare the next delicious layer.
Step 3: Add the Caramel Layer
Carefully pour the caramel sauce over the slightly cooled crust, ensuring it is evenly distributed across the surface. Use a spatula to spread it out smoothly. Then, sprinkle the pecans generously over the caramel layer. This combination will provide a delightful crunch and savory flavor that perfectly complements the sweet Turtle Bars.
Step 4: Melt and Spread the Chocolate
In a microwave-safe bowl, melt the chocolate chips in 30-second increments, stirring between each session until smooth and glossy. Once melted, pour the chocolate over the caramel-pecan layer. Using a spatula, spread the chocolate evenly, creating a silky top for your Turtle Bars that enhances their decadent appearance.
Step 5: Cooling Time
Allow the Turtle Bars to cool completely at room temperature. This step is essential for setting the layers so they cut neatly later. You can expedite the cooling process by placing the pan in the refrigerator once it reaches room temperature, ensuring a gooey yet firm treat once you’re ready to slice and serve.
Turtle Bars Variations & Substitutions
Feel free to put your own spin on these Turtle Bars; your creativity is the secret ingredient!
-
Nut Variations: Substitute pecans with walnuts or almonds for a different flavor. Each nut brings its own unique taste and crunch, giving you plenty of options to keep your Turtle Bars exciting!
-
Chocolate Twist: Experiment with milk, dark, or white chocolate chips for varied sweetness and depth. Dark chocolate offers a slightly richer flavor, while milk chocolate can create a creamier, sweeter topping!
-
Flavor Boost: Add a pinch of sea salt or a sprinkle of flaky salt on top. This simple addition enhances the overall flavor profile, balancing the sweetness beautifully and adding a gourmet touch.
-
Caramel Alternative: Use homemade caramel sauce instead of store-bought for a personal touch. Making caramel from scratch can elevate these bars to a whole new level of indulgence.
-
Gluten-Free Option: Substitute all-purpose flour with a gluten-free blend. This allows everyone to enjoy the deliciousness without compromising on taste or texture!
-
Add a Kick: For those who enjoy heat, mix in a dash of cayenne pepper or sprinkle crushed red pepper flakes into the chocolate layer. It provides a surprising yet delightful contrast to the sweetness.
-
Vegan Version: Swap butter for vegan butter and chocolate chips for dairy-free alternatives. It’s an easy way to make these bars accessible for your plant-based friends.
-
Mini Bars: For bite-sized fun, make Turtle Bar bites by pressing the crust into mini muffin tins. They’re perfect for parties or an adorable treat to share with friends!
Feel free to explore and make these Turtle Bars truly yours! If you’re in the mood for more sweet adventures, don’t forget to try my Brown Butter Bars—a delightful addition to your baking repertoire!
What to Serve with Easy Turtle Bars
Indulging in the rich, gooey goodness of Turtle Bars is just the beginning; let’s build your perfect dessert spread!
- Vanilla Ice Cream: A scoop of creamy vanilla ice cream balances the sweetness, offering a delightful contrast in temperatures and textures.
- Fresh Berries: Juicy strawberries or raspberries add a refreshing burst, complementing the rich flavors and cleansing the palate beautifully.
- Coffee: A robust cup of coffee or espresso enhances the chocolate and caramel experiences, making every bite feel like a special occasion.
- Whipped Cream: Light and airy whipped cream provides a perfect topping, adding a fluffy, silky texture that elevates the decedent Turtle Bars.
- Chocolate Sauce: Drizzling extra chocolate sauce over the top amplifies the decadence for those who can’t get enough of that sweet chocolaty goodness.
- Nutty Cookies: Serve alongside a platter of almond or pecan cookies; the nutty flavors harmonize wonderfully with the pecans in the Turtle Bars.
- Milk: An ice-cold glass of milk is the classic pairing, soothing the rich flavors while enhancing the cookie bar’s nostalgic appeal.
With these delightful pairings, your Turtle Bars will transform into an unforgettable dessert experience that’ll leave everyone wanting more!
Make Ahead Options
These Easy Turtle Bars are a dream come true for busy home cooks looking to save time without sacrificing flavor! You can prepare the crust up to 24 hours in advance—just bake it, let it cool completely, and store it in an airtight container. Additionally, you can also make the caramel layer ahead of time and refrigerate it for up to 3 days, ensuring it remains gooey when you’re ready to assemble. To finish, simply reheat the caramel slightly for easy spreading, then layer it over the crust, sprinkle on the pecans, add the melted chocolate, and let it cool before cutting. This way, you’ll have a delightful dessert ready to impress your guests with minimal effort!
How to Store and Freeze Turtle Bars
Room Temperature: Store Turtle Bars in an airtight container at room temperature for up to one week for optimal freshness.
Fridge: If you prefer a firmer texture, keep the bars in the fridge. They can last up to 2 weeks, but bring them to room temperature before enjoying.
Freezer: For longer storage, freeze the Turtle Bars wrapped tightly in plastic wrap and stored in an airtight container. They will maintain their delicious flavor for up to 3 months.
Reheating: When ready to indulge, thaw your frozen Turtle Bars in the fridge overnight and enjoy them as is, or pop them in the microwave for a few seconds for that warm, gooey feeling.
Expert Tips for Perfect Turtle Bars
- Use Cold Butter: Ensuring your butter is cold helps achieve the perfect crumbly crust, enhancing texture and flavor in your Turtle Bars.
- Monitor Baking Time: Keep an eye on the crust during baking; pulling it out as soon as it turns golden will prevent a dry base.
- Caramel Consistency: If using homemade caramel, stir it continuously while cooking to avoid burning and ensure a smooth layer.
- Let Chocolate Cool: Allow melted chocolate to cool slightly before spreading to achieve a silky layer that won’t mix with the caramel.
- Cut with Care: To get clean, beautiful slices of Turtle Bars, make sure they’re completely cooled before cutting them into squares.

Easy Turtle Bars Recipe FAQs
What type of pecans should I use for Turtle Bars?
Absolutely! I recommend using fresh, unsalted pecans for maximum flavor and crunch. If you’re in the mood for variety, walnuts or almonds can also offer a delightful twist! Just make sure they’re roughly chopped to evenly distribute throughout the bars.
How should I store leftover Turtle Bars?
To keep your Turtle Bars fresh, store them in an airtight container at room temperature for up to one week. If you prefer them chilled, you can refrigerate them for up to two weeks. Just let them sit out a bit before enjoying for the best taste!
Can I freeze Turtle Bars?
Yes, the more the merrier! To freeze your Turtle Bars, wrap them tightly in plastic wrap and place them in an airtight container. They will stay delicious in the freezer for up to three months. When you’re ready to indulge, simply thaw them in the fridge overnight or warm them up briefly in the microwave.
What should I do if my caramel sauce is too thick?
Very common! If your caramel is super thick, you can gently reheat it in a saucepan over low heat, adding a splash of cream or water to loosen it up. Stir constantly until you reach your desired consistency, and it’ll spread beautifully over your crust!
Are Turtle Bars safe for people with nut allergies?
Unfortunately, no. Since pecans are a key ingredient in Turtle Bars, they are not suitable for anyone with nut allergies. However, for a nut-free version, consider using a graham cracker or cookie crust topped with caramel and chocolate without nuts for a similar sweet treat!
What if my chocolate layer is not smooth?
If your chocolate layer turns out uneven, it’s usually because it cooled too much before being spread. Try letting the melted chocolate sit for a minute, then reheat it briefly in the microwave at 10-second intervals until it’s nice and silky again. Alternatively, you can drizzle it on top for a rustic look!
Decadent Turtle Bars That Will Wow Your Guests
Ingredients
Equipment
Method
- Preheat your oven to 350°F (175°C) and grease an 8x8 inch baking pan with butter or cooking spray. In a mixing bowl, combine cold butter, brown sugar, and all-purpose flour. Mix until the mixture resembles coarse crumbs. Press this crust mixture evenly into the bottom of the prepared baking pan.
- Bake for about 15 minutes, or until the crust turns lightly golden at the edges. Remove the pan from the oven and let it cool slightly.
- Carefully pour the caramel sauce over the slightly cooled crust and spread it out smoothly. Sprinkle the pecans generously over the caramel layer.
- In a microwave-safe bowl, melt the chocolate chips in 30-second increments until smooth. Pour the melted chocolate over the caramel-pecan layer and spread evenly.
- Allow the Turtle Bars to cool completely at room temperature. You can also refrigerate once at room temperature to expedite the cooling.
Leave a Reply