
In the midst of my busy week, I found myself craving a little indulgence without the guilt. Enter the stars of the day: 4-Ingredient Crispy Chocolate Oat Cookies! These delightful morsels merge the wholesome texture of oats with the rich allure of chocolate, creating a snack that feels both comforting and satisfying. What could be better than a treat that’s not only easy to whip up but also a crowd-pleaser? With just four simple ingredients, I can have these cookies ready in no time, making them the perfect solution for those hectic afternoons or unexpected guests. Plus, they hold their own beautifully as a cozy dessert or a pick-me-up during the day. Ready to see how a few pantry staples can lead to cookie perfection? Let’s dive in!
Why Are These Cookies So Irresistible?
Simplicity, with just four ingredients, these crispy chocolate oat cookies require minimal effort and deliver maximum flavor. Heartiness comes from the oats, making each bite satisfyingly chewy while being complemented by the rich cocoa. Versatility allows you to customize them with nuts or coconut for added texture. Quick to make, perfect for whipping up a last-minute treat or snack for unexpected guests. Enjoy them warm with a glass of milk or coffee – an irresistible pairing you won’t want to miss!
Chocolate Oat Cookies Ingredients
For the Cookies
- Oats – Provide a hearty texture; use rolled oats for that chewy bite.
- Cocoa Powder – Adds deep chocolate flavor; unsweetened is best for balance.
- Honey (or Maple Syrup) – Serves as a sweetener and binder; maple syrup works as a vegan option.
- Egg – Moistens and binds ingredients; for a vegan twist, use a flax egg.
These chocolate oat cookies are not only simple but also buffed with flavor, making them a delightful treat for any occasion!
Step‑by‑Step Instructions for 4-Ingredient Crispy Chocolate Oat Cookies
Step 1: Preheat the Oven
Begin by preheating your oven to 350°F (175°C). This critical step ensures your cookies bake evenly and achieve that perfect crispy texture. While the oven warms up, gather all your ingredients to streamline the process and set yourself up for cookie-making success.
Step 2: Combine Dry Ingredients
In a large mixing bowl, add the rolled oats and unsweetened cocoa powder. Using a whisk or a fork, mix these dry ingredients thoroughly until they’re well integrated. This step is essential for achieving the flavor-packed chocolate oat cookies that balance textures and flavors perfectly, so take your time to ensure even distribution.
Step 3: Mix Wet Ingredients
In a separate bowl, whisk together the honey (or maple syrup) and egg until the mixture is smooth and well-combined. This will create a sticky binder that holds your cookie ingredients together. Make sure there are no lumps; a completely mixed wet base will help ensure your chocolate oat cookies come together beautifully.
Step 4: Combine Wet and Dry Mixtures
Slowly incorporate your wet ingredients into the dry mixture, stirring gently until fully combined. You should see a cohesive dough forming; it should be slightly sticky yet manageable. If your dough feels too wet, consider adding a touch more oats to maintain the desired cookie shape during baking.
Step 5: Shape the Cookies
Drop spoonfuls of your cookie dough onto a lined baking sheet, spacing them about two inches apart. Flatten each mound slightly with the back of a spoon to help them bake evenly. This shaping technique is key to ensuring your cookies crisp up nicely while retaining that chewy inside, delivering the best of both worlds in your chocolate oat cookies.
Step 6: Bake Until Perfect
Place the baking sheet in your preheated oven and bake the cookies for 10 to 12 minutes. Keep an eye on them; you’re looking for golden edges and a slightly set center with a glossy sheen on top. This visual cue is important for ensuring that your cookies are cooked through, yet still delightfully chewy.
Step 7: Cool and Enjoy
Once baked, remove the sheet from the oven and allow the cookies to cool on it for a few minutes. This resting time helps them firm up before transferring to a wire rack. After they’ve cooled completely, you can indulge in these scrumptious, flavor-packed chocolate oat cookies that are sure to impress family and friends alike!
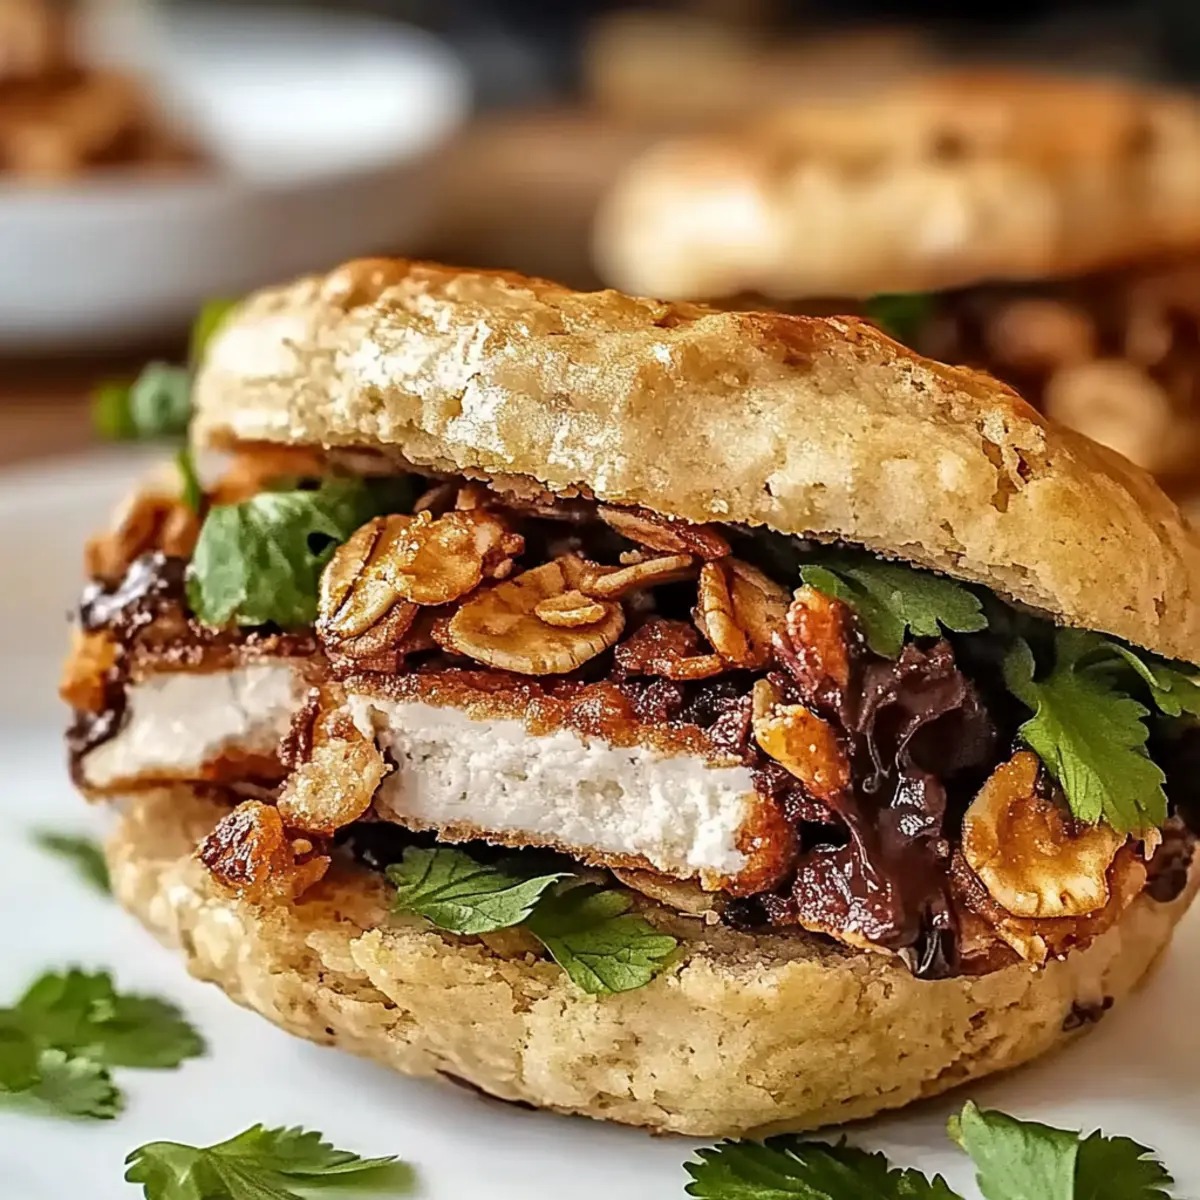
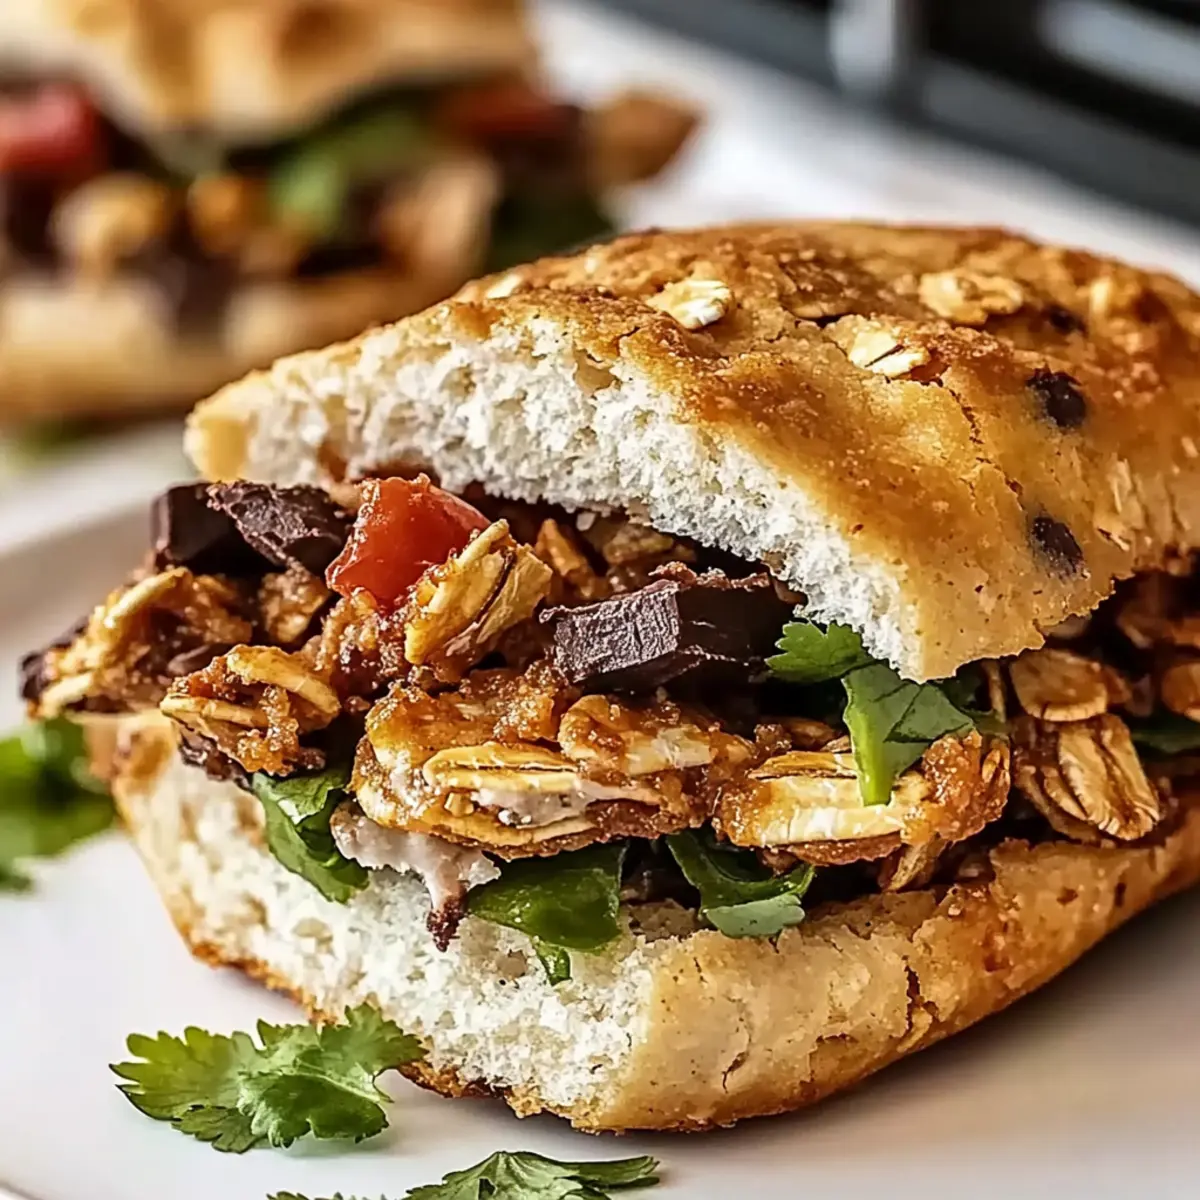
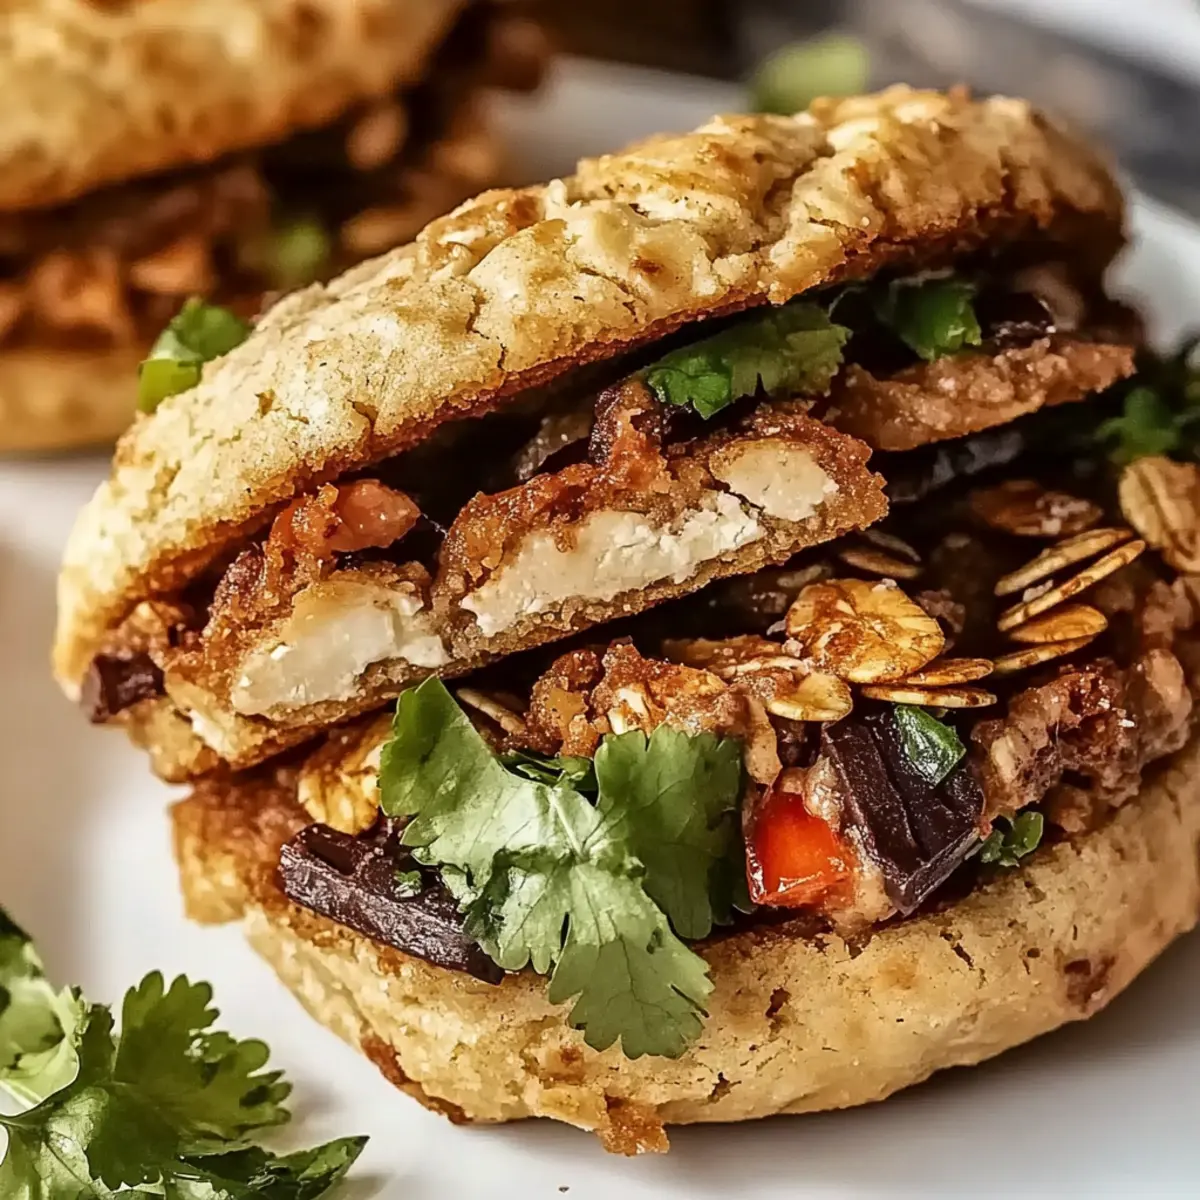
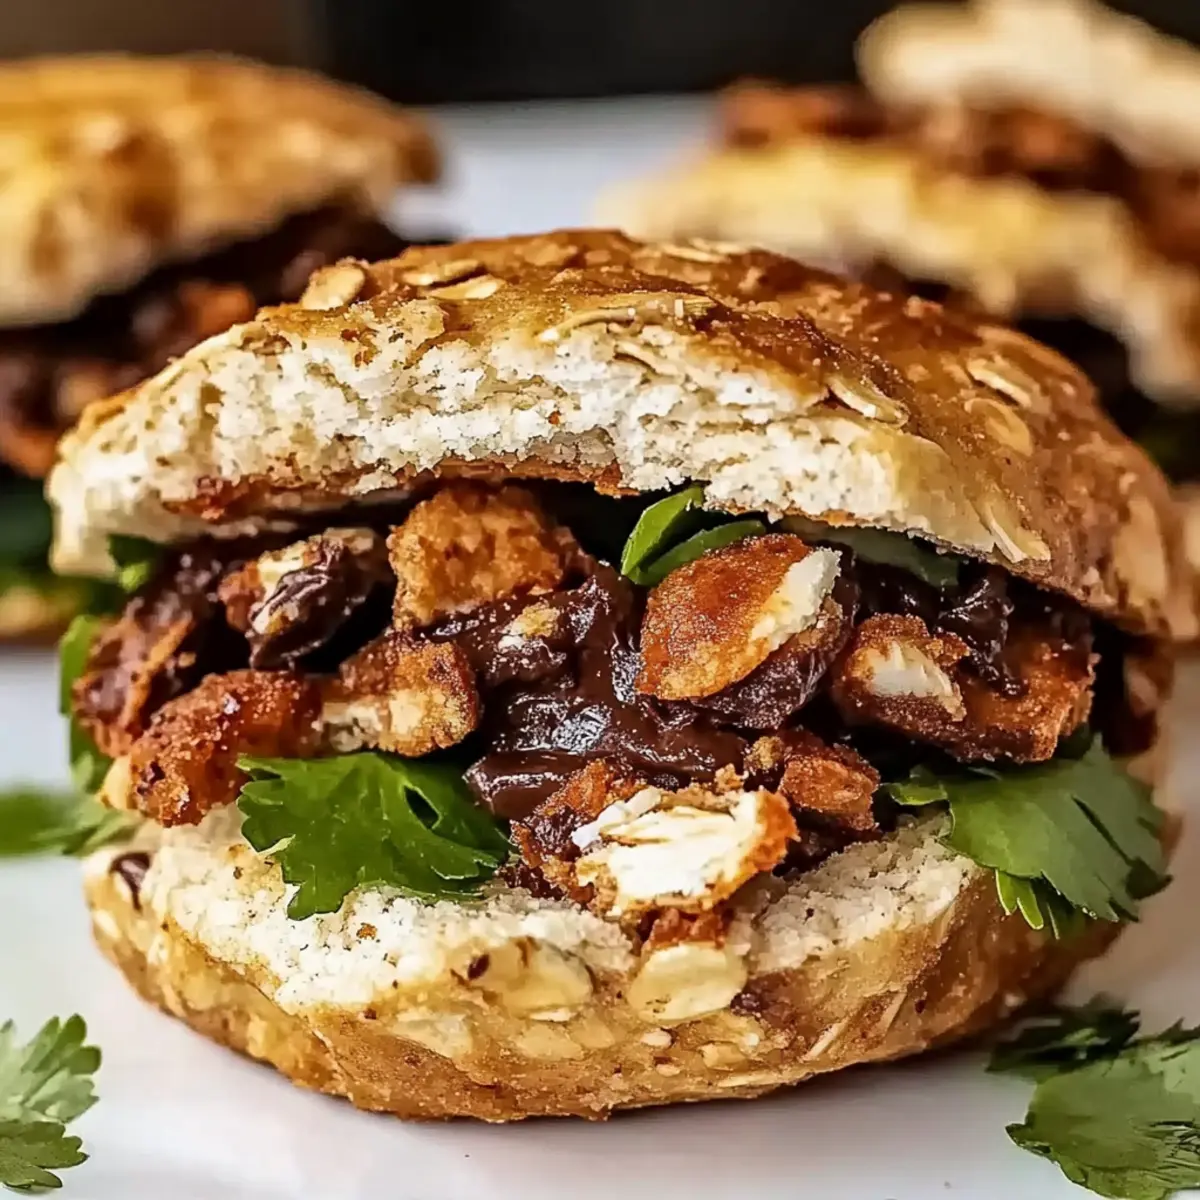
Flavor-Packed Chicken Torta Sandwich Variations
Feel free to put your twist on the classic chicken torta sandwich and create something uniquely delicious that’ll tingle your taste buds!
- Spicy Kick: Add sliced jalapeños or chipotle sauce for a zesty burst. The heat can elevate the sandwich, making each bite an adventure.
- Creamy Avocado: Swap out some mayonnaise for mashed avocado to add richness and a velvety texture. Avocado lends a delightful creaminess that complements the flavors beautifully.
- Veggie Boost: Pile on fresh veggies like lettuce, tomatoes, or radishes for a crunchy element. This will not only enhance the flavor but also add a refreshing pop of color.
- Cheese Lover’s Delight: Melt cheese such as pepper jack or queso fresco on top for an extra layer of flavor. The cheese will create a gooey, mouthwatering contrast to the savory chicken.
- Herb Infused: Mix chopped cilantro or parsley into your mayonnaise for a bright, herbaceous twist. Fresh herbs can elevate the entire dish, making it vibrant and aromatic.
- Sweetness: Include caramelized onions for a sweet and savory combo. The sweetness of the onions pairs perfectly with the boldness of the chicken, creating a symphony of flavors.
- Gluten-Free Option: Use gluten-free bread or lettuce wraps to cater to dietary needs without sacrificing flavor. This swap ensures everyone can join in on the deliciousness!
- Mediterranean Flair: Try adding hummus instead of mayo and topping with olives or feta for a Mediterranean-inspired twist. The creamy and tangy additions create a delightful mix with the chicken.
For an even more delicious experience, pair your chicken torta with a side of Mediterranean Chicken Tzatziki Bowls or enjoy as a savory snack alongside Honey Chicken Sandwiches. Enjoy your culinary adventures and personalize each sandwich to your heart’s desire!
Make Ahead Options
These 4-Ingredient Crispy Chocolate Oat Cookies are perfect for meal prep enthusiasts looking to save time during busy weeks! You can prepare the cookie dough up to 24 hours in advance, storing it in the refrigerator in an airtight container. If you’re really tight on time, you can also scoop the individual cookie shapes onto the baking sheet and cover them with plastic wrap, then refrigerate overnight before baking. When you’re ready to enjoy these cookies, simply preheat the oven and bake straight from the fridge, adding an extra minute or two if they are still cold. This way, the cookies will come out just as delicious and fresh as if they were made that day!
Storage Tips for Chocolate Oat Cookies
- Room Temperature: Store your chocolate oat cookies in an airtight container at room temperature for up to 1 week to keep them fresh and crunchy.
- Freezer: For longer storage, freeze cookies in a single layer, then transfer to a freezer-safe container. They’ll maintain their taste for up to 3 months.
- Reheating: To enjoy them warm later, simply pop the cookies in the oven at 350°F (175°C) for about 5 minutes, bringing back that freshly baked flavor.
- Avoiding Staleness: If storing longer, consider placing a slice of bread in the container to help retain moisture and prevent your chocolate oat cookies from becoming stale.
Expert Tips for Chocolate Oat Cookies
• Perfect Consistency: Ensure the dough is slightly sticky but not too wet to maintain the ideal shape during baking. Add more oats if necessary.
• Watch the Bake Time: Keep an eye on your cookies; they should have golden edges and a shiny center. Overbaking can lead to a dry texture.
• Cooling Matters: Allow cookies to cool on the baking sheet for a few minutes. This helps them firm up, preventing breakage during transfer.
• Ingredient Quality: Use high-quality cocoa powder for a more intense chocolate flavor, enhancing the overall taste of your chocolate oat cookies.
• Customize Your Cookies: Feel free to experiment by adding nuts or coconut flakes for extra crunch and flavor. Adjust to your personal taste!
What to Serve with 4-Ingredient Crispy Chocolate Oat Cookies
Imagine cozying up with a plate of sweet treats, perfectly balancing indulgence and wholesome goodness.
-
Fresh Berries: Bright, juicy berries add a pop of freshness that beautifully contrasts the rich chocolatey flavor, creating a delightful mouthfeel.
-
Vanilla Ice Cream: Creamy and smooth, a scoop of vanilla ice cream melts into the warm cookies, making every bite luxuriant and decadent.
-
Nut Butter Dip: A simple mix of almond or peanut butter for dipping adds a nutty richness that enhances the chocolate without overpowering it.
-
Glass of Milk: The classic pairing! A tall glass of milk brings out the cookie’s flavors while offering a nostalgic touch that everyone enjoys.
-
Herbal Tea: A warm cup of chamomile or mint tea complements the chocolate’s richness with herbal notes, creating a soothing experience for afternoon snacking.
-
Chocolate Drizzle: Extra drizzle of melted chocolate on top elevates the cookies, making them even more irresistible and visually tempting for guests.
-
Spiced Coffee: A rich, spiced coffee enhances the overall flavor profile, making each bite of your cookies feel like a luxurious treat.
-
Coconut Flakes: Tossing on some toasted coconut flakes adds texture and a hint of tropical sweetness, perfect for those craving a pop of flavor.
These serving suggestions are bound to transform your crispy chocolate oat cookies into a well-rounded dessert experience that friends and family will love!
Chocolate Oat Cookies Recipe FAQs
What type of oats should I use for these cookies?
I recommend using rolled oats for a lovely chewy texture. Quick oats can be used, but they might slightly alter the final texture of your cookies. For the best results, stick to rolled oats!
How long can I store my chocolate oat cookies?
You can store your cookies in an airtight container at room temperature for up to 1 week. For optimal freshness, they hold up well in the freezer, maintaining their delightful taste for up to 3 months if stored correctly.
Can I freeze these cookies? If so, how?
Absolutely! To freeze your chocolate oat cookies, first, let them cool completely. Then, arrange them in a single layer on a baking sheet and freeze until solid. Once frozen, transfer the cookies to a freezer-safe container or resealable bag. They’ll stay fresh and delicious for up to 3 months!
What should I do if my cookie dough is too wet?
If your dough feels overly sticky or wet, don’t fret! Simply incorporate an extra tablespoon of rolled oats into the mixture. This adjustment will help absorb any excess moisture and maintain the perfect shape during baking.
Are these cookies suitable for people with allergies?
These chocolate oat cookies can be modified for various dietary needs. For a vegan option, substitute the egg with a flax egg (1 tablespoon of flaxseed meal mixed with 2.5 tablespoons of water, let sit for 5 minutes to thicken). Always check your ingredient labels for potential allergens, especially with oats and honey or syrup.
Can I add extra ingredients to these cookies?
The more the merrier! You can easily customize your chocolate oat cookies by incorporating nuts, coconut flakes, or even chocolate chips for an extra burst of flavor. Feel free to experiment with what you have on hand for a delightful twist!
Flavor-Packed Chicken Torta Sandwich That Will Wow You
Ingredients
Equipment
Method
- Preheat your oven to 350°F (175°C).
- In a large mixing bowl, add the rolled oats and cocoa powder, mixing thoroughly.
- In a separate bowl, whisk together honey (or maple syrup) and egg until smooth.
- Slowly combine wet ingredients into the dry mixture, stirring until fully combined.
- Drop spoonfuls of cookie dough onto a lined baking sheet, spacing them apart.
- Bake the cookies for 10 to 12 minutes, looking for golden edges.
- Allow cookies to cool on the baking sheet for a few minutes before transferring.
Leave a Reply