
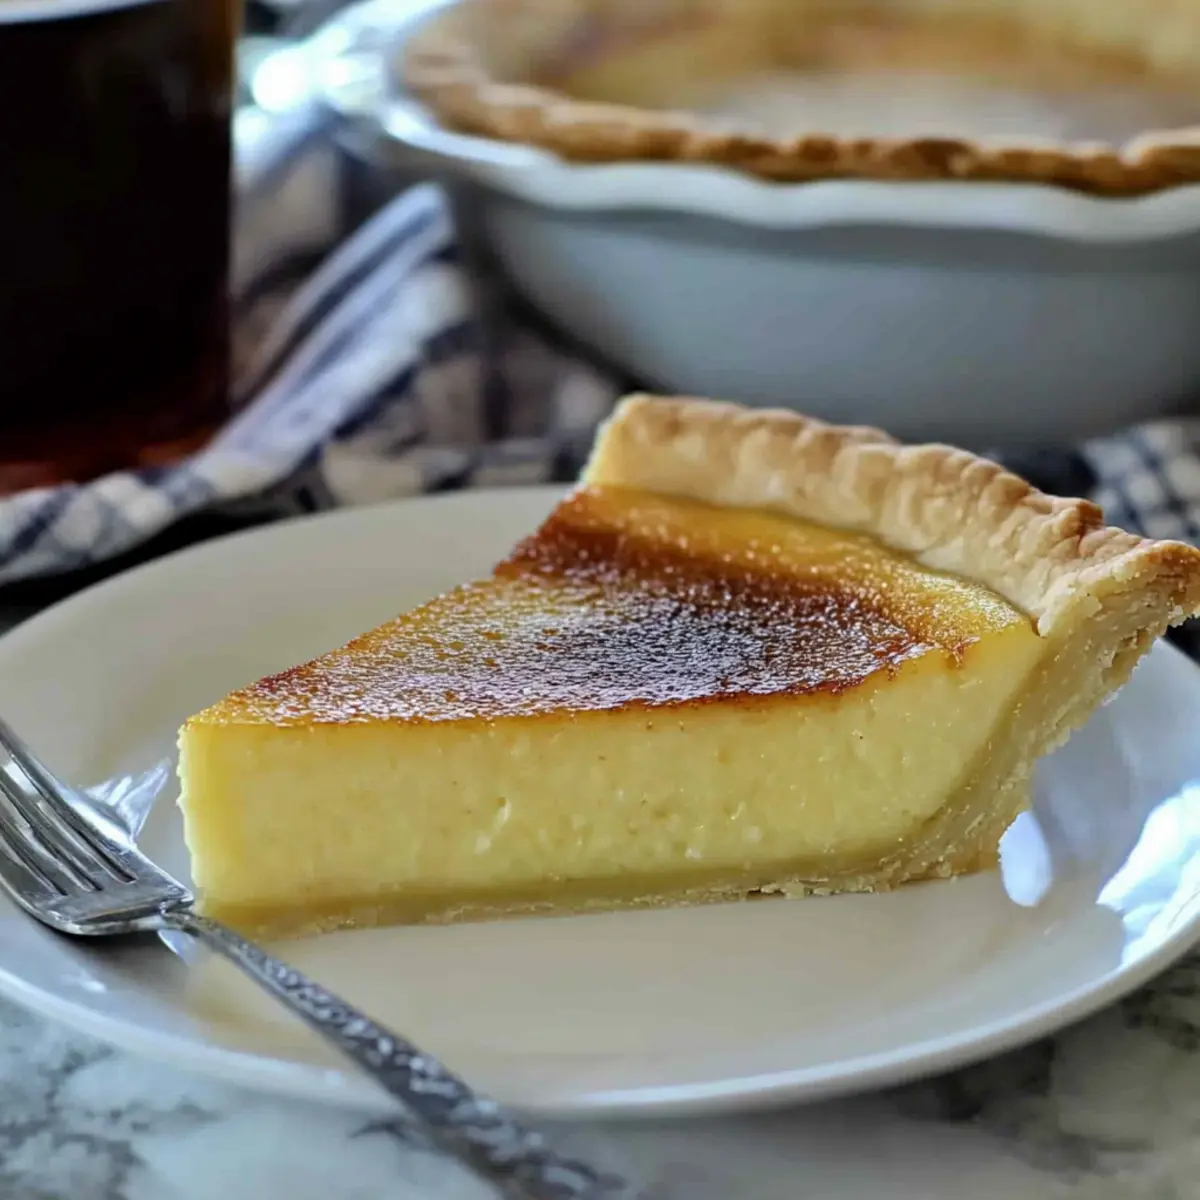
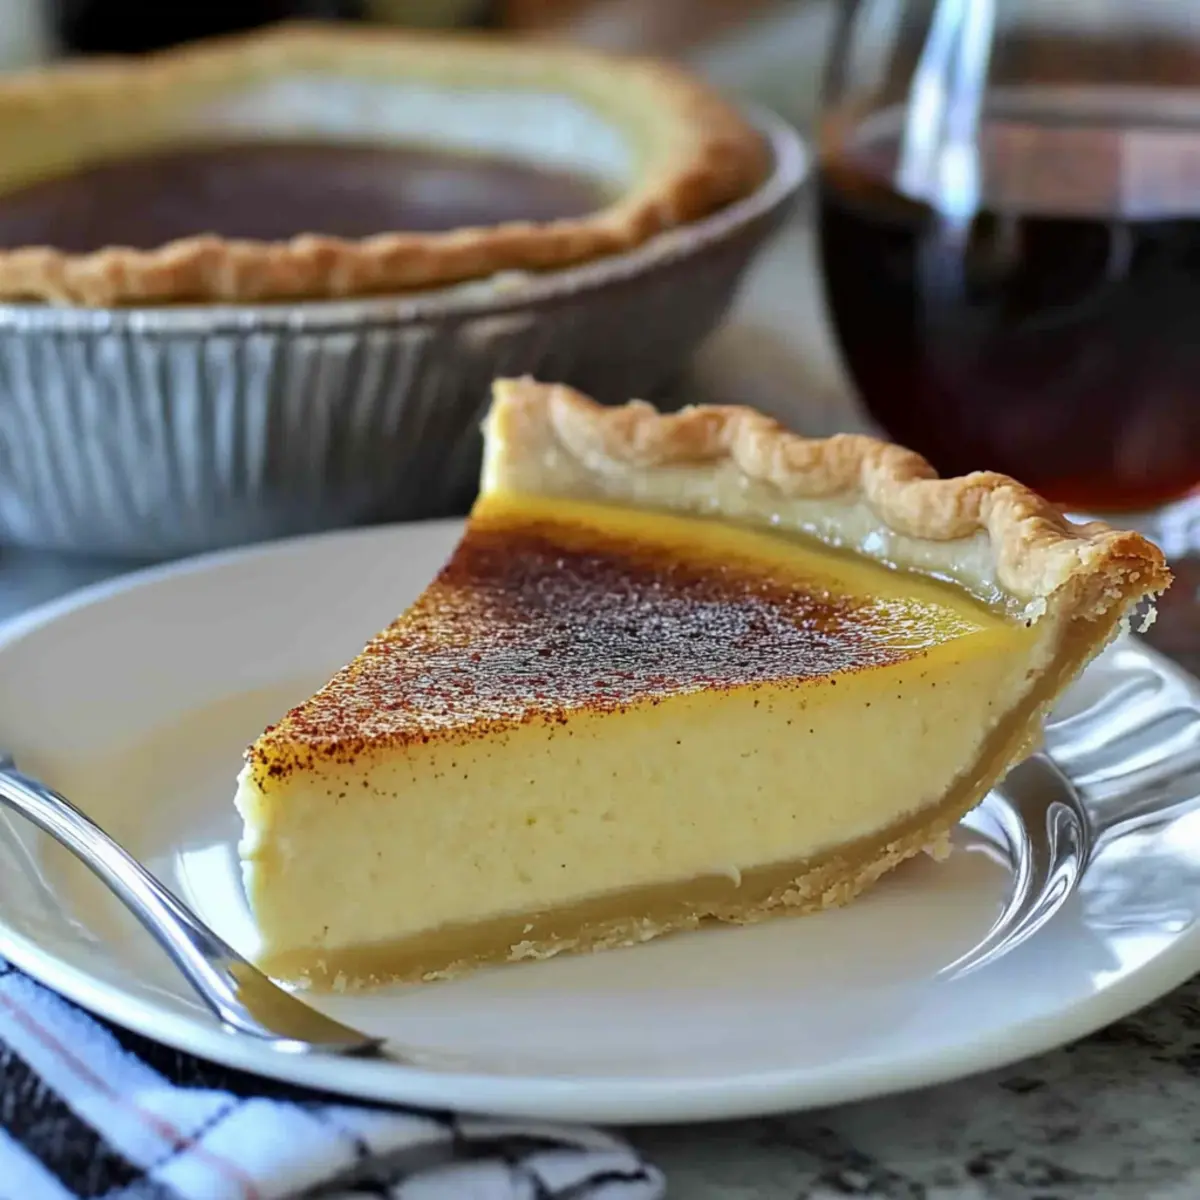
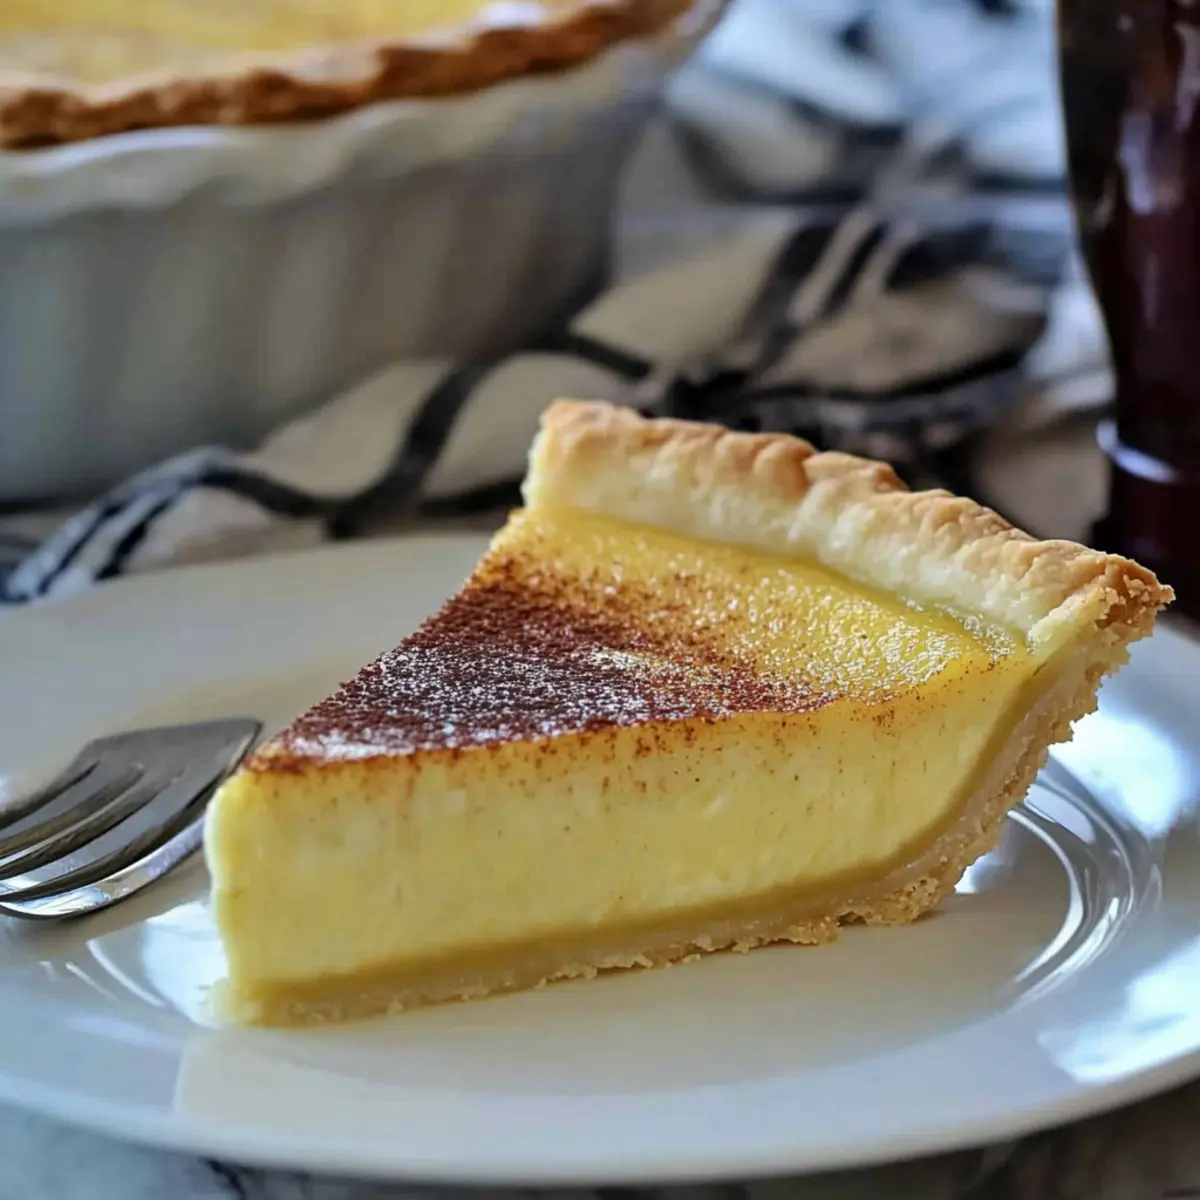
As I stirred the creamy mixture, the sweet scent of vanilla filled my kitchen, taking me back to brighter days spent in my grandmother’s home. This Old Fashioned Silky Creamy Custard Pie is a recipe that not only warms the heart but also embodies the essence of cherished family traditions. With just 15 minutes of hands-on time, this classic American dessert is incredibly easy to whip up, making it perfect for festive gatherings or cozy evenings at home. The combination of eggs, cream, and sugar creates a lush, velvety filling nestled in a flaky, unbaked pie crust—a treat that’s sure to please sweet-toothed fans of all ages. Curious how to make this nostalgic pie a star at your next meal? Let’s dive in!
What makes this pie so special?
Nostalgic: This Old Fashioned Silky Creamy Custard Pie is a delightful throwback to simpler times, reminding us of cherished family moments and home-cooked goodness.
Effortless: With only 15 minutes of prep, it’s easy for anyone, whether you’re a seasoned chef or a cooking novice, to recreate this classic at home.
Versatile: Feel free to customize it by adding your favorite fruits or spices, just like a traditional recipe would allow!
Crowd-Pleasing: It’s a guaranteed hit at gatherings and dinner parties, sure to dazzle guests alongside other favorites like Cajun Chicken Pasta or Creamy Garlic Shrimp Over.
Smooth & Creamy: The buttery texture and rich flavor create a dessert experience that’s truly indulgent, making every bite feel like a warm hug.
Make-Ahead: This pie can be prepared a day in advance, ensuring you can spend more time with your loved ones and less time in the kitchen.
Old Fashioned Silky Creamy Custard Pie Ingredients
For the Crust
• 9-inch unbaked pie crust – Provides the base structure for the pie. Substitution: Use store-bought or homemade crust; gluten-free options are available.
For the Custard Filling
• 4 large eggs – Essential for setting the custard and adding richness.
• 3/4 cup sugar – Adds sweetness and balances the flavors. Substitution: Can use Allulose for a low-calorie alternative, increasing quantity slightly.
• 1/4 teaspoon salt – Enhances the overall flavor profile.
• 1 teaspoon vanilla – Adds depth and a warm scent. Note: Use pure vanilla extract for best flavor.
• 1 cup heavy cream – Contributes to the custard’s creamy texture. Alternative: Milk or plant-based cream can be used for lighter variations.
• 1 1/2 cups milk – Acts as the liquid base for the custard. Substitution: Any milk variant, including almond or oat milk, works wonderfully.
• 1/4 teaspoon nutmeg – Offers aromatic warmth and spice to the custard.
This Old Fashioned Silky Creamy Custard Pie is just waiting to become your new family favorite!
Step‑by‑Step Instructions for Old Fashioned Silky Creamy Custard Pie
Step 1: Preheat the Oven
Begin by preheating your oven to 375°F (190°C). This will ensure that your pie bakes evenly and achieves that perfect golden finish. While the oven heats up, prepare your pie crust so that everything is ready to go once the oven reaches the desired temperature.
Step 2: Prepare the Crust
In a small bowl, separate one egg white from its yolk, setting aside both for later use. Brush the unbaked pie crust with the beaten egg white, which helps to create a crisp, flaky texture. Pre-bake the crust for 7-8 minutes until it’s just set and lightly golden, then allow it to cool for 10 minutes before filling.
Step 3: Whisk Together the Filling
In a large mixing bowl, combine the remaining 3 eggs, the reserved egg yolk, and any leftover beaten egg white. Add sugar, salt, vanilla, heavy cream, and milk to the mixture, whisking until everything is thoroughly combined and smooth. This rich mixture will form the silky custard filling for your Old Fashioned Silky Creamy Custard Pie.
Step 4: Pour the Custard Mixture
Carefully pour the prepared custard filling into the cooled pie crust, taking your time to ensure it is evenly distributed. Once filled, sprinkle the top with 1/4 teaspoon of nutmeg to add a fragrant spice note. This aromatic touch enhances the custard’s rich flavors, making the pie all the more delightful.
Step 5: Bake the Pie
Place the custard pie in the oven and bake for 35-45 minutes. Keep an eye on it, and when a knife inserted about 1 inch from the edge comes out clean, but the center still jiggles slightly, it’s done! This ensures the custard is set perfectly while retaining its luscious creaminess.
Step 6: Cool and Chill
After baking, remove the pie from the oven and let it cool on a wire rack. Cooling is essential, as it allows the custard to firm up a bit more. Once it reaches room temperature, refrigerate the pie for at least a couple of hours before serving, which makes it wonderfully refreshing and easy to slice.
Old Fashioned Silky Creamy Custard Pie Variations
Feel free to put your own spin on this classic dessert and make it uniquely yours!
- Fruit-Infused: Add 1 cup of diced fruits like cherries or peaches to the custard for a burst of natural sweetness.
- Spice Twist: Experiment with ground cinnamon or cardamom instead of nutmeg for an unexpected aromatic flavor profile.
- Dairy-Free: Substitute the dairy ingredients with coconut milk and almond milk for a deliciously creamy yet lighter pie.
- Sweetener Swap: Try using maple syrup or honey in place of sugar for a natural sweetener option, providing a cozy taste.
- Chocolate Decadence: Mix in 1/2 cup of melted dark chocolate to the custard for a rich, chocolatey custard pie that chocolate lovers will adore.
- Nutty Delight: Fold in 1/2 cup of toasted nuts like pecans or walnuts for added crunch and a nutty flavor that complements the creaminess.
- Additional Creaminess: Replace heavy cream with mascarpone cheese for a heavier, richer texture in your custard, reminiscent of a cheesecake.
- Citrus Zing: Stir in 1 tablespoon of lemon or orange zest for a refreshing citrus note that elevates the overall flavor experience.
These variations will not only delight your taste buds but also ensure that your Old Fashioned Silky Creamy Custard Pie stays fresh and exciting each time you prepare it! If you’re looking for more ways to impress guests, pair this pie with savory dishes like Chicken Gyros Feta or Pepper Chicken Mac.
How to Store and Freeze Old Fashioned Silky Creamy Custard Pie
Fridge: Store the pie covered in the refrigerator for up to 3 days to keep it fresh. This ensures it remains deliciously creamy and ready to serve.
Freezer: If you’d like to freeze the pie, wrap it well in plastic wrap and aluminum foil. It can be stored for up to 2 months. When ready to serve, thaw it overnight in the fridge.
Reheating: For a warm treat, you can reheat individual slices in the microwave for about 15-20 seconds, just until slightly warm. Avoid overheating, as it can alter the creamy texture.
Make-Ahead: This Old Fashioned Silky Creamy Custard Pie can be prepared a day in advance, letting you enjoy your time with loved ones without sacrificing dessert!
Make Ahead Options
These Old Fashioned Silky Creamy Custard Pies are perfect for meal prep enthusiasts! You can prepare the entire pie up to 24 hours in advance, allowing you to enjoy more time with family and guests. To do this, bake the pie according to the instructions, then let it cool completely before refrigerating it, which helps maintain its silky texture and prevents moisture buildup. If you’re prepping just the filling, you can combine the eggs, sugar, and other ingredients and store them covered in the fridge for up to 3 days. When ready to serve, simply pour the mixture into the pre-baked crust and bake as instructed, ensuring that you achieve that perfect, creamy consistency for a delightful dessert!
Expert Tips for Old Fashioned Silky Creamy Custard Pie
- Use Fresh Nutmeg: Freshly grated nutmeg enhances the flavor beautifully. Avoid pre-ground varieties for a more aromatic experience.
- Don’t Over-bake: Keep an eye on the pie! The center should jiggle slightly when done—over-baking leads to a rubbery texture in your custard.
- Allow for Chilling: After baking, refrigerate the pie for optimal slicing and flavor. Chilling enhances the overall experience of the Old Fashioned Silky Creamy Custard Pie.
- Customize Your Fillings: Feel free to add fruits like berries or peaches. Just ensure they are chopped small enough to evenly distribute throughout the custard.
- Egg Quality Matters: Use the freshest eggs you can find; they contribute to the richness and texture of your pie.
What to Serve with Old Fashioned Silky Creamy Custard Pie
The warm, sweet aroma of custard pie fills the air—pair it with delightful sides to create a memorable meal.
-
Whipped Cream: A dollop of freshly whipped cream adds a light, airy touch, enhancing the rich pie’s flavor with its creamy texture.
-
Fresh Berries: A medley of strawberries, blueberries, and raspberries introduces a vibrant burst of freshness that complements the custard’s sweetness.
-
Nutty Granola: Sprinkling crunchy granola on top creates a delightful contrast, adding texture and a touch of wholesome flavor to each bite.
-
Minted Fruit Salad: A refreshing fruit salad with mint provides a bright, zesty balance to the dessert, offering a rejuvenating finish.
-
Chocolate Espresso Stout: This dark beer features rich notes of chocolate and coffee, pairing beautifully with the pie’s creamy filling and appealing to adult tastes.
-
Pumpkin Spice Latte: Embrace the seasonal vibes with this classic beverage, enhancing the sensory experience with warm, inviting flavors that echo autumn.
-
Cinnamon Sugar Churros: These warm, crispy treats offer a fun and sweet side, encouraging guests to savor the delicious contrast of textures with the custard pie.
-
Caramel Drizzle: Serving slices drizzled with caramel adds an elegant touch and a sweet contrast that elevates every bite into pure indulgence.

Old Fashioned Silky Creamy Custard Pie Recipe FAQs
What should I look for when selecting eggs?
Absolutely! When selecting eggs, look for organic or free-range options whenever possible. Check for cracks and assess the freshness by doing the water test: a fresh egg sinks in water, while a stale one floats. Fresh eggs yield a creamier texture in your custard.
How can I store leftover custard pie?
Very simple! Cover the pie with plastic wrap or foil and store it in the refrigerator for up to 3 days. This keeps your creamy custard pie fresh and maintains its silky texture—perfect for enjoying a slice later!
Can I freeze Old Fashioned Silky Creamy Custard Pie?
Certainly! To freeze, wrap the pie tightly with plastic wrap, followed by a layer of aluminum foil to prevent freezer burn. It can be kept in the freezer for up to 2 months. When you’re ready to enjoy it again, just thaw it overnight in the fridge!
What if my custard pie turns out too runny?
No worries! If you find your custard pie is too runny after baking, it’s often due to under-baking. Make sure you bake until the edges are set and the center jiggles slightly, not wobbles. If it’s already cooled and still runny, you can carefully return it to the oven in 5-minute increments until it firms up—just ensure not to over-bake, which can lead to a rubbery texture.
Can my pet consume this pie?
Definitely not! While the ingredients are safe for humans, this pie contains high levels of sugar and dairy. Avoid sharing it with pets, as these components can upset their stomachs or cause more serious health issues.
What can I use as a substitute for heavy cream?
Absolutely! If you’re looking for a lighter version, substitute heavy cream with whole milk or a plant-based alternative like almond or oat milk. You might find that the texture varies slightly, but it will still be deliciously creamy.
Old Fashioned Silky Creamy Custard Pie Your New Family Favorite
Ingredients
Equipment
Method
- Preheat your oven to 375°F (190°C).
- Brush the unbaked pie crust with a beaten egg white and pre-bake for 7-8 minutes until lightly golden.
- In a large bowl, whisk together the eggs, sugar, salt, vanilla, heavy cream, and milk until smooth.
- Pour the custard mixture into the cooled pie crust and sprinkle with nutmeg.
- Bake for 35-45 minutes until a knife inserted comes out clean.
- Cool on a wire rack and refrigerate for at least 2 hours before serving.
Leave a Reply