
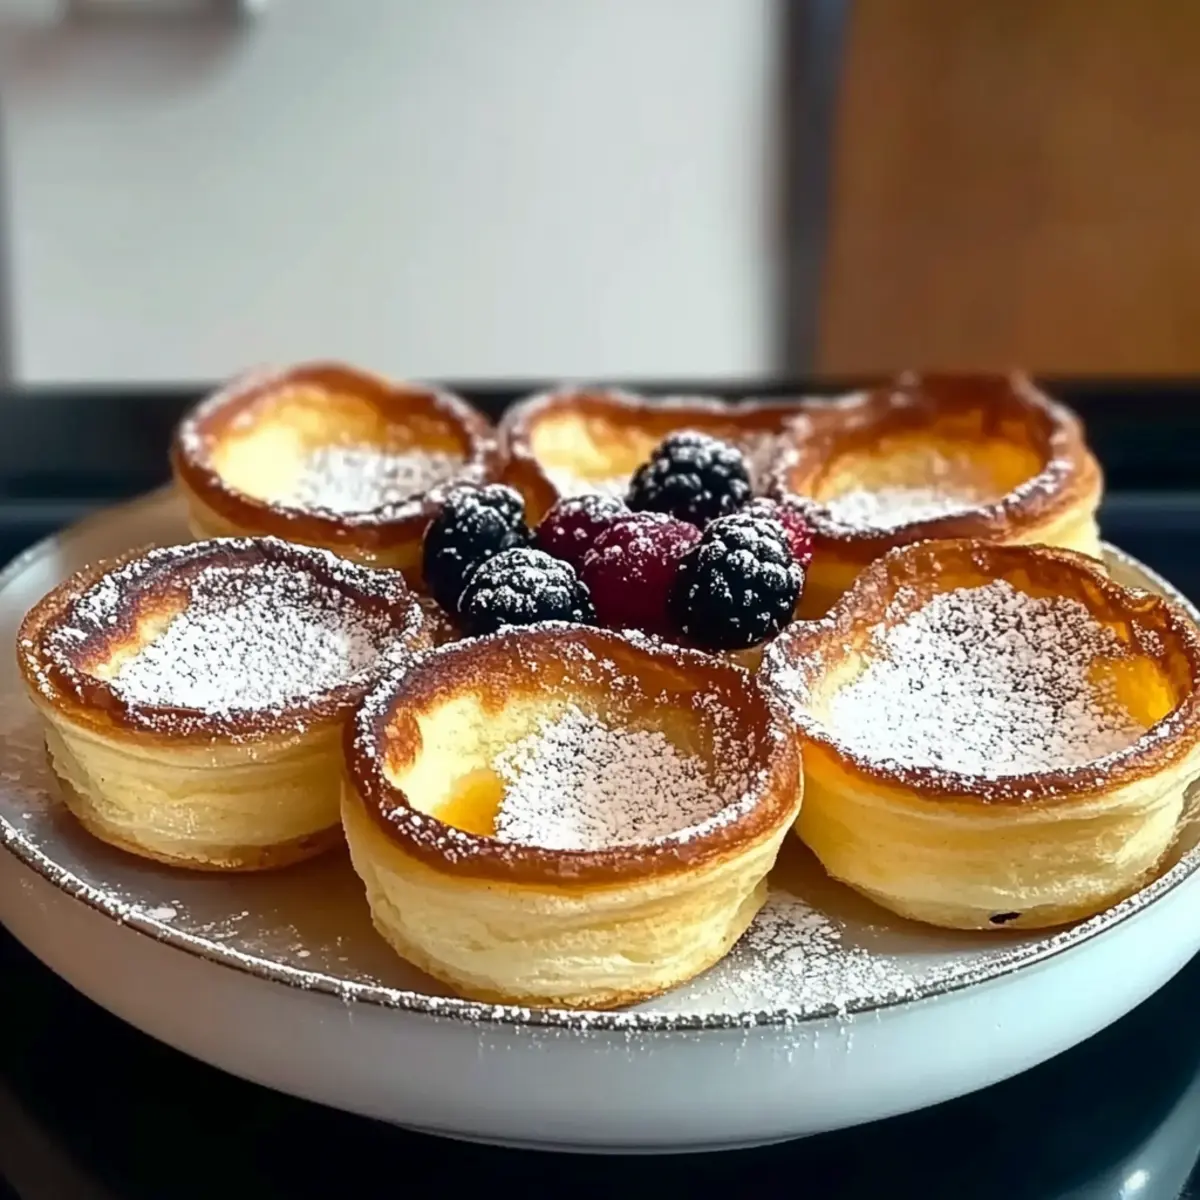
As I pulled the mini Dutch baby pancakes from the oven, their delightful puffiness greeted me like a warm hug on a chilly morning. These bite-sized breakfast gems boast a light, custard-like texture and a golden crust that beckons for a drizzle of sweet maple syrup or a sprinkle of fresh berries. Plus, they come together in just a matter of minutes, making them a hassle-free option for busy weekends or spontaneous brunches. The best part? You can customize each one to suit your taste, whether you prefer a sweet slather of jam or a savory twist with cheese and herbs. Who wouldn’t want to whip up mini Dutch baby pancakes and surprise their loved ones? Let’s dive into this delightful recipe that will turn your breakfast table into a cozy culinary adventure!
Why are Mini Dutch Baby Pancakes a Must-Try?
Delightfully Versatile: These pancakes are a canvas for creativity, allowing you to experiment with toppings like fresh fruit, whipped cream, or even savory options like cheese and herbs.
Quick & Easy: With just a few simple ingredients, you can whip up these mini delights in no time, making them perfect for spontaneous brunches or busy weekday mornings.
Showstopper Appeal: Their golden, puffed-up appearance is bound to impress your guests, whether you’re hosting a weekend gathering or treating your family to a special breakfast.
Health-Conscious Options: Adapt the recipe to fit your dietary needs by using gluten-free flour or dairy alternatives, ensuring everyone can enjoy these tasty bites.
Perfect for Sharing: Serve them straight from the oven and watch as everyone customizes their pancakes with toppings—it’s a fun way to start your day!
If you love delicious breakfast ideas, also check out these Garlic Baby Potatoes for a perfect brunch side!
Whip Up Mini Dutch Baby Pancakes
-
For the Batter
• All-Purpose Flour – Provides structure for the pancakes; substitute with gluten-free flour for a gluten-free option.
• Milk (Whole or 2%) – Adds richness and moisture; almond milk or oat milk can be used for a dairy-free version.
• Large Eggs – Essential for the airy, fluffy texture; no direct substitutes recommended as eggs are crucial for puffiness.
• Granulated Sugar – Adds sweetness to the batter; can be replaced with a sugar substitute or honey for a lower-calorie option.
• Vanilla Extract – Enhances overall flavor; substitute with almond extract for a different taste profile.
• Kosher Salt – Balances sweetness; regular salt can be used if kosher salt is unavailable.
• Unsalted Butter – Creates a crispy, golden exterior; coconut oil can be used for a dairy-free version. -
Toppings
• Fresh Berries – Perfect for adding natural sweetness and a pop of color to your stack.
• Powdered Sugar – A light dusting adds a touch of sweetness and elegance.
• Maple Syrup – Drizzle over your pancakes for a classic sweet touch that complements their flavor.
• Whipped Cream – Adds creaminess and a fun twist to your breakfast experience.
• Savory Additions – Experiment with shredded cheese or sautéed vegetables for a deliciously different take.
These delightful bites make it easy to whip up mini Dutch baby pancakes your family will love!
Step‑by‑Step Instructions for Whip Up Mini Dutch Baby Pancakes
Step 1: Preheat Your Oven
Begin by preheating your oven to 425°F (220°C). Place your muffin tin inside the oven to warm up—this is crucial for achieving that delightful puffiness in your Mini Dutch Baby Pancakes. Allow the muffin tin to heat for about 10-15 minutes as you prepare the batter, ensuring every cup is sizzling hot.
Step 2: Prepare the Batter
In a blender or mixing bowl, combine the all-purpose flour, milk, eggs, granulated sugar, vanilla extract, and kosher salt. Blend or whisk the mixture until it’s completely smooth and well combined; this should take roughly 1-2 minutes. You want a lump-free batter that flows easily, so take care not to overmix.
Step 3: Melt the Butter
Carefully remove the hot muffin tin from the oven, taking caution as it’s extremely hot. Add a small piece of unsalted butter to each muffin cup, returning the tin to the oven for about 2 minutes. Watch as the butter melts and bubbles—a sign that it’s ready for the batter!
Step 4: Fill the Muffin Cups
Once the butter is melted, take the muffin tin out again and quickly pour the prepared batter into each cup, filling them halfway. The heat from the tin will create a lovely, crispy edge as they bake.
Step 5: Bake to Perfection
Return the muffin tin to the oven and bake the Mini Dutch Baby Pancakes for 12-15 minutes. Keep an eye on them as they puff up dramatically and turn golden brown around the edges. When they are visibly puffy and a deep golden color, it’s time to take them out.
Step 6: Serve and Enjoy
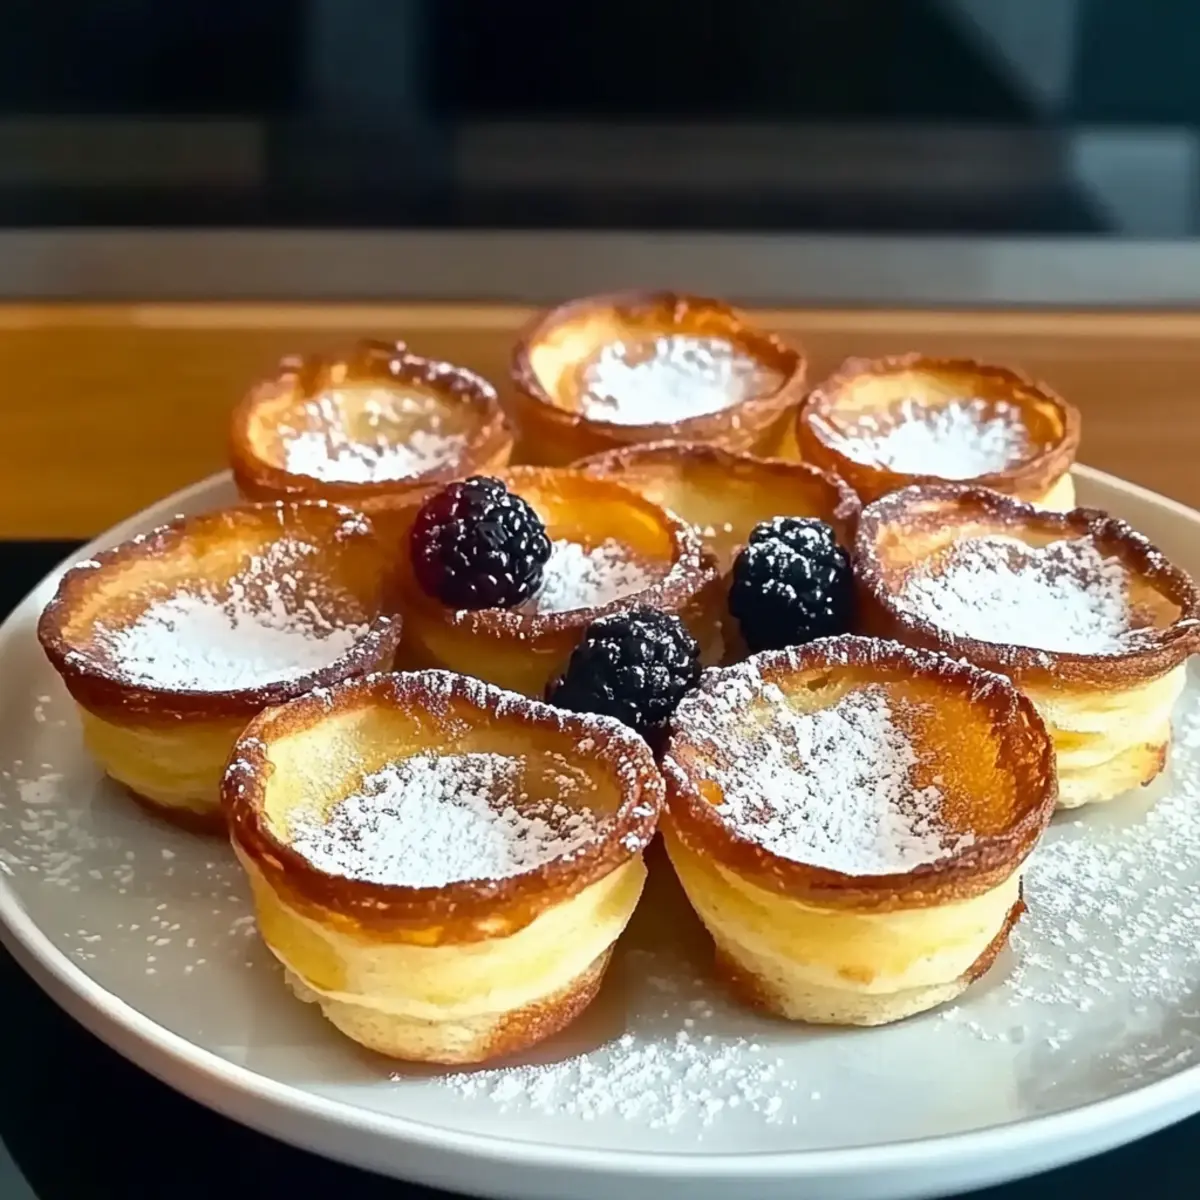
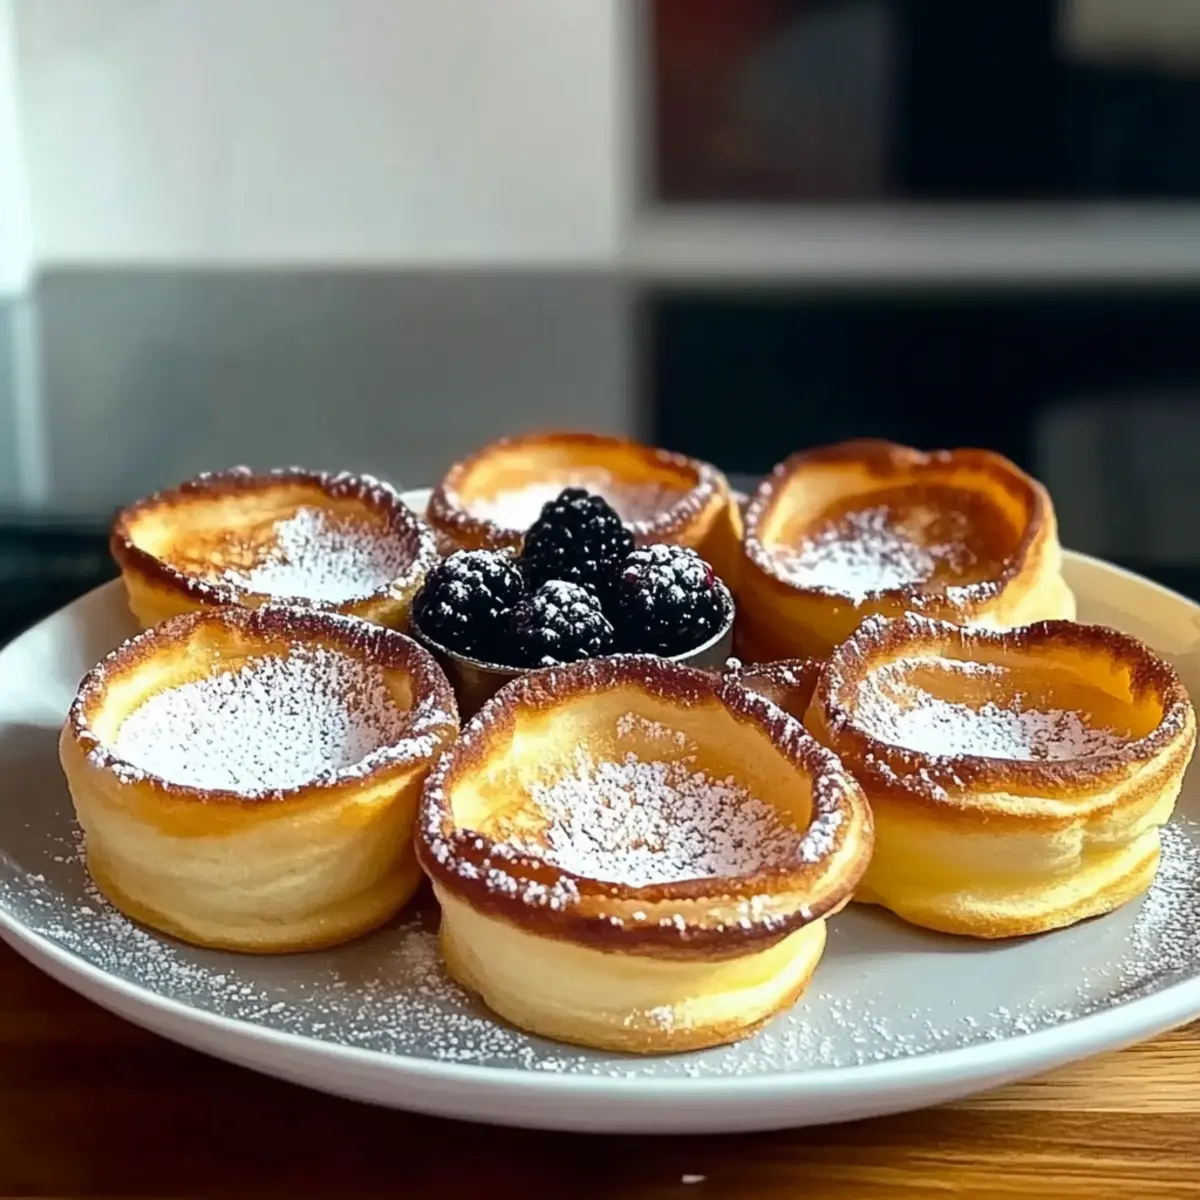
Once they are baked to perfection, remove the muffin tin from the oven and let the pancakes cool for a moment. Dust them with powdered sugar or serve them with your favorite toppings like fresh berries or maple syrup. Enjoy the mouthwatering experience of your Mini Dutch Baby Pancakes right away!

Whip Up Mini Dutch Baby Pancakes Variations
Feel free to explore these delightful twists that can elevate your Mini Dutch Baby Pancakes into something truly special!
-
Gluten-Free: Substitute all-purpose flour with a gluten-free blend to make these pancakes suitable for those with gluten sensitivities. They’ll still puff up beautifully!
-
Dairy-Free: Use almond milk or oat milk instead of regular milk, and swap unsalted butter for coconut oil. You’ll enjoy a rich flavor without the dairy.
-
Sweet Cravings: Add a tablespoon of cocoa powder to your batter and top with chocolate sauce for a decadent twist that chocolate lovers will appreciate. It’s like dessert for breakfast!
-
Savory Goodness: Mix in shredded cheese or finely chopped sautéed vegetables into the batter. This savory option introduces a delightful contrast to the sweet pancakes.
-
Berry Bliss: Incorporate mashed or chopped fresh strawberries or blueberries right into the batter for a fruity burst in every bite. They’ll naturally sweeten your pancakes!
-
Spiced Up: Add a dash of cinnamon or nutmeg to the batter for a warm spice flavor that pairs wonderfully with maple syrup. The aroma alone will have everyone smiling!
-
Herb Infusion: For an aromatic touch, stir fresh herbs like basil or chives into the batter. This herbaceous twist transforms them into an elegant breakfast option.
-
Layer It Up: Serve with layers of whipped cream and fresh fruit like banana slices or peaches to create a mini pancake stack that’s both beautiful and delicious.
As you whip up these mini Dutch baby pancakes, don’t forget to accompany them with these delightful Garlic Baby Potatoes for a brunch spread that impresses!
Make Ahead Options
These Mini Dutch Baby Pancakes are ideal for meal prep, saving you time on busy mornings! You can prepare the batter up to 24 hours in advance by blending the ingredients and refrigerating it in an airtight container. This keeps the flavors fresh and ready to go. When it’s time to bake, simply remove the batter from the fridge, whisk it briefly to ensure it’s smooth, then heat your muffin tin with butter as instructed. Pour the batter into each cup and bake for 12-15 minutes until puffed and golden. This way, you can enjoy delightful pancakes just as fresh and fluffy as if you made them from scratch that morning!
How to Store and Freeze Mini Dutch Baby Pancakes
Fridge: Store leftover Mini Dutch Baby Pancakes in an airtight container for up to 3 days. Reheat them in a toaster oven or microwave for a few seconds until warm.
Freezer: Wrap individual pancakes in plastic wrap and place them in a freezer-safe bag or container. They can be frozen for up to 2 months. Thaw in the fridge overnight before reheating.
Reheating: For best results, reheat mini pancakes in the oven at 350°F (175°C) for about 10 minutes or until warm. Serve with your favorite toppings for a delightful breakfast.
Make-Ahead Tip: You can prepare the batter in advance and store it in the fridge for up to 24 hours before baking. This makes it easy to whip up Mini Dutch Baby Pancakes on busy mornings!
What to Serve with Mini Dutch Baby Pancakes?
Elevate your brunch experience by complementing the airy deliciousness of these pancakes with delightful sides that entice both taste buds and eyes.
-
Crispy Bacon: The savory, smoky flavor of bacon adds a perfect contrast to the sweet fluffiness of mini Dutch baby pancakes. A classic pairing that never disappoints!
-
Fruit Salad: A mix of vibrant, fresh fruits brightens up your plate, offering a refreshing and healthy contrast to the rich pancakes. It also adds zesty flavors that sing in every bite.
-
Yogurt Parfait: Layered with granola and berries, this creamy delight brings texture and nutrition, making it a wholesome accompaniment alongside your pancakes. Plus, it plays beautifully with their fluffiness!
-
Maple Syrup or Honey: A drizzle of warm maple syrup or a touch of honey elevates the natural sweetness of the pancakes and enhances their golden crust.
-
Savory Scrambled Eggs: Fluffy, seasoned scrambled eggs provide a savory element that balances the sweetness, creating a satisfying and hearty breakfast platter.
-
Herbed Cream Cheese Spread: A dollop of cream cheese mixed with herbs can be an unexpected yet delightful addition. The creaminess pairs well with warm pancakes, adding richness.
-
Hot Chocolate or Coffee: Sip on a creamy hot chocolate or a bold cup of coffee that complements the sweet notes of the pancakes, making your breakfast even more comforting.
-
Whipped Cream with a Twist: Serve a luscious dollop of whipped cream, perhaps infused with vanilla or orange zest, perfect for those who enjoy rich, creamy textures atop their pancakes.
Each of these pairings adds layers of flavor and excitement, making your meal memorable and delightful!
Expert Tips for Whip Up Mini Dutch Baby Pancakes
-
Preheat Properly: Ensure your muffin tin is well-heated before adding the batter; this is key to achieving maximum puffiness in your pancakes.
-
Mix with Care: Be cautious not to overmix the batter. A few lumps are fine; overmixing can lead to dense pancakes instead of that airy structure.
-
Baking Time Matters: Keep an eye on the baking time. If they aren’t puffing up, check your oven temperature; too cool can prevent them from rising.
-
Experiment with Toppings: Don’t hesitate to customize each pancake with various toppings. From sweet berry combinations to savory cheese options, each bite can offer something new!
-
Make-Ahead Magic: For convenience, consider preparing the batter in advance. Store it in the fridge for up to 24 hours for an easy breakfast option to whip up whenever cravings strike.
Mini Dutch Baby Pancakes Recipe FAQs
How do I select the right ripeness for the ingredients?
For the best flavor and texture, use fresh ingredients—your eggs should be at room temperature for optimal fluffiness, and ensure your milk is fresh. When using fresh berries as toppings, look for plump, bright-colored fruit without any signs of mold or mushiness.
How should I store leftover Mini Dutch Baby Pancakes?
Absolutely! Store your leftover Mini Dutch Baby Pancakes in an airtight container in the refrigerator for up to 3 days. To reheat, pop them in the microwave for a few seconds or warm them in a toaster oven until they are heated through.
Can I freeze Mini Dutch Baby Pancakes?
Yes, you can! Wrap each pancake individually in plastic wrap and place them in a freezer-safe bag or container. They can be frozen for up to 2 months. When you’re ready to enjoy, simply thaw them in the fridge overnight, then reheat in the oven at 350°F (175°C) for about 10 minutes.
What if my pancakes don’t puff up?
If your Mini Dutch Baby Pancakes aren’t puffing, it could be due to an under-heated muffin tin—ensure it’s hot before adding the batter. Also, check your oven temperature; a cooler oven can prevent them from rising. Additionally, be careful not to overmix the batter, as this can lead to denser pancakes.
Are there any dietary considerations I should be aware of?
Definitely! If you have allergies, be cautious with egg substitutions, as they are critical for the pancake’s puffiness. For a gluten-free option, substitute the all-purpose flour with gluten-free flour, and for dairy-free, use almond or oat milk and coconut oil instead of butter.
Can I prepare the batter ahead of time?
Yes, you can prepare the batter up to 24 hours in advance! Just store it in the refrigerator and give it a quick stir before pouring it into the heated muffin tin. This makes it super convenient for busy mornings when you want to whip up Mini Dutch Baby Pancakes quickly!
Whip Up Mini Dutch Baby Pancakes for a Perfect Brunch Treat
Ingredients
Equipment
Method
- Preheat your oven to 425°F (220°C) and place muffin tin inside the oven to warm up for about 10-15 minutes.
- In a blender or mixing bowl, combine all-purpose flour, milk, eggs, granulated sugar, vanilla extract, and kosher salt until smooth.
- Remove the hot muffin tin and add a small piece of unsalted butter to each cup, returning to the oven for about 2 minutes until melted.
- Once the butter is melted, pour the batter into each cup, filling them halfway.
- Bake for 12-15 minutes until puffed up and golden brown around the edges.
- Remove from oven, let cool briefly, and serve with toppings like powdered sugar, fresh berries, or maple syrup.
Leave a Reply