
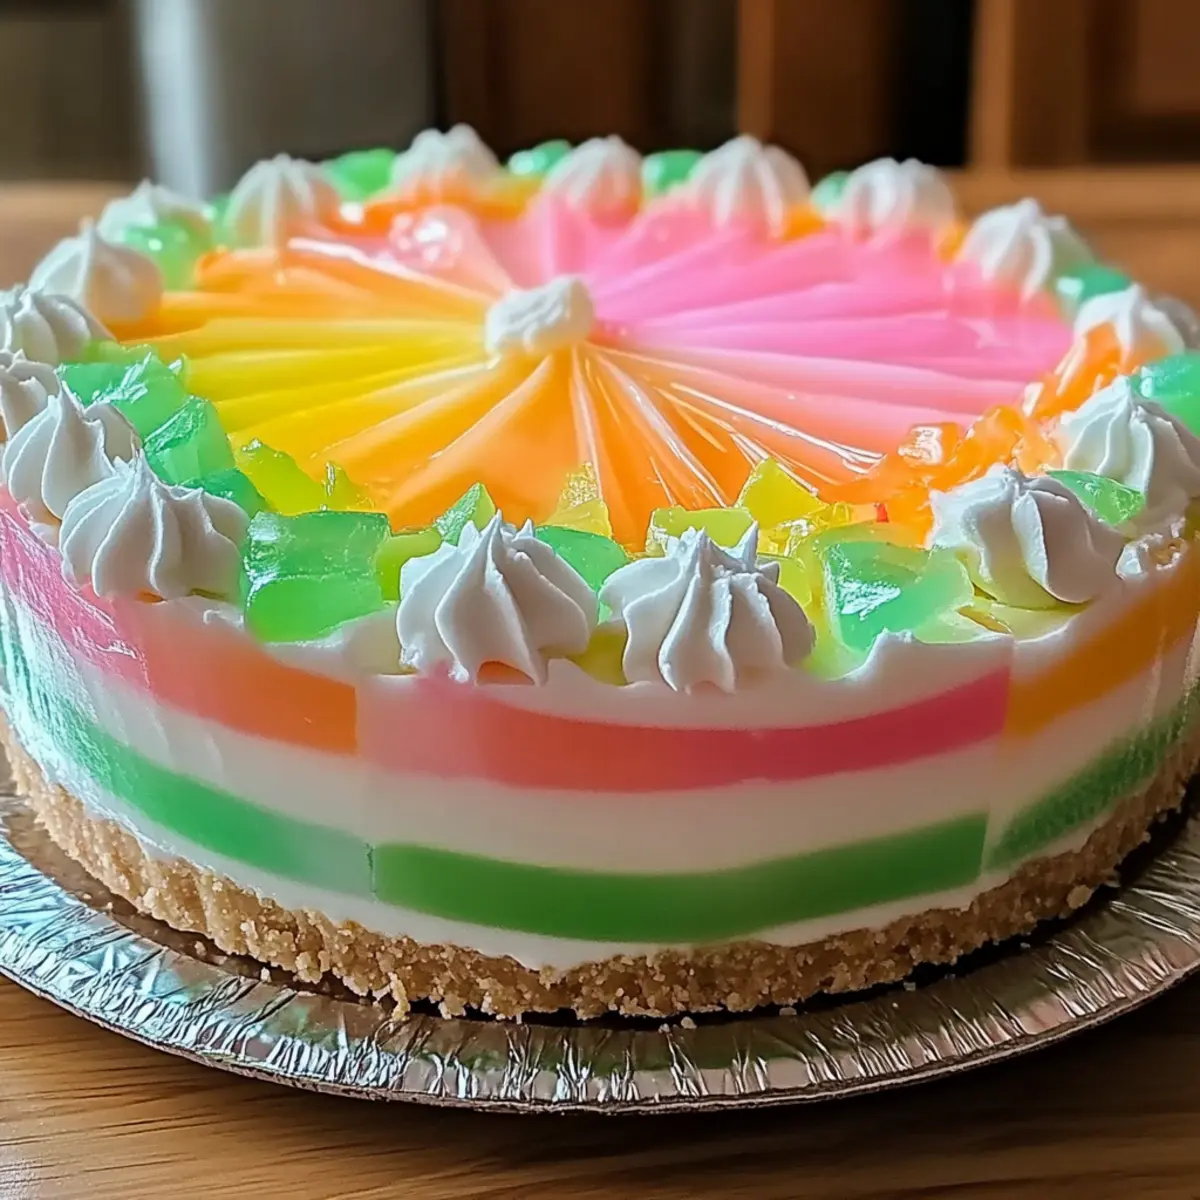
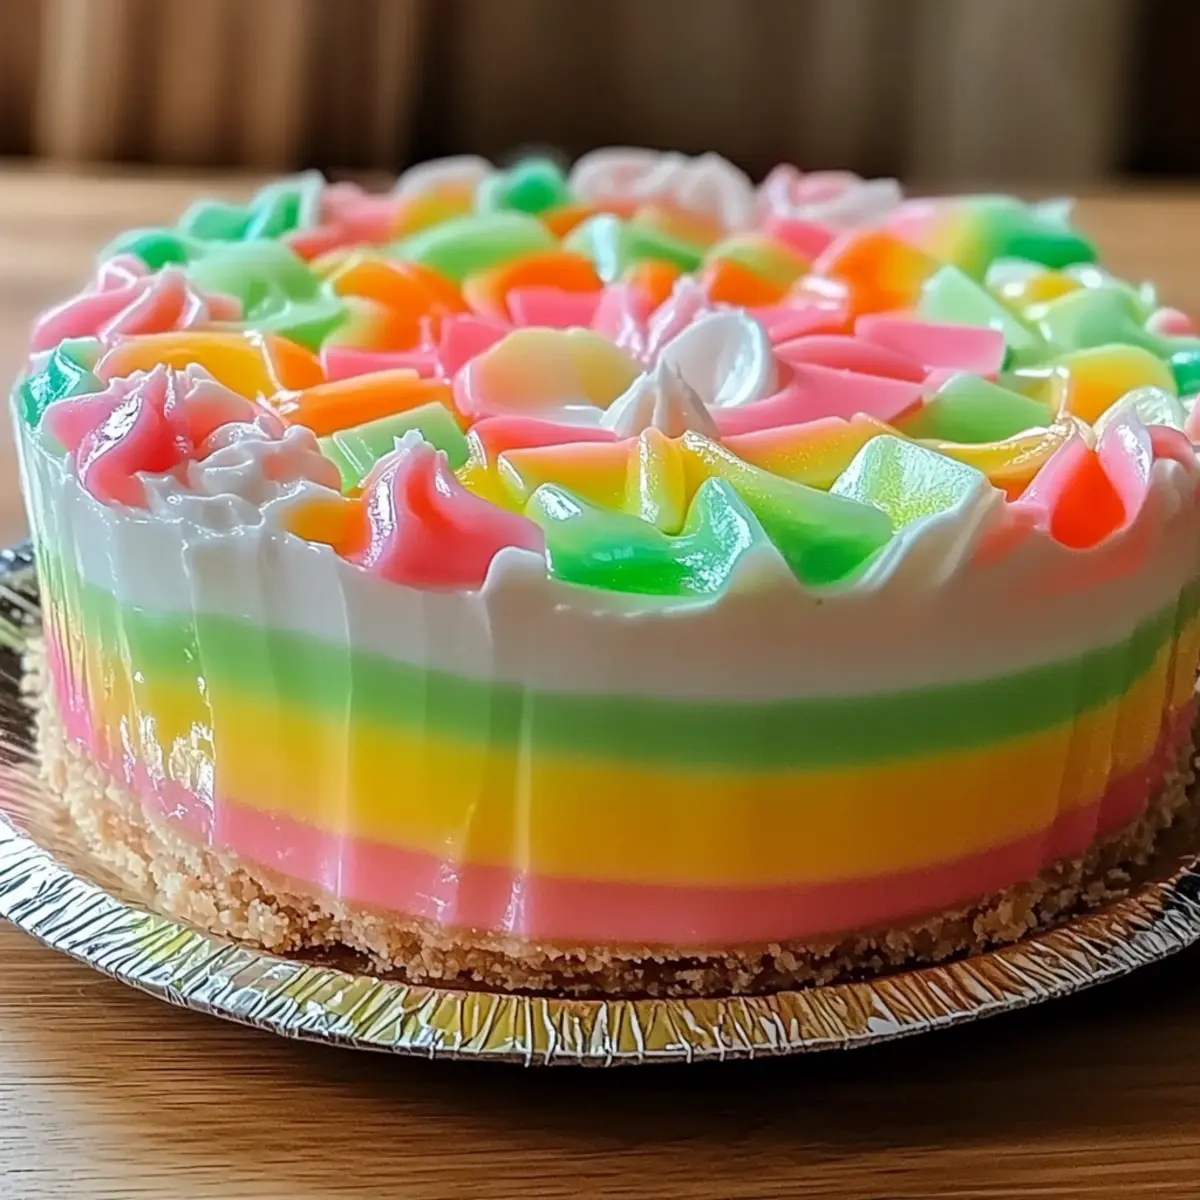
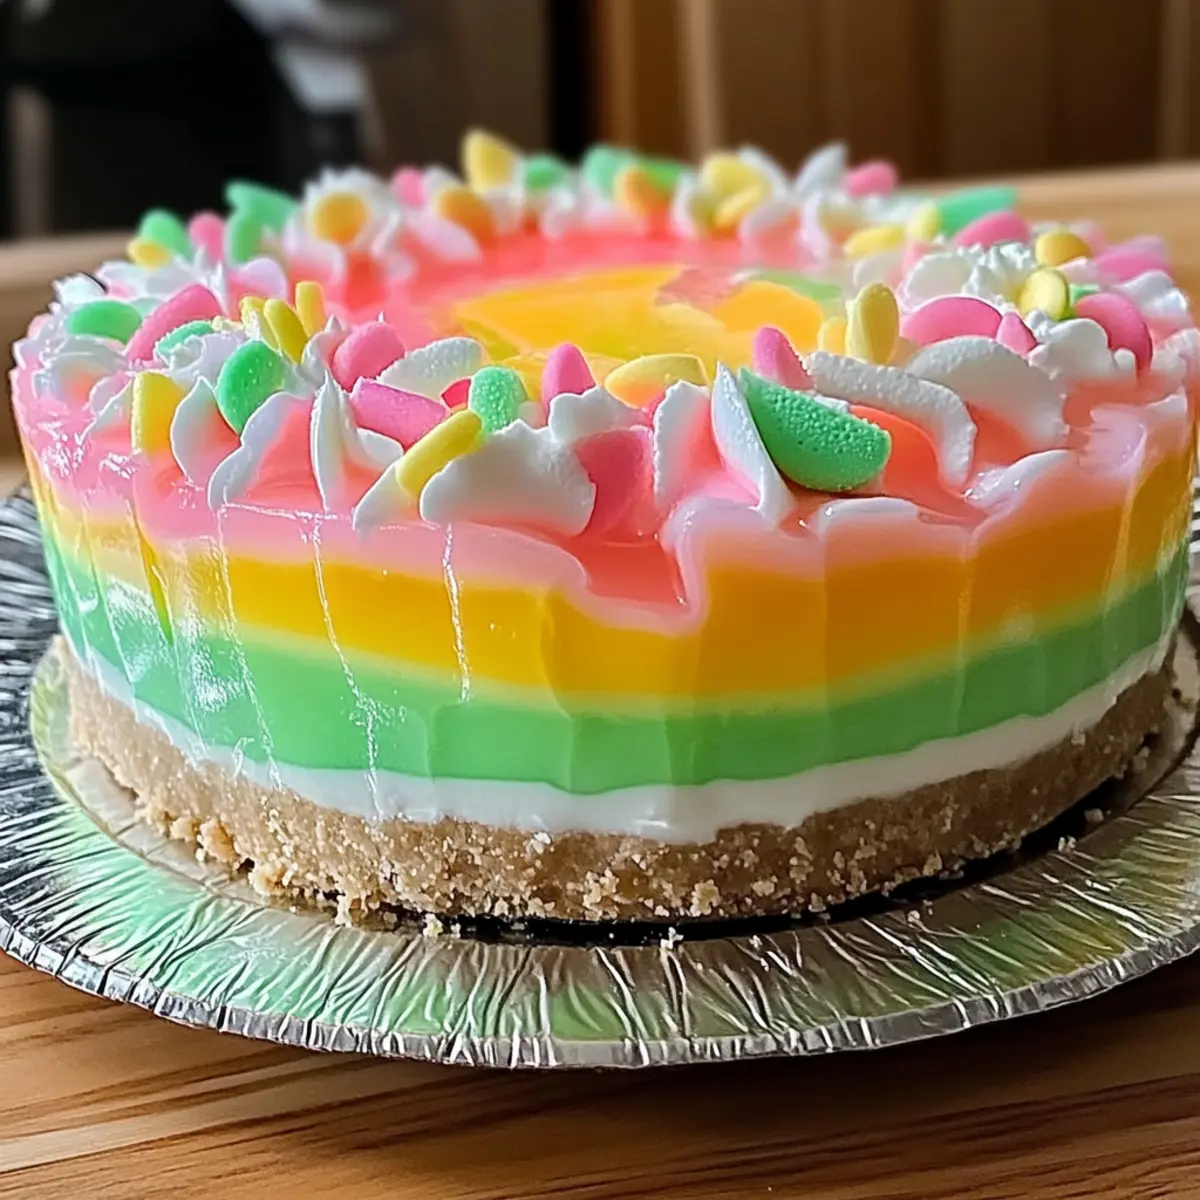
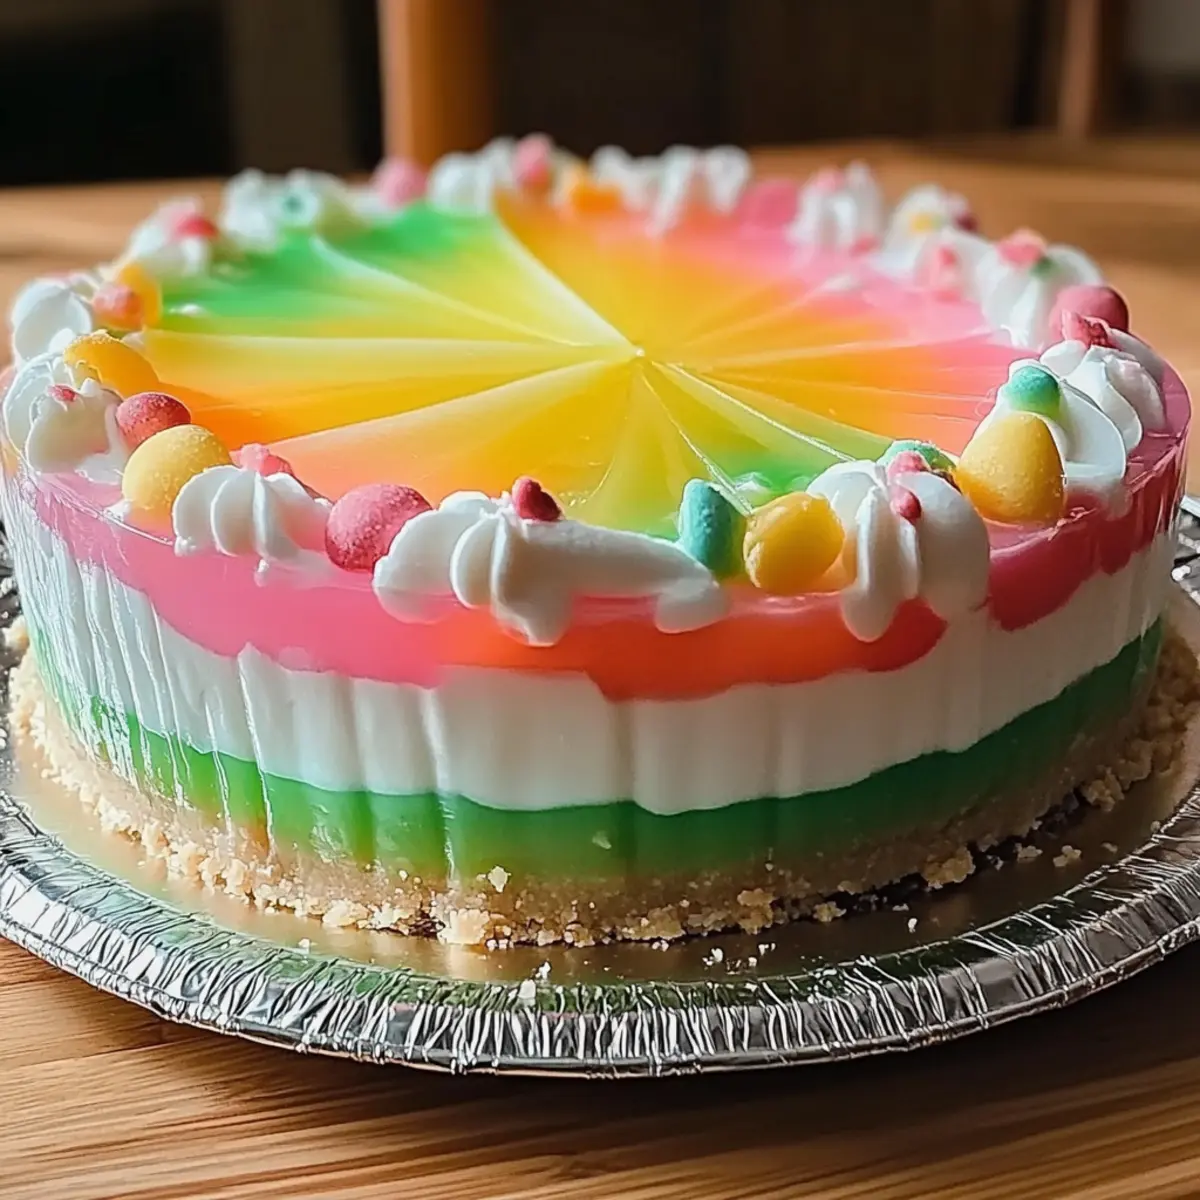
As I sift through my memories of Easter gatherings past, I can almost taste the excitement of the day. Among the colorful eggs and blooming flowers, one dessert always steals the show: the Easter No-Bake Jello Pie. This vibrant treat is not just a feast for the eyes; it’s a wonderful fusion of smooth cream cheese, playful jiggly Jello, and a crunchy graham cracker crust that everyone loves. The best part? It’s incredibly easy to whip up, cutting down your cooking time so that you can focus on family and fun. Plus, it’s a versatile crowd-pleaser, accommodating sugar-free and dairy-free preferences for your loved ones. Ready to dive into the simplest Easter dessert that promises smiles all around? Let’s get started!
Why is this Jello Pie a must-try?
Vibrant colors and flavors will brighten any Easter table, making this pie an instant showstopper. No-Bake convenience means you can spend less time in the kitchen and more time making memories with loved ones. Customizable options let you play with flavors and dietary needs, whether you want a sugar-free twist or a dairy-free delight. Plus, crowd-pleasing goodness is guaranteed, as this dessert appeals to all ages, delighting both kids and adults alike. Pair it with an optional fruit topping or some festive sprinkles for that extra pop, and you’ll have a dessert that truly stands out. If you’re looking for similar easy desserts, don’t miss out on our Chicken Zucchini Bake or Pumpkin Apple Baked.
Easter No-Bake Jello Pie Ingredients
Looking to create the perfect festive treat? Here’s everything you need!
For the Crust
- Graham Cracker Crust – Provides structure and crunch; you can use a pre-made crust for convenience or make your own for a personal touch.
For the Cream Cheese Layer
- Cream Cheese – This adds a rich creaminess; opt for full-fat or reduced-fat depending on your preference.
- Granulated Sugar – Sweetens the cream cheese layer; feel free to adjust or skip if using sweetened cream cheese.
- Vanilla Extract – Enhances flavor depth; substituting with almond extract adds a unique twist that complements the Jello beautifully.
For the Jello Layers
- Boiling Water – Essential for dissolving the Jello mix; make sure it’s boiling to efficiently activate the gelatin.
- Cold Water – Helps cool down the Jello mixture before pouring it into the pie; it’s crucial for the perfect texture.
- Jello (Various Flavors and Colors) – Provides fruity flavor; feel free to choose your favorite flavor, including sugar-free options for lighter indulgence.
For the Topping
- Whipped Topping – Adds a delightful lightness on top; choose dairy or non-dairy alternatives based on your needs.
- Optional Easter Candies or Sprinkles – Decorative elements that enhance the visual appeal and festive mood, perfect for making your pie truly festive.
Ready to make this delightful Easter No-Bake Jello Pie? You’ll surely create a crowd-pleaser!
Step‑by‑Step Instructions for Easter No Bake Jello Pie
Step 1: Prepare the Cream Cheese Layer
In a mixing bowl, beat 8 ounces of cream cheese using an electric mixer until it’s smooth and creamy, about 2 minutes. Gradually add in 1/2 cup of granulated sugar and 1 teaspoon of vanilla extract, mixing until well combined and fluffy. This rich cream cheese layer will be the foundation of your Easter No Bake Jello Pie.
Step 2: Prepare the First Jello Layer
In a separate bowl, pour in one package of your chosen Jello flavor and briskly stir in 1 cup of boiling water until the mix is completely dissolved, ensuring no granules remain. Then, add 1 cup of cold water and mix thoroughly. This vibrant mixture will create the first layer of your pie, adding both color and flavor.
Step 3: Chill the First Jello Layer
Carefully pour half of the Jello mixture into the pre-prepared graham cracker crust, spreading it evenly. Place the crust in the refrigerator and chill for 1 to 2 hours, or until the Jello is fully set. You’ll know it’s ready when the top is firm to the touch and slightly bouncy, providing the ideal base for the cream cheese layer.
Step 4: Spread the Cream Cheese Layer
Once the first Jello layer is set, remove the pie from the refrigerator. Evenly spread the cream cheese mixture over the chilled Jello layer, smoothing it out to create a nice, fluffy surface. This step is essential, as it adds a creamy contrast and enhances the overall texture of your Easter No Bake Jello Pie.
Step 5: Chill the Cream Cheese Layer
Return the pie to the refrigerator for about 1 hour, allowing the cream cheese layer to firm up. You’re looking for a solid consistency that will hold its shape when you add the final Jello layer atop it. This cooling process is vital for maintaining the lovely layers of this festive dessert.
Step 6: Prepare and Pour the Second Jello Layer
After the cream cheese layer has set, pour the remaining Jello mixture over it gently, ensuring it covers everything evenly. This colorful top layer will not only add another burst of flavor to your Easter No Bake Jello Pie, but it will also create a beautiful visual appeal with its vibrant hues.
Step 7: Chill the Pie Completely
Place the assembled pie back in the refrigerator and allow it to chill for an additional 2 to 3 hours, or until the top layer is fully set. It’s essential to ensure all layers are firm and cohesive, creating a delightful sliceable dessert that will impress your family and friends.
Step 8: Decorate and Serve
Once the pie is completely set, remove it from the refrigerator. Top it with whipped topping, spreading it evenly for a light finish. For an extra festive touch, you can decorate with Easter-themed candies or colorful sprinkles, making your Easter No Bake Jello Pie ready to dazzle on the dessert table.
Expert Tips for Easter No Bake Jello Pie
-
Chill Wisely: Always chill between layers to ensure they don’t mix. This will help maintain those beautiful distinct layers in your Easter No Bake Jello Pie.
-
Dissolve Fully: Make sure the Jello is fully dissolved in boiling water before adding cold water. This prevents any graininess and ensures a smooth texture.
-
Avoid Freezing: Do not freeze the pie, as it will alter the texture. It’s best enjoyed fresh within 3-4 days of making.
-
Storage Matters: Store your pie in an airtight container in the refrigerator to maintain its freshness and flavor. Cover it well to keep it from absorbing other odors.
-
Flavorful Variations: Don’t hesitate to get creative with flavors and colors by choosing different Jello varieties. You can mix flavors for a fun twist on this classic dessert!
Easter No Bake Jello Pie Variations
Feel free to customize this delightful dessert to suit your taste buds and dietary needs!
-
Dairy-Free: Swap the cream cheese for dairy-free cream cheese and use non-dairy whipped topping. This allows everyone to join in on the fun without compromising flavor!
-
Gluten-Free: Use a gluten-free cookie crust instead of graham crackers for a delightful crunch that everyone can enjoy. It’s all about enjoying the flavors without the fuss!
-
Sugar-Free: Try sugar-free Jello for a lighter version that’s still just as colorful and delicious. You’ll satisfy those sweet cravings without the added sugar!
-
Flavor Infusion: Experiment with different flavored Jellos, like strawberry or raspberry, to add a fruity twist. Each flavor brings its own unique charm to the pie!
-
Mixed Berry Version: Combine several Jello flavors to create a layered rainbow effect. This playful take will make your dessert even more festive and visually appealing.
-
Chocolatey Delight: Add a chocolate layer by using chocolate pudding instead of cream cheese. This rich twist gives a delightful contrast to the fruity layers.
-
Fruit Topping: Before serving, add fresh berries or diced fruits on top for added texture and a burst of flavor. It creates a beautiful topping and delightful contrast!
-
Nutty Crunch: Sprinkle crushed nuts, like pecans or walnuts, on top of the whipped cream. This adds a lovely crunch that complements the creaminess of the pie wonderfully.
For even more inspiring ideas, don’t forget to check out our Healthy Baked Feta or try a slice of the festive Pumpkin Apple Baked dessert!
Make Ahead Options
These Easter No-Bake Jello Pies are perfect for meal prep enthusiasts! You can prepare the cream cheese layer and the Jello layers separately up to 24 hours in advance. Simply follow the steps to make the cream cheese mixture and the first Jello layer, then refrigerate each in airtight containers. When you’re ready to serve, just assemble the pie by layering the prepped components and allow it to set for an additional 2-3 hours. This method not only cuts down on last-minute stress but keeps the pie just as delicious and colorful. Trust me, your guests will love it, and you’ll have more time to relish the celebrations!
What to Serve with Easter No-Bake Jello Pie
Nothing complements the vibrant flavors of this delightful pie like a spread of fresh and festive options to enhance your Easter gathering.
-
Fresh Fruit Salad: A mix of berries and citrus lends a refreshing touch that balances the pie’s sweetness. Toss in some mint for a burst of color and flavor.
-
Mimosas: This bubbly cocktail is perfect for Easter brunch, combining the sweetness of orange juice with the crispness of champagne, effortlessly elevating your celebration.
-
Vanilla Ice Cream: A scoop of creamy vanilla ice cream brings a delightful contrast in temperature and texture, pairing beautifully with the pie’s chilled layers.
-
Mini Chocolate Eggs: These fun little treats add a whimsical touch to your dessert table, inviting guests to enjoy both the pie and a bit of Easter candy joy.
-
Chocolate Dipped Strawberries: These sweet treats offer a luscious chocolate contrast to the fruity pie while maintaining that festive atmosphere everyone loves.
-
Shredded Coconut Topping: Sprinkle this around your pie for a tropical twist that enhances the visual appeal and adds a delightful chewiness.
-
Carrot Cake Muffins: These moist and spiced muffins are a nod to Easter traditions and complement the pie’s flavors, creating a homely and comforting feel at your gathering.
-
Sparkling Lemonade: This refreshing drink offers a citrusy zing that cuts through the creaminess of the pie, making every bite feel like a celebration.
-
Pistachio Pudding Cups: Creamy and nutty, these cups provide an added layer of texture and a visually appealing green hue that fits perfectly with the holiday theme.
Storage Tips for Easter No Bake Jello Pie
Fridge: Keep your pie covered in the refrigerator for up to 3-4 days to maintain its freshness and delightful flavors. An airtight container works best to avoid absorbing any other odors.
Preparation: Make sure to chill between each layer to keep the distinct layers intact; this also helps in keeping the pie firm and beautifully presentable.
Reheating: While it’s best enjoyed fresh, if you do have leftovers, there’s no need to reheat. Simply enjoy them chilled straight from the fridge.
Freezer: Avoid freezing the Easter No Bake Jello Pie as it may alter the texture of the layers. Enjoy while fresh for the best taste experience.
Easter No-Bake Jello Pie Recipe FAQs
How do I choose ripe ingredients for the Easter No-Bake Jello Pie?
Absolutely! When selecting ingredients, ensure your cream cheese is fresh – check the expiration date. For the Jello, just look for brightly colored packets without any moisture, and your graham cracker crust should be crisp and intact. If you’re adding fresh fruit as decoration, pick fruit that is firm and bright, avoiding any that have dark spots or bruising.
How should I store leftover Easter No-Bake Jello Pie?
For the best results, keep your pie covered in an airtight container in the refrigerator. It should stay fresh for about 3-4 days. This method helps retain its delightful flavors and textures, ensuring every bite is as good as the first!
Can I freeze the Easter No-Bake Jello Pie?
I recommend against freezing this pie, as the texture will be significantly altered once thawed. The delicate layers of Jello and cream cheese may become watery or grainy. If you have leftovers, enjoy them fresh from the refrigerator within 3-4 days for the best taste experience.
What if my Jello layers aren’t setting properly?
No worries! If your Jello isn’t setting, make sure you’re using boiling water when dissolving the Jello mix. Ensure it’s completely free of granules before adding cold water. If it’s still not setting after chilling properly, it might be due to using a low-quality gelatin. Try another brand next time, as a quality gelatin will help achieve that perfect wiggly texture.
Can I make this pie sugar-free or dairy-free for dietary restrictions?
Very much so! For a sugar-free version, just use sugar-free Jello and adjust the cream cheese layer with a sugar substitute. For a dairy-free option, try a dairy-free cream cheese alternative and a non-dairy whipped topping. Both options work beautifully and allow everyone to enjoy this delicious Easter No-Bake Jello Pie regardless of dietary preferences!
Easter No Bake Jello Pie: A Vibrant Dessert Delight
Ingredients
Equipment
Method
- In a mixing bowl, beat 8 ounces of cream cheese until smooth and creamy, about 2 minutes.
- Gradually add in 1/2 cup of granulated sugar and 1 teaspoon of vanilla extract, mixing until well combined and fluffy.
- In a separate bowl, pour in one package of your chosen Jello flavor and stir in 1 cup of boiling water until completely dissolved.
- Add 1 cup of cold water and mix thoroughly before pouring half into the graham cracker crust.
- Cover and chill for 1 to 2 hours or until the Jello is fully set.
- Spread the cream cheese mixture evenly over the set Jello layer.
- Return the pie to the refrigerator for about 1 hour to firm up the cream cheese layer.
- Pour the remaining Jello mixture over the cream cheese layer gently.
- Chill the pie for an additional 2 to 3 hours or until the top layer is fully set.
- Top with whipped topping and decorate with Easter-themed candies or sprinkles.
Leave a Reply