
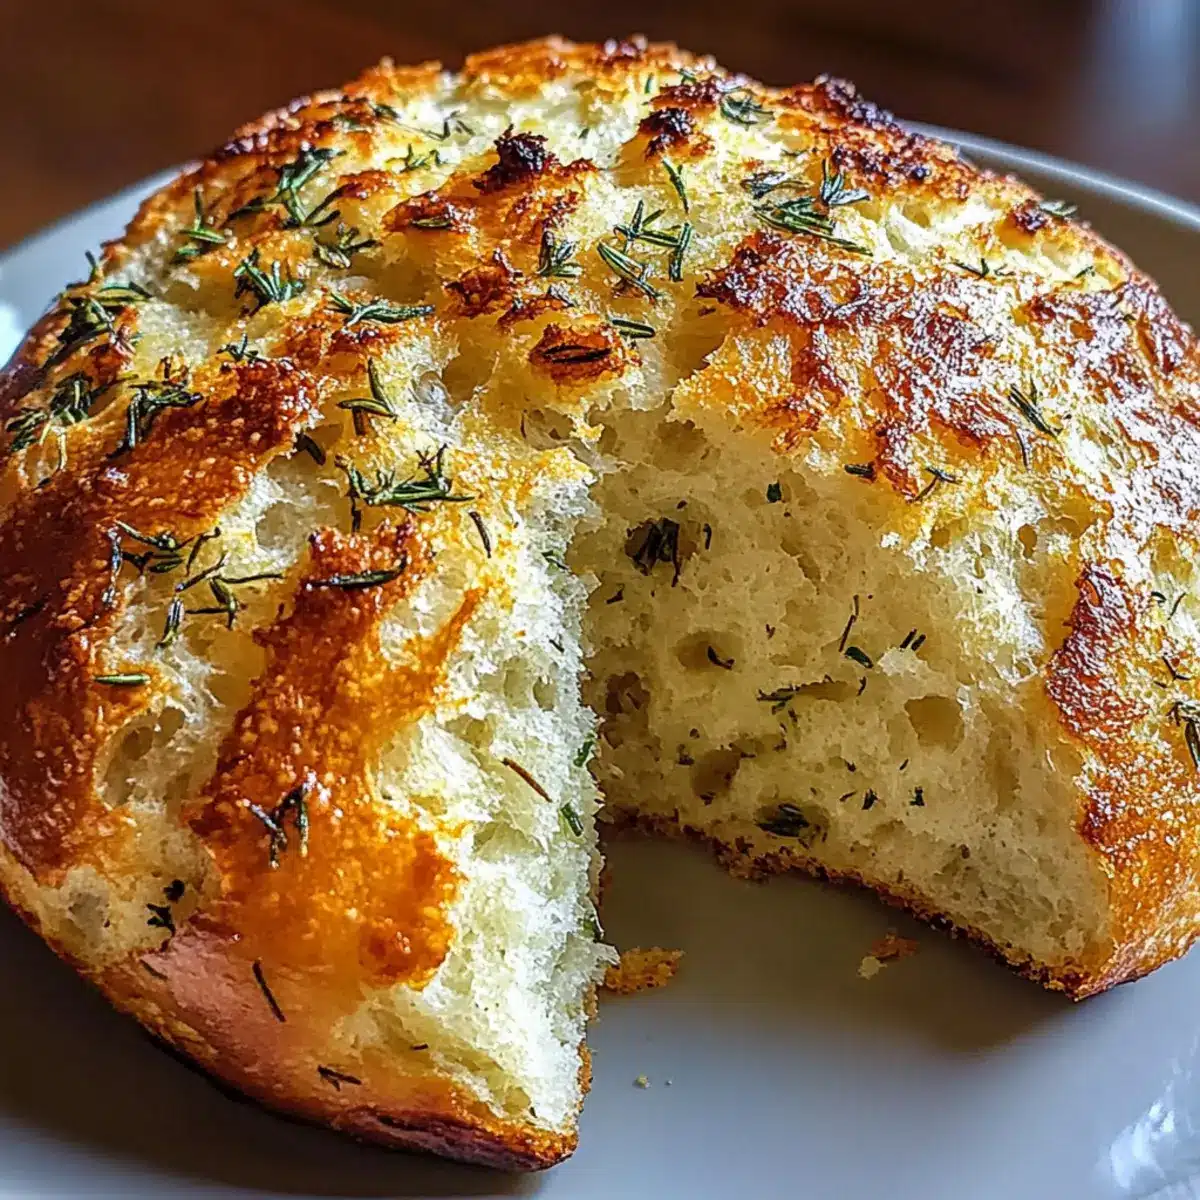
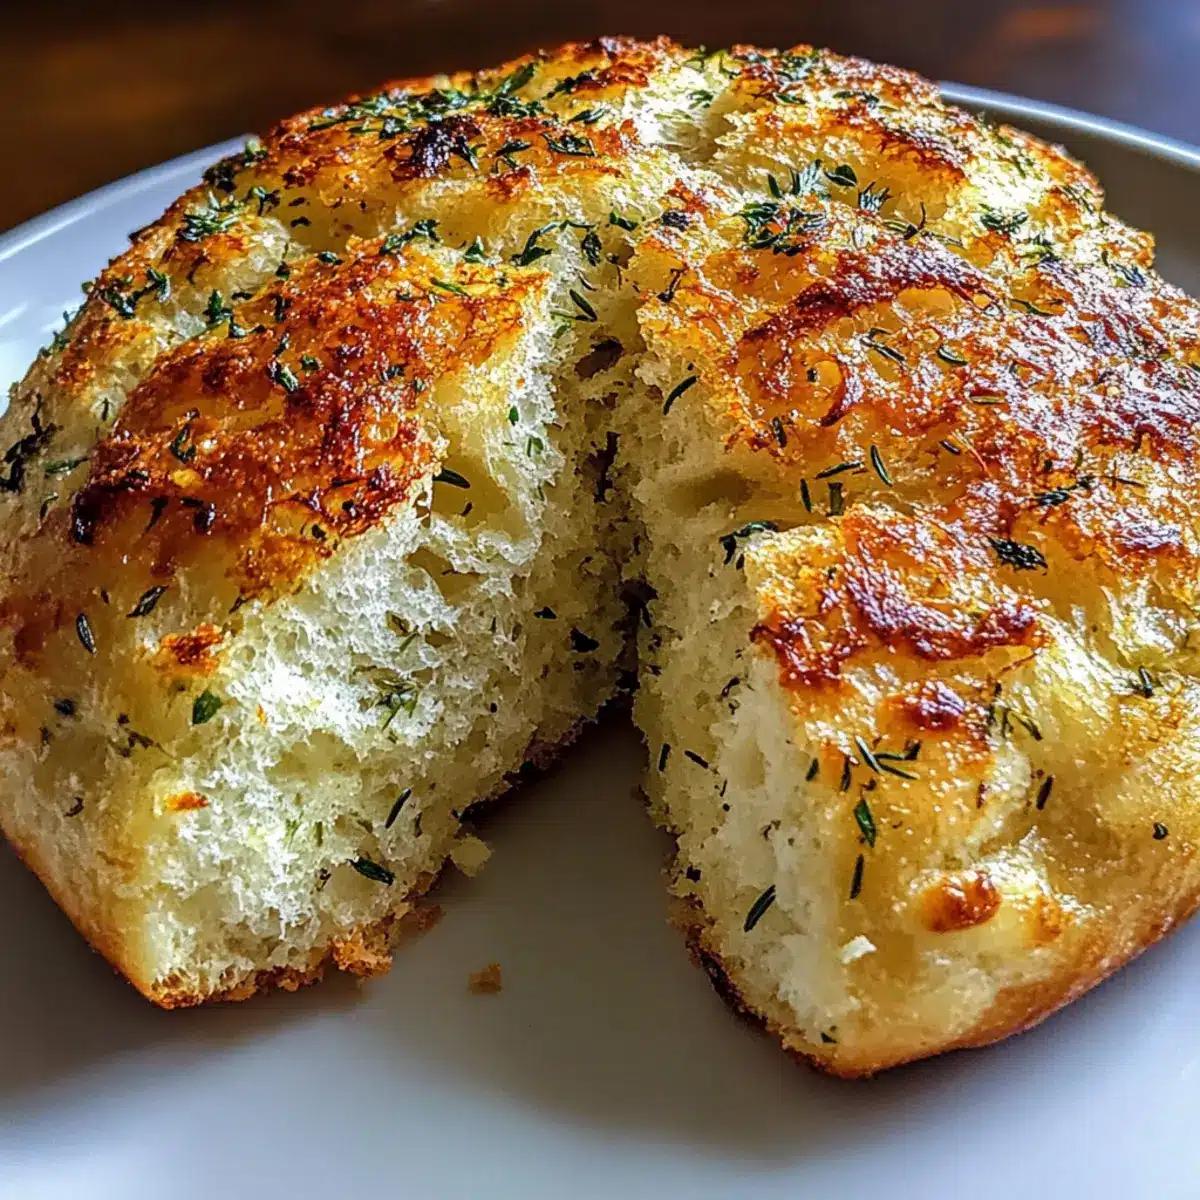
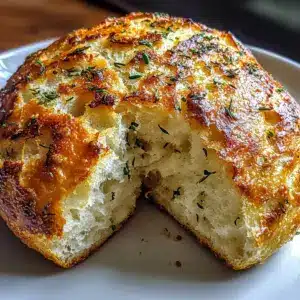
There’s something magical about the aroma of freshly baked bread wafting through the kitchen, isn’t there? Today, I’m excited to share my recipe for Crusty Garlic Herb Dutch Oven Bread—a delightful loaf that’s as satisfying to make as it is to enjoy. With just a handful of simple ingredients, this artisan bread transforms the ordinary into something truly special. One of the best perks? It’s incredibly easy to prepare with minimal hands-on time, making it a perfect weeknight project even for busy home chefs. Plus, the Dutch oven method ensures you’ll get that perfect crispy crust while keeping the inside soft and airy. What’s your favorite way to enjoy homemade bread? Let’s dive into the recipe!

Why Is This Garlic Herb Bread Special?
Simplicity at its Finest: With just a few staple ingredients, this recipe allows you to whip up an artisan loaf without any fuss.
Crispy, Crusty Perfection: The Dutch oven method creates an impressively crusty exterior, locking in moisture for that sought-after fluffy interior.
Flavorful Infusion: Each bite is bursting with the rich taste of garlic and fresh herbs, elevating your bread game to a whole new level.
Ideal for Any Occasion: Whether you’re serving it alongside a soup or layering it for a gourmet sandwich, this bread versatile enough to shine anytime.
Minimal Hands-On Time: It takes just minutes to prepare, making it perfect even for busy weeknights.
Indulge in this crusty garlic herb bread, and if you’re looking for other mouthwatering recipes, consider trying my delicious Crockpot Garlic Butter Beef Bites or the savory Garlic Shrimp Over Mashed Potatoes for a full meal experience!
Crusty Garlic Herb Dutch Oven Bread Ingredients
This recipe is simple yet transforms your kitchen into a bakery!
For the Bread
• All-purpose flour – Provides structure and texture to the bread; substitute with bread flour for extra chewiness.
• Salt – Enhances flavor and is essential for yeast function; don’t skip it!
• Instant yeast – Responsible for leavening; ensures a good rise; you can swap with active dry yeast by adjusting the method.
• Warm water (110°F/43°C) – Activates yeast; if you’re in a hurry, use warmer water for a quicker rise.
• Olive oil – Adds moisture and flavor, helping achieve that golden crust; melted butter works too.
For the Flavor
• Garlic (minced) – Infuses the bread with a robust flavor; feel free to use roasted garlic for a sweeter touch.
• Fresh rosemary – Adds aromatic freshness; substitute with dried rosemary at one-third the amount for a simpler option.
• Thyme – Brings complexity to the flavor; can be omitted if you prefer.
• Dried oregano – Enhances the herbaceous flavor profile.
• Black pepper – Adds a hint of spice; adjust to your taste.
For Finishing Touches
• Optional topping herbs and sea salt – Elevates the bread’s appearance and flavor, making it even more appealing.
Get ready to wow your taste buds with this crusty garlic herb Dutch oven bread!
Step‑by‑Step Instructions for Crusty Garlic Herb Dutch Oven Bread
Step 1: Combine Dry Ingredients
In a large mixing bowl, whisk together 4 cups of all-purpose flour, 1.5 teaspoons of salt, and 2 teaspoons of instant yeast until well blended, ensuring everything is evenly distributed. This mix will serve as the foundation for your Crusty Garlic Herb Dutch Oven Bread. Set this bowl aside as you prepare the flavorful wet ingredients.
Step 2: Mix Wet Ingredients
In a separate bowl, combine 1.5 cups of warm water (around 110°F/43°C), 2 tablespoons of olive oil, 4 cloves of minced garlic, 1 tablespoon of fresh rosemary, 1 teaspoon of thyme, 1 teaspoon of dried oregano, and freshly cracked black pepper. Whisk well to blend the ingredients and activate the yeast, setting the stage for a delightfully aromatic loaf.
Step 3: Form the Dough
Pour the wet mixture into the dry ingredients and stir using a wooden spoon until a shaggy dough forms—it should be sticky and rustic looking. Don’t overmix; the dough will come together as it rises. Cover the bowl tightly with plastic wrap or a clean kitchen towel, allowing the dough to rise at room temperature for 12 to 18 hours until it has doubled in size and appears bubbly on the surface.
Step 4: Shape the Dough
After the long rise, lightly flour a clean surface and gently turn out the dough onto it. Using floured hands, shape the dough into a round boule, being careful not to deflate it too much. This step is crucial for creating the airy texture of your Crusty Garlic Herb Dutch Oven Bread, so keep it light and tender.
Step 5: Second Rise and Preheat
Place the shaped dough onto a piece of parchment paper, cover it with a kitchen towel, and let it rest for about 1 hour. During this time, preheat your oven to 450°F (232°C) and place your Dutch oven inside to heat up. This preheating will help achieve that perfect crusty exterior.
Step 6: Prepare the Dutch Oven
Once the oven is hot, carefully remove the Dutch oven using oven mitts. Drizzle 1 tablespoon of olive oil into the bottom of the pot, swirling to coat evenly. This oil will help prevent sticking while enhancing the crust’s texture.
Step 7: Transfer the Dough
With the parchment paper as a support, lift the dough and place it seam-side down in the hot Dutch oven. Sprinkle any additional herbs and a pinch of sea salt on top for that extra flavor boost. The dough will sizzle slightly upon contact, a sign that you’re on the right path to a beautiful loaf.
Step 8: Bake the Bread
Cover the Dutch oven with its lid and bake the bread for 30 minutes. This initial phase traps steam within, essential for achieving that crusty finish. After 30 minutes, remove the lid and bake for an additional 15 to 20 minutes, or until the bread is a deep golden brown and sounds hollow when tapped on the bottom.
Step 9: Cool Before Slicing
Once baked, carefully remove the Dutch oven from the oven using mitts, and transfer the bread to a wire rack. Allow it to cool for at least 30 minutes before slicing. This cooling period not only enhances the flavor but also ensures the structure of your Crusty Garlic Herb Dutch Oven Bread remains intact.
Expert Tips for Crusty Garlic Herb Dutch Oven Bread
• Optimal Rising: Allowing the dough to rise for 12 to 18 hours develops richer flavors; skipping this step may lead to denser bread.
• Proper Preheating: Make sure to preheat your Dutch oven thoroughly; this enhances crust formation and helps achieve that crispy outer layer.
• Gentle Handling: When shaping the dough, be gentle to preserve the airy texture; overworking can lead to a dense loaf.
• Timing is Key: Keep an eye on the baking times; every oven is different. A slight over-bake can result in a dry loaf.
• Cooling Down: Don’t rush to slice the bread; allow it to cool for at least 30 minutes to maintain structure and moisture in your Crusty Garlic Herb Dutch Oven Bread.
What to Serve with Irresistibly Soft and Crusty Garlic Herb Dutch Oven Bread
Imagine the savory aroma of garlic herb bread mingling with comforting sides that elevate your meal to unforgettable heights.
-
Creamy Tomato Soup: The rich, velvety texture complements the crispy bread perfectly, making each bite an indulgent experience.
-
Garden Salad with Lemon Vinaigrette: Fresh greens and zesty dressing add brightness, balancing the rich flavors of the bread beautifully. A sprinkle of feta or goat cheese elevates it further!
-
Savory Herb Chicken: Juicy, herb-marinated chicken brings out the delightful garlic notes while providing a protein-packed pairing. This duo truly brings comfort to the table.
-
Roasted Vegetables: A colorful medley of roasted seasonal veggies adds a nutritious crunch, enhancing not only the taste but also the visual appeal of your meal.
-
Homemade Bruschetta: Top cool, diced tomatoes mixed with basil and balsamic on slices of the bread for a fresh, flavorful appetizer that’s modelled around the bread’s deliciousness.
-
Creamy Mashed Potatoes: Dreamy, buttery mashed potatoes are the ultimate comfort food, creating a delightful contrast to the crisp crust of the garlic herb bread.
-
Rich Red Wine: A glass of full-bodied red wine enhances the meal, harmonizing beautifully with the savory garlic and herb notes in the bread.
-
Chocolate Lava Cake: For dessert, a warm, gooey chocolate lava cake offers a decadent finish to your meal, simply calling for a slice of garlic herb bread for a unique twist.
Crusty Garlic Herb Dutch Oven Bread Variations
Feel free to get creative and make this recipe your own with these delightful twists!
- Dairy-Free: Substitute olive oil with a plant-based oil, and skip any dairy toppings for a delicious vegan option.
- Cheesy Delight: Add 1 cup of shredded mozzarella or Parmesan cheese to the dough for a rich, cheesy flavor in every bite.
- Spicy Kick: Mix in 1 teaspoon of red pepper flakes or crushed chili for a tasty, spicy version that’ll elevate your palate.
- Garlic Lover’s Twist: For a bolder garlic flavor, incorporate more minced garlic, or use roasted garlic for a subtle sweetness that complements the herbs beautifully.
- Herb Medley: Experiment with different fresh herbs! Try basil, dill, or parsley to add unique flavor profiles that reflect your personal taste or the season.
- Savory Additions: Add chopped sun-dried tomatoes or olives into the dough for an Italian-inspired twist that balances both savory and aromatic elements.
- Whole Wheat Goodness: Substitute half of the all-purpose flour with whole wheat flour for a heartier bread with a lovely nutty flavor and extra nutrition.
- Sweet Herb Bread: For a unique fusion, incorporate brown sugar along with your herbs to create a subtly sweet bread that pairs perfectly with butter or spreads.
As you explore these variations, remember, there’s plenty of joy in transforming this bread into something truly special for you and your loved ones! And if you’re in the mood for other savory experiences, try my delicious Crockpot Garlic Butter Beef Bites or the irresistible Garlic Shrimp Over Mashed Potatoes for a full feast!
Storage Tips for Crusty Garlic Herb Dutch Oven Bread
Room Temperature: Store your bread in an airtight container at room temperature for up to 3 days to keep it fresh and soft.
Freezer: For longer preservation, slice the bread and freeze individual pieces in a resealable plastic bag for up to 3 months.
Reheating: To enjoy, simply toast slices in a toaster or oven until warm and crispy. This brings back that delightful freshly-baked texture from your Crusty Garlic Herb Dutch Oven Bread.
Make Ahead Options
These Crusty Garlic Herb Dutch Oven Bread loaves are perfect for meal prep! You can mix the dry ingredients and prepare the wet mixture up to 24 hours in advance. Simply combine the two mixtures and let the dough rise at room temperature overnight for optimal flavor. If you want to take it a step further, shape the dough and let it rise for an hour, then refrigerate it (up to 3 days) before baking. When ready to enjoy, simply preheat your oven and Dutch oven, allowing the dough to come to room temperature before baking as usual. This way, you’ll have artisan-quality bread that’s just as delicious without the last-minute fuss!
Crusty Garlic Herb Dutch Oven Bread Recipe FAQs
How do I choose the best garlic for this bread?
Absolutely! When selecting garlic, look for firm bulbs with dry, papery skins. Avoid any that feel soft or have dark spots. Fresh garlic will give your bread the best flavor, and you can even experiment with roasted garlic for a sweeter taste.
What’s the best way to store leftover bread?
Store your Crusty Garlic Herb Dutch Oven Bread in an airtight container at room temperature for up to 3 days. If you want to keep it longer, slice it and freeze individual pieces in a resealable plastic bag for up to 3 months. This retains its delicious taste and texture!
Can I freeze dough before baking the bread?
Absolutely! To freeze your dough, after the first rise, shape it into a round boule, wrap it tightly in plastic wrap, and place it in a freezer bag. It can be frozen for up to 3 months. When you’re ready to bake, thaw it in the refrigerator overnight and let it rise for about 1 hour before baking.
How do I know if my bread is over-proofed?
Very! If your dough has doubled but has bubbles that look excessively large and the surface is shiny or very soft when you poke it, it may be over-proofed. In that case, gently deflate it by folding it and allow it to rise again briefly—this can save your delicious bread!
What dietary considerations should I keep in mind?
For those concerned with dietary restrictions, note that this recipe contains gluten due to the all-purpose flour. If you’re cooking for someone with gluten intolerance, I recommend using a gluten-free flour blend, keeping in mind that this may affect the bread’s texture. Always check the labels for allergens, especially if you’re serving to friends or family with specific dietary needs.
What should I do if my bread doesn’t rise as expected?
If your bread does not rise as it should, check the freshness of your yeast—expired yeast can lead to disappointing results. Ensure the warm water used to activate the yeast was at the correct temperature (around 110°F/43°C); too hot or too cold can kill the yeast. If the dough is too dry, try adding a little water, keeping in mind that the dough should remain rustic and slightly sticky.

Crusty Garlic Herb Dutch Oven Bread That'll Wow Your Tastebuds
Ingredients
Equipment
Method
- In a large mixing bowl, whisk together flour, salt, and instant yeast until well blended.
- In a separate bowl, mix warm water, olive oil, minced garlic, rosemary, thyme, oregano, and black pepper.
- Pour the wet mixture into the dry ingredients and stir until a shaggy sticky dough forms.
- Cover and let the dough rise at room temperature for 12 to 18 hours.
- Lightly flour a clean surface and turn out the dough, shaping it into a round boule.
- Place the dough on parchment paper, cover, and let it rest for about 1 hour.
- Preheat your oven to 450°F (232°C) with the Dutch oven inside.
- Carefully remove the hot Dutch oven and drizzle olive oil inside.
- Lift the dough using parchment paper and place it in the Dutch oven seam-side down, adding any herbs and a pinch of sea salt on top.
- Cover and bake for 30 minutes, then remove the lid and bake for an additional 15 to 20 minutes.
- Remove the bread from the oven and let it cool for at least 30 minutes before slicing.
Leave a Reply