
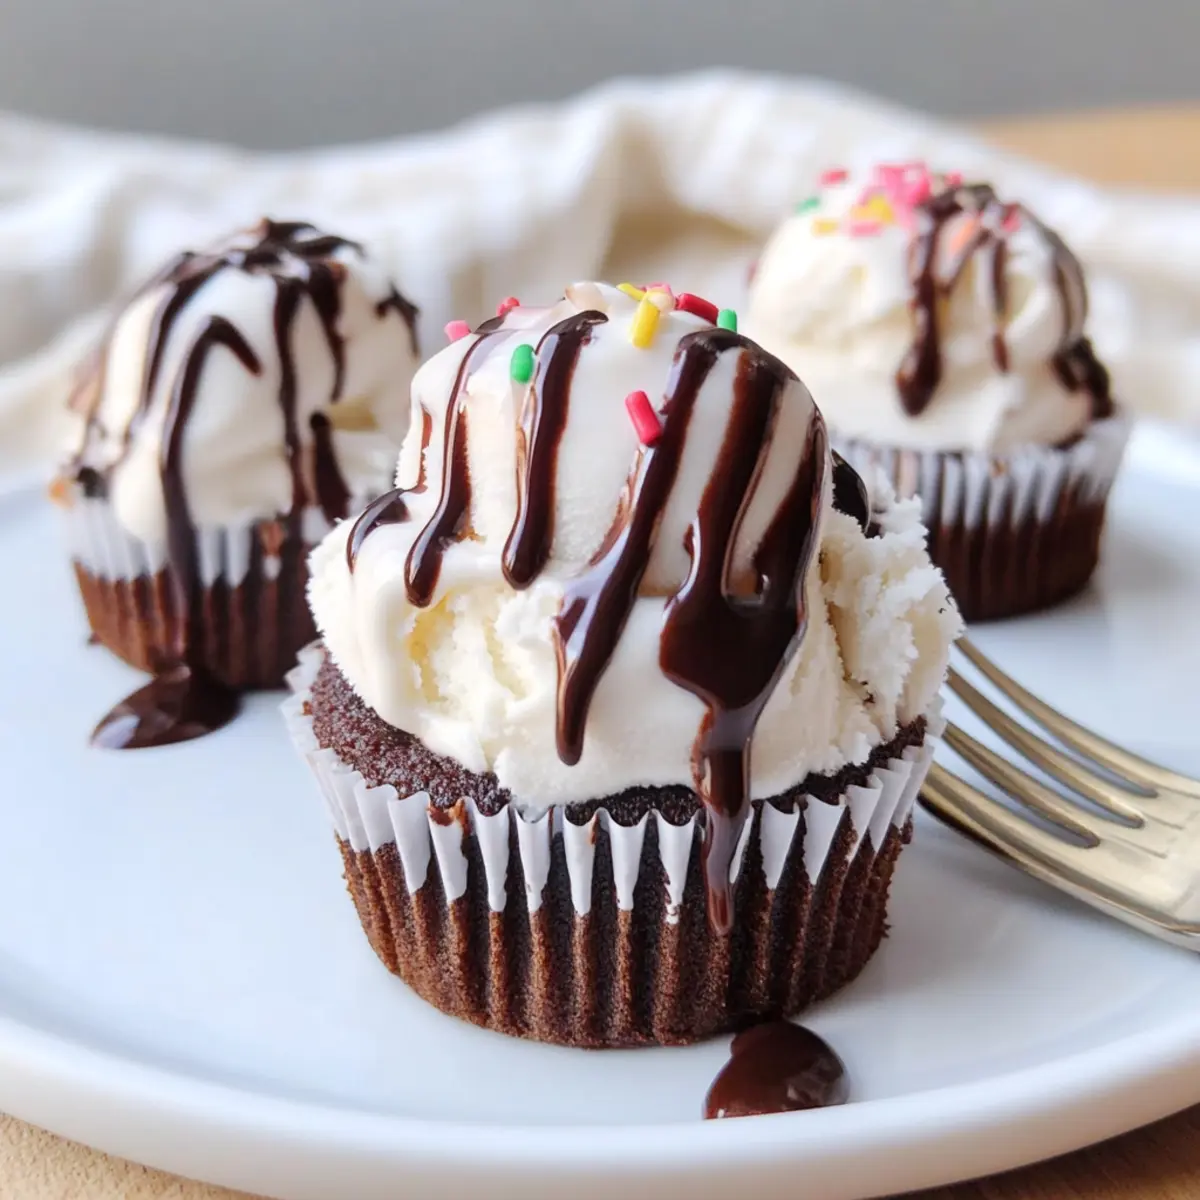
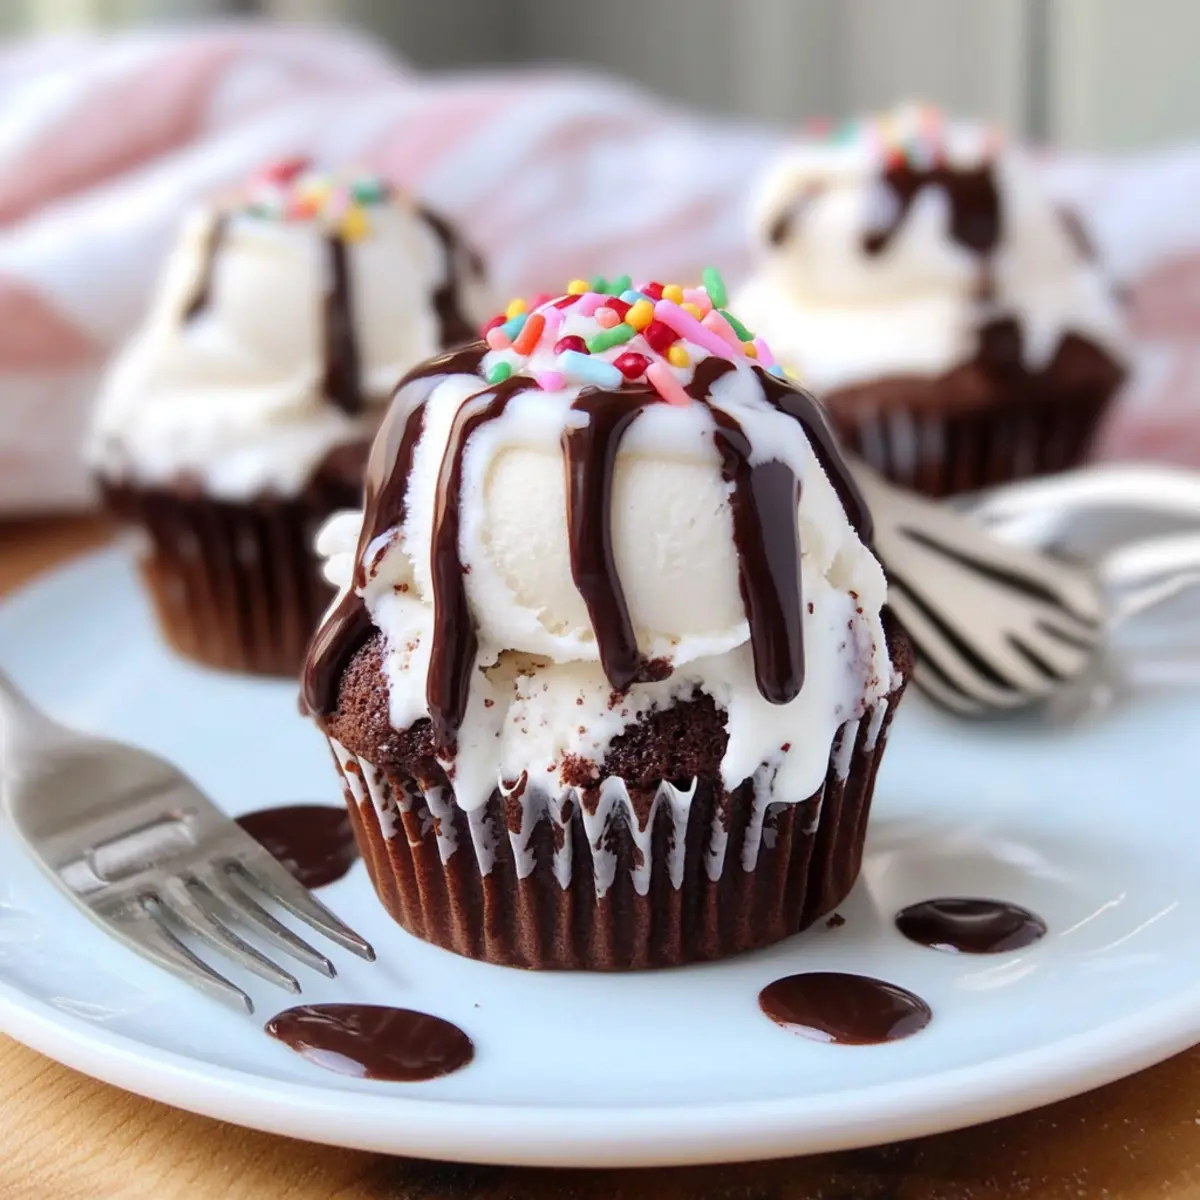
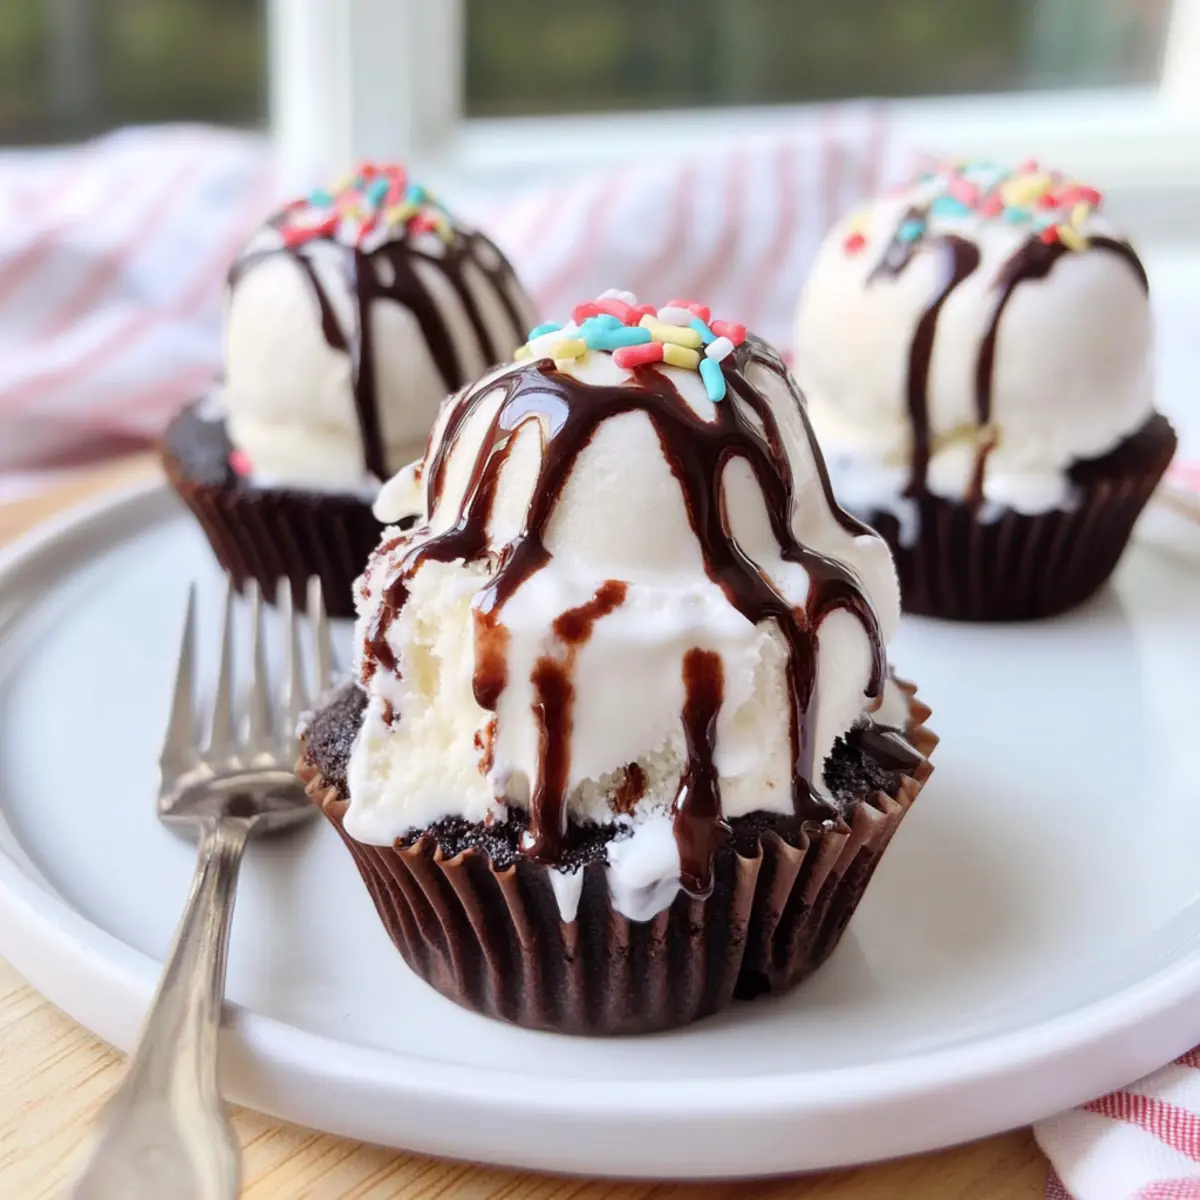
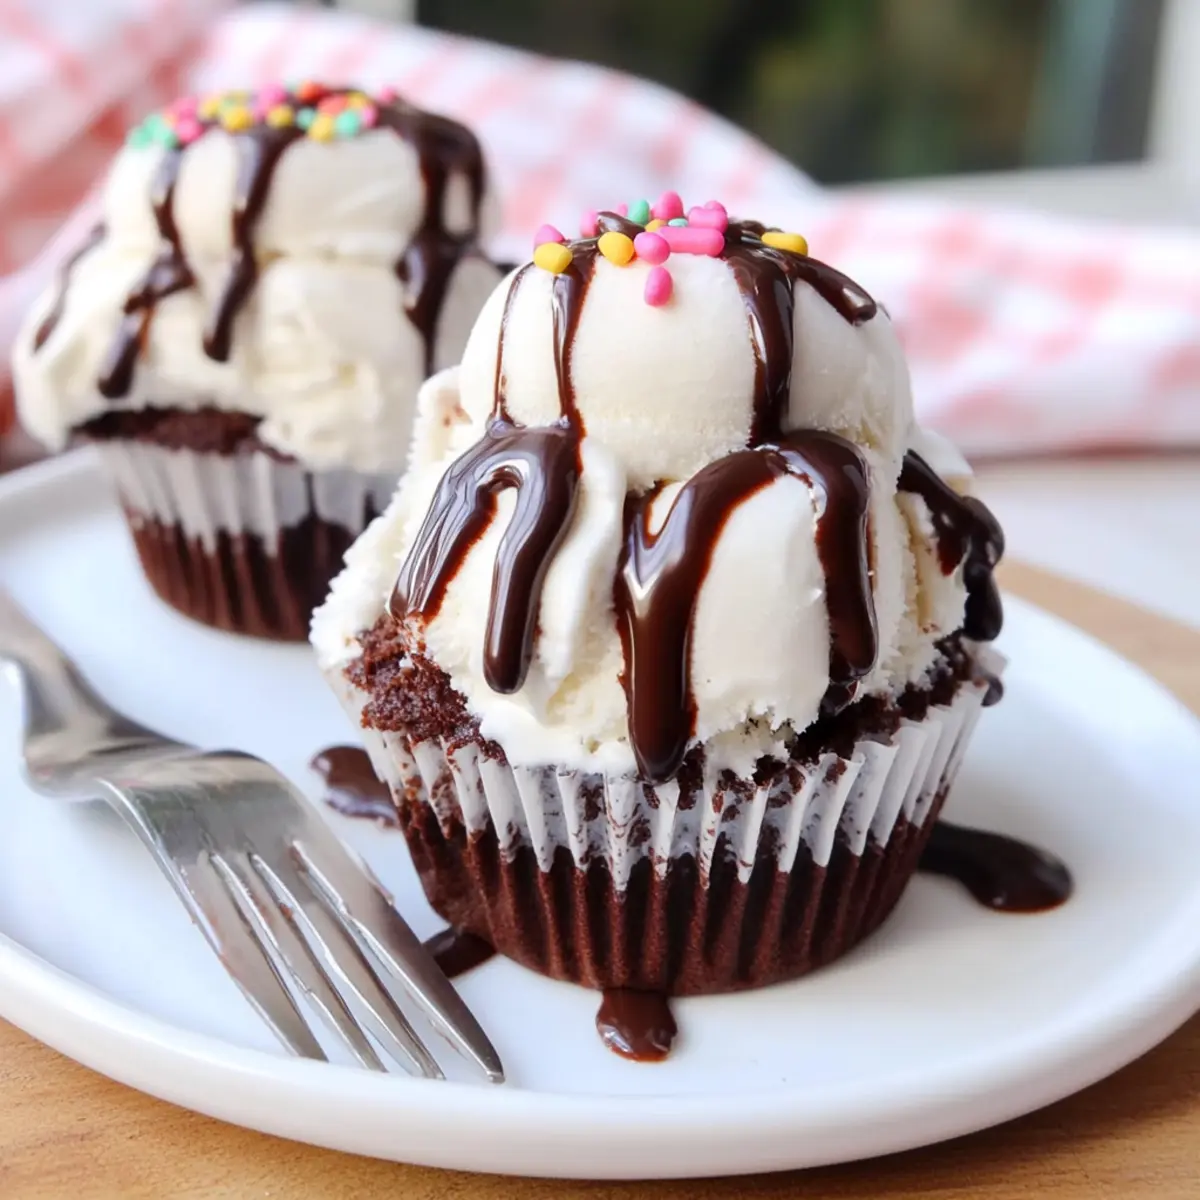
The sound of laughter and the mingling of friends often awakens fond memories, such as the delightful moment when a surprise dessert makes an entrance. That’s where these Mini Ice Cream Cakes come in—combining the rich taste of chocolate cupcakes and creamy ice cream, they’re a sweet addition to any celebration. Not only are they incredibly easy to whip up, but they’re also freezer-friendly, ensuring a delicious treat is always on hand for unexpected gatherings. Each mini cake is a perfect blend of soft, moist cupcake and luscious ice cream, drizzled with chocolate syrup and topped with fluffy whipped cream and colorful sprinkles—who could resist? Whether you’re planning a party or simply want to indulge in a homemade dessert, these mini cakes are bound to make your day a little sweeter. Curious to learn how to create this delightful dessert? Let’s dive into the recipe!
Why Make Mini Ice Cream Cakes?
Easy and Fun: These Mini Ice Cream Cakes are not only a breeze to make, but they also add a whimsical touch to any gathering.
Crowd-Pleaser: With flavors from chocolate to vanilla ice cream, there’s something to satisfy everyone’s sweet tooth!
Freezer-Friendly: Made ahead of time and stored for up to two months, they’re perfect for last-minute parties or spontaneous get-togethers.
Versatile Toppings: Customize them with toppings like crushed cookies or seasonal sprinkles for a unique twist—ideal for any occasion!
Celebrate Anytime: Whether it’s a birthday or a simple family gathering, these mini delights will definitely steal the show! Want more delicious ideas? Try our Cajun Chicken Pasta for dinner or enjoy some Chocolate Pumpkin Cupcakes for dessert!
Mini Ice Cream Cakes Ingredients
Whether you’re planning a festive gathering or a cozy night in, these Mini Ice Cream Cakes will be a hit!
For the Cupcakes
- Chocolate Cake Mix – Offers a rich and sweet base; feel free to experiment with any flavor of boxed cake mix as a tasty alternative.
- Eggs – Essential for binding the mix and adding moisture; always check the package for specific egg requirements.
- Water – This ingredient helps to activate the cake mix; substitute with milk for a creamier texture.
For the Ice Cream
- Ice Cream – The star of the show, adding creamy goodness; choose your favorite flavors, but remember to soften before scooping.
For the Toppings
- Whipped Cream – Adds lightness and a touch of richness; homemade or store-bought options both work well.
- Chocolate Syrup – Enhances sweetness and adds a delightful chocolatey kick; caramel sauce is a great substitute if you’re feeling adventurous!
- Sprinkles – A fun way to celebrate; use seasonal or themed sprinkles to match any occasion.
These Mini Ice Cream Cakes are as fun to make as they are to eat!
Step‑by‑Step Instructions for Mini Ice Cream Cakes
Step 1: Preheat the Oven
Begin by preheating your oven to 350°F (175°C). This ensures that your Mini Ice Cream Cakes bake evenly. While the oven warms up, gather your cupcake liners and muffin tins, readying them for the chocolate cake mix that will create the base of this delightful dessert.
Step 2: Prepare the Cake Mix
In a large mixing bowl, combine the chocolate cake mix with the eggs and water, following the package instructions for best results. Mix until the batter is smooth and consistent, with no lumps remaining. This rich cake batter provides a perfect foundation for your Mini Ice Cream Cakes, adding sweetness and structure.
Step 3: Fill the Muffin Tins
Place cupcake liners into your muffin tins, aiming for a total of 48 liners. Using a tablespoon, fill each liner with about 1 tablespoon of the prepared chocolate cake batter. Make sure to space them evenly to allow for expansion while baking. This portioning will set you up for those perfectly sized mini treats.
Step 4: Bake the Cupcakes
Pop the muffin tins into your preheated oven and bake for approximately 14 minutes. To check for doneness, insert a toothpick into the center of a cupcake—it should come out clean. Once baked, carefully remove the tins from the oven and let them cool for a few minutes while you prepare for the next step.
Step 5: Freeze the Cupcakes
After allowing the mini cupcakes to cool, transfer them to a rimmed baking sheet. Freeze the cupcakes for about 30 minutes, which will make it easier to top them with ice cream later. This chilling step ensures that your Mini Ice Cream Cakes maintain their shape when you add the creamy goodness on top.
Step 6: Scoop the Ice Cream
Once the cupcakes are adequately frozen, take your favorite ice cream and let it soften at room temperature for about 10-15 minutes. Using an ice cream scoop, portion out a scoop of softened ice cream and gently press it onto the top of each frozen cupcake. This step allows you to create a delicious layer that makes these treats extra special.
Step 7: Freeze to Set
Return the mini cakes to the freezer once more, allowing them to set for at least 2 hours. This ensures that the ice cream molds perfectly to the cupcake base and holds its shape when you serve these cheerful Mini Ice Cream Cakes at your next gathering.
Step 8: Add the Final Touches
Before serving, remove the mini cakes from the freezer and top each one generously with whipped cream. Drizzle chocolate syrup over the whipped cream, allowing it to cascade down the sides. For an extra festive look, sprinkle colorful toppings, making your Mini Ice Cream Cakes a truly delightful presentation for friends and family.
Expert Tips for Mini Ice Cream Cakes
-
Softened Ice Cream: Ensure the ice cream is softened for easy scooping; leaving it out for 10-15 minutes makes the process smoother.
-
Quality Cake Mix: Use a high-quality chocolate cake mix to enrich the flavor of your Mini Ice Cream Cakes; it truly shines through in every bite.
-
Even Freezing: For even freezing, place the cupcakes on a rimmed baking sheet without touching each other; this prevents them from sticking together.
-
Alternate Fillings: Experiment with different ice cream flavors to create unique mini cakes that everyone will love based on your crowd’s preferences.
-
Decorative Toppings: Get creative with your toppings! Use seasonal sprinkles or crushed cookies to personalize each mini cake for special occasions.
How to Store and Freeze Mini Ice Cream Cakes
Fridge: Store any uneaten Mini Ice Cream Cakes in the fridge for up to 3 days; however, they may lose their creaminess and texture over time.
Freezer: Keep these delightful treats in the freezer for up to 2 months. Wrap each mini cake tightly in plastic wrap and then in aluminum foil to prevent freezer burn.
Serving: When ready to serve, remove mini cakes from the freezer and let them sit at room temperature for about 5-10 minutes for easier handling.
Reheating: There’s no need to reheat, as these are best enjoyed cold! Just add your toppings and serve directly from the freezer for a refreshing treat.
Mini Ice Cream Cakes Variations & Substitutions
Feel free to get creative with these Mini Ice Cream Cakes; the possibilities are just as delightful as the original!
-
Vanilla Cake Mix: Swap the chocolate cake mix for vanilla to offer a lighter flavor that pairs beautifully with any ice cream.
-
Different Ice Cream Flavors: Try fruity ice creams like mango or raspberry to add a refreshing twist to your mini cakes.
-
Gluten-Free Option: Use a gluten-free cake mix to cater to dietary needs while enjoying the same delicious flavors.
-
Nutty Delight: Top with crushed nuts or nut butter for a richer taste and an enjoyable crunch that complements the softness of the cake.
-
Spicy Kick: Add a pinch of cinnamon or cayenne to the cake batter or ice cream for a surprising flavor boost that will thrill adventurous eaters!
-
Dairy-Free: Substitute regular ice cream with almond or coconut milk-based ice creams to ensure that everyone can enjoy a sweet treat.
-
Chocolate Magic: Drizzle with hot fudge instead of chocolate syrup for an extra decadent experience; it adds warmth and richness to your mini cakes.
As you explore these variations, consider serving them alongside our Mediterranean Chicken Gyros or a fresh batch of Bbq Steak Rice for a joyful mix of flavors!
Make Ahead Options
These Mini Ice Cream Cakes are perfect for busy home cooks looking to save time! You can prepare the chocolate cupcakes up to 24 hours in advance; simply bake them, cool completely, and store them in an airtight container in the fridge to maintain their moisture. The ice cream can be scooped and placed on top of the cupcakes up to 3 days before serving—just make sure to cover them tightly with plastic wrap to prevent freezer burn. When it’s time to serve, remove the mini cakes from the freezer, add the whipped cream, drizzle with chocolate syrup, and sprinkle with festive toppings for an effortless yet delightful dessert. Enjoy these make-ahead treats that taste just as delicious as when freshly made!
What to Serve with Mini Ice Cream Cakes?
Create a delightful dessert experience that pairs perfectly with these whimsical treats!
- Fresh Fruit Salad: A colorful mix of strawberries, blueberries, and kiwi adds a refreshing contrast to the sweetness of the mini cakes, balancing flavors beautifully.
- Chocolate Fondue: Dip fruit or marshmallows into a warm chocolate fondue for an interactive dessert that elevates the mini ice cream cakes to new heights of indulgence.
- Coffee: A rich cup of coffee complements the chocolate and ice cream perfectly, creating a delightful pairing that’s sure to wake up your taste buds.
- Milkshakes: Pairing creamy mini ice cream cakes with a decadent milkshake makes for a true dessert extravaganza—imagine sipping and savoring all at once!
- Cookies: Offer a selection of baked cookies, like chocolate chip or peanut butter. Their chewy texture adds an enjoyable contrast to the smooth mini cakes, inviting guests to mix and match treats.
- Whipped Yogurt Parfaits: Layer yogurt with granola and fruit for a lighter option that provides a refreshing counterpoint to the rich flavors of the mini ice cream cakes.
- Soda Floats: Pour your favorite soda over a scoop of vanilla ice cream for a fun float that echoes the decadent spirit of the mini cakes while adding fizzy delight.
- Chocolate Chip Brownies: These fudgy treats can enhance the chocolate experience, complementing the rich flavor profile of the mini cakes for chocolate lovers everywhere!
- Sparkling Lemonade: This tangy, effervescent drink not only quenches thirst but also adds a zesty brightness that cuts through the sweetness of the dessert, making it a vibrant pairing.
Mini Ice Cream Cakes Recipe FAQs
How do I choose the right ice cream for my Mini Ice Cream Cakes?
Absolutely! Choose ice cream that you truly enjoy. I recommend using premium brands for a creamier texture and richer flavor. Make sure to soften it at room temperature for about 10-15 minutes before scooping, as this makes it much easier to spread on top of the cupcakes.
How should I store leftover Mini Ice Cream Cakes?
Very! You can store uneaten Mini Ice Cream Cakes in the fridge for up to 3 days, but they may lose some of their creamy texture. For the best longevity, wrap each mini cake tightly in plastic wrap and aluminum foil, then store in the freezer for up to 2 months, ensuring they stay fresh and delicious.
Can I freeze Mini Ice Cream Cakes?
Yes! These treats are perfect for freezing. After assembling the cakes and allowing them to set for at least 2 hours, wrap each one individually and store them in the freezer. They can be enjoyed straight from the freezer or thawed for about 5-10 minutes before serving.
What should I do if my ice cream has been melted before use?
If your ice cream becomes too melted, simply refreeze it for about 30 minutes to an hour until it firms up enough to scoop. This not only ensures you get the ideal consistency but also helps your Mini Ice Cream Cakes hold their shape when layered.
Are these Mini Ice Cream Cakes suitable for kids with allergies?
When preparing these Mini Ice Cream Cakes, always check for allergens like gluten, dairy, or nuts in both the cake mix and ice cream. I often find that using alternatives—like gluten-free cake mix or non-dairy ice cream—makes it easy to create a treat that everyone can enjoy.
Mini Ice Cream Cakes for Effortless and Fun Celebrations
Ingredients
Equipment
Method
- Preheat your oven to 350°F (175°C). Gather your cupcake liners and muffin tins.
- In a large mixing bowl, combine chocolate cake mix, eggs, and water. Mix until smooth.
- Place cupcake liners into muffin tins and fill each liner with about 1 tablespoon of batter.
- Bake for approximately 14 minutes. Check doneness with a toothpick.
- Remove the tins from the oven and let cupcakes cool before freezing them on a baking sheet for 30 minutes.
- Scoop softened ice cream and press onto each frozen cupcake.
- Return to freezer for at least 2 hours to set.
- Top each mini cake with whipped cream, drizzle with chocolate syrup, and add sprinkles before serving.
Leave a Reply