
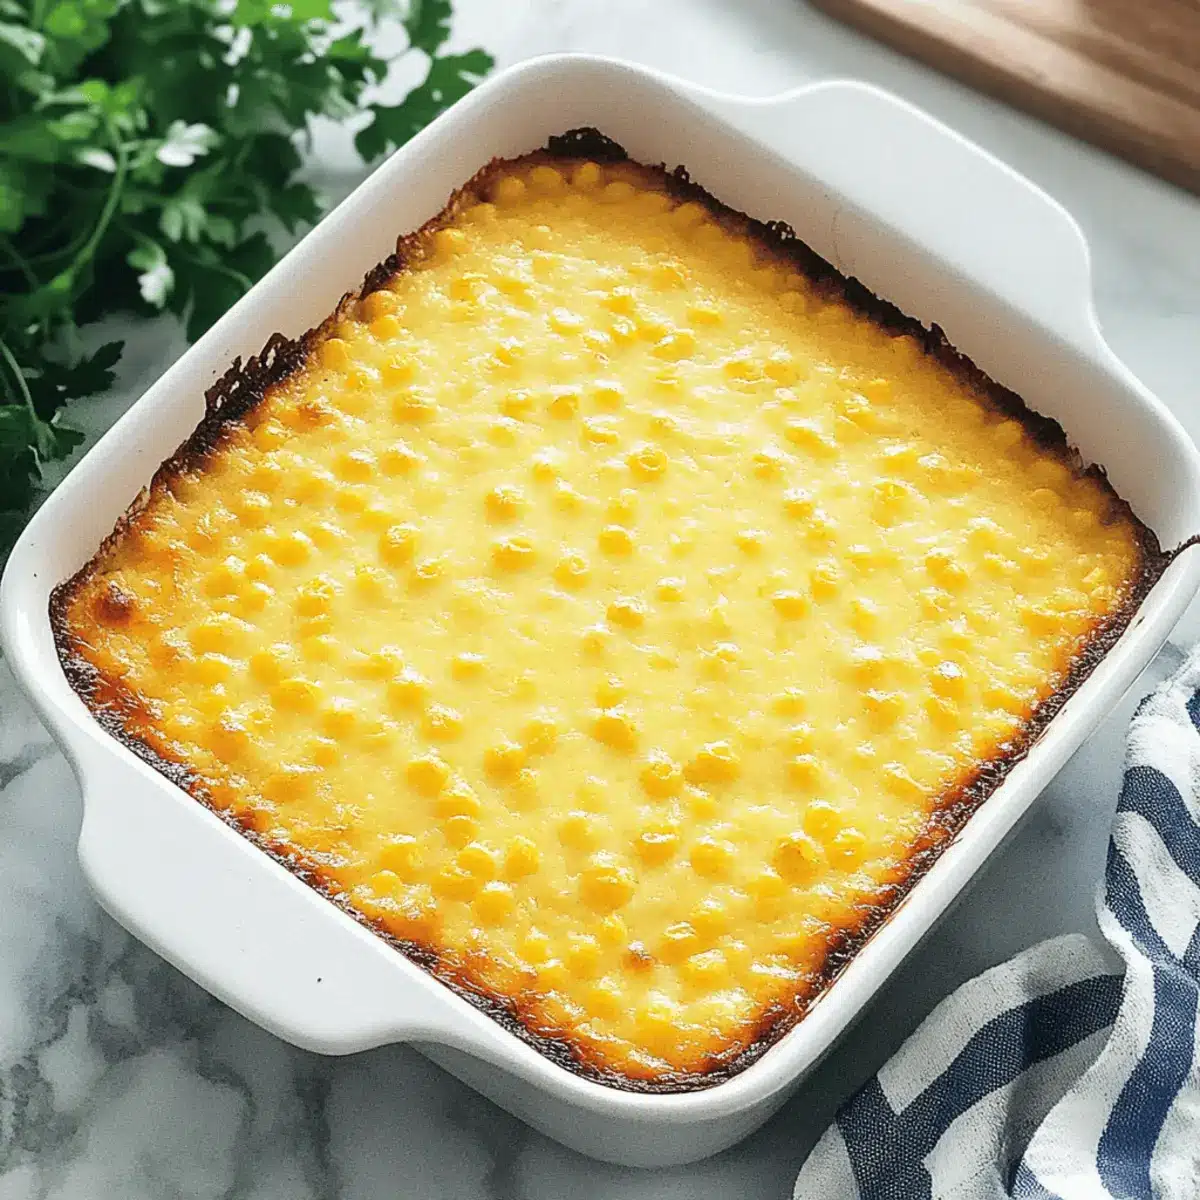
“Did you hear that?” my friend whispered as the tantalizing aroma wafted through the air, inviting everyone to the kitchen. That’s the magic of Easy Jiffy Corn Casserole—a dish that transforms a simple gathering into a cozy feast filled with laughter and warmth. This comforting staple offers a delightful twist on cornbread, combining the sweetness of corn with a creamy, cake-like texture that everyone will love. With just six budget-friendly ingredients, it’s perfect for busy weeknights or family potlucks, ensuring you’ll have plenty of seconds to go around! Best of all, this dish is ready in no time, so you can focus on what really matters—creating beautiful memories around the table. Curious about how to whip up this crowd-pleaser? Let’s get cooking!

Why is Jiffy Corn Casserole a Must-Try?
Comforting, this casserole blends sweet corn and creamy goodness, creating a familiar taste everyone craves.
Quick Preparation means you can whip it up faster than a pizza delivery!
Versatile enough to pair with anything from Spicy Southern Casserole to roasted chicken, it’s the ultimate side dish.
Budget-Friendly without sacrificing flavor, this meal makes home cooking accessible.
Family Approved, it’s a dish that even kids can’t resist, ensuring happy faces at the table!
Jiffy Corn Casserole Ingredients
• Easy to gather and budget-friendly—let’s dive into the essentials for a perfect Jiffy Corn Casserole!
For the Batter
- Jiffy Corn Muffin Mix – This is your flavor base; any 8.5 oz corn muffin mix works as a substitute.
- Whole Kernel Corn – Provides delightful texture; use drained canned corn or thawed frozen corn (1.5 cups if frozen).
- Creamed Corn – Key for moisture and creaminess; using this is highly recommended for the best texture.
- Sour Cream – Adds richness; for a lighter version, substitute with plain Greek yogurt.
- Eggs – Acts as a binder; lightly whip before mixing for a smoother batter.
- Butter – Essential for flavor and moisture; melted coconut oil or vegetable oil can be used as alternatives.
Optional Additions
- Shredded Cheese – Mix in for an extra layer of flavor; it melts beautifully into the casserole.
- Diced Jalapeños – For those who love a little kick; they add a nice heat contrast to the sweetness of the corn.
Now that you’re equipped with the ingredients, it’s time to bring your family around the table for this comforting dish!
Step‑by‑Step Instructions for Jiffy Corn Casserole
Step 1: Preheat Your Oven
Begin by preheating your oven to 350°F (175°C), allowing it to reach a steady temperature. This step is crucial as it ensures that your Jiffy Corn Casserole bakes evenly and develops that beautiful golden-brown top. While the oven warms up, gather your mixing bowl and measuring tools to prepare for the next steps.
Step 2: Prepare the Eggs
In a large mixing bowl, take a moment to lightly beat two eggs with a fork. This step helps to incorporate air into the eggs, making for a fluffier casserole. Once they are well beaten, you’ll want to move on quickly to the next ingredients for the best texture.
Step 3: Combine Wet Ingredients
Add in the melted butter and sour cream to the eggs, mixing everything together until it forms a creamy mixture. This combination will add richness to your Jiffy Corn Casserole. Make sure the butter is not too hot to avoid cooking the eggs. Stir gently until fully incorporated and smooth.
Step 4: Mix in the Corn
Now, stir in the drained whole kernel corn and the creamed corn, integrating them thoroughly into the wet mixture. The whole kernel corn adds delightful texture, while the creamed corn enhances the overall creaminess of your casserole. Make sure all the corn is evenly distributed throughout.
Step 5: Incorporate Jiffy Mix
Pour in the Jiffy Corn Muffin Mix, carefully folding it into the mixture until it’s smooth and lump-free. This step is essential, as it creates the cake-like texture characteristic of the Jiffy Corn Casserole. Take your time here to ensure you don’t overmix, which can lead to a tougher casserole.
Step 6: Prepare the Baking Dish
Grease your 8×8 inch casserole dish with butter or non-stick spray, ensuring it’s well coated. This will prevent your casserole from sticking and make for an easier clean-up. Spread the cornbread mixture evenly into the dish, smoothing the top for an even bake.
Step 7: Bake to Golden Perfection
Place your casserole in the preheated oven and bake for about 45 minutes. You’ll know it’s ready when the top is golden brown and the center feels firm to the touch. Keep an eye on it in the last few minutes to avoid overbaking.
Step 8: Cool Before Serving
Once baked, remove the Jiffy Corn Casserole from the oven and let it cool for about 5 minutes. This waiting period allows the casserole to set and enhances the texture. Serve warm and enjoy the delightful flavors that will surely bring smiles around the table!

How to Store and Freeze Jiffy Corn Casserole
-
Fridge: Store leftover Jiffy Corn Casserole in an airtight container for up to 4 days. Make sure it cools completely before covering to preserve its moisture.
-
Freezer: For longer storage, wrap the cooled casserole tightly in plastic wrap and then in foil. It can be frozen for up to 2 months without losing flavor.
-
Thawing: When ready to enjoy, thaw the casserole overnight in the fridge. This gradual thawing maintains its delicious texture.
-
Reheating: To reheat, place the thawed Jiffy Corn Casserole in a preheated oven at 350°F until heated through, about 20-25 minutes. Enjoy the warmth and comfort of this delightful dish!
Expert Tips for Jiffy Corn Casserole
-
Check for Firmness: Ensure the center is not jiggly. If it is, it may need more time in the oven to avoid a wet middle.
-
Resting Time Matters: Let the casserole sit for 5 minutes after baking. This resting period improves the texture, making it easier to serve.
-
Flavor Boost: For a delightful twist, mix in diced Ortega green chilies or shredded cheese for added flavor and creaminess to your Jiffy Corn Casserole.
-
Larger Batches: Doubling the recipe? Use a larger pan! Just be mindful to adjust the baking time, as more mixture means longer cooking.
-
Ingredient Variations: Don’t hesitate to swap sour cream for plain Greek yogurt for a lighter option, or use thawed frozen corn for a fresh taste in your casserole.
Make Ahead Options
These Easy Jiffy Corn Casseroles are perfect for home cooks looking to save time on busy weeknights! You can prepare the entire casserole up to 24 hours in advance. Simply mix all the ingredients, pour the batter into your greased baking dish, cover with plastic wrap, and refrigerate. This way, the flavors have a chance to meld, making it just as delicious when baked! When you’re ready to serve, allow it to come to room temperature for about 30 minutes before popping it into the oven at 350°F (175°C) for 45 minutes. By prepping ahead, you’ll ensure a comforting side dish is ready to go with minimal effort!
Jiffy Corn Casserole: Creative Twists Await!
Ready to put your personal spin on this beloved classic? Let’s discover some exciting variations that will tantalize your taste buds!
- Gluten-Free: Substitute Jiffy mix with any gluten-free cornbread mix for a safe and scrumptious alternative.
- Cheesy Delight: Add shredded cheese, like cheddar or pepper jack, for a melty and savory twist that everyone will adore.
- Spicy Kick: Mix in diced jalapeños or green chilies for a delightful heat that pairs perfectly with the sweet corn flavor.
- Sweet Twist: Incorporate a bit of honey or maple syrup to elevate the sweetness, creating a lovely balance with the savory elements.
- Herb Infusion: Fresh herbs like chopped chives or parsley can be stirred in for a pop of freshness that brightens the dish.
- Veggie Boost: Toss in finely diced bell peppers or zucchini for added nutrients and a colorful presentation.
- Creamy Upgrade: Replace sour cream with cream cheese or ricotta for a richer, velvety texture that takes comfort to the next level.
- Breakfast Version: Transform it into a breakfast casserole by adding cooked bacon or sausage and extra eggs, making it a hearty morning treat!
With these simple swaps or additions, your Jiffy Corn Casserole can shine in a whole new light. If you’re looking for more inspiration, check out this delicious Croissant Breakfast Casserole or give our Dorito Casserole Savory a try for a fun twist on another classic!
What to Serve with Easy Jiffy Corn Casserole
Transform your meal into a feast with delightful pairings that enhance the comforting flavors of this corn casserole.
-
Roasted Chicken: Juicy, herb-infused chicken complements the creamy texture of the casserole perfectly, creating a flavorful balance on your plate. The savory notes of the chicken work harmoniously with the sweetness of the corn.
-
BBQ Pulled Pork: The tangy richness of pulled pork adds a mouthwatering contrast to the corn casserole, making for a wholesome southern-inspired meal that guests will rave about.
-
Fresh Garden Salad: A crisp salad with a zesty vinaigrette brightens the dish, offering a refreshing crunch that balances the casserole’s creamy softness. Add colorful veggies to enhance both flavor and aesthetics!
-
Baked Beans: Smoky and slightly sweet baked beans bring heartiness to your table, creating a classic comfort food combo that’s perfect for family gatherings.
-
Glazed Carrots: Sweet and tender glazed carrots provide a pop of color and a subtle sweetness that pairs beautifully with the corn casserole. Their natural sugars enhance the overall warmth of the meal.
-
Cornbread Muffins: For the true corn lover, serving cornbread muffins alongside the Jiffy Corn Casserole adds an extra layer of delight, featuring that same wonderful corny goodness in fluffy, portable bites.
-
Iced Tea or Lemonade: A refreshing glass of iced tea or lemonade complements the the casserole’s rich flavors while keeping the meal light and enjoyable. Perfect for sipping on during warm summer evenings!
With these perfect pairings, you’ll create a comforting and delicious experience that everyone will enjoy!

Jiffy Corn Casserole Recipe FAQs
What type of corn should I use for Jiffy Corn Casserole?
Absolutely, you can use either drained canned whole kernel corn or thawed frozen corn. If you opt for frozen, I recommend using about 1.5 cups after it’s thawed. Both choices add delightful texture and natural sweetness to your casserole!
How should I store leftover Jiffy Corn Casserole?
You can store leftovers in an airtight container in the fridge for up to 4 days. Make sure it’s completely cooled before sealing to help maintain its moisture and flavor. Simply reheat individual portions in the microwave or place it back in the oven until warmed through.
Can I freeze Jiffy Corn Casserole?
Certainly! To freeze, let the casserole cool completely. Then, wrap it tightly in plastic wrap and follow up with foil to prevent freezer burn. It can be stored for up to 2 months. When it’s time to enjoy, thaw it overnight in the fridge before reheating in the oven.
What if the center of my casserole is jiggly after baking?
If your Jiffy Corn Casserole is jiggly in the center, it may need more baking time. I recommend checking every 5 minutes until the center feels firm to the touch. Undercooking can lead to a wet middle, so keep a close eye on it during the last moments of baking!
Is Jiffy Corn Casserole suitable for people with dietary restrictions?
While this recipe is generally family-friendly, it does contain gluten from the Jiffy Corn Muffin Mix. For a gluten-free option, simply substitute the Jiffy mix with a gluten-free cornbread mix. Additionally, be mindful of allergies; if needed, you can replace sour cream with plain Greek yogurt for a lighter alternative.
Jiffy Corn Casserole: The Easiest Comfort Food Delight
Ingredients
Equipment
Method
- Preheat your oven to 350°F (175°C).
- Lightly beat the two eggs in a large mixing bowl.
- Mix melted butter and sour cream into the eggs until creamy.
- Stir in the drained whole kernel corn and the creamed corn.
- Fold in the Jiffy Corn Muffin Mix until smooth.
- Grease your 8x8 inch casserole dish and spread the mixture evenly.
- Bake for about 45 minutes until golden brown and firm.
- Cool for 5 minutes before serving.
Leave a Reply