
As I stood in my kitchen, the lively chatter of friends echoed from the living room, and I realized I was craving a treat that was both delightful and guilt-free. Enter my High Protein No-Bake Cheesecake Jars—a dessert that perfectly blends indulgence with health. With layers of creamy cheesecake made from cottage cheese and Greek yogurt, these jars not only deliver a satisfying sweetness but also pack a protein punch. The best part? They come together in mere minutes with just five simple ingredients, making them a go-to for busy home chefs or anyone tired of the fast-food trap. Whether you serve them at a gathering or sneak one in as a mid-day pick-me-up, these cheesecake jars are sure to impress. Ready to learn how to whip up this deliciously easy dessert? Let’s dive in!

Why choose cheesecake jars for dessert?
Simplicity is a game-changer: These cheesecake jars require minimal ingredients and effort, making them perfect for any home cook. High Protein content: By using cottage cheese and Greek yogurt, these jars deliver a guilt-free dessert packed with protein. Mouthwatering Layers: Enjoy the delightful contrast between creamy filling and crunchy graham cracker crust—a treat for the senses! Customizable for unique flavors: Add your favorite fruits like strawberries or blueberries, or even a chocolate twist for a fun variation. Quick and Easy: Ready in minutes, they fit seamlessly into a busy lifestyle. Whip up these cheesecake jars and impress your guests—everyone will love your efforts! For more delightful variations, try my Espresso Cheesecake Decadent or Vanilla Bean Cheesecake.
Cheesecake Jars Ingredients
• For the Cheesecake Filling
- Cottage Cheese – Provides a creamy base and boosts protein content; try low-fat for a lighter dessert.
- Plain Greek Yogurt – Adds a rich creaminess and additional protein; opt for full-fat for indulgence or low-fat for a healthier choice.
- Maple Syrup – Acts as a natural sweetener, bringing balance to the cheesecake; feel free to swap with honey or agave syrup if desired.
• For the Crust
- Crushed Graham Crackers – Perfect for creating that classic cheesecake crust layer; gluten-free alternatives can be used if needed.
• For the Topping
- Berries – Elevate both flavor and nutrition, and can be fresh or frozen; mix them in or use as a vibrant garnish on top of your cheesecake jars.
These cheesecake jars are not only a culinary delight but also a wholesome, high protein dessert option that will surely satisfy your sweet tooth!
Step‑by‑Step Instructions for High Protein No-Bake Cheesecake Jars
Step 1: Blend the Base
In a large food processor, add the cottage cheese and blend on high for 1-2 minutes until the mixture is incredibly smooth and creamy. This step is crucial for achieving that velvety texture typical of cheesecake jars. Once blended, you should see no lumps; it should resemble a thick cream.
Step 2: Add Sweetness
Pour in the maple syrup and continue blending for another 30 seconds until fully incorporated. Taste the mixture to ensure it has the desired sweetness; feel free to add more syrup if you prefer a sweeter result. The blend should now have a rich and inviting aroma, setting the stage for your cheesecake jars.
Step 3: Combine with Yogurt
Transfer the blended cottage cheese mixture to a mixing bowl. Using a silicone spatula, gently fold in the plain Greek yogurt until the two are well combined. This will add a lovely creaminess and extra protein to your cheesecake filling. The mixture should be thick yet airy, perfect for layering.
Step 4: Prepare the Jars
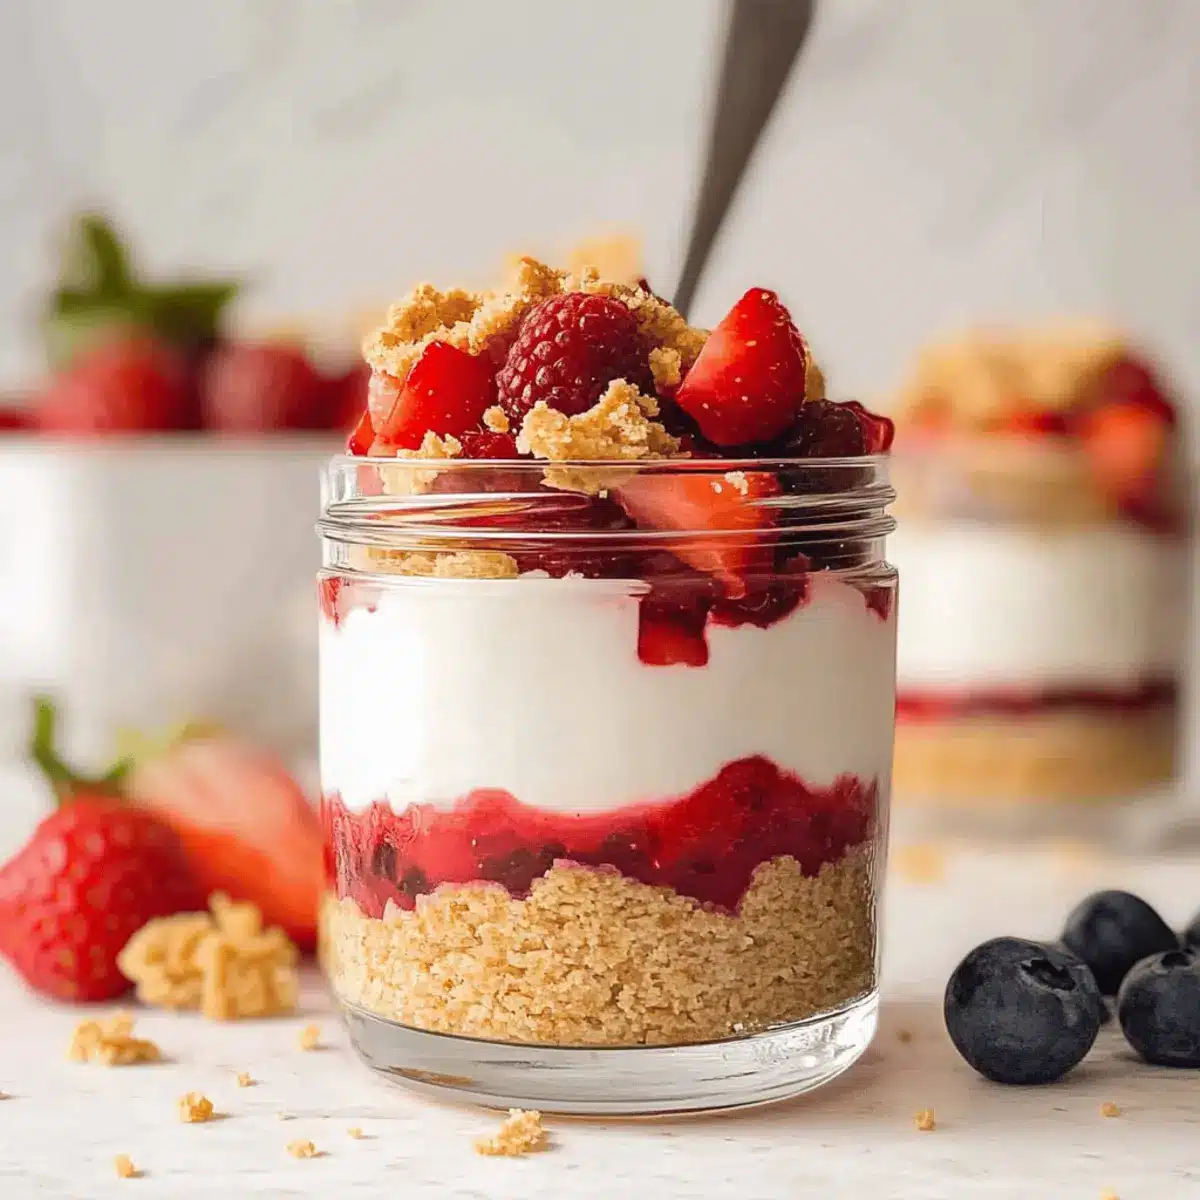
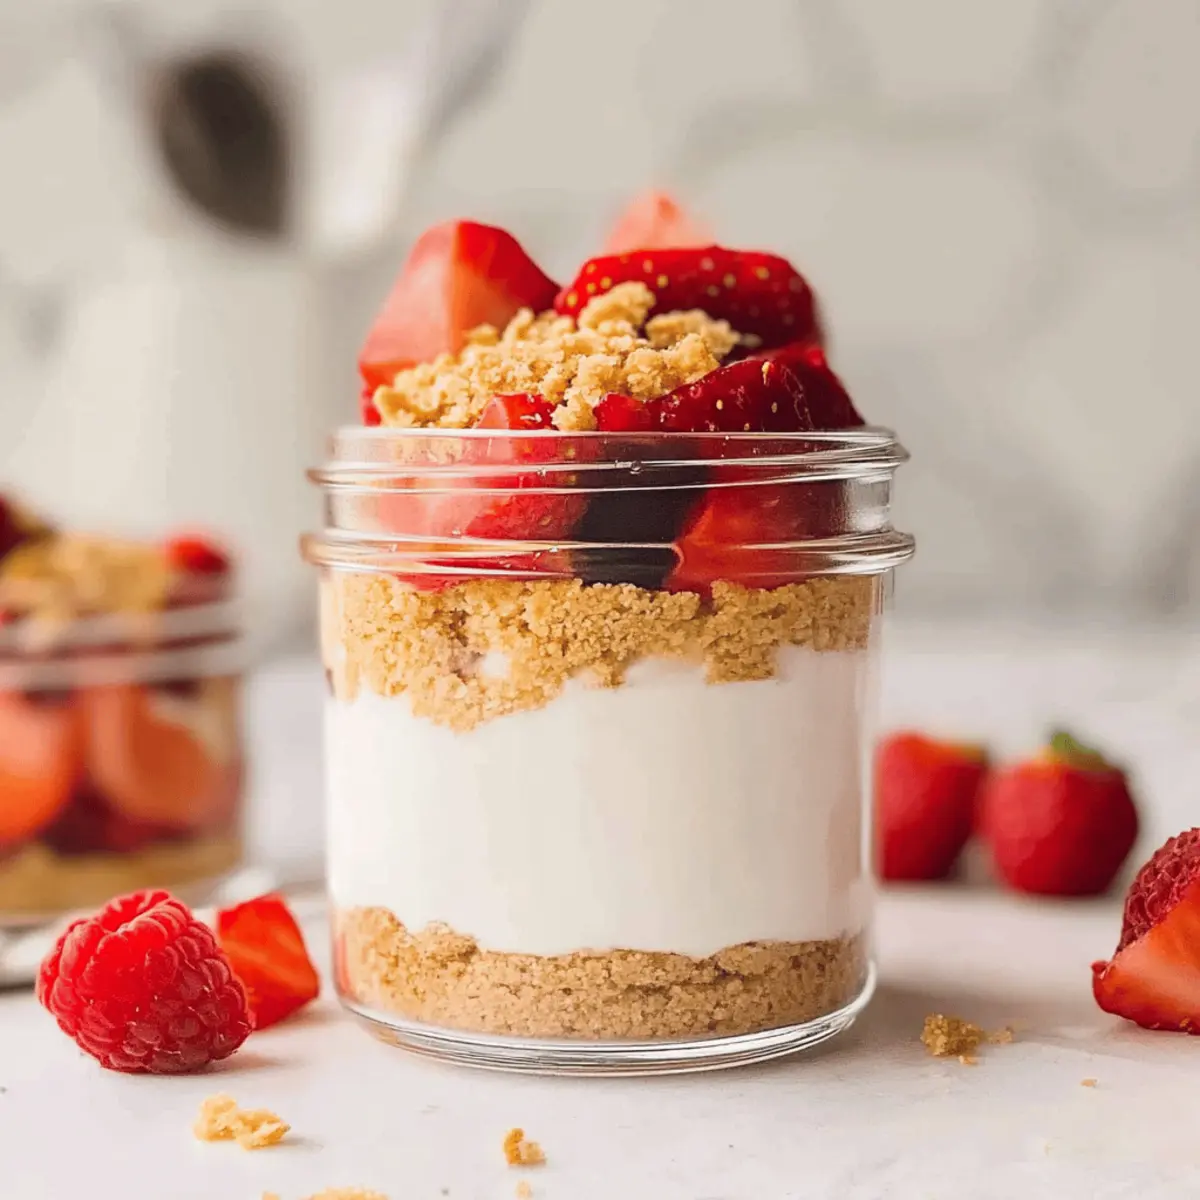
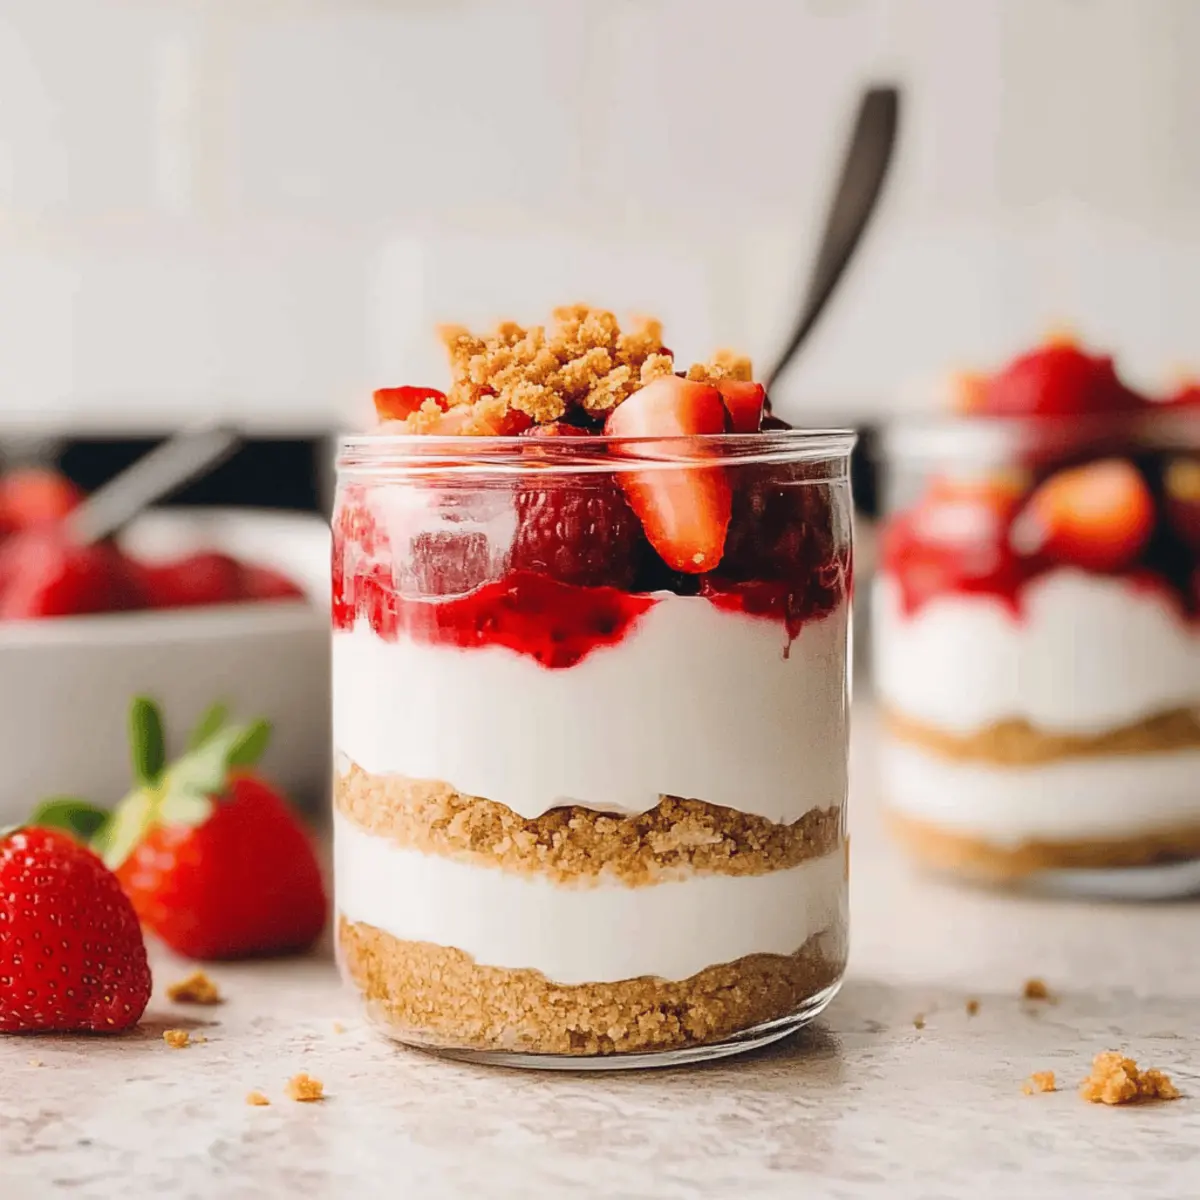
Gather clear jars for assembling your cheesecake jars. Start by adding a layer of crushed graham crackers at the bottom of each jar, about 2 tablespoons deep. The crunch of the crackers creates a delightful contrast to the creamy filling. Pack it down slightly to form a solid base for your cheesecake jars.
Step 5: Create the First Layer
Spoon a generous layer of the cheesecake mixture over the graham crackers, filling each jar about halfway. Smooth the top with your spatula to ensure an even layer. This creamy layer is the heart of your cheesecake jars and should look inviting and fluffy, promising a delicious bite.
Step 6: Layer More Graham Crackers
Add another layer of crushed graham crackers on top of the cheesecake mixture, just like before. This extra layer adds both texture and crunch to your cheesecake jars, setting up the next delicious layer. Aim for about a tablespoon of crushed crackers to keep the balance in flavors.
Step 7: Add Berries
Sprinkle a handful of fresh or frozen berries on top of the graham cracker layer. Choose a mix of your favorites for added flavor and color—strawberries, blueberries, or raspberries work wonderfully. This step not only enhances the taste but also adds a vibrant touch to your high protein cheesecake jars.
Step 8: Finish with Cheesecake Layer
Spoon the remaining cheesecake mixture over the berries, filling each jar to the brim. Smooth out the tops again for a polished look. Your jars should now be full and beautiful, showcasing the lovely layers of crust, cream, and fruit.
Step 9: Garnish and Chill
Finally, garnish the tops with a few extra berries for a beautiful finish. Cover the jars with lids or plastic wrap and refrigerate for at least 1 hour to let the flavors meld together and the jars to set. When ready, they will be delightfully chilled and ready to serve.
Make Ahead Options
These High Protein Cheesecake Jars are perfect for busy home cooks looking to save time during the week! You can prepare the cheesecake filling up to 24 hours in advance by blending the cottage cheese and Greek yogurt mixture and storing it in the refrigerator. Meanwhile, you can also crush the graham crackers and store them in an airtight container to maintain freshness. When you’re ready to serve, simply layer the graham crackers, cheesecake filling, and berries in each jar. This way, you’ll have delicious, creamy cheesecake jars that are just as delightful as if you made them fresh, saving you precious time while keeping your dessert indulgent and nutritious!
What to Serve with High Protein No-Bake Cheesecake Jars
These delightful jars create a sweet ending to any meal, inviting you to explore mouthwatering pairings that complement their creamy richness.
- Fresh Fruit Salad: A vibrant mix of seasonal fruits adds brightness and balances the richness of the cheesecake, making each bite refreshing.
- Coffee or Espresso: A warm cup of coffee enhances the flavor of the cheesecake pans, offering a comforting contrast to the dessert’s texture.
- Chocolate-Covered Almonds: The crunchy sweetness of chocolate-covered almonds adds an indulgent touch, perfectly harmonizing with the creamy cheesecake jars.
- Mint Leaves: Fresh mint leaves lend a refreshing note, brightening the overall flavor and enhancing the aesthetic appeal of your dessert.
- Coconut Whipped Cream: Light and airy, this tropical addition perfectly offsets the dense cheesecake, elevating the dessert experience with every spoonful.
- Vanilla Ice Cream: Creamy vanilla ice cream can add an extra layer of decadence to your dessert, providing a pleasantly cold and sweet contrast.
Indulge in these delightful pairings while enjoying your cheesecake jars for an unforgettable culinary experience!
Expert Tips for Cheesecake Jars
-
Smooth Texture: Ensure the cottage cheese is blended until completely smooth; this prevents any lumps and helps achieve that classic cheesecake texture.
-
Sweetness Adjustment: Taste the cheesecake filling after adding the maple syrup. You can easily tweak the sweetness to meet your liking by adding more or less syrup.
-
Layering Delight: Make sure to pack the graham cracker layers lightly in the jars. This helps create a better texture and maintains the balance between creamy and crunchy in the cheesecake jars.
-
Choose Your Berries: Don’t hesitate to mix different berries for an exciting flavor. Fresh or frozen both work nicely, and seasonal fruits can elevate your cheesecake jars experience!
-
Time to Chill: Always refrigerate your jars for at least an hour before serving. This step allows the flavors to meld beautifully together and ensures the cheesecake filling firms up well.
Cheesecake Jars Variations & Substitutions
Customize your cheesecake jars with these exciting variations that will tantalize your taste buds.
-
Fruit Fusion: Swap berries for mango or peach for a tropical twist. Each fruit brings a unique sweetness that transforms the entire dessert.
-
Nutty Delight: Add crushed nuts such as almonds or walnuts between the layers for an extra crunch. The contrast in texture is delightful and adds healthy fats.
-
Chocolate Lover: Mix in cocoa powder with the cheesecake filling or top with chocolate chips for a decadent experience. The rich chocolate flavor will satisfy any sweet tooth!
-
Sugar-Free: Use a sugar substitute like erythritol or stevia instead of maple syrup to create a sugar-free version. You can still indulge while keeping your health goals in check.
-
Spiced Sensation: Sprinkle cinnamon or nutmeg into the filling for a warm spice aroma that elevates the dessert. This small change can bring comfort and cozy vibes!
-
Dairy-Free: Look for cashew cream or silken tofu as a substitute for cottage cheese and Greek yogurt. Combating dietary restrictions doesn’t mean compromising on flavor!
-
Layered Parfait: Instead of jars, layer the cheesecake filling in a glass with granola at the base for a breakfast twist. Perfect for a nutritious start to your day!
-
Citrus Zing: Add a splash of lemon or orange juice to the filling for a bright, zesty flavor. It gives the cheesecake a fresh and uplifting kick that’s oh-so-refreshing!
Exploring these variations is part of the joy of cooking! Don’t miss out on the delightful treats I’ve whipped up before like my Espresso Cheesecake Decadent and Vanilla Bean Cheesecake. Enjoy the journey of flavor!
How to Store and Freeze Cheesecake Jars
Fridge: Store the cheesecake jars covered in the fridge for up to 3 days. This will keep them fresh and ensure the creamy texture remains intact for delightful servings.
Freezer: For longer storage, freeze the cheesecake jars without the berry topping for up to 2 months. When ready to enjoy, thaw in the fridge overnight before serving.
Reheating: If you’re using frozen jars, avoid reheating them in the microwave. Instead, let them thaw naturally in the fridge for a softer texture when ready to indulge.
Serving: Always garnish with fresh berries just before serving for the best flavor and presentation. Enjoy your cheesecake jars and share the joy they bring!
High Protein No-Bake Cheesecake Jars Recipe FAQs
What kind of cottage cheese should I use?
For a creamier texture, I recommend using low-fat or regular cottage cheese. If you’re feeling indulgent, full-fat cottage cheese is also a great option. Just make sure it’s smooth and free of lumps after blending, as that’s the key to achieving a velvety cheesecake filling!
How long can I store the cheesecake jars in the fridge?
These delectable cheesecake jars can be stored in the fridge for up to 3 days. Make sure to keep them covered to maintain their freshness and texture, ensuring each serving is just as delightful as the first.
Can I freeze the cheesecake jars? If so, how?
Absolutely! To freeze your cheesecake jars, omit the berry topping initially. Cover them tightly with lids or plastic wrap and place them in the freezer for up to 2 months. When you’re ready to enjoy, simply transfer the jars to the fridge and let them thaw overnight. This gentle thawing helps preserve their texture beautifully.
What should I do if my cheesecake filling is lumpy?
If your cheesecake mixture has lumps, don’t worry! Blend the cottage cheese longer in the food processor, aiming for a smooth consistency. If it’s still not smooth enough, try passing the mixture through a fine-mesh sieve or pulse it again until all lumps are eliminated. Your patience will pay off with creamy, luscious jars!
Are cheesecake jars safe for those with dietary restrictions?
Great question! These cheesecake jars can be made gluten-free by using crushed gluten-free graham crackers. Additionally, if anyone has dairy allergies, you might consider experimenting with dairy-free yogurt and alternatives to cottage cheese found at health food stores. Always check ingredient labels for allergens to ensure safety for those with dietary restrictions.
How can I enhance the flavors in my cheesecake jars?
There are endless possibilities! You might try mixing in a teaspoon of vanilla extract for added flavor, or experiment with different fruits beyond berries, like peaches or mangoes. If you love chocolate, add cocoa powder into the cheesecake mixture or top with chocolate shavings. The more, the merrier in creating a flavor explosion!
Decadent Cheesecake Jars Ready in Minutes for Dessert Bliss
Ingredients
Equipment
Method
- In a large food processor, add the cottage cheese and blend on high for 1-2 minutes until smooth.
- Pour in the maple syrup and continue blending for another 30 seconds until fully incorporated.
- Transfer the blended cottage cheese mixture to a mixing bowl and fold in the plain Greek yogurt.
- Add a layer of crushed graham crackers in clear jars, about 2 tablespoons deep.
- Spoon a layer of the cheesecake mixture over the graham crackers, filling each jar about halfway.
- Add another layer of crushed graham crackers on top of the cheesecake mixture.
- Sprinkle a handful of berries on top of the graham crackers.
- Spoon the remaining cheesecake mixture over the berries, filling each jar to the brim.
- Garnish the tops with extra berries and refrigerate for at least 1 hour.
Leave a Reply