
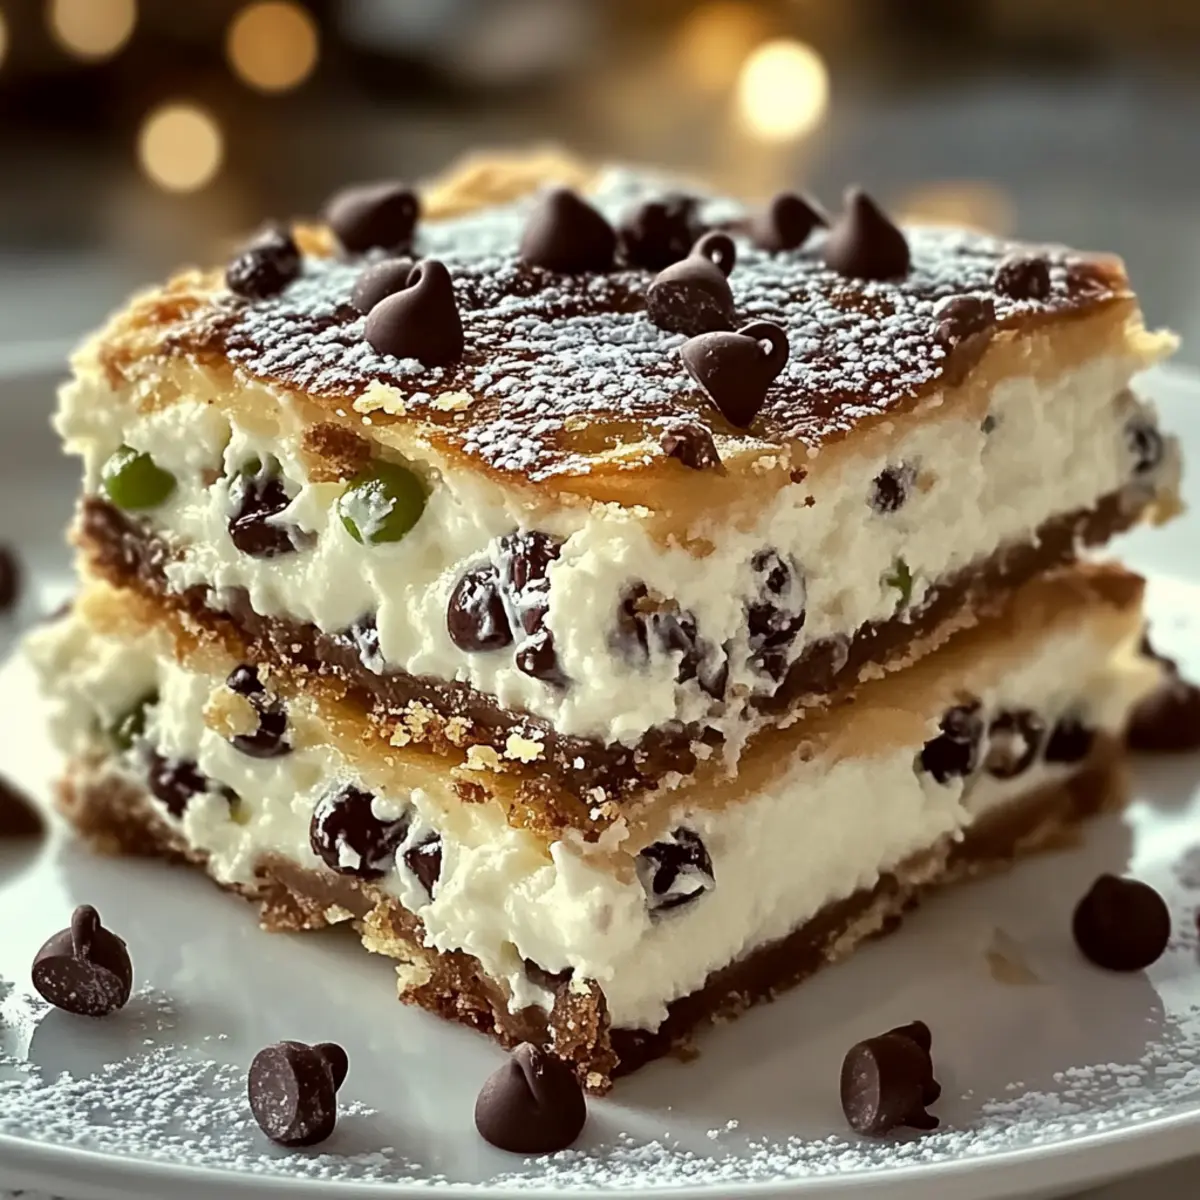
“Did you catch that amazing cannoli recipe?” I overheard my friend exclaim as I was strolling through the local market, and it sparked a wave of nostalgia. Those delightful Classic Cannoli Squares are what you need to indulge your sweet cravings while bringing a touch of Italy right into your kitchen. This recipe offers you a quick and easy way to create a creamy, luscious dessert that’s perfect for any gathering or cozy night in. With just a few ingredients, you’ll enjoy a crispy golden crust enveloping a dreamy ricotta filling—guaranteed to wow your taste buds and impress your guests. Plus, these squares can be made ahead of time, making them an ideal crowd-pleaser that saves you time on busy occasions. Are you ready to uncover the secrets behind this delicious make-ahead dessert?
Why Are Classic Cannoli Squares So Irresistible?
Creamy Delight: The smooth ricotta filling combined with a hint of cinnamon draws you in with its rich, comforting flavor.
Versatile Options: Customize your squares with endless variations, from zesty lemon zest to indulgent chocolate chips!
Make-Ahead Convenience: Prepare the filling a day prior, or assemble the squares ahead of time—perfect for busy gatherings.
Crowd-Pleaser: Amazing dessert that caters to everyone’s sweet tooth, making you the star of any celebration!
If you’re looking for more scrumptious ideas, check out my Spinach Mushroom Lasagna for the main course and follow it up with an equally delightful Apple Broccoli Salad for a refreshing side.
Classic Cannoli Squares Ingredients
• Whether you’re planning a festive gathering or a quiet night in, having all the right ingredients on hand will help create these Classic Cannoli Squares that will wow your taste buds!
For the Filling
- Ricotta Cheese – Adds creaminess and texture; choose whole milk for richer flavor.
- Powdered Sugar – Sweetens and smoothens the filling; coconut sugar can be a healthier swap.
- Vanilla Extract – Elevates the flavor profile; opt for pure for authenticity.
- Cinnamon – Provides a warm spice note; feel free to omit for a classic taste.
- Mini Chocolate Chips – Adds a delightful, chocolaty surprise; dark chocolate enhances richness.
For the Crust
- Pre-made Pie Crusts – Simple base and top crust; a homemade option grants a personal touch.
- Egg – Used for egg wash to achieve a glossy finish on the top crust.
- Sugar – Sprinkled on top, adding sweetness and delightful crunch when baked.
Optional Garnishes
- Chopped Pistachios – Bring crunchy texture and beautiful color to the presentation.
- Maraschino Cherries – Offer a sweet topping with decorative flair.
- Extra Chocolate Chips – Use these to amplify the chocolate flavor for the chocoholics in your life.
Step‑by‑Step Instructions for Classic Cannoli Squares That Will Wow Your Taste Buds
Step 1: Prepare Filling
In a mixing bowl, combine 15 ounces of ricotta cheese, 1 cup of powdered sugar, 1 teaspoon of vanilla extract, ½ teaspoon of cinnamon, and ½ cup of mini chocolate chips. Whisk together until the mixture is smooth and creamy, ensuring there are no lumps. This luscious filling is the heart of your Classic Cannoli Squares, so take your time to achieve a perfect texture.
Step 2: Preheat Oven
Set your oven to preheat at 375°F (190°C) and allow it to reach temperature as you assemble your dessert. A properly preheated oven is key to achieving the golden crust that will encase your creamy filling. This is the perfect moment to enjoy the delicious aroma of the ingredients mixing in the air as you prepare for baking.
Step 3: Prepare Crust
Roll out one pre-made pie crust to fit a 9×9-inch baking dish, pressing it into the corners and up the sides for a secure hold. This forms the base of your Classic Cannoli Squares, ready to cradle the delightful filling. Make sure it’s evenly distributed and smooth, providing the perfect foundation for the luscious layers ahead.
Step 4: Add Filling
Spoon the prepared creamy filling over the crust, spreading it evenly while leaving about a half-inch edge free for sealing. This layer should be thick and satisfying, showcasing the beautiful textures you’ve created. Look for that inviting, glossy appearance as you spread the filling, invoking excitement for the flavors to come.
Step 5: Top Crust
Carefully lay the second pie crust over the filling, pressing down around the edges to seal securely. Whisk an egg and brush it over the top crust for a golden finish, then sprinkle with sugar for extra sweetness and delight. This step not only adds flavor but also creates an appealing crunch on top of your Classic Cannoli Squares.
Step 6: Bake
Place the dish in your preheated oven and bake for 30-35 minutes, or until the top is golden brown and delightful. Keep a close eye on it to ensure a perfectly baked crust that contrasts beautifully with the creamy filling. The enticing aroma will fill your kitchen, promising a treat that captivates everyone.
Step 7: Cool and Slice
Once baked, allow the Classic Cannoli Squares to cool for at least 30 minutes in the baking dish. This cooling period will help the filling set nicely and make cutting easier. You’ll know they’re ready for slicing when they’re slightly firm to the touch and the crust is beautifully golden, inviting indulgence in every bite.
What to Serve with Classic Cannoli Squares
Indulge in a delightful spread of flavors that complements the luscious sweetness of your cannoli squares, perfect for any occasion.
- Espresso: A robust cup of espresso balances the sweet, creamy notes, enhancing the overall dessert experience.
- Fresh Berries: Juicy strawberries or raspberries add a burst of freshness that brightens up each bite, creating a lovely contrast to the richness.
- Whipped Cream: Light and airy, a dollop of whipped cream offers a creamy accompaniment that melds beautifully with the cannoli filling.
- Pistachio Salad: A crunchy pistachio salad with a citrus dressing complements the dessert’s sweetness while introducing a fun, nutty crunch.
- Chocolate Sauce: Drizzling warm chocolate sauce brings an indulgent touch, enhancing the dessert for true chocolate lovers.
- Sweet Wine: Serve with a sweet dessert wine like Moscato to elevate the dining experience, perfectly matching the cannoli’s flavors.
- Sponge Cake: Light and spongy cake serves as a gentle backdrop, allowing the cannoli squares to shine as the star of your dessert table.
- Homemade Gelato: A scoop of creamy gelato in flavors like vanilla or pistachio pairs wonderfully with the squares for a true Italian experience.
- Coffee Cake: Serve slices of coffee cake alongside for a delightful brunch option that balances the richness of the cannoli squares beautifully.
- Lemon Sorbet: The tartness of lemon sorbet provides a refreshing palate cleanser that leaves a zing after the rich dessert.
Expert Tips for Classic Cannoli Squares
-
Ingredient Quality: Use high-quality ricotta and pure vanilla extract for the best flavor. Low-quality ingredients can lead to a bland dessert.
-
Moisture Management: Drain excess moisture from the ricotta before mixing to achieve a thicker filling that holds its shape when served.
-
Crust Care: Monitor the baking process closely to avoid over-browning. An ideal crust is golden brown, not dark or burnt.
-
Cool Properly: Allow the squares to cool for at least 30 minutes before slicing; this helps the filling set and prevents messiness.
-
Experiment Freely: Don’t hesitate to try variations like adding lemon zest or using gluten-free crusts for a personalized twist on these Classic Cannoli Squares.
How to Store and Freeze Classic Cannoli Squares
- Room Temperature: Enjoy your Classic Cannoli Squares at room temperature for up to 2 hours; after that, it’s best to refrigerate them to maintain freshness.
- Fridge: Store leftovers in an airtight container in the fridge for up to 3 days; this keeps the filling creamy and the crust from becoming soggy.
- Freezer: For longer storage, freeze the squares wrapped tightly in plastic wrap or foil for up to 3 months. Thaw overnight in the fridge before enjoying.
- Reheating: If preferred warm, reheat individual squares in the microwave for about 15-20 seconds; enjoy them fresh and delightful!
Classic Cannoli Squares Variations & Substitutions
Feel free to personalize your Classic Cannoli Squares with these delightful twists that will make your dessert experience even more memorable.
-
Dairy-Free: Substitute ricotta with blended silken tofu and add nutritional yeast for a deliciously creamy alternative. This option ensures everyone can savor the flavors!
-
Gluten-Free: Simply use gluten-free pie crusts to enjoy the same delightful texture and flavor without the gluten. Your guests won’t even notice the difference!
-
Extra Zesty: Add fresh lemon zest to the filling for a bright, citrusy lift that complements the creaminess beautifully. It’s like a sweet sunbeam in every bite!
-
Flavor Boost: Mix in almond extract for a nutty depth that surprises the palate and enriches the overall flavor profile. Don’t be afraid to experiment—it’s your creation!
-
Layered Delight: Incorporate fresh strawberries or raspberries between filling layers for a burst of fruity freshness. This not only tastes great but also adds a colorful visual appeal!
-
Spicy Sweet: For a fun twist, introduce a hint of cayenne pepper to the filling for an unexpected but delicious contrast. It’s a daring blend of sweet and spicy that’ll keep them coming back for more.
-
Chocolate Lovers: Combine chocolate chips with crushed chocolate-covered espresso beans for a rich, decadent flavor that will satisfy even the most serious chocolate cravings. Who can resist that?
For more tasty inspiration, after these decadent Classic Cannoli Squares, why not complement your meal with a delicious Spinach Mushroom Lasagna or a refreshing Apple Broccoli Salad? The sky’s the limit with your culinary creativity!
Make Ahead Options
These Classic Cannoli Squares are perfect for meal prep enthusiasts! You can prepare the filling up to 24 hours in advance; simply store it in an airtight container in the refrigerator to maintain its creamy texture. Additionally, you can assemble the entire dessert (without baking) up to 3 days ahead. Just cover it tightly with plastic wrap and refrigerate to keep the crust crisp and the filling fresh. When you’re ready to bake, remove the plastic wrap, brush the top crust with egg wash, and sprinkle with sugar before popping them into a preheated oven. This way, you’ll enjoy delicious, homemade Cannoli Squares that are just as delightful as if made fresh!
Classic Cannoli Squares Recipe FAQs
What kind of ricotta should I use for the filling?
Absolutely! For the best flavor and texture, opt for whole milk ricotta. It provides a creaminess that makes your filling rich and delightful. If you prefer a lighter option, part-skim ricotta can be used, but be aware it may affect the thickness of your filling.
How long can I store Classic Cannoli Squares in the fridge?
You can store your Classic Cannoli Squares in an airtight container in the fridge for up to 3 days. This keeps the filling creamy and prevents the crust from getting soggy. Just remember to let them cool completely before placing them in the fridge!
Can I freeze the Classic Cannoli Squares?
Very! To freeze, wrap the squares tightly in plastic wrap or aluminum foil, ensuring there’s no air inside. They can be stored in the freezer for up to 3 months. When you’re ready to enjoy, simply thaw them overnight in the fridge. For a warm treat, reheat individual squares in the microwave for about 15-20 seconds.
What should I do if my filling is too runny?
If your filling is too runny, this usually means the ricotta was too moist or not drained well. To fix this, strain the ricotta through a fine-mesh sieve or cheesecloth for about 30 minutes before mixing it with the other ingredients. This will help create a thicker filling that holds up beautifully in each square.
Are there any dietary considerations I should keep in mind?
Absolutely! If you have dietary restrictions, you can make these squares gluten-free by using gluten-free pie crusts. For a dairy-free option, substitute the ricotta with blended silken tofu and add a bit of nutritional yeast for flavor. Always check for allergies with the ingredients, especially with those garnishes like chocolate chips or nuts.
Can I make the filling ahead of time?
Yes! You can prepare the filling up to a day in advance. Just store it in an airtight container in the refrigerator. Assembled squares can also be prepped ahead and refrigerated before baking to enhance the flavors. This way, you’re all set for a gathering with minimal stress!
Classic Cannoli Squares That Will Wow Your Taste Buds
Ingredients
Equipment
Method
- In a mixing bowl, combine ricotta cheese, powdered sugar, vanilla extract, cinnamon, and mini chocolate chips. Whisk together until smooth and creamy.
- Preheat your oven to 375°F (190°C) as you assemble your dessert.
- Roll out one pie crust to fit a 9x9-inch baking dish, pressing it into the corners and up the sides.
- Spoon the creamy filling over the crust, spreading it evenly while leaving a half-inch edge free for sealing.
- Lay the second pie crust over the filling, pressing down around the edges to seal, then brush with egg and sprinkle with sugar.
- Bake for 30–35 minutes or until the top is golden brown.
- Allow the Classic Cannoli Squares to cool for at least 30 minutes in the baking dish before slicing.
Leave a Reply