
As I savored the delightful crunch of nori paired with tender chicken, I was whisked away to a bustling corner of Tokyo, where street vendors expertly craft onigiri. Quick to prepare and packed with flavor, these Chicken Onigiri are not only a convenient snack but also an amazing way to impress your family or guests. This easy recipe showcases the savory bliss of teriyaki chicken embraced by sticky sushi rice, making it ideal for lunch boxes, picnics, or simply an on-the-go meal. Best of all, it’s highly adaptable—feel free to swap in your favorite chicken cuts or experiment with different fillings. Ready to make your own batch of these handheld delights? Let’s dive into the recipe!
Why will you adore Chicken Onigiri?
Quick and Easy: This recipe comes together in just 30 minutes, perfect for busy days when you crave something homemade.
Flavor Explosion: The teriyaki glaze infuses each bite with mouthwatering umami, while the nori adds a satisfying crunch.
Versatile Fillings: Customize with your favorite chicken cuts or get creative with fillings like tofu or pickled veggies.
Perfect for Any Occasion: Whether it’s a lunchbox surprise or a picnic snack, these onigiri are sure to impress friends and family alike!
Healthier Option: Ditch the fast food and treat yourself to this wholesome, satisfying snack. You can even create bento box meals alongside dishes like Coconut Chicken Rice or Mediterranean Chicken Tzatziki for an unforgettable culinary experience!
Chicken Onigiri Ingredients
For the Rice
- Cooked Sushi Rice – Essential for the signature sticky texture; always use short-grain rice for best results.
- Salt – Enhances the rice’s flavor; fine salt distributes evenly throughout the dish.
- Furikake (Optional) – Adds a tasty layer of flavor; sprinkle on top for a delicious finish.
For the Chicken Filling
- Boneless Skinless Chicken Meat – Use chicken drumsticks or thighs as your protein base.
- Soy Sauce – Provides the umami profile; consider reduced sodium for a lighter option.
- Sake – Enhances the chicken’s flavor during marinating; you can substitute with water if necessary.
- Baking Soda – Helps tenderize the chicken for a soft texture; just a pinch goes a long way.
- Cornstarch – Aids in achieving a crispy exterior when cooked.
- Mirin – Adds sweetness to the teriyaki sauce; a mild rice vinegar can substitute if needed.
- Brown Sugar – Sweetens the glaze; make sure to pack it firmly for the right consistency.
- Oil – Use a neutral oil like canola for cooking.
- Minced Garlic – Amplifies the aroma while the chicken cooks.
For Assembly
- Nori – Wraps the onigiri, adding a delightful umami crunch; cut into rectangles for easy handling.
Step‑by‑Step Instructions for Chicken Onigiri
Step 1: Prepare the Sushi Rice
Start by rinsing 1 cup of short-grain sushi rice under cold water until the water runs clear, then cook it according to the package instructions. Once cooked, gently stir in ½ teaspoon of salt and optional furikake for added flavor. Allow the rice to cool slightly in a bowl, keeping it covered with a damp cloth to maintain moisture while you prepare the chicken.
Step 2: Marinate the Chicken
Cut 1 pound of boneless, skinless chicken into small bite-sized pieces. In a bowl, combine chicken with 2 tablespoons of soy sauce, 1 tablespoon of sake, a pinch of baking soda, and 1 tablespoon of cornstarch. Mix well to coat the chicken thoroughly, then let it marinate for about 30 minutes to absorb all the savory flavors while you gather your other ingredients.
Step 3: Prepare the Teriyaki Sauce
In a small bowl, whisk together ¼ cup of soy sauce, 2 tablespoons of mirin, and 1 tablespoon of brown sugar until the sugar is dissolved. This mixture will create a delicious teriyaki glaze that enhances the chicken onigiri. Set aside the sauce for later; it’s a crucial component that adds a rich flavor to your dish.
Step 4: Cook the Chicken
Heat 1 tablespoon of neutral oil in a nonstick pan over medium-high heat until shimmering. Add the marinated chicken pieces in a single layer, cooking them for 2-3 minutes until they are golden brown and fully cooked through. Ensure the chicken reaches an internal temperature of 165°F, then remove from the heat.
Step 5: Finish the Sauce with Garlic
Lower the heat slightly and add 2 cloves of minced garlic to the pan with the chicken. Sauté for about 30 seconds until fragrant, then pour in the teriyaki sauce mixture you prepared earlier. Stir constantly for 1-2 minutes until the sauce thickens and coats the chicken evenly. This step elevates the Chicken Onigiri’s flavor to new heights.
Step 6: Shape the Onigiri
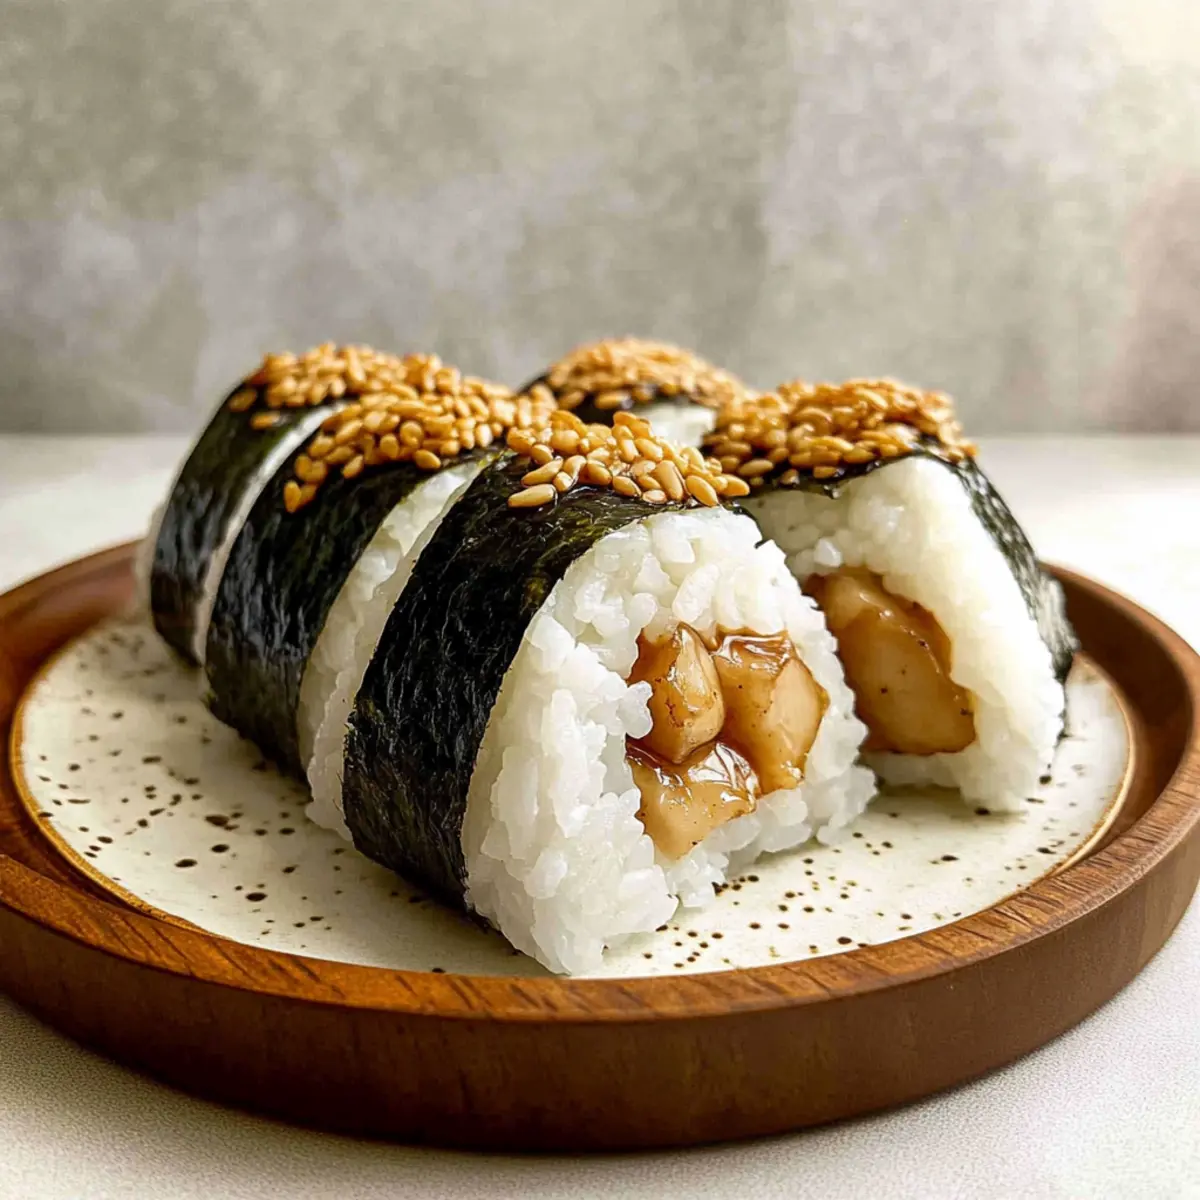
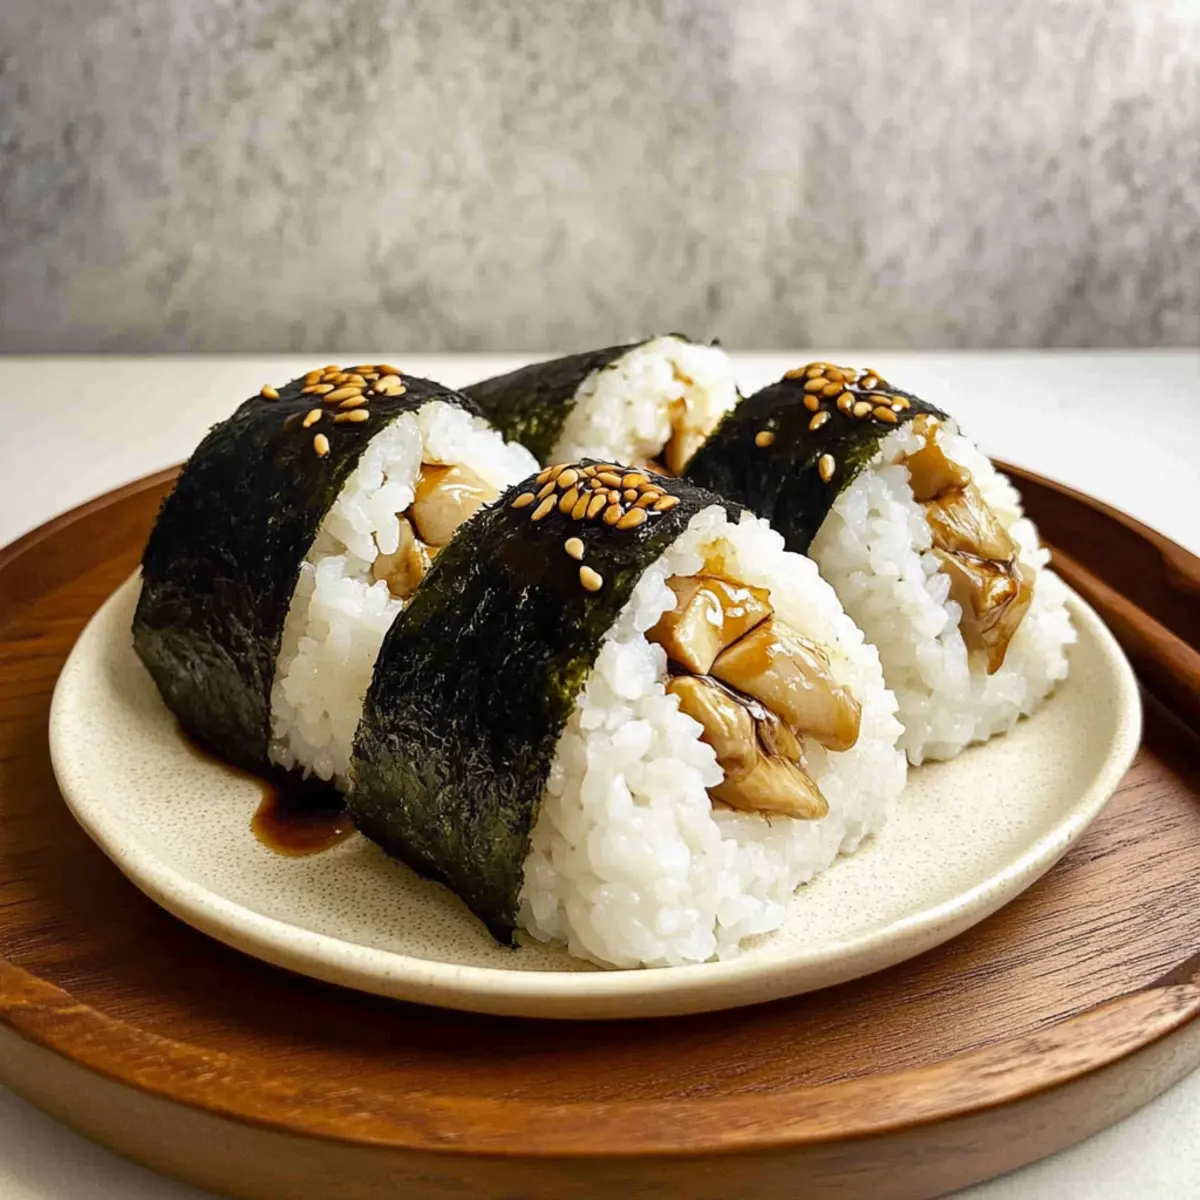
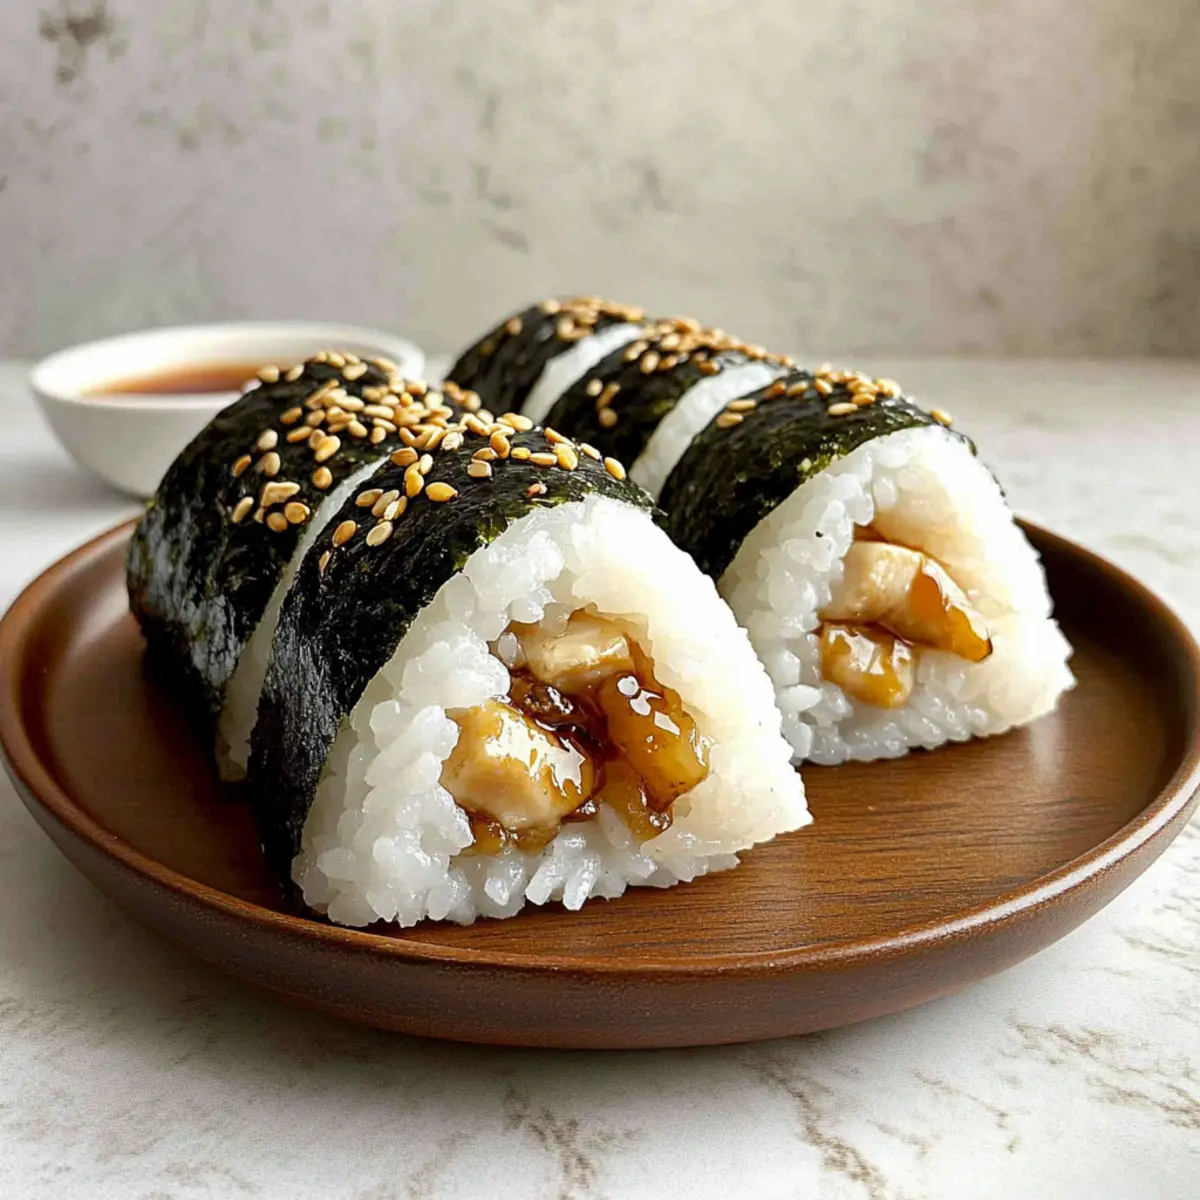
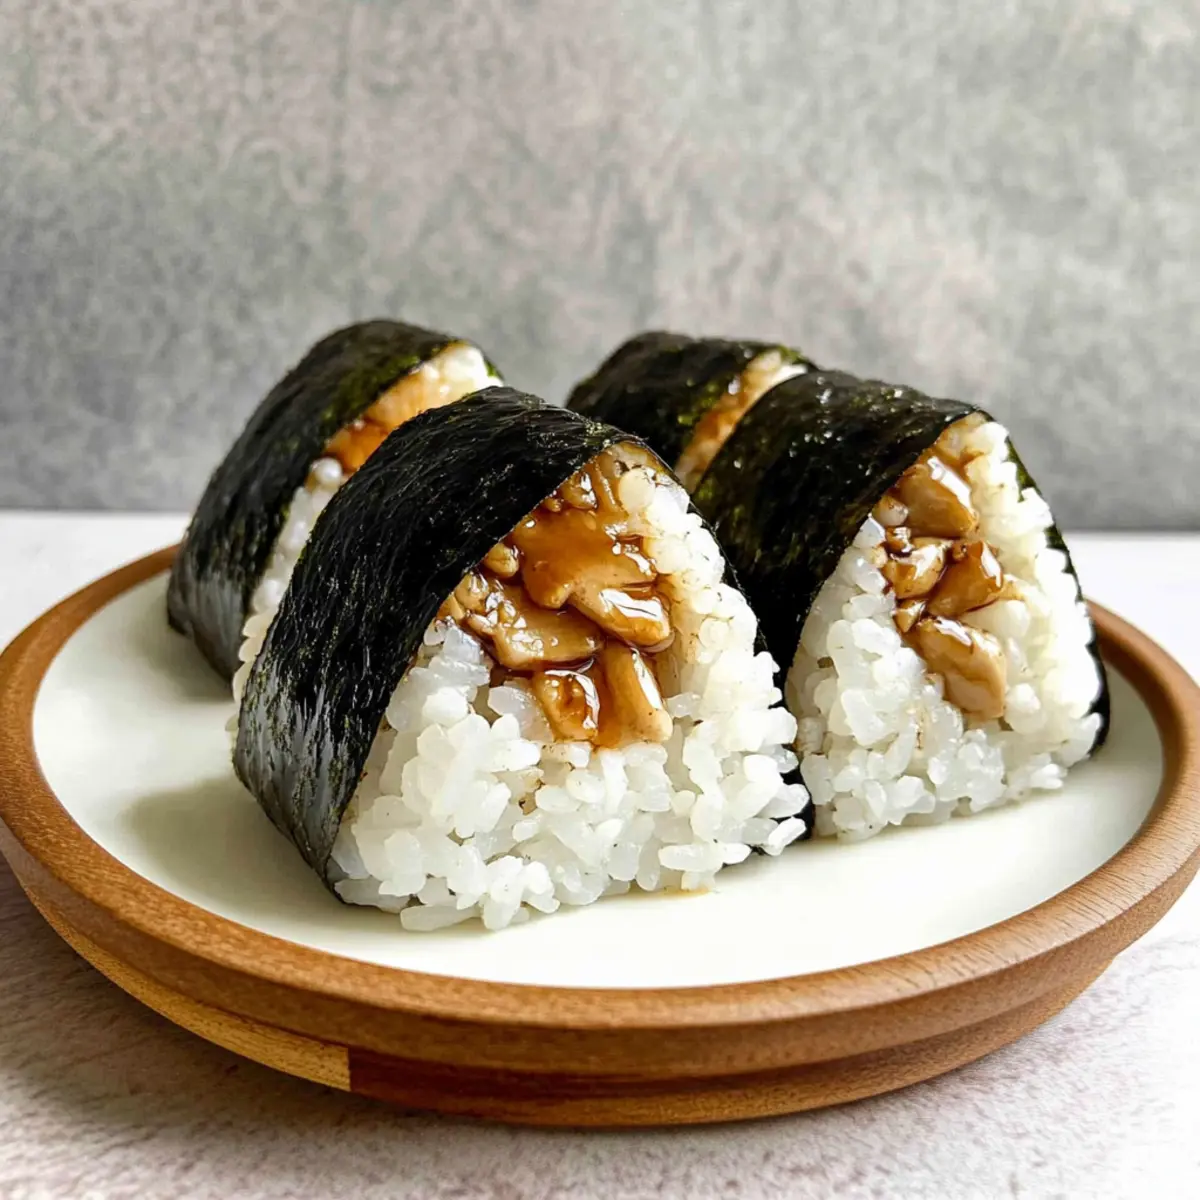
To assemble the Chicken Onigiri, wet your hands to prevent sticking, then scoop about ⅓ cup of the sushi rice into one palm. Create a small well in the center, add a spoonful of the cooked chicken, and cover it with another ⅓ cup of rice. Firmly shape it into a triangle, ensuring the filling is sealed within the rice mold.
Step 7: Wrap with Nori
Cut nori sheets into small rectangles and wrap them around the base of each onigiri for a delightful, crunchy finish. This wrapping not only enhances the visual appeal but also adds a savory umami taste that complements the teriyaki chicken. Be sure to serve the Chicken Onigiri immediately or store them wrapped in plastic for later enjoyment.
What to Serve with Easy Chicken Onigiri?
Imagine a vibrant meal where savory snacks and colorful sides create a delightful symphony of flavors and textures.
-
Crispy Seaweed Salad: This refreshing side dish adds a crunchy texture that complements the soft onigiri beautifully. Tossed in a light sesame dressing, it brings a burst of flavor to your meal.
-
Pickled Vegetables: A colorful array of pickled veggies offers a tangy contrast to the sweet teriyaki glaze of the chicken onigiri. These bright bites revitalize the palate, making every mouthful exciting.
-
EdamameBeans: Steamed edamame sprinkled with coarse sea salt makes a healthy snack full of protein. Their tender firmness contrasts nicely with the soft texture of onigiri.
-
Miso Soup: A warm bowl of miso soup envelops you in comforting flavors that perfectly balance the savory onigiri. Add some tofu or seaweed for extra depth and nutrition.
-
Cucumber and Avocado Salad: This refreshing salad, drizzled with a zesty dressing, adds a delightful crunch and creamy texture. It enhances the umami flavors in the Chicken Onigiri, making it a perfect pairing.
-
Japanese Green Tea: A soothing cup of green tea serves as a cleansing counterpart to your meal, enhancing the onigiri’s savory profile while promoting digestion.
-
Sesame Chicken Wings: Serve alongside for a heartier option. The honey-sesame glaze complements the teriyaki flavors beautifully while providing additional crispy texture and spice.
-
Fruit Skewers: Lighten your palate with some skewers of seasonal fruits like watermelon and strawberries, providing a fresh, sweet finish that contrasts delightfully with the savory onigiri.
Chicken Onigiri Variations & Substitutions
Feel free to get creative with this recipe—once you’ve tasted the lovely teriyaki goodness, you’ll want to try all sorts of delightful twists!
-
Vegetarian: Replace chicken with tofu for a tasty plant-based version that’s equally satisfying. Just marinate the tofu in the same sauce for flavor.
-
Spicy Kick: Add Sriracha or gochujang to your teriyaki sauce for a zesty touch. A little heat can transform the entire experience, making each bite a little adventure of flavor!
-
Ground Chicken: Use ground chicken instead of chunks for a different texture. Shape the onigiri around the cooked ground chicken mixture, mixed with your favorite herbs or spices for added flair.
-
Nutrient Boost: Mix in chopped spinach or shredded carrots into the sushi rice for a pop of color and extra nutrition. This amendment brings fresh crunch and vibrancy to each bite!
-
Crispy Edges: Try pan-searing your shaped onigiri in a bit of oil before serving. This gives them a delightful crispiness that wonderfully contrasts the tender filling.
-
Pickled Vegetable Filling: Incorporate pickled vegetables like umeboshi or radish for a tangy surprise inside. This punch of acidity beautifully complements the sweetness of the teriyaki glaze!
-
Swap the Sauce: Experiment with other sauces like honey mustard or teriyaki sauce variations, creating unique flavor profiles that fit your mood. A twist can showcase a different cultural essence, much like in my Mediterranean Chicken Gyros!
-
Fancy Presentation: For a gourmet touch, sprinkle sesame seeds or chopped green onions on top of your finished onigiri. This not only enhances the look but adds a lovely nutty flavor to the dish.
Whether you’re packing lunch for the kids, hosting a picnic, or simply indulging in a quick snack, customizing these Chicken Onigiri will elevate your culinary experience!
Make Ahead Options
These Chicken Onigiri are perfect for meal prep enthusiasts! You can prepare the sushi rice and marinate the chicken up to 24 hours in advance. Simply cook the rice as instructed, mix in the salt and optional furikake, then let it cool before refrigerating. For the chicken, marinate it in soy sauce, sake, baking soda, and cornstarch, then store it in an airtight container in the fridge. When you’re ready to enjoy, cook the marinated chicken and assemble the onigiri, ensuring they are reshaped and wrapped with nori for the same fresh taste. This way, you’ll have flavorful Chicken Onigiri without the last-minute rush, perfect for busy weeknights!
Expert Tips for Chicken Onigiri
-
Short-Grain Rice: Always use short-grain rice for its essential stickiness; this helps shape perfect onigiri without falling apart.
-
Proper Marination: Allow the chicken to marinate for at least 30 minutes; it’s key to enhancing the flavor of your Chicken Onigiri.
-
Don’t Overcook: Keep a close eye on the chicken; it should be just cooked through to maintain tenderness and juiciness in your onigiri.
-
Perfect Nori Cut: Ensure the nori is cut into small rectangles; this makes it easier to wrap and prevents it from overshadowing the flavors.
-
Wetting Hands: Wet your hands before shaping the rice; it prevents excessive sticking and helps form a neat triangle.
-
Serve Fresh: For the best taste, enjoy your Chicken Onigiri fresh; if making ahead, wrap them tightly to keep them moist!
Storage Tips for Chicken Onigiri
Fridge: Store Chicken Onigiri in an airtight container or wrapped tightly in plastic wrap for up to 2 days. Enjoy within this timeframe for the best flavor and texture.
Freezer: For longer storage, freeze onigiri for up to 1 month. Ensure they are well-wrapped to prevent freezer burn. Thaw in the fridge overnight before reheating.
Reheating: When ready to enjoy, gently reheat in the microwave for 30-60 seconds or until warmed through, ensuring the rice remains moist.
Best When Fresh: While you can store Chicken Onigiri, they taste best when fresh, allowing you to savor the delightful flavors and textures!
Chicken Onigiri Recipe FAQs
What type of rice is best for making onigiri?
Absolutely! For making Chicken Onigiri, it’s crucial to use short-grain sushi rice. This type has the ideal sticky quality for shaping, ensuring that your onigiri holds its form beautifully. If you can’t find sushi rice, arborio rice can be a decent alternative as it also has a similar stickiness.
How long can I store Chicken Onigiri in the fridge?
You can store Chicken Onigiri in the fridge for about 1 to 2 days. To keep them fresh, make sure to wrap them tightly in plastic wrap or place them in an airtight container. However, I always recommend enjoying them fresh for the best flavor and texture!
Can I freeze Chicken Onigiri?
Yes! To freeze your Chicken Onigiri, place them individually on a baking sheet to prevent sticking and freeze for about 1-2 hours. Once frozen solid, wrap them tightly in plastic wrap and place them in a freezer-safe bag. They can be stored for up to 1 month. When you’re ready to enjoy, simply thaw in the fridge overnight and reheat gently in the microwave.
What should I do if my chicken turns out tough?
Very! If your chicken ends up being tough, it might be due to overcooking or not marinating long enough. Here’s how to fix it: First, ensure you are cooking the chicken just until it’s reached an internal temperature of 165°F; otherwise, it may dry out. For tenderness, allow the chicken to marinate for at least 30 minutes before cooking. Additionally, incorporating a small pinch of baking soda during marination can help tenderize the meat even further.
Are there any dietary considerations I should keep in mind?
Absolutely! If you have allergies, you might want to keep an eye on certain ingredients like soy sauce, which can contain gluten, or mirin, if you’re avoiding alcohol. For those with gluten sensitivities, try using gluten-free soy sauce. If you’re preparing for pets, remember that ingredients like garlic can be harmful to them, so be cautious if sharing your delicious onigiri!
Can I use other proteins instead of chicken?
Very! The beauty of Chicken Onigiri is its adaptability. You can easily substitute chicken with tofu for a vegetarian option or use other types of meat like ground turkey or pork. Feel free to experiment with unique fillings like pickled vegetables or even sushi-grade fish for a twist on this classic Japanese snack. The more the merrier!
Savory Chicken Onigiri: Your New Favorite Snack Adventure
Ingredients
Equipment
Method
- Rinse 1 cup of short-grain sushi rice under cold water until the water runs clear, then cook according to package instructions. Stir in ½ teaspoon of salt and optional furikake once cooked.
- Cut 1 pound of chicken into small pieces. In a bowl, mix with 2 tablespoons soy sauce, 1 tablespoon sake, a pinch of baking soda, and 1 tablespoon cornstarch. Let marinate for about 30 minutes.
- Whisk together ¼ cup soy sauce, 2 tablespoons mirin, and 1 tablespoon brown sugar in a small bowl for the teriyaki glaze. Set aside.
- Heat 1 tablespoon of oil in a nonstick pan over medium-high heat. Cook the marinated chicken for 2-3 minutes until golden brown and fully cooked.
- Lower heat, add 2 cloves minced garlic to the pan, and sauté for about 30 seconds. Pour in the teriyaki sauce and stir for 1-2 minutes until thickened.
- Wet your hands, scoop about ⅓ cup of sushi rice into one palm, create a well in the center, add a spoonful of chicken, and cover with another ⅓ cup of rice. Shape into a triangle.
- Wrap the formed onigiri with rectangles of nori and serve immediately or store wrapped in plastic.
Leave a Reply