
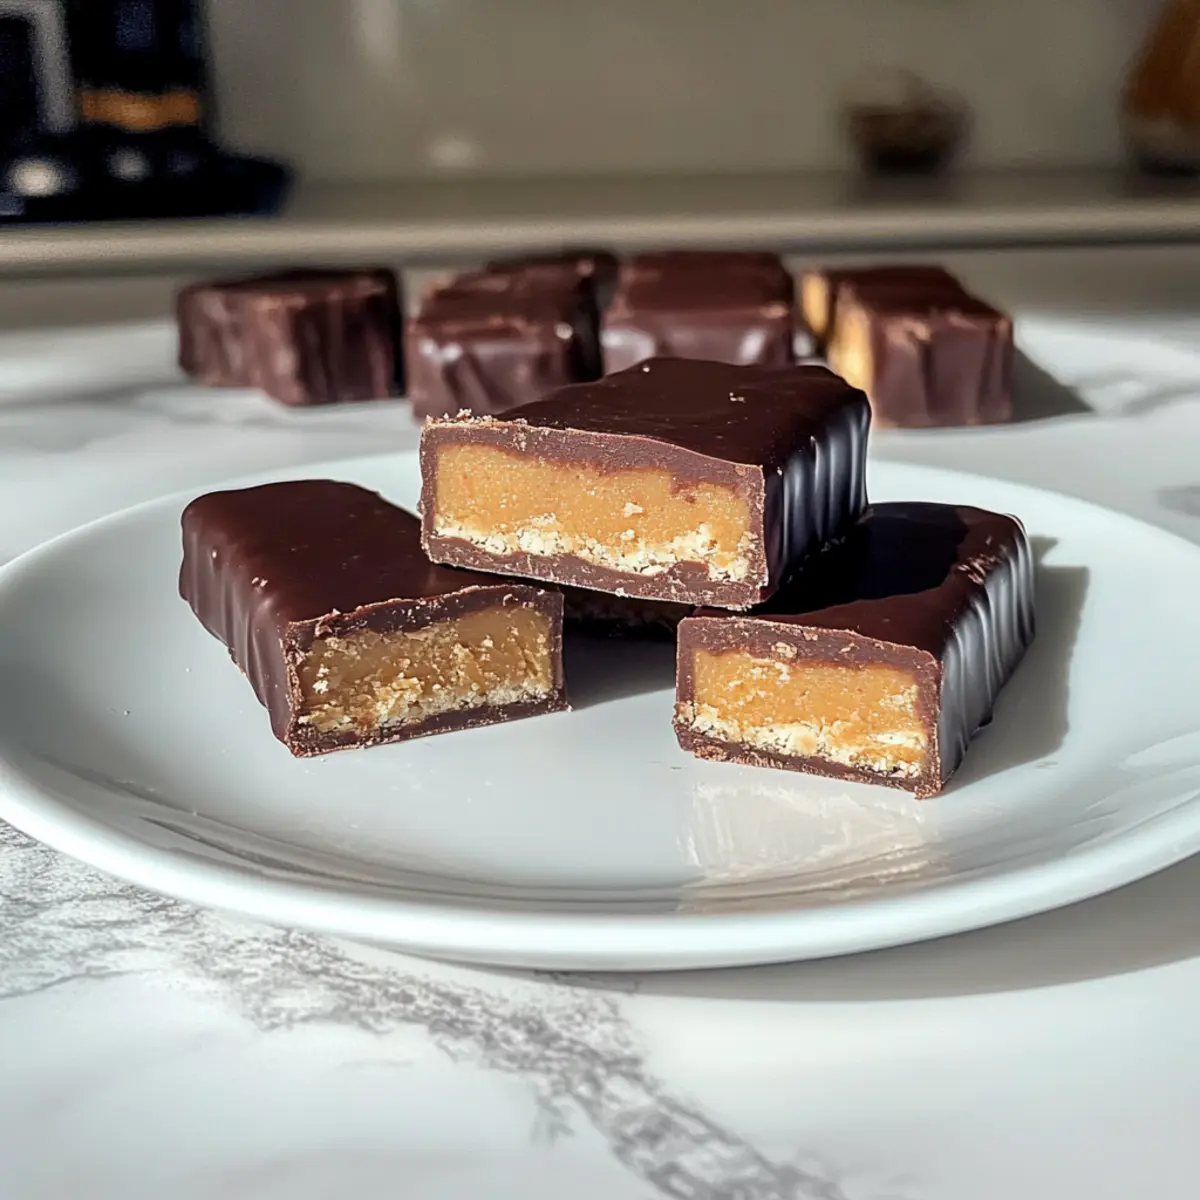
As I was rummaging through my pantry one afternoon, my eyes landed on a bag of almond flour and a jar of creamy peanut butter. That’s when the idea sparked: what if I could recreate the satisfying crunch and gooey goodness of a classic candy bar, but in a healthier, homemade version? Enter my Healthy Twix Bars! These delightful treats feature a gluten-free almond flour base layered with rich peanut butter caramel and enveloped in smooth dark chocolate. Not only are they simple to whip up and require no baking, but they also serve as a guilt-free dessert that still caters to your sweet tooth. Perfect for a quick snack or an indulgent treat, these bars are versatile enough that you can customize them to your taste. Curious about how to make your own batch of these delicious Healthy Twix Bars? Let’s dive in!
Why Are These Healthy Twix Bars Irresistible?
Satisfying, these Healthy Twix Bars deliver the perfect crunch complemented by creamy caramel and silky chocolate for an indulgent treat without the guilt. Customizable, feel free to swap peanut butter for almond butter or add a sprinkle of toasted coconut for extra flair. Quick and Easy, they come together with minimal effort and no baking required, making them a lifesaver for busy days. Crowd-Pleasing, whether serving at a party or enjoying a quiet night in, everyone will love these! Don’t miss out on pairing them with a cup of tea like you would with my Healthy Baked Feta for a delightful experience.
Healthy Twix Bars Ingredients
For the Shortbread Base
- Almond Flour – This gluten-free alternative gives a lovely structure; feel free to substitute with oat flour or coconut flour, but use less since it’s more absorbent.
- Butter – Adds richness and flavor; you can use melted butter, or swap in coconut oil for a dairy-free version.
- Maple Syrup – A natural sweetener that enhances flavor; can be replaced with honey, agave, or even corn syrup if needed.
- Vanilla Extract – Boosts the overall taste; consider almond extract for a twist or vanilla bean paste as a tasty alternative.
- Salt – Balances out sweetness; substitutes like sea salt or Himalayan pink salt work just as well.
For the Caramel Layer
- Creamy Peanut Butter – Provides that indulgent creaminess; try almond butter, cashew butter, or tahini for a different flavor profile.
- More Maple Syrup – Keeps the caramel sweet; you can use honey here too!
For the Chocolate Coating
- Chocolate Chips – The outer layer that makes it delicious; dark chocolate chips offer a richer taste, while milk chocolate chips add sweetness.
- Coconut Oil – Essential for melting chocolate; can be substituted with butter or avocado oil for similar results.
By gathering these ingredients, you’re on your way to crafting delightful Healthy Twix Bars that are sure to satisfy your cravings while keeping things healthy!
Step‑by‑Step Instructions for Healthy Twix Bars
Step 1: Prepare Baking Pan
Start by preheating your oven to 350°F (175°C). While the oven heats, line an 8×8 inch baking pan with parchment paper, allowing edges to hang over for easy removal later. This step ensures a clean release and helps maintain the shape of your Healthy Twix Bars after baking.
Step 2: Make Shortbread Base
In a mixing bowl, combine almond flour, melted butter, maple syrup, vanilla extract, and salt. Stir until the mixture is well-combined into a dough-like consistency. Press this mixture firmly into the bottom of your prepared pan, smoothing it out evenly. Bake for 10-12 minutes until it’s golden and fragrant, then let it cool completely in the pan.
Step 3: Prepare Caramel Filling
In another bowl, mix together creamy peanut butter, more maple syrup, and a bit of almond flour. Stir until you achieve a smooth, creamy texture. Once the shortbread base has cooled, spread this luscious peanut butter caramel layer evenly over the top, ensuring it reaches the edges. Place the pan in the freezer for at least 1 hour to set firmly.
Step 4: Create Chocolate Coating
Grab a microwave-safe bowl or a small pot for this step. Combine chocolate chips and coconut oil, then melt gently in the microwave at 30-second intervals, stirring until smooth. Alternatively, use a double boiler, letting the chocolate mixture melt over simmering water. This rich chocolate blend will form a glossy coating for your Healthy Twix Bars.
Step 5: Assemble Bars
Once the caramel layer is set, remove the pan from the freezer and cut the block into 16 even bars using a sharp knife. Dip each bar into the melted chocolate, ensuring it’s completely coated. Allow excess chocolate to drip off before placing the bars on a tray lined with parchment paper. This careful dipping technique ensures a decadent chocolate layer on each Healthy Twix Bars.
Step 6: Final Touch
With the bars lined up on the tray, drizzle any leftover melted chocolate over them for an appealing finish. For an extra touch of flavor and texture, sprinkle flaky sea salt over the chocolate coating. Place the tray back in the freezer for another 10 minutes to let the chocolate harden completely.
Step 7: Serve & Enjoy
Once the chocolate has set, your Healthy Twix Bars are ready to be savored! Serve them immediately or store leftovers in an airtight container in the fridge or freezer. These delicious bars are perfect snacks or desserts that satisfy your sweet tooth without the guilt.
Healthy Twix Bars Variations & Substitutions
Unleash your creativity in the kitchen by exploring these enticing variations for Healthy Twix Bars! Each idea adds a unique twist that will elevate your experience.
- Nut-Free: Swap nut butter with sunflower seed butter to make allergy-friendly bars that everyone can enjoy.
- Sugar-Free: Use a sugar substitute like erythritol or monk fruit sweetener in place of maple syrup for a low-sugar treat.
- Chocolate Overload: Add a layer of chocolate caramel by mixing melted chocolate with a touch of coconut cream for an indulgent layer.
- Dairy-Free: Opt for dairy-free chocolate chips and coconut oil to keep your bars completely dairy-free while maintaining rich flavor.
- Texture Boost: Fold in crushed nuts or seeds into your caramel layer to add delightful crunch throughout each bite.
- Coconut Variation: Sprinkle toasted coconut on top of the chocolate layer for an extra layer of flavor and texture reminiscent of traditional candy bars.
- Flavor Infusion: Consider adding a drop of espresso or espresso powder to the chocolate coating for a café-inspired twist.
- Dessert Pairing: Serve your bars with a side of fresh berries to brighten the palate, which pairs beautifully with the rich chocolate.
By mixing and matching these ideas, you’ll discover a new favorite rendition of your Healthy Twix Bars while keeping your treats as delightful as ever. If you’re seeking more delicious recipe ideas, why not explore my Brown Butter Bars or enjoy a comforting bowl of Philly Cheesesteak Rice? The culinary possibilities are endless!
Expert Tips for Healthy Twix Bars
-
Layer Consistency: Ensure each layer is completely set before adding the next. This will prevent the layers from mixing and help achieve clean, distinct layers in your Healthy Twix Bars.
-
Press Firmly: When making the shortbread base, press the mixture firmly into the pan. A well-compressed base prevents crumbling and gives your bars a beautiful structure.
-
High-Quality Chocolate: Use high-quality chocolate for melting, as it provides better consistency and flavor. Remember, the chocolate coating can make or break your Healthy Twix Bars!
-
Chill After Coating: For optimal texture, consider placing the bars in the fridge after coating them with chocolate. This helps the chocolate set evenly and keeps each bite indulgently satisfying.
-
Experiment with Substitutions: Feel free to swap the creamy peanut butter for almond butter or cashew butter and have fun with flavors! Just be mindful of any adjustments in sweetness or texture when using different ingredients.
What to Serve with Healthy Gluten-Free Twix Bars
Treat your taste buds to a delightful spread that complements these decadent yet wholesome bars.
- Creamy Almond Milk: A splash of creamy almond milk perfectly balances the rich chocolate, enhancing the lusciousness of the bars.
- Fresh Berries: Juicy raspberries or strawberries add a burst of freshness, creating a colorful contrast against the sweet layers.
- Decadent Coffee: Pair with a rich cup of coffee; the bitterness complements the sweetness of the bars beautifully.
- Yogurt Parfait: A yogurt parfait layered with granola and fruits offers a delightful crunch and tang, balancing the sweet flavors.
- Nutty Granola: Serve with nutty granola for added texture; the crunch pairs harmoniously with the creamy caramel and smooth chocolate.
- Chilled Herbal Tea: A refreshing herbal tea, such as peppermint or chamomile, cleanses the palate and provides a soothing finish.
- Vanilla Ice Cream: For a special treat, a scoop of vanilla ice cream elevates your dessert game, creating a delightful contrast of warm and cold.
- Dark Chocolate Dipping Sauce: For the ultimate indulgence, a warm dark chocolate dipping sauce adds extra richness to every bite.
Storage Tips for Healthy Twix Bars
Fridge: Keep your Healthy Twix Bars in an airtight container in the fridge for up to 2 weeks. This will maintain their freshness and flavor.
Freezer: For longer storage, wrap each bar individually and freeze them for up to 3 months. This way, you can enjoy a sweet treat anytime you need a quick snack!
Thawing: When ready to enjoy, simply transfer the bars to the fridge for a few hours or let them sit at room temperature for about 15-20 minutes before indulging.
Reheating: If you prefer a softer texture, you can lightly microwave them for 10-15 seconds, but be careful not to melt the chocolate coating too much!
Make Ahead Options
Making Healthy Twix Bars ahead of time is a fantastic way to save precious moments during a busy week! You can prepare the shortbread base and the peanut butter caramel layer up to 24 hours in advance. Simply follow the initial steps, allow each layer to cool and set, then cover the baking pan tightly with plastic wrap and refrigerate. When you’re ready to finish, just melt the chocolate and coat the bars—bringing your homemade Healthy Twix Bars to life without the last-minute rush. Remember, chilling them briefly after coating also enhances the texture, ensuring they stay just as delicious as when freshly made!
Healthy Twix Bars Recipe FAQs
How do I choose the right almond flour for the base?
Absolutely! Look for almond flour that is finely ground, as this will give your Healthy Twix Bars the best texture. If you see a coarse grind or dark flecks, it may not blend well, resulting in a gritty base. I recommend checking the packaging for the word “blanched,” which means the skins have been removed for a smoother finish.
What is the best way to store Healthy Twix Bars?
To maintain their deliciousness, store your Healthy Twix Bars in an airtight container in the fridge for up to 2 weeks. For longer shelf life, individually wrap each bar in plastic wrap and place them in a freezer-safe bag; they can be stored in the freezer for up to 3 months. This way, you’ll always have a healthy treat on hand!
Can I freeze Healthy Twix Bars, and how should I do it?
Certainly! To freeze your Healthy Twix Bars, make sure they are completely set and cut into individual portions. Wrap each bar tightly in plastic wrap, then place them in a freezer bag or container to prevent freezer burn. For the best texture, when you’re ready to enjoy, thaw them in the fridge for a few hours or leave them at room temperature for about 15 minutes before eating.
What if my caramel layer is too runny?
If your caramel layer turns out runny, don’t worry! Simply add a little more almond flour—1 tablespoon at a time—until you achieve the desired consistency. Make sure to mix thoroughly for an even texture. Alternatively, you can freeze the layer a bit longer to help it firm up before proceeding with assembly.
Are there any dietary considerations I should keep in mind?
Very! These Healthy Twix Bars are gluten-free but check your labels for any added allergens, especially if serving to guests. If you have nut allergies, consider using sun butter or a seed butter as a replacement for the nut butter. Gluten-free chocolate chips can also be used for an extra layer of assurance. Always adapt the ingredients according to your dietary needs!
Delicious Healthy Twix Bars That Satisfy Your Sweet Cravings
Ingredients
Equipment
Method
- Preheat your oven to 350°F (175°C) and line an 8x8 inch baking pan with parchment paper.
- Combine almond flour, melted butter, maple syrup, vanilla extract, and salt in a mixing bowl. Press into the pan and bake for 10-12 minutes.
- Mix peanut butter, maple syrup, and almond flour until smooth. Spread over the cooled shortbread base and freeze for at least 1 hour.
- Melt chocolate chips and coconut oil together at 30-second intervals until smooth. Allow to cool slightly.
- Cut the caramel layer into 16 bars, dip in melted chocolate, and place on parchment-lined tray.
- Drizzle any remaining chocolate over the bars and sprinkle with flaky sea salt. Freeze again for 10 minutes.
- Once set, serve and enjoy, or store in an airtight container in the fridge or freezer.
Leave a Reply