
If the scent of cinnamon wafts through your kitchen, you know something delightful is on the way. That’s exactly what you’ll experience when you whip up a batch of these Cinnamon Roll Bliss Bars. This recipe brilliantly combines the warm, comforting essence of cinnamon rolls with a chewy, cookie-like texture, making it a lovely treat for any occasion. In just 45 minutes, you can create a gorgeous dessert that not only captures the heart of homemade goodness but is also a breeze to prepare—perfect for busy weeknights or last-minute gatherings. Plus, with simple variations available, including gluten-free options, you’re bound to find a way to make it your own. Ready to fill your home with the irresistible aroma of sweet cinnamon and sugar? Let’s dive into this sweet adventure!
Why Love Cinnamon Roll Bliss Bars?
Comforting aroma: The moment these bars bake, your home will fill with the inviting scent of cinnamon, making it a true delight for the senses.
Effortless baking: With just a few simple steps, even novice bakers can master these heavenly treats in no time.
Customizable indulgence: Feel free to add chocolate chips or nuts, tailoring each batch to your taste or experimenting with unique frostings like cream cheese for added richness.
Crowd-pleaser: Whether at family gatherings or cozy coffee dates, these bars are sure to impress friends and loved ones alike. Want more sweet ideas? Check out my delightful Cider Cinnamon Rolls or try the irresistible Brown Butter Bars for your next dessert adventure!
Versatile option: Need a gluten-free treat? Simply choose the right flour, and voilà! You’re all set to enjoy this comforting dessert without compromising on flavor.
Cinnamon Roll Bliss Bars Ingredients
For the Bars
• Butter – Provides richness and moisture; for a dairy-free version, consider margarine or coconut oil.
• Brown Sugar – Adds sweetness and a hint of caramel flavor; light brown sugar can replace dark for a milder taste.
• Granulated Sugar – Provides additional sweetness; feel free to reduce for a less sweet bar.
• Eggs – Contributes to structure and moisture; substitute with flax eggs for a vegan alternative.
• Sour Cream – Ensures moistness with a slight tang; Greek yogurt works well as a substitute.
• Vanilla Extract – Adds depth to the flavor; almond extract can be used for a unique twist.
• All-Purpose Flour – Acts as the main structure ingredient; for a gluten-free option, choose gluten-free flour.
• Baking Powder – Essential for a light texture; no substitute is needed for proper rise.
• Baking Soda – Enhances browning and aids leavening; no substitute necessary.
• Ground Cinnamon – Gives these Cinnamon Roll Bliss Bars their signature flavor; try using pumpkin pie spice for variation.
• Salt – Balances the sweetness; keep it to enhance flavor, but omit if on a sodium-restricted diet.
For the Frosting
• Powdered Sugar – Adds sweetness and smoothness; a sugar alternative is perfect for keto-friendly bars.
• Milk – Combines with powdered sugar for frosting; any plant-based milk works for a dairy-free option.
• Vanilla Extract – Enhances the frosting flavor; experiment with almond extract for diverse taste notes.
Step‑by‑Step Instructions for Cinnamon Roll Bliss Bars
Step 1: Preheat and Prepare the Pan
Begin your Cinnamon Roll Bliss Bars by preheating your oven to 350°F (175°C). While it warms, grease a 9×13 inch baking pan with butter or non-stick spray to ensure the bars come out perfectly after baking. This step is crucial for achieving golden edges and a moist interior.
Step 2: Cream the Butters and Sugars
In a mixing bowl, cream together the softened butter, brown sugar, and granulated sugar until the mixture is light and fluffy, about 2-3 minutes. A hand mixer works best for this task, but a sturdy whisk will do if you’re up for a workout! Aim for a smooth consistency that’s slightly lighter in color.
Step 3: Incorporate the Wet Ingredients
Next, add the eggs, sour cream, and vanilla extract to the creamed mixture, mixing until well combined. The batter should be smooth and slightly thick. Use a spatula to scrape down the sides of the bowl for even mixing. This step helps achieve the moistness and richness typical of these delicious bars.
Step 4: Mix the Dry Ingredients
In a separate bowl, whisk together the all-purpose flour, baking powder, baking soda, ground cinnamon, and salt. This step is important as it evenly distributes the leavening agents and cinnamon throughout the flour, ensuring a consistent rise and flavor in your Cinnamon Roll Bliss Bars.
Step 5: Combine Wet and Dry Mixtures
Gradually add the dry flour mixture to the wet ingredients, stirring gently until just combined. Be careful not to overmix; a few lumps are perfectly fine. This gentle mixing leads to a tender texture. The batter will resemble a thick cookie dough, ready to be spread into your prepared pan.
Step 6: Spread the Batter Evenly
Transfer the batter into the greased baking pan, using a spatula to spread it evenly across the bottom. Ensure you reach the corners to promote even baking. The batter should fill the pan nearly to the top, creating a delightful base for your Cinnamon Roll Bliss Bars.
Step 7: Create the Cinnamon Sugar Topping
In a small bowl, mix together some additional cinnamon and granulated sugar for topping. Sprinkle this blend generously over the batter, allowing it to sink slightly as the bars bake. This adds a sweet cinnamon swirl effect that mirrors the classic cinnamon roll experience.
Step 8: Bake Until Golden
Place the pan in the preheated oven and bake for 25-30 minutes. The bars are done when a toothpick inserted into the center comes out clean and the edges are lightly golden brown. Keep an eye on them as they bake—the enticing aroma of cinnamon will fill your kitchen!
Step 9: Cool and Frost the Bars
Once baked, remove the pan from the oven and let the bars cool completely in the pan on a wire rack. This allows them to set properly. Meanwhile, prepare the frosting by combining powdered sugar, milk, and vanilla extract until smooth; it should have a thick yet pourable consistency.
Step 10: Drizzle the Frosting
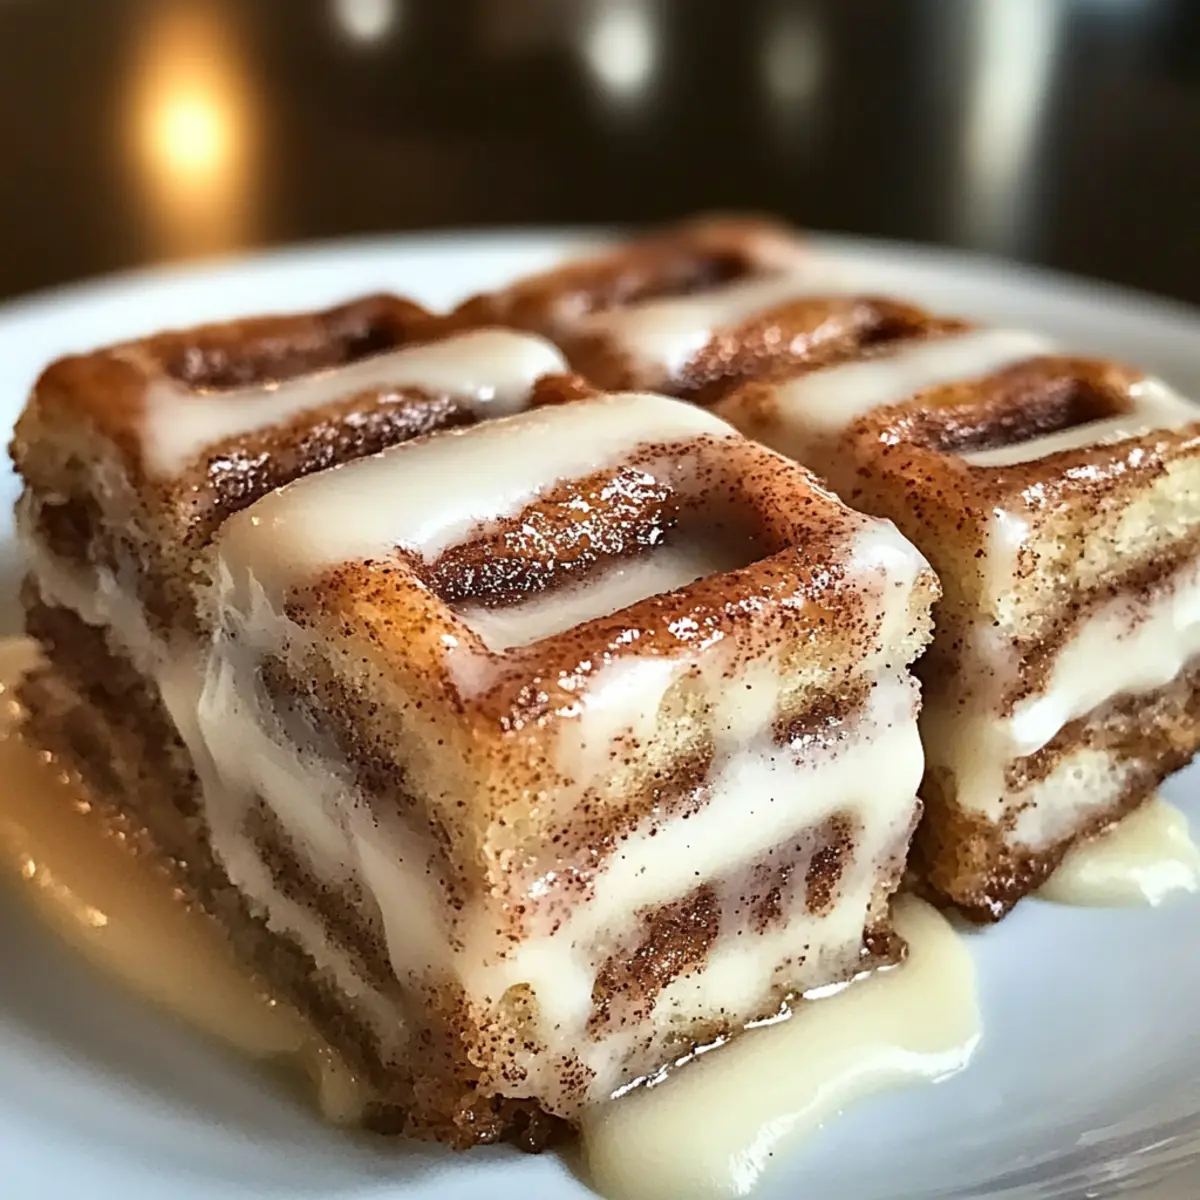
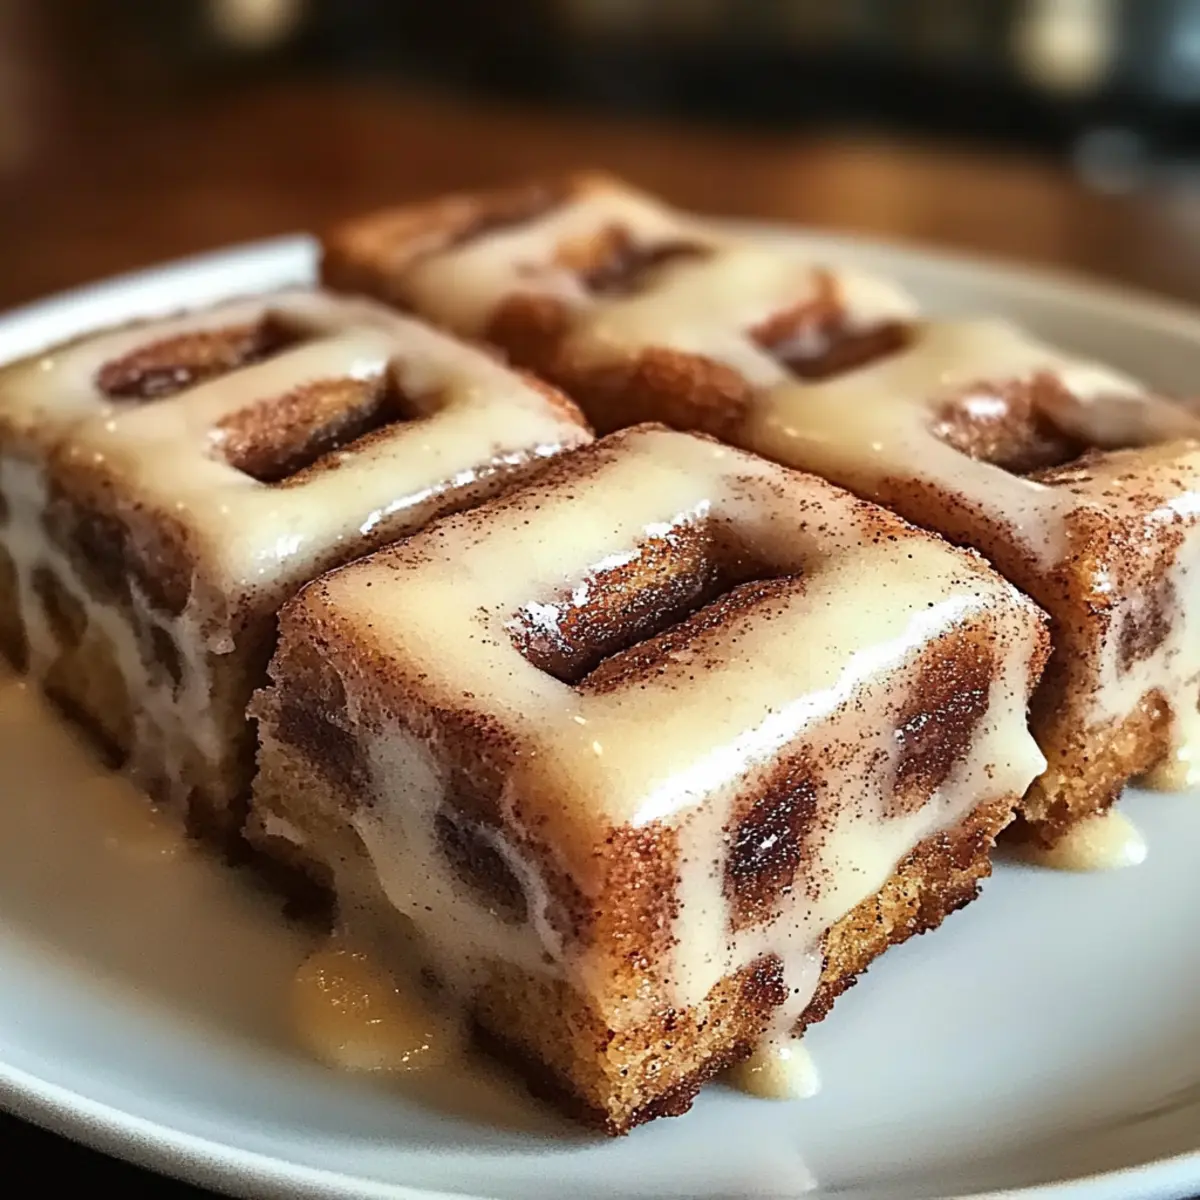
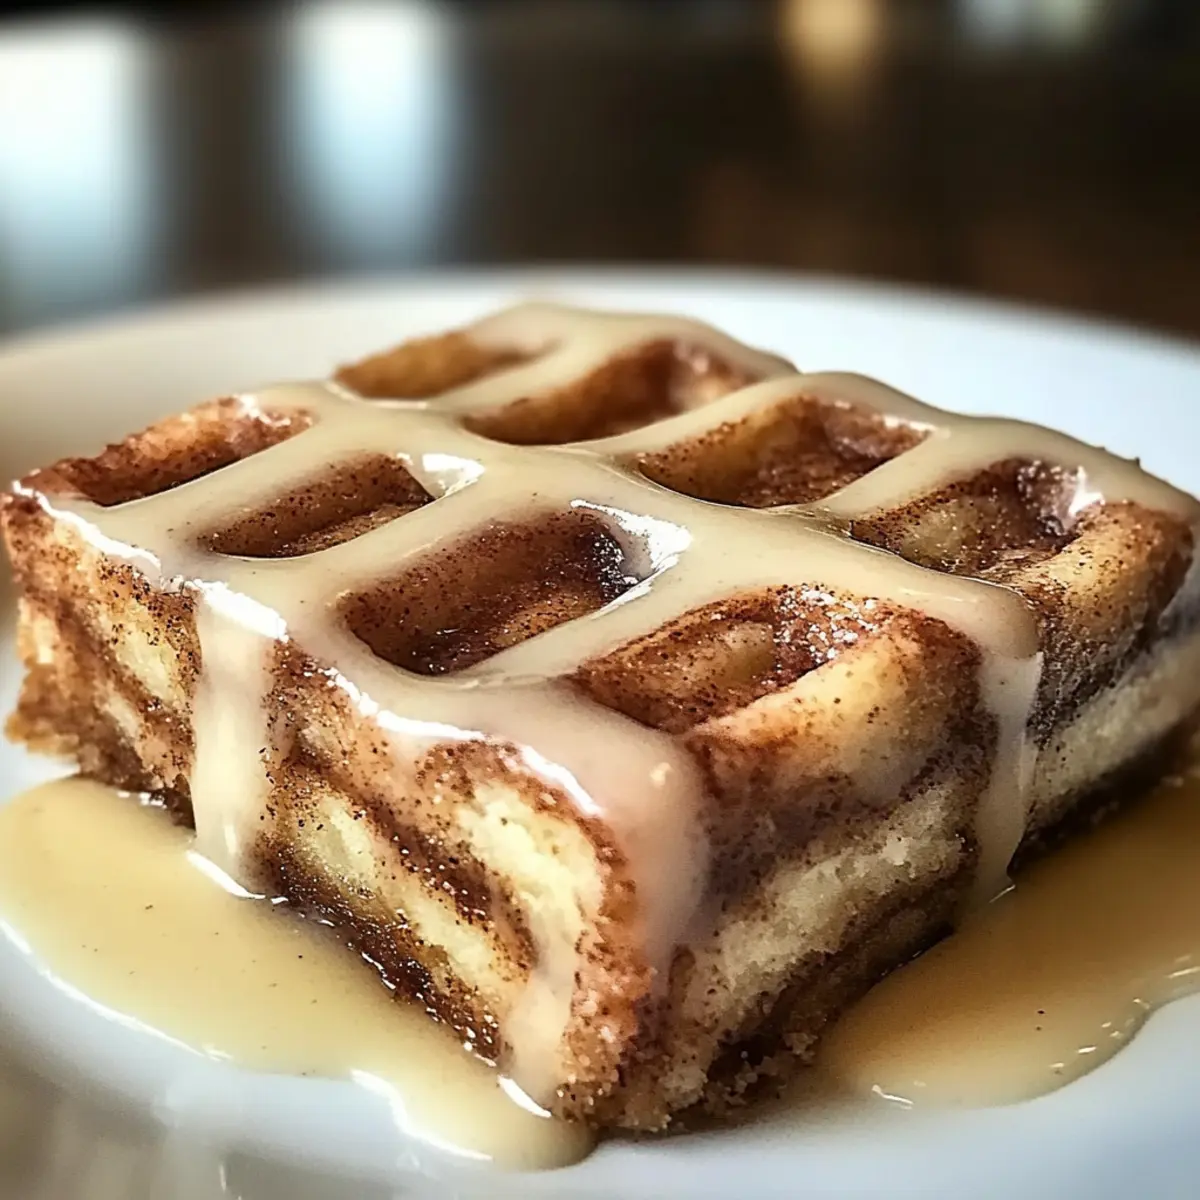
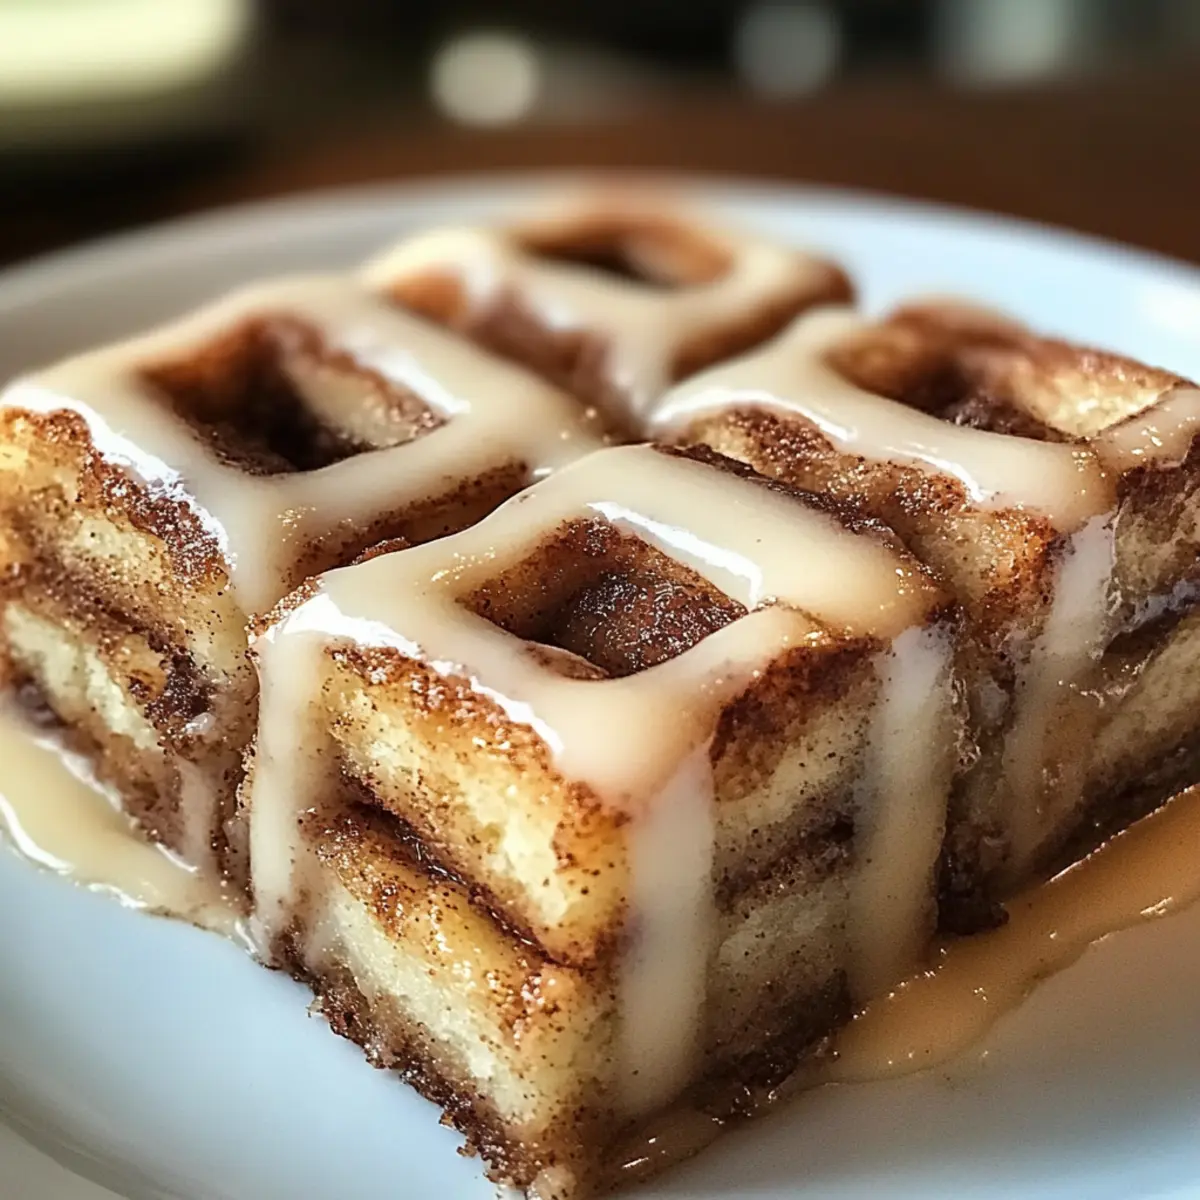
After the Cinnamon Roll Bliss Bars have cooled, drizzle or spread the creamy frosting over the top. Let the frosting set for a few minutes before slicing into squares. This last step adds an extra touch of sweetness and creaminess that makes these bars truly irresistible!
What to Serve with Cinnamon Roll Bliss Bars?
Satisfy your sweet tooth and elevate your dessert experience with complementary sides that enhance the delightful essence of these bars.
-
Fresh Berries: Bright, juicy berries like strawberries or blueberries add a refreshing contrast that brightens each bite.
-
Vanilla Ice Cream: The creamy richness of vanilla ice cream pairs beautifully with the warm spice of the bars, creating a decadent treat.
-
Whipped Cream: Light and airy whipped cream adds a delightful touch of sweetness, making your dessert feel extra special.
-
Coffee or Espresso: A rich cup of coffee or a shot of espresso balances the sweetness of the bars and elevates your dessert experience.
-
Caramel Sauce: Drizzling warm caramel sauce over your bars adds a luscious flavor twist, making each bite indulgently sweet and gooey.
-
Chopped Nuts: Sprinkle toasted pecans or walnuts for added crunch—this contrast in texture makes each mouthful even more satisfying.
-
Cinnamon Sugar Dusting: A light dusting of cinnamon sugar on top of the bars enhances their flavor and adds an appealing visual touch.
-
Chai Tea: Sip on a steaming cup of chai, with its warm spices mirroring those in the bars, for a cozy and thematic pairing.
-
Cream Cheese Frosting: Try spreading cream cheese frosting instead of traditional frosting for a tangy twist that pairs beautifully with cinnamon flavors.
Make Ahead Options
These Cinnamon Roll Bliss Bars are a fantastic choice for meal prep and can save you precious time on busy days! You can bake them up to 24 hours in advance. After baking, allow the bars to cool completely before covering them with an airtight lid or plastic wrap to maintain their moistness. If you prefer, you can frost the bars right before serving; this keeps the frosting fresh and creamy! If you’re looking to prepare even further in advance, the unbaked batter can be refrigerated for up to 3 days or frozen for up to 2 months. Just remember to let it sit at room temperature for about 30 minutes before baking to ensure even results. Enjoy delightful, homemade flavors while saving time in your busy week!
How to Store and Freeze Cinnamon Roll Bliss Bars
Room Temperature: Store any leftovers in an airtight container for up to 3 days at room temperature to maintain their delightful texture and flavor.
Fridge: If you prefer, keep the Cinnamon Roll Bliss Bars in the fridge for up to 5 days. Just make sure to place them in an airtight container to avoid drying out.
Freezer: For longer storage, slice the bars and place them in a single layer on a baking sheet to freeze. Once solid, transfer to a zip-top bag or airtight container for up to 2 months.
Reheating: To enjoy them warm, simply microwave each square for about 10-15 seconds or reheat in a low oven. This restores the softness and makes the frosting melt just a little, enhancing the blissful experience.
Cinnamon Roll Bliss Bars Variations
Feel free to make these Cinnamon Roll Bliss Bars your own with these creative tweaks that will ignite your culinary spirit.
-
Dairy-Free: Use coconut oil and almond milk for a completely dairy-free version while keeping the deliciousness intact.
Add a sprinkle of chopped nuts for a delightful crunch—your taste buds will rejoice! -
Gluten-Free: Swap out all-purpose flour for a high-quality gluten-free flour blend.
This keeps the texture and flavor close to the original while accommodating those with gluten sensitivities! -
Chocolate Lovers: Fold in chocolate chips or chunks for a luscious surprise in every bite.
It’s a decadent twist that transforms these bars into a chocolate lover’s dream! -
Nutty Addition: Try adding finely chopped pecans or walnuts to the batter for added texture and flavor depth.
Nuts bring a delightful crunch, enhancing the overall experience of your bars. -
Extra Cinnamon Swirl: For a more pronounced cinnamon flavor, increase the cinnamon in the batter and top with generous cinnamon-sugar.
Your kitchen will be filled with the heavenly scent of cinnamon, promising a warm embrace with every bite! -
Cream Cheese Frosting: Mix up your frosting game by using cream cheese frosting instead for a rich and tangy finish.
It’s a beautiful marriage of flavors that adds a touch of indulgence, perfect for gatherings. -
Spicy Kick: Add a hint of cayenne or chili powder to the cinnamon-sugar topping if you enjoy a little heat.
This unexpected twist will awaken your taste buds and keep everyone guessing what makes them so special! -
Fruit Fusion: Incorporate dried fruits like cranberries or raisins into the batter for a sweet, chewy texture.
Not only do they add flavor, but they also introduce a delightful chewiness that contrasts wonderfully with the softness of the bars.
Want more ways to sweeten your life? Try my delightful Cinnamon Swirl Bundt or whip up some Cinnamon Sugar Air Fryer Banana Chips for a unique dessert adventure!
Expert Tips for Cinnamon Roll Bliss Bars
-
Room Temperature Eggs: Ensure your eggs are at room temperature. This helps them blend smoothly with the butter and sugar, resulting in a better texture.
-
Avoid Overmixing: Gently stir the batter until just combined. Overmixing can lead to dense bars, so keep some lumps for a lighter result.
-
Cool Completely: Allow the bars to cool completely in the pan before frosting. This prevents the frosting from melting and ensures a beautiful finish.
-
Customize Wisely: Don’t hesitate to add nuts or chocolate chips to your batter. This customization can elevate your Cinnamon Roll Bliss Bars and suit personal tastes.
-
Check for Doneness: Bake until the edges are lightly golden and a toothpick comes out clean. This ensures a soft, chewy texture without a dry center.
Cinnamon Roll Bliss Bars Recipe FAQs
What kind of butter should I use for the Cinnamon Roll Bliss Bars?
Absolutely! I recommend using unsalted butter for better control over the saltiness in your recipe. If you’re looking for a dairy-free option, margarine or coconut oil works wonders as substitutions that still give rich moisture.
How should I store my Cinnamon Roll Bliss Bars to keep them fresh?
Store any leftovers in an airtight container at room temperature for up to 3 days. For longer freshness, you can refrigerate them for up to 5 days, ensuring the container is airtight to prevent drying out.
Can I freeze Cinnamon Roll Bliss Bars?
Yes, indeed! To freeze, slice the bars and place them in a single layer on a baking sheet to flash freeze. Once solid, transfer them to a zip-top bag or an airtight container, where they’ll last for up to 2 months. When you’re ready to enjoy, microwave each square for about 10-15 seconds to restore that fresh-baked softness.
What should I do if my batter seems too thick or too thin?
Very! If your batter appears too thick, it might be due to overmeasured flour. Gradually add a tablespoon of milk to loosen the consistency. Conversely, if it’s too thin, you can sprinkle a bit more flour to thicken it. It should be like thick cookie dough and not runny.
Are there any dietary considerations for Cinnamon Roll Bliss Bars?
Yes! These bars can easily be adapted for different dietary needs. For a gluten-free version, simply use a reliable gluten-free flour blend. If you’re vegan, consider substituting eggs with a flax egg (1 tablespoon ground flaxseed mixed with 2.5 tablespoons water) and using plant-based milk and yogurt. Always check the packaging of ingredients for potential allergens if serving to others.
Can I use different add-ins in my Cinnamon Roll Bliss Bars?
Absolutely! The more, the merrier! Feel free to include chopped nuts, chocolate chips, or dried fruits to customize your bars. Just make sure to evenly distribute them within the batter before baking to ensure every bite is filled with delightful surprises.
Cinnamon Roll Bliss Bars: The Cozy Treat You’ll Adore
Ingredients
Equipment
Method
- Preheat your oven to 350°F (175°C). Grease a 9x13 inch baking pan with butter or non-stick spray.
- Cream together the softened butter, brown sugar, and granulated sugar until light and fluffy, about 2-3 minutes.
- Add the eggs, sour cream, and vanilla extract to the creamed mixture and mix until well combined.
- Whisk together the all-purpose flour, baking powder, baking soda, ground cinnamon, and salt in a separate bowl.
- Gradually add the dry flour mixture to the wet ingredients, stirring gently until just combined.
- Transfer the batter into the greased baking pan and spread it evenly across the bottom.
- Mix together some additional cinnamon and granulated sugar for topping and sprinkle it generously over the batter.
- Bake for 25-30 minutes until a toothpick inserted into the center comes out clean and the edges are golden brown.
- Remove the pan from the oven and let the bars cool completely in the pan.
- Prepare the frosting by combining powdered sugar, milk, and vanilla extract until smooth.
- Drizzle or spread the frosting over the cooled bars and let it set for a few minutes before slicing into squares.
Leave a Reply