
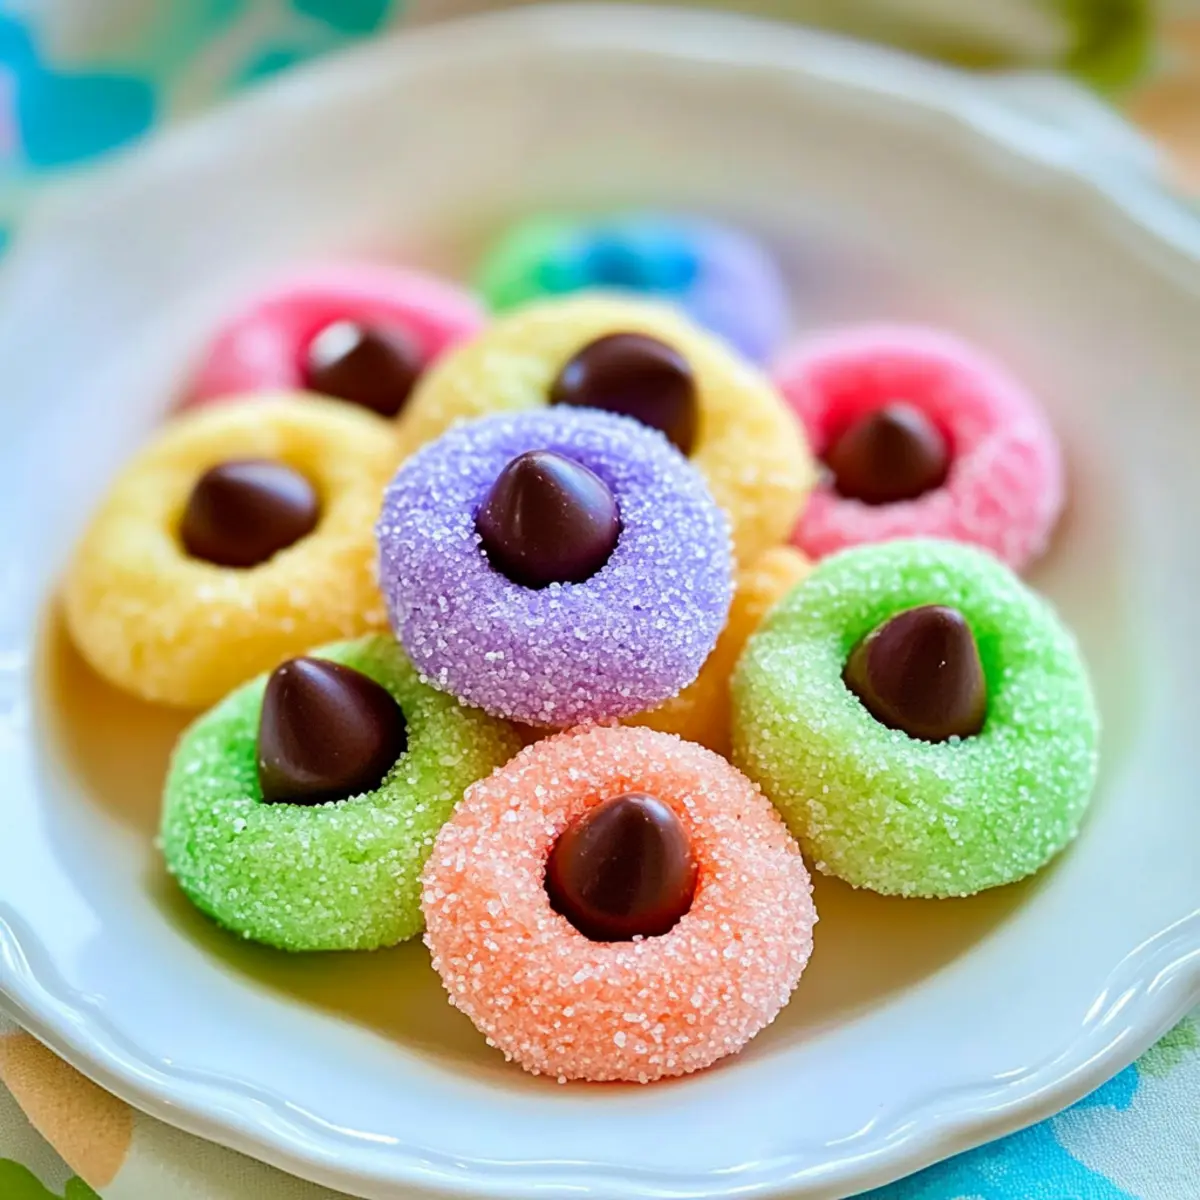
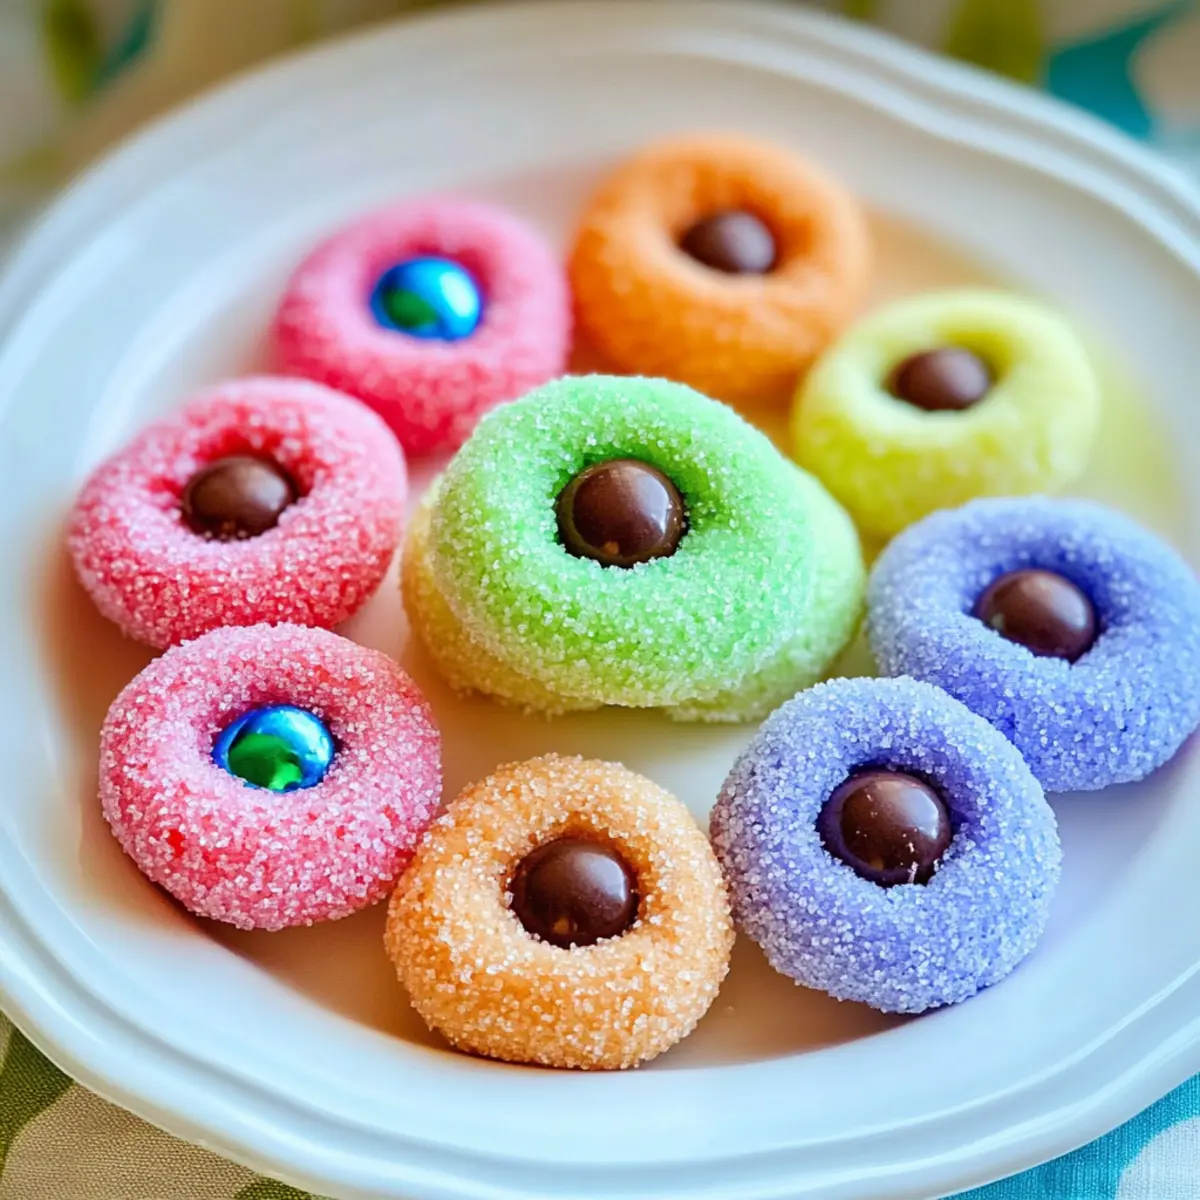
As I leaned against the kitchen counter, I couldn’t help but steal glances at the vibrant pastel sugar scattered across the table—it instantly transported me to a joyous spring celebration. The scent of freshly baked treats filled the air, and I knew it was time to whip up my favorite Easy Easter Blossom Cookies. These delightful cookies are as simple to make as they are cute, adorned with creamy chocolate kisses that peek out like cheerful little flowers. Not only do they bring smiles to festive gatherings, but their quick prep time means you can spend less time in the kitchen and more time enjoying laughter with loved ones. Ready to bake a batch that’s bound to become a seasonal favorite? Let’s dive in and make these cookies together!
Why Are These Cookies a Must-Bake?
Simplicity at its core: These Easy Easter Blossom Cookies come together in just minutes, perfect for busy bakers or those new to the kitchen.
Irresistible flavor: The buttery sweetness combined with chocolate kisses creates an unforgettable taste that everyone will adore.
Festive appeal: Sprinkled with pastel sanding sugar, they’re perfect for brightening up your Easter gatherings.
Versatile delight: Feel free to experiment with different flavored chocolate kisses or even add a twist with sprinkles or nuts!
Perfect for sharing: These cookies make a charming treat to bring to family events or casual get-togethers, spreading joy with every bite.
Looking for more options? Try my Thick Chewy Cookies or indulge in the creamy goodness of Pumpkin Oatmeal Cookies for extra sweetness!
Easy Easter Blossom Cookies Ingredients
For the Cookies
• Butter – Adds richness and flavor; softened for easy mixing.
• Sugar – Sweetens the cookies and helps achieve a light, fluffy texture; can be substituted with brown sugar for a deeper flavor.
• Egg – Provides moisture and binds ingredients; replace with a flax egg for a vegan option.
• Vanilla Extract – Adds aromatic flavor; can be swapped with almond extract for a different taste.
• Flour – The main structure of the cookies; use all-purpose flour or a gluten-free blend.
• Baking Powder – Helps cookies rise, making them softer; ensure it’s fresh for best results.
• Salt – Balances sweetness; omit if using salted butter.
• Pastel Sanding Sugar – For rolling the dough balls; can use granulated sugar or colored sugar sprinkles.
• Chocolate Kisses – The signature topping for these cookies; any chocolate candy or chocolate chips can serve as a substitute.
Feel free to gather these ingredients for delightful Easy Easter Blossom Cookies that will surely brighten up your springtime celebrations!
Step‑by‑Step Instructions for Easy Easter Blossom Cookies
Step 1: Preheat the Oven
Begin by preheating your oven to 350°F (175°C). While the oven warms up, line a baking sheet with parchment paper to ensure your Easy Easter Blossom Cookies don’t stick. This simple prep step is crucial for achieving that perfect cookie texture, so make sure you’re ready to go when it’s time to bake.
Step 2: Cream the Butter and Sugar
In a large mixing bowl, combine the softened butter and granulated sugar. Using a hand mixer or stand mixer, beat them together on medium speed until the mixture becomes light and fluffy, about 2-3 minutes. This step incorporates air into the batter, ensuring your cookies will be soft and tender.
Step 3: Mix in the Egg and Vanilla
Next, add the egg and vanilla extract to the creamed butter and sugar mixture. Beat everything together until smooth and well combined, which should take another 1-2 minutes. This wet mixture will serve as the foundation for making your delightful Easy Easter Blossom Cookies.
Step 4: Combine Dry Ingredients
In a separate bowl, whisk together the all-purpose flour, baking powder, and salt. This step ensures that your dry ingredients are evenly mixed and helps the baking powder distribute properly. Once combined, gradually add the flour mixture to your wet ingredients, stirring gently to form a cohesive dough.
Step 5: Form the Dough Balls
Once your dough is ready, use a cookie scoop or tablespoon to portion out 1-inch balls of dough. Roll each ball gently in your palms to create a smooth shape, then roll them in pastel sanding sugar for that festive touch. The sugar coating adds sweetness and a sparkly finish to each Easy Easter Blossom Cookie.
Step 6: Arrange on Baking Sheet
Place the sugar-coated dough balls on the prepared baking sheet, ensuring they’re spaced about 2 inches apart. This spacing is essential as the cookies will spread while baking. Take a moment to review your arrangement, as it will ensure an even bake and lovely presentation.
Step 7: Bake the Cookies
Pop the baking sheet into your preheated oven and bake for 8-10 minutes. Keep an eye on them; the edges should be set while the centers still look slightly soft. This balance is key to achieving that wonderful chewy texture the Easy Easter Blossom Cookies are known for!
Step 8: Add the Chocolate Kisses
As soon as you remove the baking sheet from the oven, immediately press a chocolate kiss into the center of each cookie. The residual heat will melt the chocolate slightly, creating a deliciously gooey center. This final step adds both visual appeal and flavor to your festive spring treats.
Step 9: Cool the Cookies
Allow the cookies to cool on the baking sheet for about 5 minutes. This gentle cooling period helps them firm up before transferring. After that, carefully move them to a wire rack to cool completely. Your kitchen will smell incredible as you wait for your Easy Easter Blossom Cookies to finish cooling!

Easy Easter Blossom Cookies Variations
Get creative with your baking! These delightful cookies can be customized in various ways, making them even more enjoyable.
-
Vegan Version: Replace the egg with a flax egg made from 1 tablespoon of ground flaxseed mixed with 2.5 tablespoons of water. This swap allows everyone to enjoy these cookies!
-
Nutty Delight: Stir in 1/2 cup of finely chopped nuts like walnuts or pecans for a tasty crunch. The combination of flavors creates a beautiful surprise with every bite.
-
Different Chocolate: Use assorted chocolate kisses, like caramel-filled or peanut butter, to add a delightful twist. Each cookie will have its own exciting flavor!
-
Gluten-Free Option: Substitute all-purpose flour with a gluten-free flour blend. It’s a perfect way to cater to those with gluten sensitivities, ensuring no one misses out on the fun.
-
Add Fun Sprinkles: Mix in colored sprinkles into the dough for a festive touch. They’ll bring extra joy to your cookies and brighten up the presentation!
-
Coconut Bliss: Add 1/2 cup of shredded coconut to the dough for an exotic flavor twist. The coconut will add a lovely chew and tropical flair.
-
Spiced Variation: Incorporate a teaspoon of cinnamon or nutmeg into the flour mixture for a warm, cozy flavor that complements the festive spirit beautifully.
If you’re inspired by these variations, don’t miss out on trying my scrumptious Chewy Pumpkin Cookies or the delightful Thick Chewy Cookies for more baking joy!
Make Ahead Options
These Easy Easter Blossom Cookies are perfect for meal prep, allowing you to spend more time enjoying the festivities and less time in the kitchen! You can prepare the cookie dough up to 24 hours in advance. Simply follow the steps to mix the ingredients, form the dough balls, roll them in pastel sanding sugar, and then refrigerate them on a baking sheet. When you’re ready to bake, just pop them into a preheated oven and press a chocolate kiss into each one as soon as they come out. The cookies will maintain their soft, chewy texture and delightful sweetness, making them just as delicious as when freshly made!
What to Serve with Easy Easter Blossom Cookies
As you indulge in these delightful treats, imagine the vibrant flavors and textures that can accompany them on your festive table.
- Fresh Fruit Salad: A bright mix of berries and citrus provides a refreshing contrast to the sweetness of the cookies, cleansing the palate with every bite.
- Whipped Cream: Light and airy, this fluffy topping can enhance the cookie experience, especially when served alongside fresh strawberries for a delightful dessert duo.
- Caramel Sauce: Drizzling warm caramel over the cookies adds an indulgent touch, complementing the chocolate kisses’ richness with a buttery sweetness.
- Iced Tea: A chilled glass of sweetened or unsweetened iced tea balances the flavors perfectly, providing a refreshing drink to accompany your spring celebration.
- Chocolate Milkshake: A creamy, chocolatey treat that harmonizes beautifully with the cookies’ flavors, this milkshake will evoke childhood joy in every sip!
- Pastel Macarons: These colorful French treats add an elegant touch to your Easter spread while enhancing the overall festive aesthetic.
- Mini Cheesecakes: Rich and creamy, mini cheesecakes provide a delightful contrast in texture and richness, making for a decadent dessert combo at your gathering.
- Coffee: The warmth and slight bitterness of freshly brewed coffee creates a cozy balance to the sweet cookies, perfect for a little afternoon treat.
Elevate your Easter celebration by pairing these Easy Easter Blossom Cookies with delightful accompaniments that bring colors and flavors to your table.
How to Store and Freeze Easy Easter Blossom Cookies
Room Temperature: Store cookies in an airtight container at room temperature for up to 5 days. This keeps them soft and chewy, ready to enjoy anytime!
Fridge: If you prefer your cookies chilled, they can be stored in the fridge for up to 7 days. Just make sure they are in an airtight container to prevent them from drying out.
Freezer: To preserve freshness, freeze the cookies for up to 3 months. Place them in a freezer-safe bag or airtight container, separating layers with parchment paper.
Reheating: When ready to enjoy, you can thaw them at room temperature or warm them in the microwave for about 10-15 seconds. This will bring back their delightful softness!
Expert Tips for Easy Easter Blossom Cookies
-
Softened Butter: Ensure your butter is fully softened to room temperature for easy creaming with sugar; cold butter won’t blend well.
-
Don’t Overbake: Bake until just set around the edges; centers should remain soft for that perfect chewy texture in your Easy Easter Blossom Cookies.
-
Roll in Sugar: Rolling dough balls in pastel sanding sugar adds sweetness and visual appeal; don’t skip this step for that festive sparkle!
-
Spacing Matters: Place cookie dough balls at least 2 inches apart on the baking sheet to avoid spreading into each other while baking.
-
Quick Cooling: Allow cookies to cool slightly on the baking sheet before transferring to a wire rack; this helps maintain structure and prevents breakage.
Easy Easter Blossom Cookies Recipe FAQs
How do I choose the right butter for these cookies?
Absolutely! For the best results, you’ll want to use unsalted butter that is fully softened to room temperature. This allows for easier creaming with the sugar, ensuring a light and fluffy texture. If you only have salted butter, you can omit any additional salt in the recipe to maintain balance.
What’s the best way to store my cookies?
To keep your Easy Easter Blossom Cookies soft and chewy, store them in an airtight container at room temperature for up to 5 days. If you’re planning to enjoy them later, place them in the fridge for up to a week. Always ensure they’re sealed well to retain moisture!
Can I freeze the cookies for later?
Absolutely! To freeze your Easy Easter Blossom Cookies, let them cool completely, then place them in a freezer-safe bag or an airtight container, separating layers with parchment paper. They can be stored for up to 3 months. When you’re ready to enjoy some, simply thaw them at room temperature or warm them slightly in the microwave.
What if my cookies spread too much while baking?
Very well! If your cookies spread more than desired, it could be due to a few factors. Ensure your butter is softened, not melted, before creaming. Next, double check your measurements, especially of the flour; too much butter can cause excess spreading. If needed, you can chill the dough for 30 minutes before baking to help!
Are there any allergy considerations for these cookies?
Yes! When making these Easy Easter Blossom Cookies, it’s important to consider allergies. The main ingredients include butter, eggs, and flour, which are common allergens. For a vegan alternative, substitute the egg with a flax egg (1 tablespoon ground flaxseed mixed with 2.5 tablespoons water, let sit for 5 minutes). Always check for gluten-free flour options if gluten is a concern, and be cautious with the chocolate kisses—verify they’re free of allergens like nuts and dairy if needed.

Soft & Chewy Easy Easter Blossom Cookies for Spring Joy
Ingredients
Equipment
Method
- Preheat your oven to 350°F (175°C) and line a baking sheet with parchment paper.
- In a large mixing bowl, combine the softened butter and granulated sugar, beating until light and fluffy, about 2-3 minutes.
- Add the egg and vanilla extract, and beat until smooth, about 1-2 minutes.
- In a separate bowl, whisk together the flour, baking powder, and salt. Gradually add this mixture to the wet ingredients, stirring gently to form a cohesive dough.
- Portion out 1-inch balls of dough and roll them in pastel sanding sugar.
- Place the sugar-coated dough balls on the baking sheet, spaced about 2 inches apart.
- Bake for 8-10 minutes, until edges are set but centers look slightly soft.
- Immediately press a chocolate kiss into the center of each cookie after removing from the oven.
- Allow cookies to cool on the baking sheet for about 5 minutes before transferring to a wire rack.
Leave a Reply