
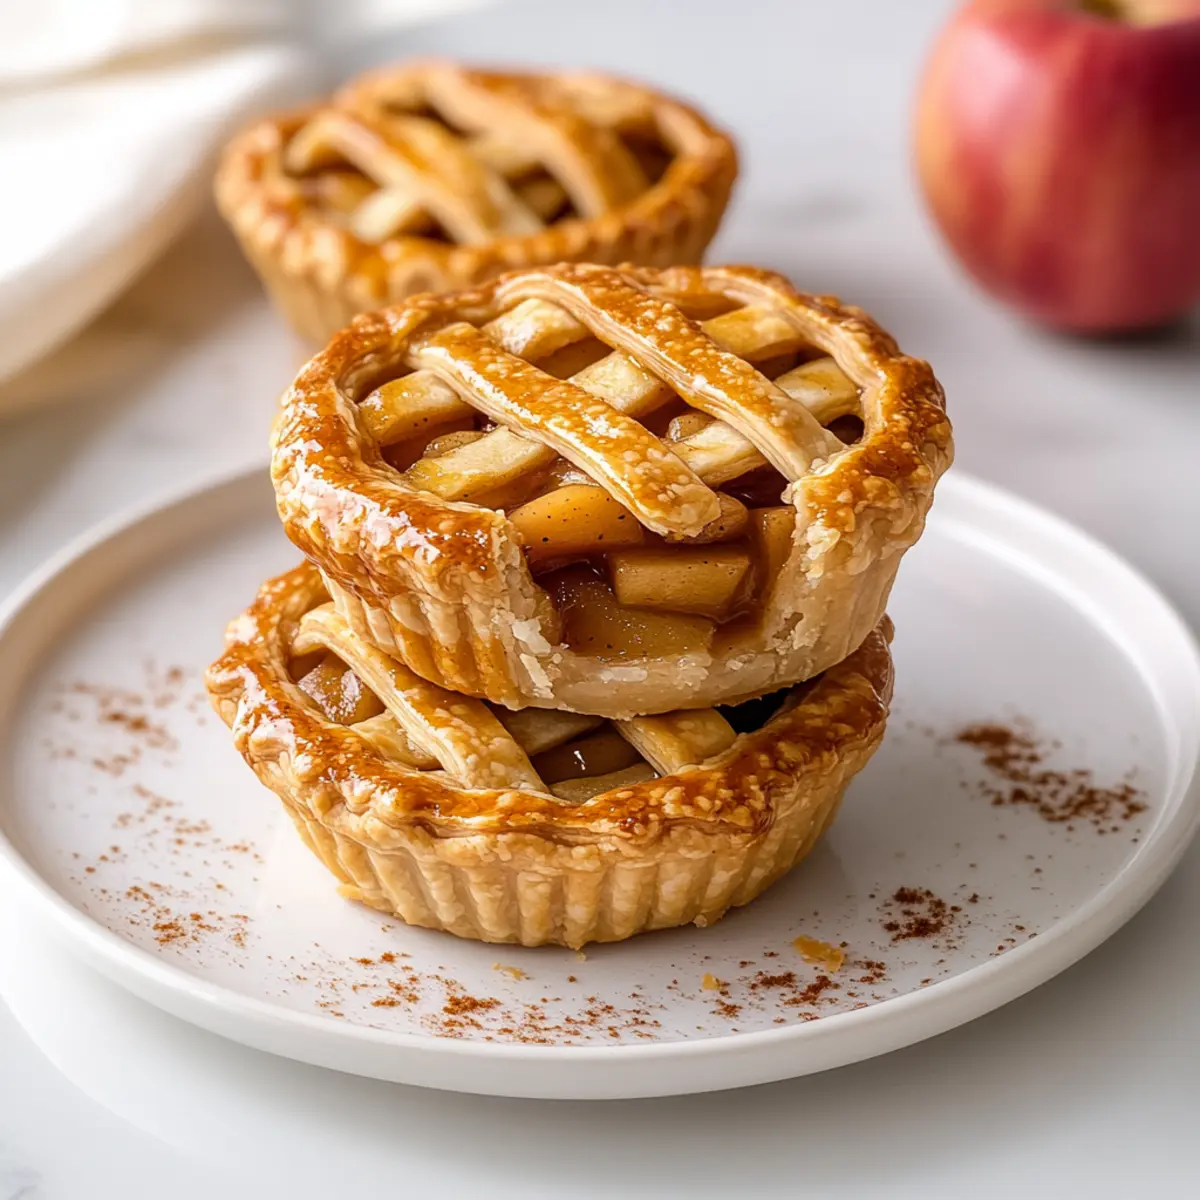
As I stood in my kitchen, the sweet scent of cinnamon and warm apples filled the air, instantly transporting me to cozy autumn days. These Mini Apple Pies are everything I love about fall, offering a delightful handheld experience that’s perfect for gatherings or an indulgent evening at home. With bakery-quality results and a buttery, flaky crust—crafted into charming little packages—this recipe strikes the perfect balance between classic comfort and sophisticated flair. Not only are they a crowd-pleaser, but their individual size makes them perfect for portion control—or just a little extra indulgence! Ready to bring a taste of nostalgia to your table? Let’s dive into creating these irresistible Mini Apple Pies!

Why are Mini Apple Pies a Must-Try?
Irresistible Flavors: The warm spices of cinnamon and nutmeg mingle beautifully with sweet apples, creating an aroma that evokes cozy autumn vibes.
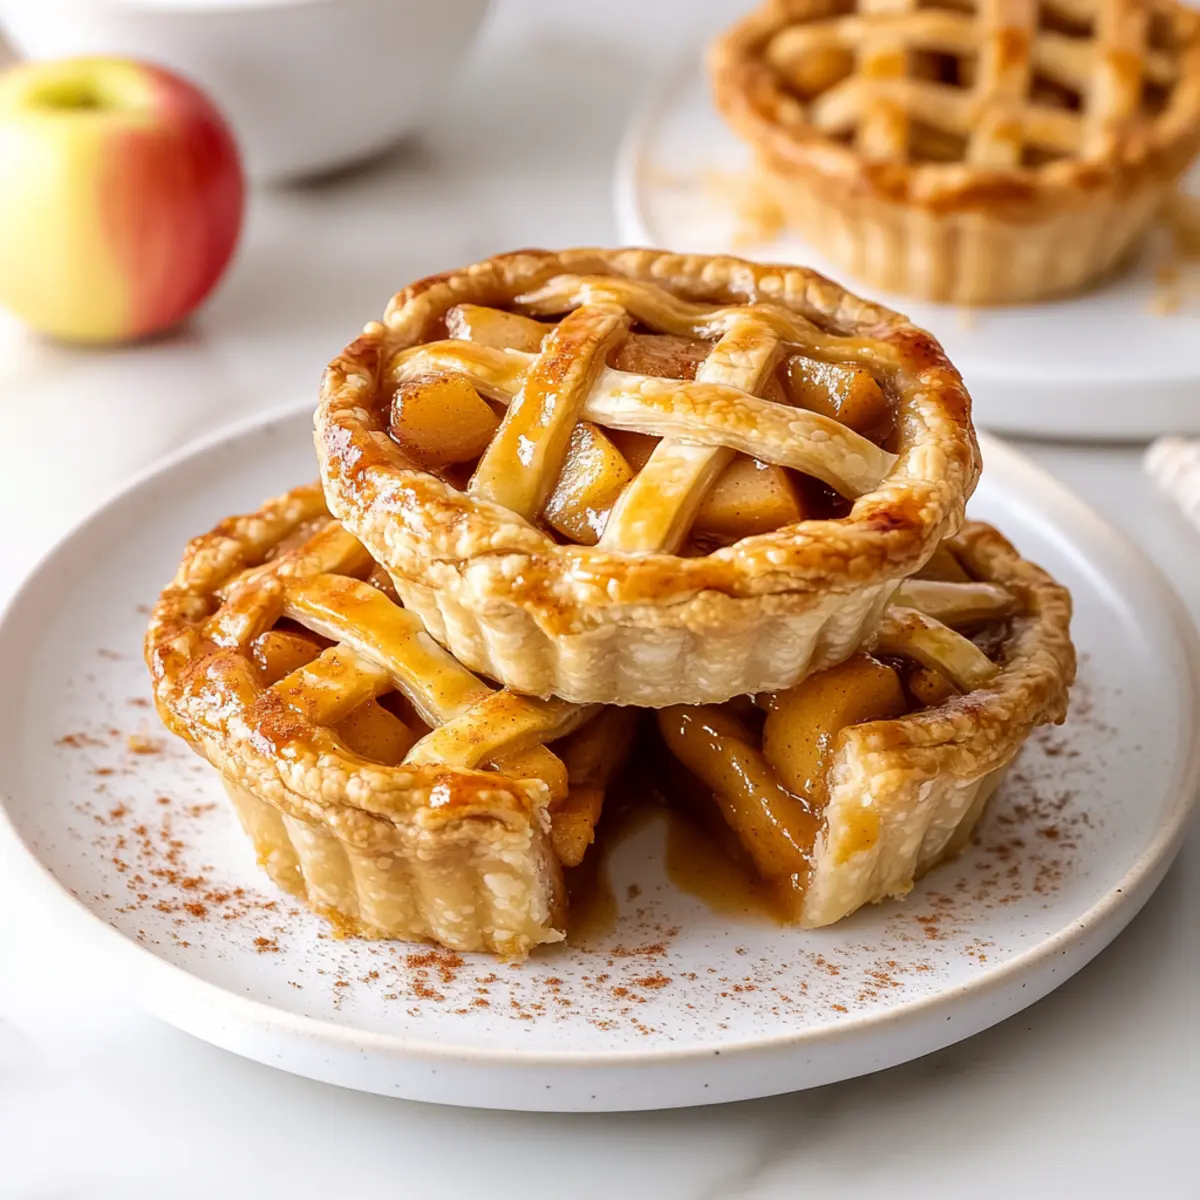
Handheld Delight: Perfectly sized for easy snacking, these pies are great for picnics, gatherings, or a comforting night in.
Bakery-Quality: With a golden, flaky crust like those you’d find at a local bakery, your friends and family will be impressed by your skills!
Versatile Options: Feel free to experiment with fillings, such as berries or nuts, for a delightful twist—how about adding pecans for added crunch?
Make-Ahead Convenience: Prepare these Mini Apple Pies in advance and pop them in the oven just before serving for that fresh-baked aroma. If you’re looking for more apple inspiration, check out my Apple Brownies Deliciously or Apple Butter Snickerdoodles—they’re just as satisfying!
Mini Apple Pie Ingredients
For the Filling
- Apples – Use tart varieties like Granny Smith or a mix of sweet and tart for the best flavor balance.
- Salted Butter – Adds richness and flavor; substitute with unsalted butter and adjust salt if preferred.
- Brown Sugar – Contributes sweetness and depth; can swap with coconut sugar for a different flavor profile.
- Ground Cinnamon – Enhances warmth and aroma; feel free to use nutmeg or allspice for a unique twist.
- Ground Nutmeg – Adds a subtle spice dimension; omit or reduce according to personal preference.
- Fresh Lemon Juice – Balances sweetness and brightens the filling; replace with apple cider vinegar in a pinch.
- Cornflour (Cornstarch) – Serves as a thickening agent to prevent a soggy pastry; use tapioca starch if needed.
- Cold Water – Essential for mixing with cornflour to create a thickener.
For the Pastry
- Frozen Shortcrust Pastry – Forms the pie crust; homemade shortcrust can be used for an even richer taste.
- Egg (whisked) – For the egg wash, providing a golden sheen; milk or cream can be used as a non-egg wash alternative.
Step‑by‑Step Instructions for Mini Apple Pies
Step 1: Simmer Filling
In a medium saucepan, combine chopped apples, butter, brown sugar, cinnamon, nutmeg, and lemon juice. Set over medium heat and simmer for about 5-8 minutes, stirring occasionally, until the apples are tender but not mushy. The mixture should smell fragrant and warm, enticingly filling your kitchen.
Step 2: Thicken
In a small bowl, mix cornflour with cold water to form a slurry. Once the apple filling is ready, stir this mixture into the saucepan and cook for another minute or two, until the filling thickens to a jam-like consistency. Remove from heat and let the filling cool completely before using.
Step 3: Prepare Oven
Preheat your oven to 180°C (356°F) and line a baking sheet with parchment paper. This will ensure that your Mini Apple Pies bake evenly and won’t stick. It’s important to get the oven ready before assembling, so the pies hit the oven fresh.
Step 4: Cut Pastry
Using a round cutter, take the first frozen shortcrust pastry sheet and cut out 9 rounds for the bases of your pies. From the second pastry sheet, cut strips about 1.5cm wide for creating a lovely lattice design on top. Make sure the pieces are even for a beautiful presentation.
Step 5: Assemble
Place a tablespoon of cooled apple filling onto each pastry round. Carefully position the pastry strips over the filling to create a lattice design, crisscrossing them as you go. This will not only look delightful but also allow the filling to peek through as it bakes.
Step 6: Seal Edges
Trim any excess pastry strips, and using a fork, crimp the edges of each pie to seal them tightly. This step is crucial to prevent any delicious apple filling from leaking during baking. Finally, brush the tops with the whisked egg for a beautiful golden finish.
Step 7: Bake
Transfer your assembled Mini Apple Pies to the prepared baking sheet and place them in the preheated oven. Bake for 20-25 minutes, or until the crust is golden brown and firm to the touch. Keep an eye on them towards the end to achieve that perfect bakery-style crust.
Storage Tips for Mini Apple Pies
Room Temperature: Enjoy your Mini Apple Pies fresh for up to 3 hours at room temperature before transferring them to the fridge to maintain their quality.
Fridge: Store in an airtight container for up to 3 days to keep the pies from drying out. Allow them to cool completely first to prevent condensation.
Freezer: Baked Mini Apple Pies can be frozen for up to 3 months. Wrap each pie in plastic wrap and place in a freezer-safe container.
Reheating: To reheat, place frozen pies in the oven at 180°C (356°F) for about 15-20 minutes until heated through and crispy, bringing back their delightful texture.
Expert Tips for Mini Apple Pies
-
Thicken Wisely: Ensure your apple filling is thick; if you find it too runny, use more cornflour slurry to achieve a jam-like consistency.
-
Crimp Tightly: Always crimp the edges securely to prevent any delicious filling from leaking during baking, ensuring a neat treat.
-
Handle Pastry with Care: If your pastry becomes too sticky while assembling, don’t hesitate to chill it briefly. A cool pastry is much easier to work with.
-
Bake for Crispness: Keep an eye on your pies towards the end of baking; you want that golden color for a truly bakery-quality Mini Apple Pie.
-
Freezing Tips: Baked pies can be frozen for later enjoyment. Reheat them to restore crispness before serving to maintain their delightful texture.
Mini Apple Pies Variations & Substitutions
Customize your Mini Apple Pies to match your taste and dietary preferences, making each bite uniquely yours!
-
Dairy-Free: Swap butter for coconut oil and use a dairy-free egg wash for a rich, vegan-friendly option.
The result will be just as delightful and flavorful while accommodating your dietary needs. -
Sugar-Free: Substitute brown sugar with your favorite sugar alternative or use pureed dates for natural sweetness.
You’ll still enjoy that warm, comforting apple filling without the added sugars! -
Grain-Free: Use almond flour and coconut flour to create a gluten-free crust.
It adds a nutty flavor that pairs wonderfully with the apple filling while keeping it suitable for gluten-sensitive diets. -
Spiced Pies: Add a sprinkle of cardamom or ginger to the filling for a spice kick that beautifully complements the apples.
This exciting twist introduces an unexpected layer of flavor to each mouthful. -
Fruit Variations: Experiment with different fruits, like ripe pears or mixed berries, to create a delicious medley of flavors.
These alternatives offer a refreshing change and keep your pies exciting! -
Nutty Crunch: Stir in chopped pecans or walnuts to the apple filling for an added crunch.
These nuts not only enhance texture but also add a delightful depth of flavor. -
Puff Pastry: Replace shortcrust with puff pastry for an airy, flaky pie that elevates the classic treat.
The beautifully risen crust will make your Mini Apple Pies even more indulgent and visually stunning!
For more apple-inspired treats, don’t miss out on my delightful Apple Brownies Deliciously or the irresistible Honeycrisp Apple Broccoli salad for something unexpected!
What to Serve with Mini Apple Pies?
Indulging in warm, flaky Mini Apple Pies is just the beginning of a heartwarming meal experience.
-
Vanilla Bean Ice Cream: The creamy richness complements the warm spices of the pie, creating an irresistible contrast of temperatures. Picture yourself savoring a warm pie with a generous scoop melting slowly on top—a true delight!
-
Salted Caramel Sauce: Drizzling this sweet, buttery sauce over your pie enhances its flavors and adds a luscious, gooey texture. It’s the perfect finishing touch that elevates each bite to pure bliss.
-
Whipped Cream: Light and airy, whipped cream adds a touch of elegance while balancing the sweetness of the pie. A dollop on the side invites guests to customize their dessert, making each serving feel special.
-
Apple Cider: For a drink pairing, warm apple cider brings out the flavors beautifully, inviting you to embrace the cozy fall vibe. Enjoying this alongside your mini pies will remind you of hayrides and harvest festivities.
-
Fresh Fruit Salad: A zesty salad of citrus and berries will refresh your palate after the rich pies. The bright colors and tartness contrast nicely with the sweet apple filling, making your meal feel light and vibrant.
-
Cheese Platter: Serve a selection of sharp cheeses to add depth and savory notes to your meal. The creaminess of brie or the nuttiness of aged cheddar balances wonderfully with the sweet tang of the pies, creating a sophisticated snacking experience.
-
Spiced Chai Tea: This warm beverage, infused with spices, echoes the flavors in your mini pies while providing a soothing, aromatic complement. Sip slowly and let the comforting warmth envelop you as you indulge in dessert.
-
Chocolate Drizzle: For dessert lovers, a drizzle of dark chocolate adds a decadent touch and a slightly bitter contrast to the sweetness of the pies. This unexpected pairing can transform your Mini Apple Pie experience into an indulgent treat.
Make Ahead Options
These Mini Apple Pies are perfect for meal prep enthusiasts looking to save time on busy weeknights! You can assemble the pies and refrigerate them unbaked for up to 24 hours without compromising quality. To maintain their freshness, cover the assembled pies with plastic wrap to prevent drying out. When you’re ready to serve, simply preheat your oven and bake the pies directly from the fridge—no need to bring them to room temperature first! This way, you can enjoy delightful, fresh-baked Mini Apple Pies with minimal effort, making them an ideal choice for those seeking a touch of homemade comfort in their busy lives.

Mini Apple Pies Recipe FAQs
What type of apples should I use for the filling?
Absolutely! I recommend using tart varieties like Granny Smith for the best flavor balance. You can also mix sweet and tart apples to create depth. Just look for firm apples that are free from dark spots to ensure a fresh filling.
How should I store Mini Apple Pies?
Store your Mini Apple Pies in an airtight container at room temperature for up to 3 hours, or in the refrigerator for up to 3 days. Make sure they cool completely before refrigerating to avoid excess moisture.
Can Mini Apple Pies be frozen?
Yes, baked Mini Apple Pies can be frozen for up to 3 months! To do this, wrap each pie in plastic wrap and place them in a freezer-safe container. When you’re ready to enjoy one, simply reheat in the oven at 180°C (356°F) for about 15-20 minutes to restore their delightful crispness.
What if my apple filling is too runny?
No worries! If your apple filling turns out too runny, just mix an extra teaspoon of cornflour with a bit of cold water to make a slurry. Stir this into the filling over medium heat, cooking until it thickens to your desired consistency. It should become jam-like and perfect for pie!
Are Mini Apple Pies suitable for those with allergies?
When it comes to allergies, always check the ingredients! Mini Apple Pies contain common allergens like gluten and eggs. If you’re baking for someone with food sensitivities, consider using gluten-free pastry options and egg substitutes, such as a soy or almond milk wash for a golden color.
Irresistible Mini Apple Pies for Cozy Autumn Bliss
Ingredients
Equipment
Method
- In a medium saucepan, combine chopped apples, butter, brown sugar, cinnamon, nutmeg, and lemon juice. Set over medium heat and simmer for about 5-8 minutes until the apples are tender.
- In a small bowl, mix cornflour with cold water to form a slurry. Stir into the saucepan and cook until thickened.
- Preheat your oven to 180°C (356°F) and line a baking sheet with parchment paper.
- Using a round cutter, cut out 9 rounds for the bases from the first pastry sheet and create strips for the lattice from the second sheet.
- Place a tablespoon of cooled apple filling onto each pastry round and position pastry strips over the filling in a lattice design.
- Trim excess pastry strips and crimp edges with a fork to seal. Brush tops with whisked egg.
- Transfer pies to the baking sheet and bake for 20-25 minutes until golden brown.
Leave a Reply