
As I rummaged through my pantry, I stumbled upon a treasure trove of dried fruits and seeds, all just waiting to come together in a harmonious crunch. That’s when the idea hit me—why not whip up some No-Bake Apricot Chia Energy Bars? These delightful snacks are not only a breeze to make with just six wholesome, allergy-friendly ingredients but they’re also a perfect solution for keeping hunger at bay in our busy lives. Whether you need a quick pick-me-up between meetings or a nutritious addition to your kids’ lunchboxes, these gluten-free, nut-free bars have got you covered. Plus, they provide a sweet yet wholesome boost to your day without any baking fuss. Curious about how to make these easy, flavorful snacks? Let’s dive into the creation of deliciousness together!
Why Make No-Bake Energy Bars?
Convenience at Its Finest: These No-Bake Apricot Chia Energy Bars require minimal effort, making them a fantastic choice for busy individuals.
Nutrient-Packed: Each bar is loaded with healthy fats, fiber, and a hint of sweetness, making them an energizing snack option.
Versatile Recipe: Feel free to swap in your favorite dried fruits or seeds for a personalized touch—figs, raisins, or even sunflower seeds could work beautifully!
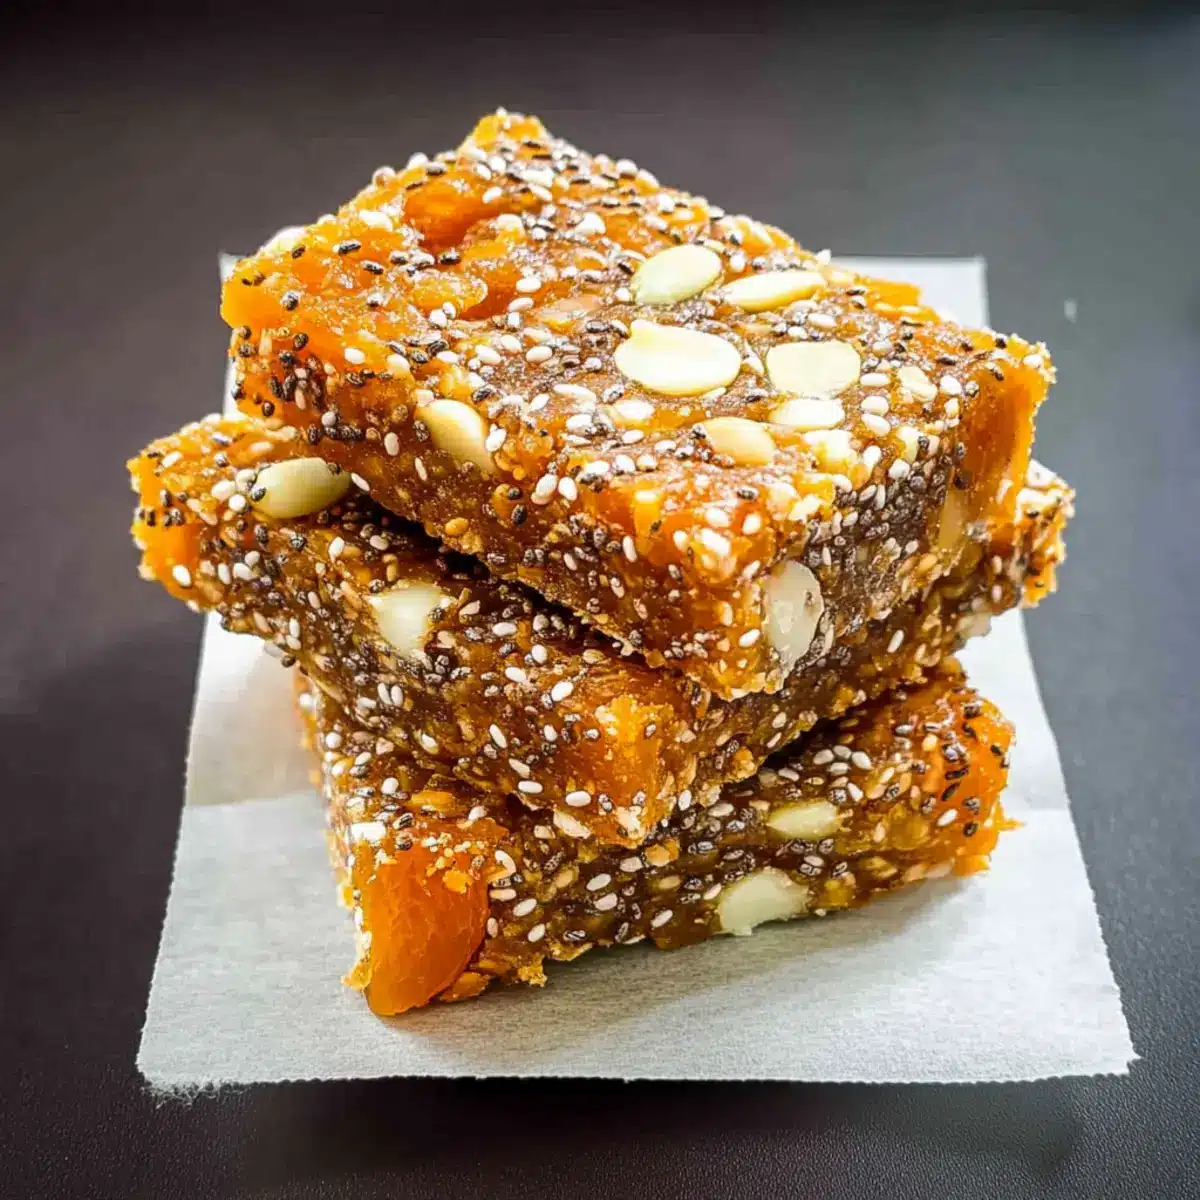
Taste & Texture: Enjoy the sweet, chewy apricot flavor paired with crunchy pumpkin seeds and creamy white chocolate for a delightful experience.
Ideal for All Occasions: Whether you are at work, post-gym, or just in need of an afternoon boost, these bars are your perfect, wholesome companion. If you’re in the mood for something equally sweet, consider trying my Brown Butter Bars, too!
No-Bake Apricot Chia Energy Bars Ingredients
• Ready to create your own batch of these delicious energy bars? Here’s what you’ll need!
For the Base
- Medjool dates – Provide natural sweetness and bind the bars together; you can substitute with any other soft dried fruit if preferred.
- Dried apricots – Add a fruity flavor and chewy texture; feel free to swap them with figs or raisins for a twist.
For the Crunch
- Chia seeds – Contribute healthy fats and Omega-3 fatty acids while giving a slight crunch; flax seeds could be used as an alternative if you like.
- Ground cinnamon – Enhances flavor with warmth and depth; omit if not preferred or substitute with nutmeg for a different flavor profile.
- Raw pumpkin seeds (pepitas) – Offer a nutritional punch and crunchy texture; consider using sunflower seeds for a nut-free option.
For the Sweetness
- White chocolate chips – Provide sweetness and creaminess; vegan chocolate chips can be swapped in for a plant-based version of these No-Bake Apricot Chia Energy Bars!
Step‑by‑Step Instructions for No-Bake Apricot Chia Energy Bars
Step 1: Prepare Ingredients
Begin by pitting the Medjool dates and chopping the dried apricots into small, manageable pieces. Ensure your ingredients are fresh and juicy for the best taste. Gather a food processor and a lined 8×8-inch baking pan, allowing for easy mixing and cleanup.
Step 2: Mix
In your food processor, combine the Medjool dates, chopped dried apricots, chia seeds, ground cinnamon, and raw pumpkin seeds. Pulse until the mixture is well blended and sticky, usually around 30-60 seconds. You want a homogenous yet textured blend, where the dates provide a gooey base that binds all ingredients together.
Step 3: Add Chocolate
Carefully mix in the white chocolate chips with a spatula, ensuring they’re evenly distributed throughout the stick mixture. This step will infuse your No-Bake Apricot Chia Energy Bars with creamy sweetness that complements the fruitiness. Blend just until the chips are barely visible—over-mixing can melt the chocolate.
Step 4: Form Bars
Transfer the sticky mixture into your lined baking pan. Use your hands or the back of a spatula to press it down firmly and evenly. Aim for about 1-inch thick to ensure the bars hold together well once chilled. This step is crucial for creating the perfect texture and shape for your energy bars.
Step 5: Chill
Place the baking pan in the refrigerator and let the mixture chill for about 30 minutes. This will help the bars firm up, making them easier to cut later. You’ll know they’re ready when they feel set, rather than sticky or soft to the touch.
Step 6: Cut
Once the No-Bake Apricot Chia Energy Bars have set, remove them from the refrigerator. Using a sharp knife, cut them into your desired size—whether that’s bars or squares. Enjoy these nutritious snacks fresh, or store them in an airtight container for later!
Expert Tips for No-Bake Apricot Chia Energy Bars
- Use Fresh Ingredients: Ensure your Medjool dates are soft and moist for easier blending; dry dates can make the mixture crumbly.
- Perfect Texture: Press the mixture firmly into the pan to avoid crumbly bars. Taking time here will yield perfectly shaped No-Bake Apricot Chia Energy Bars.
- Choco Swap: If you prefer a darker flavor, use dark chocolate chips instead of white; they combine beautifully with the fruity base!
- Storage Know-How: Store in an airtight container in the fridge to keep the bars firm and fresh. They also freeze well for longer shelf life!
- Experiment Freely: Feel free to swap in your favorite seeds or dried fruits—creativity is key to making these No-Bake Apricot Chia Energy Bars your own!
Make Ahead Options
These No-Bake Apricot Chia Energy Bars are perfect for meal prep enthusiasts looking to simplify their week! You can prepare the mixture up to 24 hours in advance and refrigerate the uncut bars, which helps maintain their delightful chewy texture. To do this, follow all the steps until you chill the mixture in the baking pan, then cover it tightly with plastic wrap or store in an airtight container. When you’re ready to enjoy your energy bars, simply cut them into pieces after chilling and serve. This not only saves you time during busy days but also ensures you have healthy snacks at the ready, just as delicious as when freshly made!
What to Serve with No-Bake Apricot Chia Energy Bars
These delightful energy bars are the perfect companion to a nourishing and satisfying meal that nourishes both body and soul.
- Creamy Yogurt: A dollop of creamy yogurt adds a tangy contrast, complementing the sweetness of the bars beautifully.
- Fresh Fruit Salad: Bright, juicy berries or a fresh citrus medley brings a burst of flavor and freshness, enhancing the wholesome experience.
- Nutty Granola: A crunchy granola sprinkled on top creates a delightful textural contrast and boosts the essence of natural ingredients.
Pair these energy bars with a refreshing green smoothie for a wholesome breakfast; the creamy blend of spinach and banana is simply invigorating!
- Crisp Veggie Sticks: Crunchy carrots and celery serve as a refreshing palate cleanser, making for a balanced snack that lightens up your day.
- Herbal Tea: A warm cup of herbal tea adds a soothing touch, elevating your snacking experience with relaxing aromas and flavors.
- Nut Butter Spread: A smear of almond or sunflower butter offers a creamy, rich layer that pairs exceptionally well with the fruity notes of the bars.
- Chocolate Dipped Pretzels: For a fun twist, serve with a side of chocolate-dipped pretzels to add a salty-sweet dynamic to your snack time.
No-Bake Apricot Chia Energy Bars Variations
Don’t be afraid to sprinkle your own creativity into these bars and make them your own!
- Nut-Free Boost: Substitute pumpkin seeds with sunflower seeds for a nut-free option that adds a delightful crunch. This keeps the bars allergy-friendly and still full of flavor!
- Protein Power: Add a scoop of vanilla protein powder to the mix for an extra dose of energy. It bulks it up while enhancing the bars’ nutritional profile.
- Cocoa Delight: Introduce some unsweetened cocoa powder for a chocolatey twist. It pairs beautifully with apricots and white chocolate, giving a lovely depth of flavor.
- Fruit Variety: Swap dried apricots for other dried fruits like figs or cranberries to experiment with flavor. Each fruit brings its own unique sweetness, making every batch a little surprise!
- Texture Fun: Roll the mixture into small energy balls instead of pressing them into bars. They’re perfect for snacking on the go! Easy to pop and just as delicious.
- Spicy Warmth: Add a pinch of ginger or cardamom for a warm and spicy twist. These spices not only elevate the flavors but also give a comforting autumn vibe.
- Seeds Galore: Mix in a variety of seeds, such as chia, flax, and hemp, for extra crunch and nutrition. Each addition brings a new texture and wholesome benefits!
- Flavorful Infusion: Infuse the mixture with a splash of vanilla extract or almond extract for a lovely aroma in every bite. It’s a tiny swap that can make a world of difference!
For even more delightful options, why not try my Brown Butter Bars? There’s always room for more delicious inspirations!
Storage Tips for No-Bake Apricot Chia Energy Bars
Fridge: Store your No-Bake Apricot Chia Energy Bars in an airtight container in the refrigerator for up to one week. This keeps them firm with a delightful chew.
Freezer: For longer shelf life, freeze the bars in a freezer-safe container or bag for up to three months. Alternatively, you can wrap them individually for quick snacks on the go.
Room Temperature: If you’re planning to eat the bars within a day, they can be kept at room temperature in a cool, dry place. Just make sure they’re well-wrapped to maintain freshness.
Reheating: There’s no need to reheat these bars; simply grab and enjoy them chilled, or let them sit at room temperature for a few minutes for a softer texture!
No-Bake Apricot Chia Energy Bars Recipe FAQs
How do I select ripe Medjool dates?
Absolutely! Look for Medjool dates that are soft to the touch, with a rich caramel color. Avoid any that have dark spots all over, as that could mean they’re dried out or past their prime. If you can squeeze them gently and they give slightly, you’re good to go!
What’s the best way to store my energy bars?
Store your No-Bake Apricot Chia Energy Bars in an airtight container in the refrigerator for up to one week. This keeps them fresh and maintains their delightful chewiness. If you need a longer shelf life, opt for freezing. Wrap the bars individually in parchment paper for easier grabbing and place them in a freezer-safe bag or container.
How can I freeze these energy bars?
Very simple! To freeze your No-Bake Apricot Chia Energy Bars, first cut them into your desired shape as directed in the recipe. Then, individually wrap each bar in plastic wrap or parchment paper to prevent freezer burn. Place them in a single layer in a freezer-safe container or bag, and they can last for up to three months. When you’re ready to enjoy one, simply take it out and let it sit at room temperature for a few minutes, or enjoy it straight from the freezer!
What if my mixture is too crumbly?
If you notice that your mixture isn’t holding together well and seems crumbly, it may be due to insufficient moisture. You can try adding a few extra Medjool dates or a splash of water or plant-based milk to achieve a sticky consistency. Make sure to blend thoroughly in your food processor until everything is well combined—this makes all the difference!
Are these energy bars suitable for people with allergies?
Absolutely! The No-Bake Apricot Chia Energy Bars are gluten-free, nut-free, and vegan, making them suitable for many dietary restrictions. However, always double-check your ingredients, especially for chocolate chips, to ensure they meet specific allergy needs. If you’re serving these to kids or others, it’s wise to confirm their individual allergy statuses to be safe!
No-Bake Apricot Chia Energy Bars for a Sweet, Healthy Boost
Ingredients
Equipment
Method
- Begin by pitting the Medjool dates and chopping the dried apricots into small, manageable pieces.
- Gather a food processor and a lined 8x8-inch baking pan.
- In your food processor, combine the Medjool dates, chopped dried apricots, chia seeds, ground cinnamon, and raw pumpkin seeds. Pulse until well blended and sticky.
- Carefully mix in the white chocolate chips with a spatula until evenly distributed.
- Transfer the sticky mixture into your lined baking pan and press it down firmly and evenly.
- Place the baking pan in the refrigerator and let it chill for about 30 minutes.
- Once set, remove from the refrigerator and cut into desired sizes.
Leave a Reply