
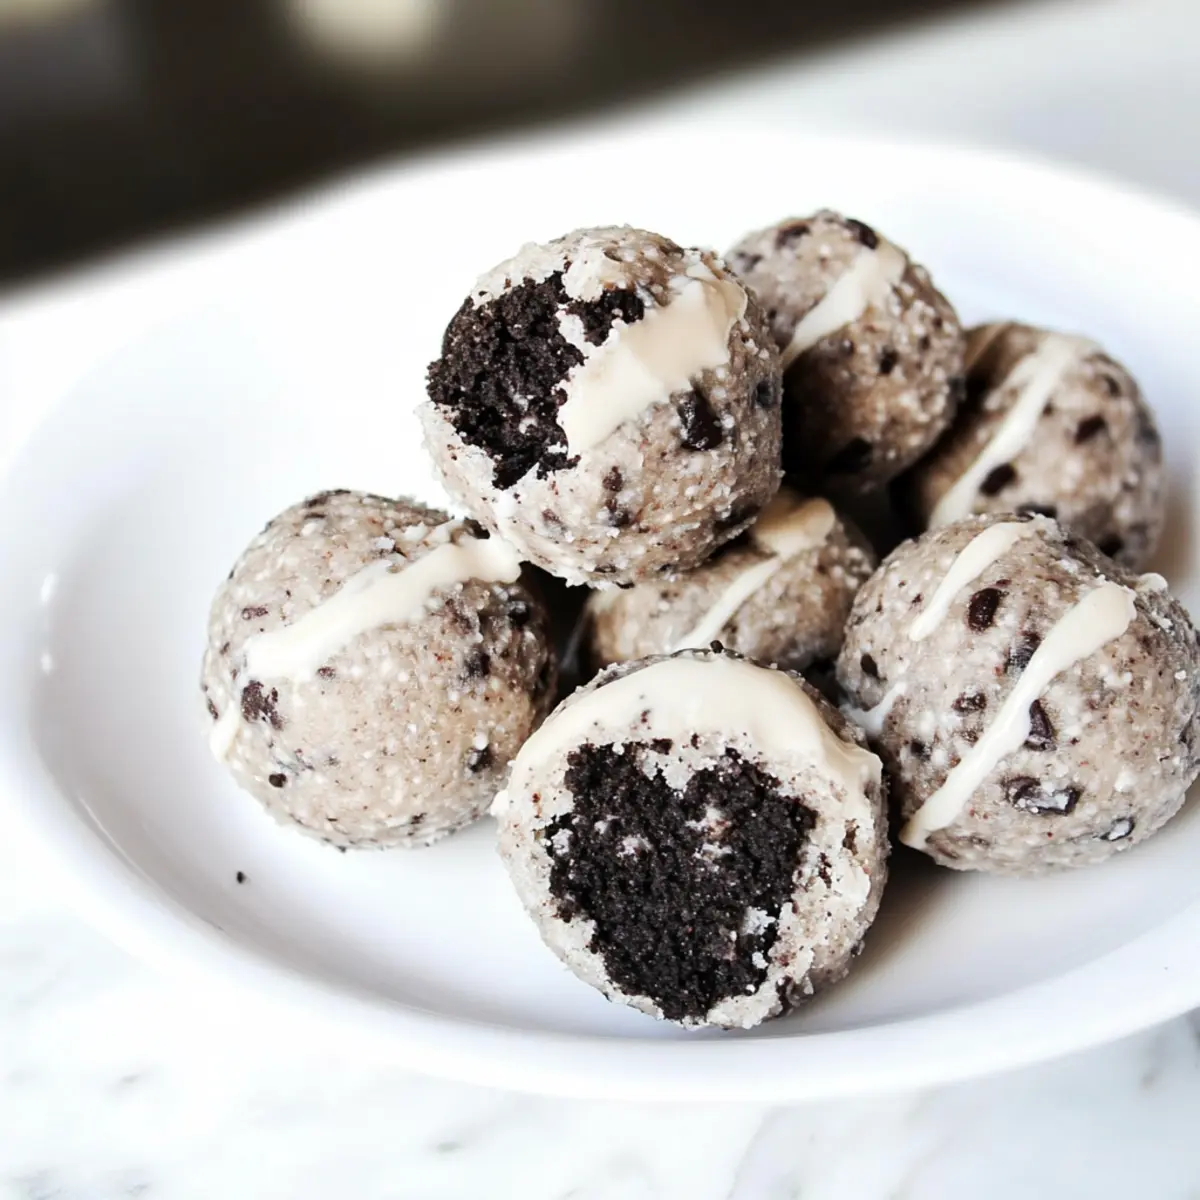
Guess what? You can have your cookie and eat it too! These Oreo Protein Balls are a delightful fusion of classic indulgence and healthy snacking, crafted just for those moments when sweet cravings hit. With their creamy interior packed with crunchy Oreo bits, they’re not only gluten-free and high in protein, but these no-bake treats also come together in just ten minutes! Perfect for a quick midday pick-me-up or a post-workout fuel, they’re the snack you didn’t know you needed. And the best part? You can easily customize them according to your taste by swapping flavors or add-ins. Ready to roll up your sleeves? Let’s dive into this guilt-free remedy for your sweet tooth!
Why Try These Oreo Protein Balls?
Guilt-Free Indulgence: Enjoy the rich taste of Oreos without any regrets. These protein balls satisfy your sweet cravings while keeping your health in check.
Quick and Easy: With just six ingredients and a mere ten minutes of prep time, you’ll have a delicious snack ready in no time, perfect for your busy lifestyle.
Versatile Options: Feel free to customize! Try different protein flavors or add a drizzle of dark chocolate to make them your own.
Ideal for Any Occasion: Whether it’s a snack for after your workout or a treat for your afternoon coffee break, these gluten-free delights fit seamlessly into any moment.
Crowd-Pleasing Treat: Your friends and family will be asking for seconds, making them a hit at gatherings! For other protein-packed snacks, check out our recipes for Pumpkin Protein Balls or Chocolate Chip Protein.
Oreo Protein Balls Ingredients
For the Base
- Vanilla Protein Powder – Provides the essential protein boost; opt for plant-based if you’re keeping it vegan.
- Coconut Flour – Adds structure and a hint of sweetness; substitute with oat flour if you prefer.
- Monk Fruit Sweetener – Sweetens the mix without added sugars; feel free to swap it with your favorite granulated sweetener.
- Cream Cheese – Gives creaminess and binds everything together; low-fat or vegan options work wonderfully here.
- Oreo Cookies – The star of the show, delivering that iconic flavor; use gluten-free Oreos to keep it celiac-friendly.
For the Topping
- White Chocolate Chips – An optional drizzle adds richness and sweetness; consider sugar-free chips for a lower-carb treat.
Ready to whip up these Oreo Protein Balls? You’ll love how simple and satisfying they are!
Step‑by‑Step Instructions for Oreo Protein Balls
Step 1: Prep Cookies
Start by finely chopping the Oreo cookies, ensuring to reserve some larger chunks for added texture in your Oreo Protein Balls. Use a sharp knife or a food processor to achieve a crumbly consistency that still holds a few delightful bits. This step should take about 5 minutes, and you’ll want to see a mix of fine crumbs and chunks.
Step 2: Mix Dry Ingredients
In a large mixing bowl, combine the vanilla protein powder, coconut flour, and monk fruit sweetener. Whisk them together until they’re well integrated, creating a uniform base for your mixture. This step is crucial to ensure even sweetness and protein distribution, which should take about 2 minutes.
Step 3: Combine Ingredients
Add the softened cream cheese and the finely chopped Oreo crumbs to the dry mixture in the bowl. Begin stirring until it becomes a well-combined and somewhat sticky dough. Use a spatula or your hands to fully integrate the ingredients, taking around 3–5 minutes. You’ll know it’s ready when the mixture holds together without being overly sticky.
Step 4: Adjust Consistency
Check the consistency of your mixture; if it’s too thick to mold, incorporate 1–2 tablespoons of almond milk or water to loosen it slightly. Conversely, if it’s too soft, sprinkle in more coconut flour to reach a moldable texture. This adjustment can take about 1–2 minutes, ensuring your Oreo Protein Balls hold their shape while staying delicious.
Step 5: Shape Balls
Using your hands, take tablespoon-sized amounts of the mixture and roll them into balls. Place each formed ball on a lined baking sheet, making sure they don’t touch. Aim to create about 12 balls; this should take around 5 minutes. Visualize a uniform size for even snacking enjoyment.
Step 6: Chill
Refrigerate the baking sheet with the Oreo Protein Balls for about 15 minutes. This chilling period allows them to firm up, making them easier to enjoy. Keep an eye on them; you’ll notice they become firmer and more cohesive as the time passes.
Step 7: Optional Drizzle
If desired, melt the white chocolate chips in a microwave-safe bowl, heating in 15-second intervals and stirring in between until smooth. Once chilled, drizzle the melted chocolate over the Oreo Protein Balls for a touch of sweetness and visual appeal. This decorative step should only take about 2-3 minutes, adding flair to your homemade snacks!
Oreo Protein Balls Variations & Substitutions
Feel free to unleash your creativity in the kitchen with these delicious twists that’ll elevate your Oreo Protein Balls!
-
Chocolate Protein Powder: Swap out vanilla protein powder for chocolate or cookies and cream flavors to enhance the chocolatey taste.
-
Almond Flour: Replace coconut flour with almond flour for a nuttier flavor and slightly different texture. This can also make the protein balls more moist.
-
Dark Chocolate Drizzle: Instead of white chocolate, melt down dark chocolate for a rich, bold flavor that complements the Oreos beautifully.
-
Nut Butter Boost: Add a tablespoon of almond or peanut butter to the mixture for a creamier texture and extra protein punch, taking your snack to the next level.
-
Mini Marshmallows: Toss in mini marshmallows for texture and a fun chewy surprise in every bite. They’re reminiscent of a s’more and add sweetness.
-
Spicy Kick: If you’re feeling adventurous, a sprinkle of cayenne pepper can add a surprising heat that beautifully contrasts the sweetness.
-
Coconut Flakes: Incorporate unsweetened coconut flakes into the mixture for a tropical twist. They add both texture and a hint of coconut flavor, which pairs well with chocolate.
-
Dried Fruit: Toss in chopped dried fruit like cranberries or cherries for a chewy burst of flavor and a touch of natural sweetness in your protein balls.
These options can transform your snacks into a variety of favorite flavors. For another tasty protein-packed idea, check out our recipe for Pumpkin Protein Balls or try something like Korean BBQ Meatballs to shake things up even more!
What to Serve with Oreo Protein Balls
For a delightful experience that complements those creamy, chocolaty bites, think beyond just the snack itself.
- Creamy Yogurt Parfait: Layering these protein balls with yogurt and fresh berries creates a satisfying texture contrast. The creamy yogurt enhances the sweetness while the berries add a refreshing touch.
- Crunchy Apple Slices: Pairing a crisp apple with Oreo protein balls brings a fresh, crunchy element to the table. The natural sweetness of the apples balances the rich, decadent flavor of the treats beautifully.
- Nut Butter Dipping Sauce: A smooth almond or peanut butter dip provides a nutty depth that enhances each bite. Dip or spread for an added protein boost and a longer-lasting energy kick!
- Iced Coffee or Tea: Serve cold, refreshing coffee or herbal tea alongside your snack. The slight bitterness of coffee cuts through the sweetness, making it a perfect pairing for a midday pick-me-up.
- Vanilla Coconut Chia Pudding: The creamy, coconut-infused chia pudding complements the rich Oreo flavors. Plus, it adds a delightful textural contrast, elevating your snack to a full-on dessert experience.
- Berries & Whipped Cream: A simple mix of fresh berries topped with whipped cream adds a light, fruity finish to your snack session. The natural tartness of the berries balances the sweetness of the protein balls, creating a delightful symphony of flavors!
How to Store and Freeze Oreo Protein Balls
Fridge: Store your Oreo Protein Balls in an airtight container in the refrigerator for up to 5-7 days. This keeps them fresh and ready for snacking!
Freezer: For longer shelf life, freeze the protein balls for up to 3 months. Place them in a single layer on a baking sheet, freeze until solid, then transfer to an airtight container for easy access.
Thawing: When you’re ready to enjoy, simply thaw at room temperature for about 15-20 minutes before serving. This ensures they maintain their delightful texture.
Reheating: There’s no need to reheat these no-bake treats; enjoy them cold for the best experience with each Oreo Protein Ball packed with flavor!
Tips for the Best Oreo Protein Balls
-
Softened Cream Cheese: Ensure your cream cheese is at room temperature for easy mixing and a smooth texture in your Oreo Protein Balls.
-
Check Consistency: If your mixture is too thick, add a bit of almond milk; if it’s too soft, incorporate more coconut flour for perfect shape and flavor.
-
Chill Well: Refrigerate the rolled balls for at least 15 minutes to firm them up, enhancing their texture and making them easier to handle!
-
Customize Flavors: Feel free to swap out vanilla protein powder for chocolate or cookies and cream to suit your taste preference while keeping them high in protein.
-
Storage Tips: Keep your Oreo Protein Balls in an airtight container in the fridge for 5-7 days for optimal freshness and quick access to a tasty snack!
Make Ahead Options
These Oreo Protein Balls are perfect for busy home cooks looking to simplify meal planning! You can prepare the mixture and shape the balls up to 24 hours in advance, storing them in an airtight container in the refrigerator to maintain their freshness and texture. When you’re ready to enjoy, simply chill for about 15 minutes to firm up if they’ve softened, and drizzle with melted white chocolate for a touch of indulgence. Alternatively, if you’re feeling extra organized, these protein balls can be frozen for up to 3 months! Just thaw them in the fridge overnight before serving, ensuring they remain just as delicious and satisfying.
Oreo Protein Balls Recipe FAQs
How do I choose the right Oreos for this recipe?
Absolutely! Look for Oreos that are fresh and without any dark spots or signs of staleness. If you’re gluten-sensitive, be sure to grab a package of gluten-free Oreos, which have the same delicious taste without any gluten.
How can I store my Oreo Protein Balls for the best freshness?
For optimal freshness, keep your Oreo Protein Balls in an airtight container and store them in the refrigerator for up to 5-7 days. This keeps them moist and flavorful, always ready for an on-the-go snack!
Can I freeze these protein balls?
Very much so! To freeze your Oreo Protein Balls, first, place them in a single layer on a baking sheet and freeze until solid, approximately 1-2 hours. Once frozen, transfer them to an airtight container or freezer bag for up to 3 months. When you’re ready to enjoy, just thaw them at room temperature for 15-20 minutes.
What if my mixture is too wet or too dry?
No worries! If your mixture seems too wet and won’t hold together, simply sprinkle in a bit more coconut flour, a tablespoon at a time, until you can shape it comfortably. If it’s too dry, add a tablespoon of almond milk or water to loosen it. It’s all about achieving that perfect moldable texture!
Are these protein balls safe for pets/children with allergies?
Great question! The ingredients in Oreo Protein Balls contain dairy and gluten, so if you’re making these for children or anyone with allergies, always double-check for specific dietary restrictions. Homemade is better when it’s safe for everyone, so consider tailoring the ingredients as needed!
Can I use different flavors of protein powder?
Absolutely, the more the merrier! Feel free to experiment with chocolate or cookies and cream flavored protein powders instead of vanilla. Each option will give your Oreo Protein Balls a unique twist while keeping them nutritious and tasty!
Decadent Oreo Protein Balls for Guilt-Free Snacking Bliss
Ingredients
Equipment
Method
- Finely chop the Oreo cookies, reserving some larger chunks for texture.
- In a large mixing bowl, combine the vanilla protein powder, coconut flour, and monk fruit sweetener. Whisk until well integrated.
- Add the softened cream cheese and chopped Oreo crumbs, and stir until it forms a sticky dough.
- Adjust consistency by adding almond milk or coconut flour as needed.
- Roll tablespoon-sized amounts into balls and place on a lined baking sheet.
- Refrigerate for about 15 minutes to firm up the balls.
- Melt the white chocolate chips and drizzle over the chilled Oreo Protein Balls if desired.
Leave a Reply