
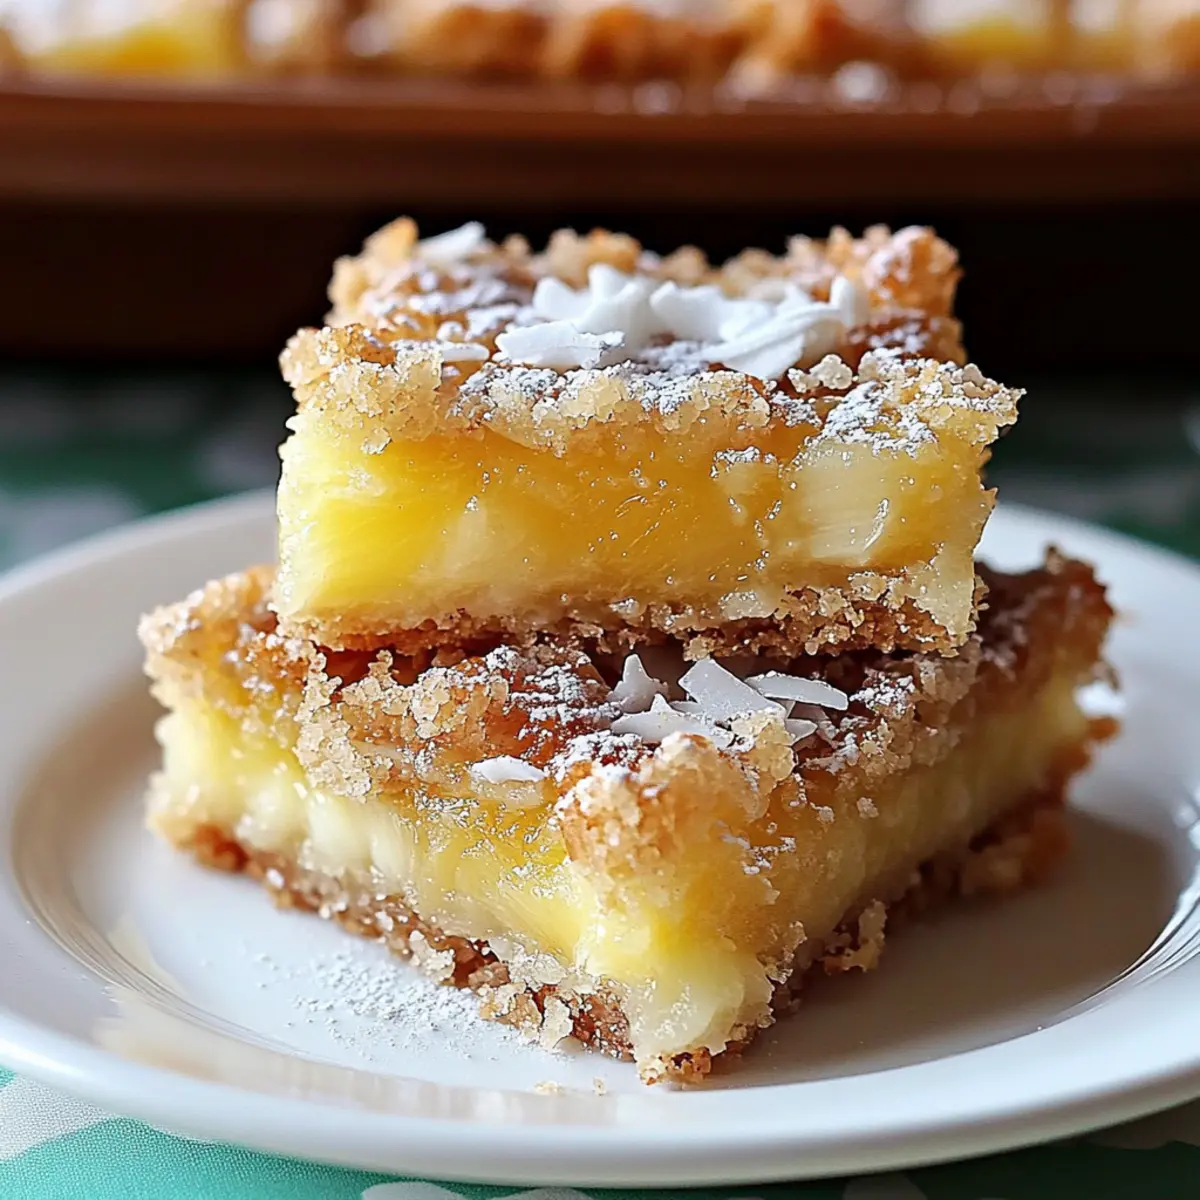
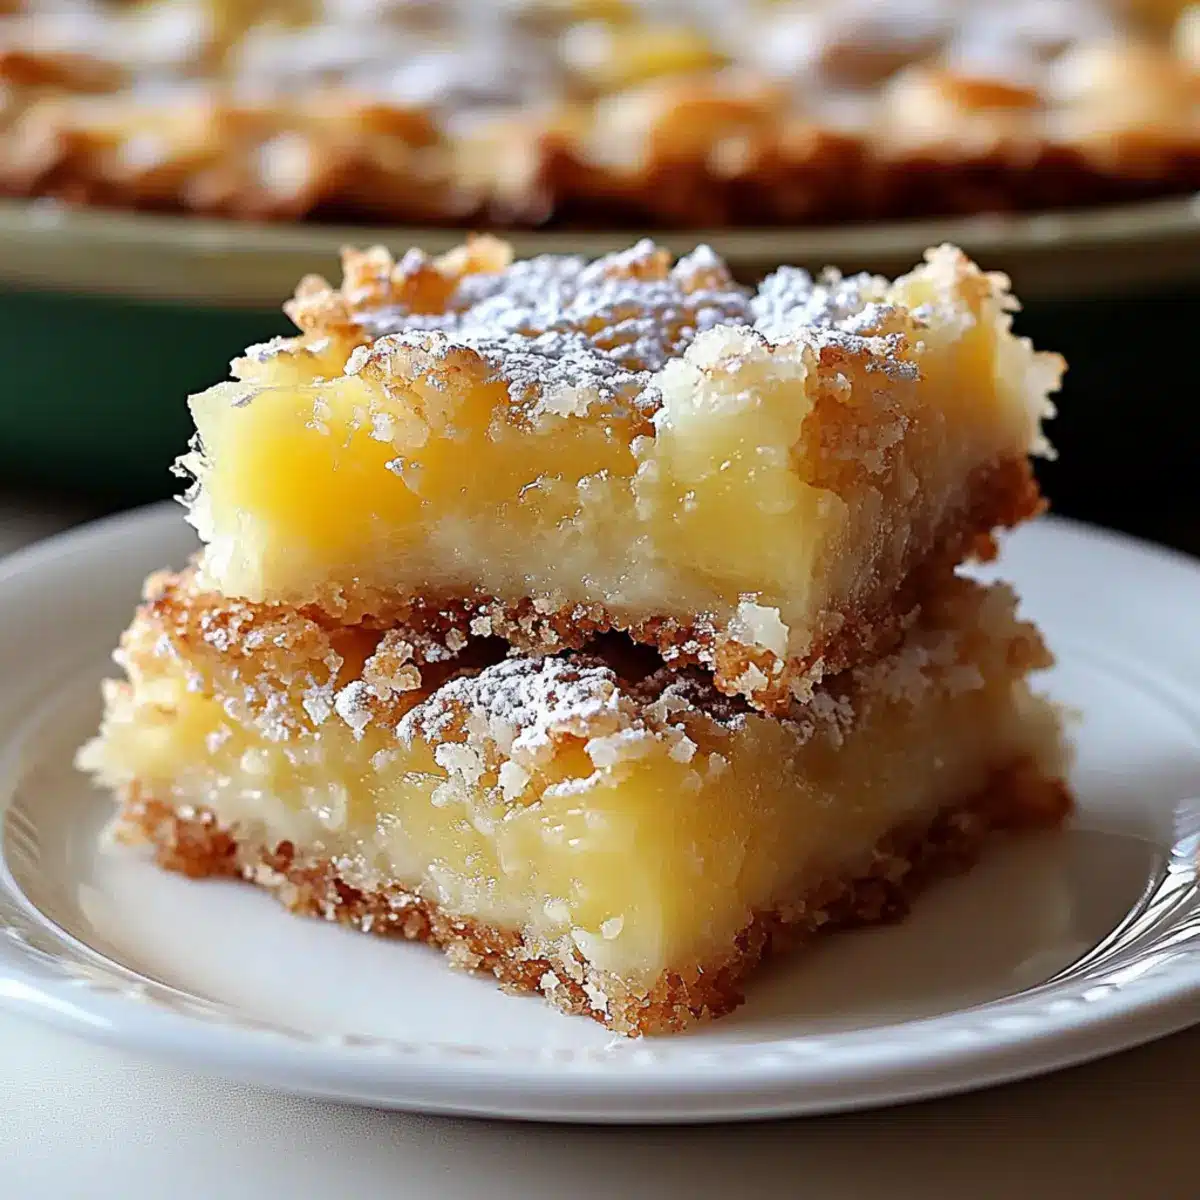
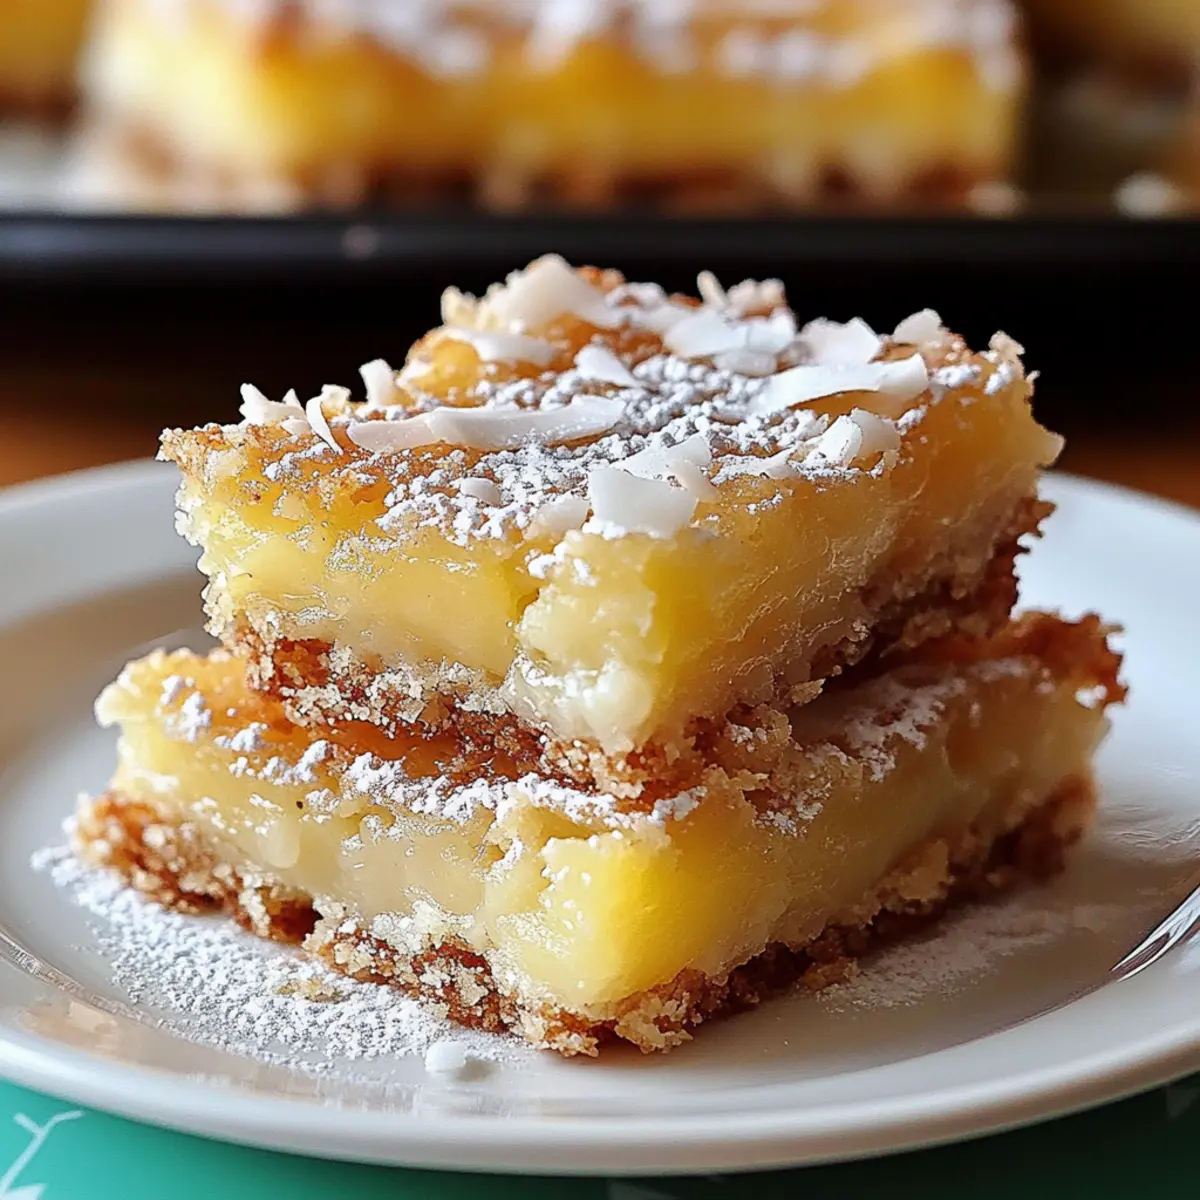
When the sun shines just right and a gentle breeze wafts through the kitchen, it’s the perfect moment for a taste of the tropics. Enter these delightful Pineapple Bliss Bars! Imagine a buttery shortbread crust giving way to an ooey-gooey pineapple filling that dances with sweet-tart flavors. Not only are they a breeze to whip up, but they also serve as a stunning dessert for any gathering. Plus, you can easily adapt them to your taste with optional shredded coconut or by using fresh pineapple for an even brighter touch. Are you ready to transport your palate to paradise with this easy tropical dessert? Let’s get started!
Why Are Pineapple Bliss Bars Irresistible?
Tropical flavors at your fingertips! These Pineapple Bliss Bars encapsulate a tropical paradise in every bite, perfect for those craving a sunny escape.
Effortless preparation makes them a go-to dessert, even for novice bakers.
Versatile options allow you to enhance your bars with shredded coconut or fresh pineapple for a uniquely delightful twist.
Crowd-pleaser appeal means they’re perfect for parties or family gatherings—everyone will rave about them!
Looking for more fruity delights? Check out our Apple Cider Icing for a sweet finish to any dessert spread!
Delicious served warm or chilled, they stay fresh for days, making them perfect for meal prep. Indulge in these Pineapple Bliss Bars, and elevate your dessert game!
Pineapple Bliss Bars Ingredients
Get ready to create a tropical sensation with these delightful bars!
For the Crust
- All-purpose flour – Provides structure to the crust; substitute with gluten-free flour for a gluten-free option.
- Granulated sugar – Sweetens both the crust and filling; brown sugar can add a richer flavor.
- Salt – Enhances sweetness and balances the flavors.
- Cold unsalted butter – Creates a crumbly texture in the crust; regular butter works as a substitute.
For the Filling
- Crushed pineapple – Adds moisture and tropical flavor; ensure it’s well-drained for the best results.
- Large eggs – Binds the filling ingredients together; replace with flaxseed meal mixed with water for a vegan version.
- Baking powder – Provides leavening for the pineapple filling.
- Vanilla extract – Elevates the overall flavor; opt for pure vanilla for the best taste.
For Serving
- Powdered sugar – Dust on top before serving for a sweet finish.
Dive into the joy of making Pineapple Bliss Bars and savor a slice of paradise!
Step‑by‑Step Instructions for Pineapple Bliss Bars
Step 1: Prep the Oven and Pan
Begin by preheating your oven to 350°F (175°C). While the oven heats up, line a 9×13 inch baking pan with parchment paper, leaving some overhang for easy removal later. This step is crucial for ensuring your Pineapple Bliss Bars bake evenly and can be lifted out easily once cooled.
Step 2: Make the Crust
In a mixing bowl, combine all-purpose flour, granulated sugar, and salt. Next, cut in cold unsalted butter using a pastry cutter or your fingers until the mixture resembles coarse crumbs. Firmly press this buttery blend into the bottom of your prepared baking pan. Bake in the preheated oven for 15 minutes, or until lightly golden and fragrant.
Step 3: Prepare the Filling
While the crust bakes, whisk together the large eggs and granulated sugar in a separate bowl until the mixture is smooth and pale. Gradually mix in the flour, baking powder, and vanilla extract. Once thoroughly combined, gently fold in the well-drained crushed pineapple, ensuring it’s evenly distributed for delightful flavor in every bite of your Pineapple Bliss Bars.
Step 4: Assemble and Bake
After the crust has finished baking, carefully pour the luscious pineapple filling over the hot crust, spreading it evenly with a spatula. Return the pan to the oven and bake for an additional 25 to 30 minutes, or until the edges are set and a light golden color appears. The center may slightly jiggle, but it will firm up as it cools.
Step 5: Cool and Serve
Once baked, remove the pan from the oven and allow the Pineapple Bliss Bars to cool completely in the pan on a wire rack for about an hour. Once cooled, lift the bars out using the parchment overhang, and dust with powdered sugar. Slice into squares and serve, enjoying the tropical flavors of your homemade treat!

Make Ahead Options
These Pineapple Bliss Bars are perfect for busy home cooks looking to save time! You can prepare the crust up to 24 hours in advance by baking it and storing it wrapped in plastic wrap at room temperature. The pineapple filling can also be mixed ahead and refrigerated for up to 3 days; just remember to bring it to room temperature before pouring it over the crust. When you’re ready to enjoy, simply bake the assembled bars, which will still be just as delicious and bursting with flavor. This thoughtful meal prep allows you to indulge in a delightful tropical treat with minimal effort on busy weeknights!
What to Serve with Pineapple Bliss Bars
Looking to create the perfect tropical trio to complement your Pineapple Bliss Bars? Here are a few mouth-watering ideas!
- Tropical Fruit Salad: A refreshing medley of mango, kiwi, and banana that harmonizes beautifully with the sweet-tart bar flavors.
- Coconut Custard: The silky, creamy texture paired with the crunch of the bars creates a delightful contrast. Warm it gently for an irresistible touch!
- Pineapple Sorbet: Serve this icy treat alongside for a light and fruity finish that cools your palate perfectly.
- Coconut Macarons: These airy delights add an elegant twist and their coconut flavor perfectly enhances the tropical theme of your dessert spread.
- Mango Panna Cotta: This silky dessert offers a luscious texture and a taste that echoes the fruity essence of your bars.
- Vanilla Ice Cream: A scoop of this classic treat melts deliciously over warm Pineapple Bliss Bars, providing the ultimate comfort food experience.
Each of these accompaniments will elevate your dessert experience, adding layers of flavor and delight to your tropical treat!
Pineapple Bliss Bars Variations & Substitutions
Feel free to make these delightful Pineapple Bliss Bars your own with these fun modifications!
- Dairy-Free: Use coconut oil or vegan butter for the crust to keep it dairy-free without sacrificing flavor.
- Gluten-Free: Substitute all-purpose flour with a 1:1 gluten-free baking flour mix for a gluten-free version. Enjoy the same delightful texture!
- Sweetener Swap: Use honey or maple syrup instead of granulated sugar for a natural sweetness. Adjust the liquids in your filling to maintain consistency.
- Tropical Twist: Add 1/2 cup of shredded coconut to the filling for a chewier texture and an extra burst of flavor that screams summer.
- Fruit Fusion: Mix in or top with fresh mango or passion fruit for a tropical fruit medley. Each bite will transport your taste buds straight to paradise.
- Protein Boost: Incorporate a scoop of protein powder into the crust for a healthier twist that won’t compromise taste. A fun way to sneak in some extra nutrition!
- Extra Zing: Add a tablespoon of lime juice to the filling for a zesty brightness that enhances the tropical flavors.
- Spicy Kick: A pinch of cayenne pepper can add an unexpected layer of warmth; it’s all about balance in your sweet-tart heavenly bars!
Are you craving more tropical delights? Don’t miss out on these delicious Crockpot Chipotle Pineapple for an extraordinary flavor experience!
How to Store and Freeze Pineapple Bliss Bars
Fridge: Store the Pineapple Bliss Bars in an airtight container for up to 5 days. Let them come to room temperature before serving to enjoy the best flavor and texture.
Freezer: For longer storage, cool the bars completely, pre-slice them, and layer with parchment paper in an airtight container. They can be frozen for up to 2 months.
Reheating: When ready to enjoy, thaw in the fridge overnight and serve at room temperature, or microwave for a few seconds for a warm, gooey treat.
Wrapping: Ensure each bar is well-wrapped to prevent freezer burn and maintain the delicious flavors of those Pineapple Bliss Bars!
Expert Tips for Pineapple Bliss Bars
-
Well-Drained Pineapple: Make sure the crushed pineapple is thoroughly drained to avoid a soggy filling. A little excess moisture can ruin the texture.
-
Butter Temperature: Use cold unsalted butter for the crust to achieve that perfect crumbly texture. Room temperature butter will lead to a denser crust.
-
Cooling Time: Allow your Pineapple Bliss Bars to cool completely in the pan before slicing. This helps them set properly and makes for cleaner cuts.
-
Flavor Variations: Feel free to add shredded coconut for an extra tropical twist. Simply fold in 1/2 cup into the pineapple filling for delicious coconut flavor!
-
Make Ahead: These bars can be made up to 5 days in advance and stored in the refrigerator—just remember to bring them to room temperature before serving.
Pineapple Bliss Bars Recipe FAQs
How do I select the best pineapple for my bars?
Absolutely! For the best flavor, choose a ripe pineapple. Look for a sweet aroma at the base and a healthy, vibrant green crown. The skin should have a slight give when pressed but not be overly soft. If using canned pineapple, ensure it’s packed in juice rather than syrup for a more natural sweetness.
How should I store my Pineapple Bliss Bars?
Very simple! Place your Pineapple Bliss Bars in an airtight container and store them in the refrigerator for up to 5 days. Before serving, let them sit at room temperature for about 30 minutes to restore their delicious texture and flavor.
Can I freeze Pineapple Bliss Bars? If so, how?
Yes, you can! To freeze your Pineapple Bliss Bars, first allow them to cool completely. Next, pre-slice them for easy serving later. Layer the bars with parchment paper inside an airtight container to prevent sticking and moisture loss. They can be kept in the freezer for up to 2 months. When you’re ready to enjoy, thaw them in the fridge overnight or microwave for a few seconds.
What should I do if my pineapple filling is too watery?
If your filling does end up watery, don’t despair! First, ensure you well-drain your crushed pineapple before adding it to the mixture next time. If you encounter excess moisture, you can thicken the mixture by adding a tablespoon of cornstarch to the pineapple layer during preparation. This will help absorb extra liquid and keep your bars perfectly gooey, not soggy.
Are there any dietary considerations I should keep in mind?
Absolutely! If you’re making these bars for a gathering, keep in mind potential allergies. Swap out chicken eggs for flaxseed meal mixed with water for a vegan version (1 tablespoon of flaxseed meal + 2.5 tablespoons of water = 1 egg). As for gluten-free options, you can replace the all-purpose flour with a gluten-free blend, making sure it has a binding agent included.
Can I add other ingredients to my Pineapple Bliss Bars?
Oh, the more the merrier! You can customize your Pineapple Bliss Bars by folding in 1/2 cup of shredded coconut into the filling, or adding candied ginger for an extra zing. Fresh pineapple can be substituted for a vibrant flavor, or you could drizzle a bit of white chocolate on top before serving for a sweet finishing touch. Let your creativity shine!
Pineapple Bliss Bars: Your Sweet Escape to Tropical Paradise
Ingredients
Equipment
Method
- Preheat your oven to 350°F (175°C) and line a 9x13 inch baking pan with parchment paper.
- Combine all-purpose flour, granulated sugar, and salt in a mixing bowl. Cut in cold unsalted butter until it resembles coarse crumbs. Press into the bottom of the prepared pan and bake for 15 minutes.
- Whisk together eggs and granulated sugar until smooth. Mix in flour, baking powder, and vanilla extract, then fold in crushed pineapple.
- Pour the filling over the hot crust and bake for an additional 25 to 30 minutes until set.
- Allow to cool completely in the pan for about an hour, then dust with powdered sugar, slice, and serve.
Leave a Reply