
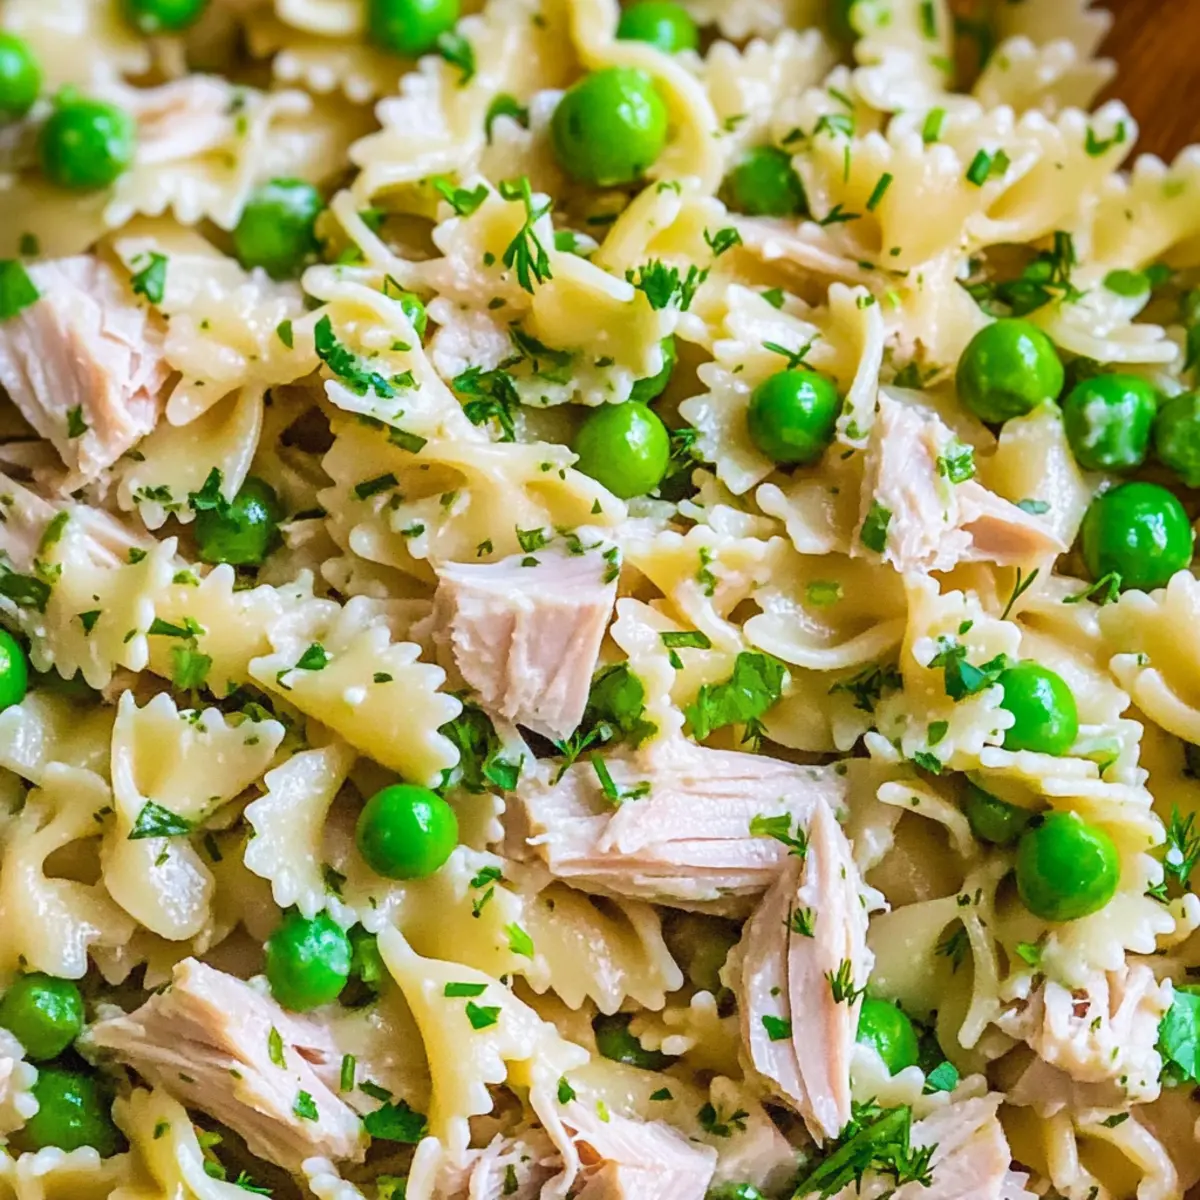
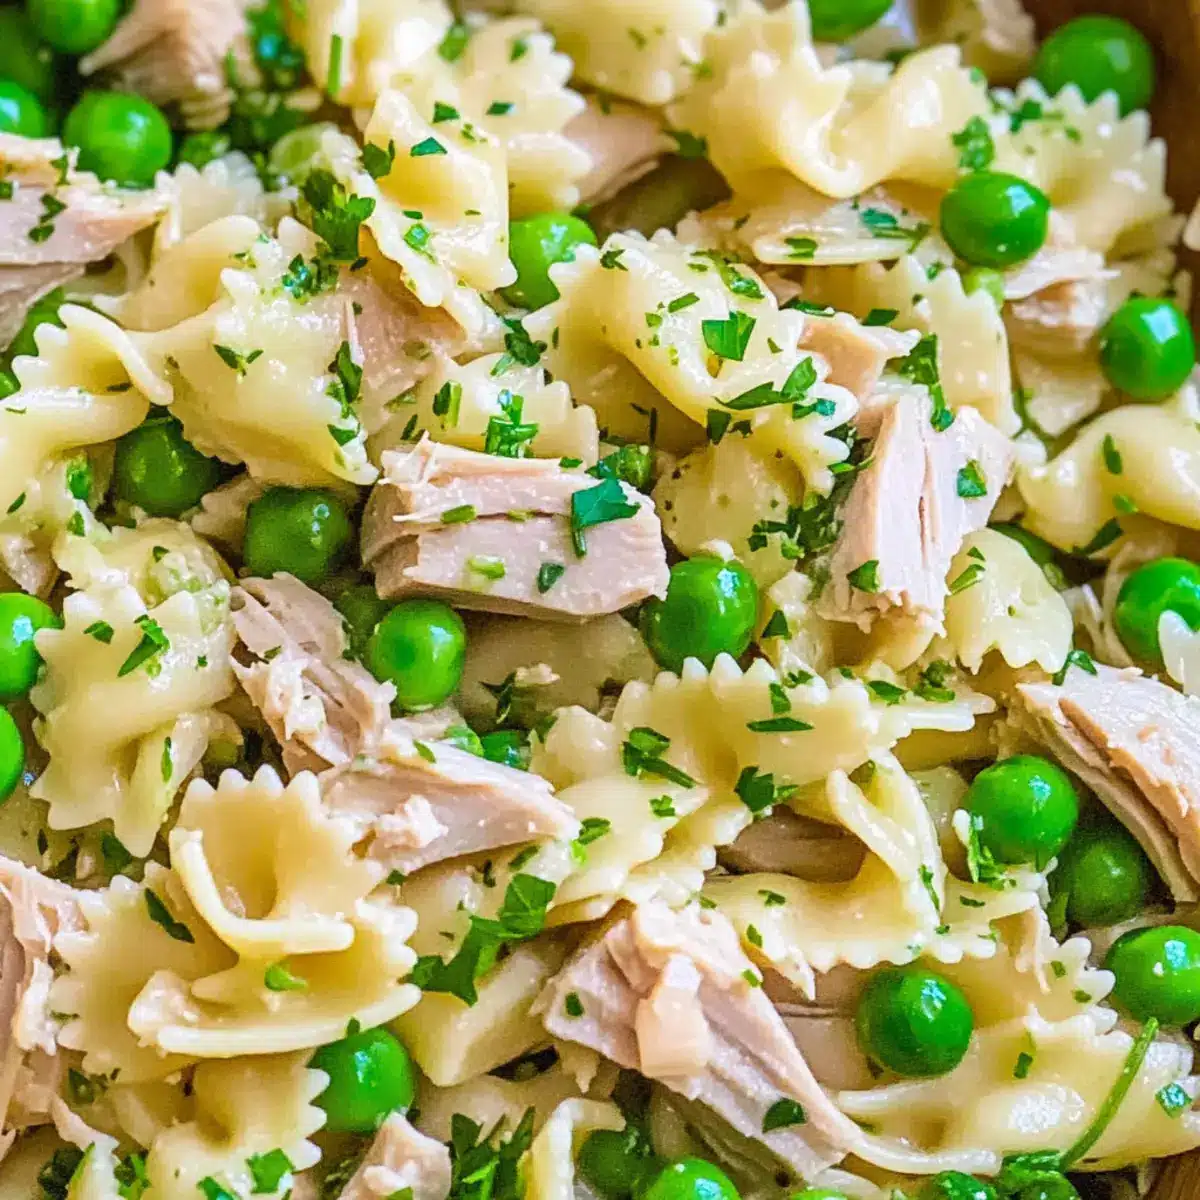
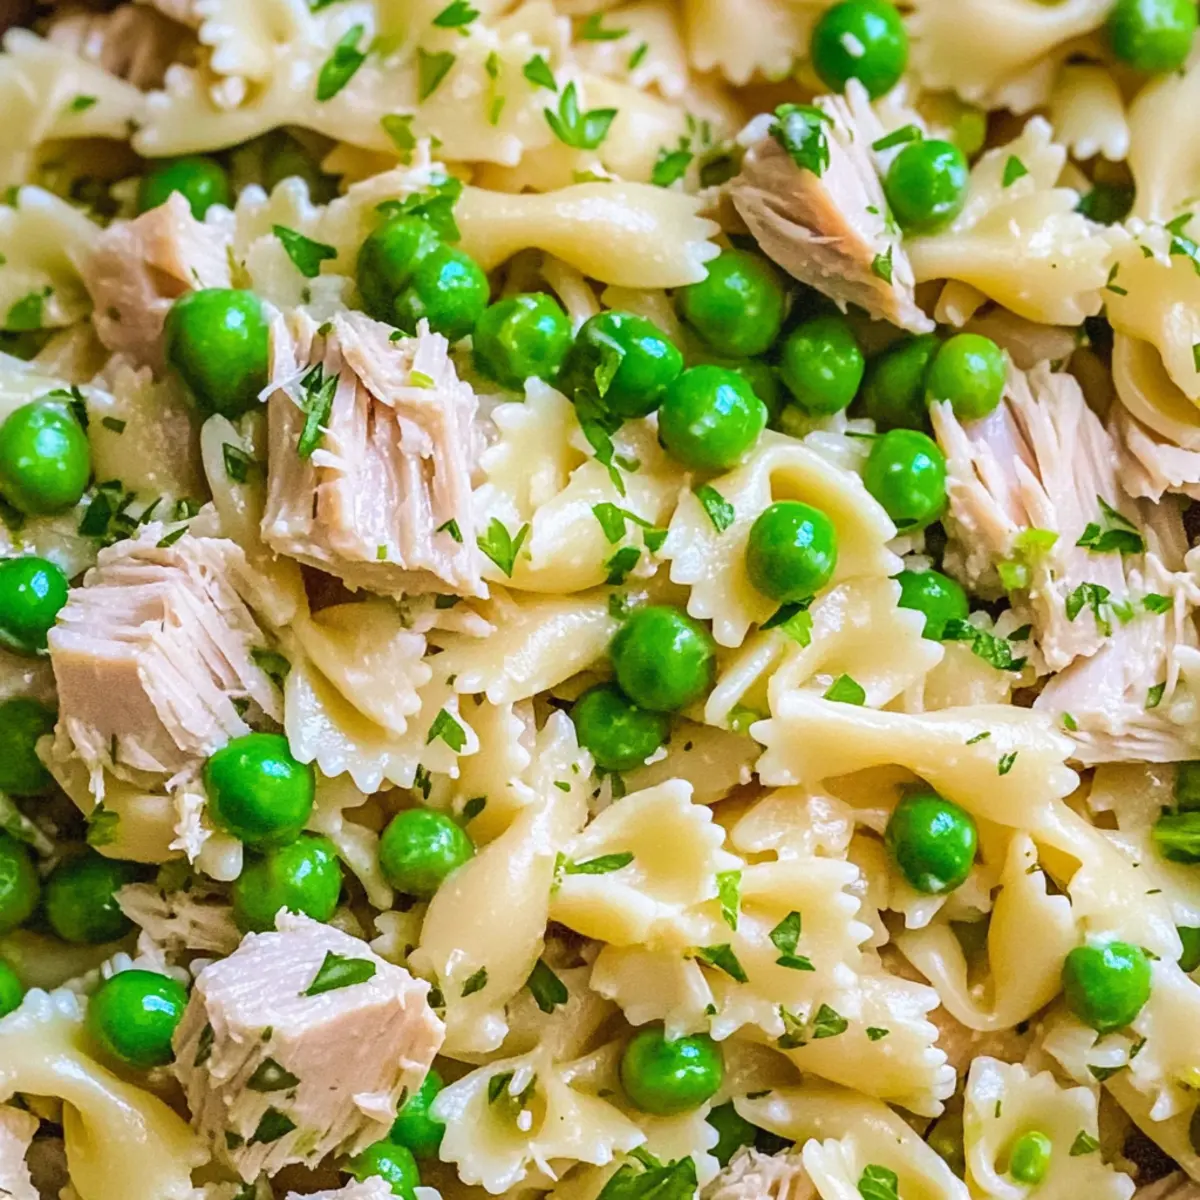
As the sun-drenched days of summer roll in, I’m always on the lookout for refreshing meals that don’t require hours in the kitchen. That’s where this Quick and Healthy Tuna Pea Pasta comes into play—ready in just 20 minutes, it’s my secret weapon for those busy evenings! Bursting with vibrant color and a delightful mix of textures, this dish marries tender pasta with sweet peas and protein-packed tuna for a kid-friendly meal everyone will love. Not only is it a breeze to whip up, but it’s also light and healthy, perfect for those looking to cut back on fast food without sacrificing flavor. Whether you’re enjoying it warm or as a chilled salad, you’ll find yourself reaching for seconds. Are you ready to bring some homemade goodness to your table? Let’s dive into the recipe!
What Makes This Tuna Pea Pasta Special?
Quick, ready in just 20 minutes—ideal for busy days or last-minute dinners! Healthy, this dish is packed with protein and nutrients, making it a guilt-free choice for the whole family. Kid-friendly flavors ensure even the pickiest eaters will happily dig in. Versatile, it can be enjoyed warm or chilled like a refreshing summer salad. Plus, it’s a perfect way to utilize leftover vegetables or swap ingredients based on what you have on hand. For similar quick meals, check out this delightful Cajun Chicken Pasta or Parmesan Chicken Pasta. Experience a burst of flavors and a colorful plate that your loved ones will adore!
Tuna Pea Pasta Ingredients
For the Pasta
• Pasta – Provides structure and base for the dish. Substitution Note: Any favorite pasta type can be used (farfalle, egg noodles, etc.).
For the Tuna and Veggies
• Albacore Tuna – Adds protein and richness. Substitution Note: May opt for other canned tuna types.
• Frozen Peas – Contribute sweetness and a pop of color. Substitution Note: Fresh or canned peas can be used; adjust cooking time accordingly.
• Garlic – Enhances flavor with aromatic depth. Prep Note: Use minced fresh garlic for best results.
• Onion – Adds sweetness and texture when sautéed. Prep Note: Dice onion finely for even cooking.
For the Dressing and Seasoning
• Extra Virgin Olive Oil – Used for dressing and sautéing; a healthy fat. Note: Choose a good quality olive oil for the best taste.
• Lemon Juice – Provides acidity to balance flavors. Substitution Note: Fresh lemon is preferable for brightness.
• Kosher Salt and Fresh Ground Pepper – Flavor enhancers. Note: Adjust to taste.
For the Freshness
• Fresh Parsley and Dill – Fresh herbs for added flavor and freshness. Substitution Note: Dried herbs can replace fresh; use 1 tsp dried for every 1 tbsp fresh.
• Parmesan Cheese – Adds a savory depth. Substitution Note: Substitute with nutritional yeast for a dairy-free version.
Step‑by‑Step Instructions for Tuna Pea Pasta
Step 1: Boil the Pasta
Begin by bringing a large pot of salted water to a vigorous boil over high heat. Once boiling, carefully add your favorite pasta, such as farfalle or egg noodles. Cook according to package instructions, usually around 8-10 minutes, until the pasta reaches al dente—a delightful firm bite. Keep an eye on the time to ensure perfect cooking!
Step 2: Add the Peas
With about 4 minutes remaining on the pasta, toss in the frozen peas directly into the pot. Stir gently to incorporate, allowing the peas to heat through and maintain their vibrant color. Their sweet pop will complement the Tuna Pea Pasta beautifully, adding texture and freshness to the dish.
Step 3: Sauté Aromatics
While your pasta and peas are cooking, heat 1 tablespoon of extra virgin olive oil in a medium skillet over medium heat. Once the oil is shimmering, add minced garlic and finely diced onion. Sauté for about 3-4 minutes, stirring frequently, until the onion becomes translucent and fragrant. This aromatic base will elevate the flavors of your Tuna Pea Pasta!
Step 4: Combine Pasta and Aromatics
Once the pasta and peas are cooked, carefully drain them in a colander, shaking out excess water. Return the drained pasta and peas back to the pot, off the heat, and add the sautéed garlic and onion mixture. Mix everything together gently, ensuring each piece is coated with that delightful aroma.
Step 5: Incorporate Tuna and Dressing
To the warm pasta mixture, add a can of drained albacore tuna, along with freshly chopped parsley and dill for a burst of herbaceous flavor. Squeeze in fresh lemon juice, adjusting to your taste, and season with kosher salt and freshly ground pepper. Stir well, allowing the Tuna Pea Pasta to absorb the delicious flavors as you gently toss to combine.
Step 6: Finish with Cheese
Finally, sprinkle in your desired amount of grated Parmesan cheese, folding it into the warm pasta. The cheese will melt slightly, creating a creamy texture that binds all ingredients together. Serve your Tuna Pea Pasta warm for a comforting dish, or let it cool for a refreshing summer salad that is just as delightful!
Expert Tips for Tuna Pea Pasta
-
Fresh Herbs Matter: Using fresh parsley and dill makes a significant flavor difference in your Tuna Pea Pasta. Dried herbs are convenient, but fresh brings brightness.
-
Al Dente Perfection: Ensure you cook the pasta to al dente; this means it should have a slight firmness when bitten. This enhances the dish’s texture and prevents mushiness.
-
Prep Ahead: If you’re short on time, chop your veggies and herbs in advance. Assemble the Tuna Pea Pasta right before serving to keep everything fresh and vibrant.
-
Adjust Seasoning: Don’t hesitate to adjust the kosher salt and pepper to suit your taste buds. This is especially important if you’re catering to kids or those who prefer a milder flavor.
-
Chill for Salad: If you’re making this dish ahead for a picnic or lunch, let it chill in the fridge after preparation. The flavors meld beautifully, creating a refreshing summer dish!
Tuna Pea Pasta: Creative Variations
Feel free to get creative with your Tuna Pea Pasta; these variations can add delightful twists and cater to your personal taste!
-
Gluten-Free: Use brown rice pasta to create a gluten-free alternative without losing any flavor.
-
Veggie-Loaded: Toss in diced bell peppers or fresh spinach for an extra crunch and a colorful presentation. The added veggies will not only brighten the dish but also boost its nutritional value.
-
Briny Twist: Add a handful of olives or capers to infuse a salty, tangy kick into your pasta. This unexpected twist can elevate the dish, making it even more delightful.
-
Protein Swap: Replace tuna with canned chickpeas or shredded chicken for a satisfying protein option. Chickpeas work wonderfully, adding a heartiness that pairs beautifully with the pasta.
-
Herb Infusion: Experiment with fresh cilantro or basil rather than parsley and dill for a unique flavor profile. Each herb offers a different aromatic experience that can transform your dish completely.
For more delicious pasta options, don’t miss out on our Savory Butternut Pasta or our indulgent Cheeseburger Alfredo Pasta. These diverse recipes will surely add some excitement to your table!
Make Ahead Options
These Tuna Pea Pasta delights are perfect for meal prep, saving you precious time on busy weeknights! You can prepare the pasta and sautéed onion and garlic mixture up to 24 hours in advance, storing them separately in airtight containers in the refrigerator. The frozen peas can also be measured out ahead of time for convenience. When you’re ready to serve, simply combine the cooked pasta and peas with the sautéed aromatics, then fold in the drained tuna, fresh herbs, lemon juice, and Parmesan cheese. This way, you’ll not only enjoy the same delicious flavors but also have a delightful, homemade meal on the table with minimal effort!
How to Store and Freeze Tuna Pea Pasta
Fridge: Store leftover Tuna Pea Pasta in an airtight container for up to 3-4 days. If you plan to serve it cold, store components separately and mix dressing just before enjoying.
Freezer: For longer storage, freeze the Tuna Pea Pasta in an airtight container for up to 2 months. When ready to eat, thaw in the fridge overnight and reheat.
Reheating: To reheat, gently warm the pasta in a skillet over low heat, adding a splash of olive oil or water to maintain moisture. Enjoy it warm or chilled, as it’s versatile!
Room Temperature: While it’s best to serve Tuna Pea Pasta cold or warm, if needed, it can sit out for about 2 hours. Be mindful of food safety to avoid bacterial growth.
What to Serve with Tuna Pea Pasta
What complements a delightful dish of Tuna Pea Pasta?
To create a well-rounded meal, consider these delicious pairings that elevate your dining experience.
-
Crispy Green Salad: A fresh mixture of greens with a light vinaigrette adds a crunchy contrast and enhances the flavors of the pasta.
-
Garlic Bread: Toasted slices spread with garlic butter provide a satisfying texture and flavor, perfect for scooping up pasta goodness.
-
Grilled Vegetables: Charred bell peppers, zucchini, and asparagus not only add vibrant colors but also lend a smoky sweetness to balance the dish.
-
Chilled White Wine: A glass of Sauvignon Blanc or Pinot Grigio complements the fresh ingredients, making the meal feel even more refreshing.
-
Lemon Sorbet: For dessert, a light and zesty lemon sorbet cleanses the palate beautifully after enjoying the Tuna Pea Pasta and provides a sweet finish.
-
Steamed Broccoli: Crisp-tender broccoli offers a nutritious boost, adding a crunch and a pop of color alongside the pasta.
-
Mediterranean Olives: A small side of assorted olives introduces a salty brine, contrasting well with the tuna’s richness for a flavorful bite.
-
Caprese Skewers: Fresh mozzarella, tomatoes, and basil drizzled with balsamic reduction provide a delightful, bite-sized appetizer with fresh flavors.

Tuna Pea Pasta Recipe FAQs
What type of pasta works best for Tuna Pea Pasta?
Absolutely! While any favorite pasta type will do, I recommend using medium-sized shapes like farfalle or penne for optimal bite. These shapes capture the sauce and vegetables beautifully. If you’re looking for a gluten-free option, brown rice pasta is a fantastic substitute!
How should I store leftovers of Tuna Pea Pasta?
To keep your Tuna Pea Pasta fresh, store it in an airtight container in the refrigerator for up to 3-4 days. If you’re planning to enjoy it cold, it’s best to store the dressing separately and mix it in right before serving to maintain flavor and texture.
Can I freeze Tuna Pea Pasta?
Definitely! To freeze your Tuna Pea Pasta, transfer it to an airtight container or a freezer-safe bag, removing as much air as possible before sealing. It can be frozen for up to 2 months. When you’re ready to enjoy it, thaw it overnight in the fridge and gently reheat it on the stove. Add a splash of olive oil or water to keep it from drying out!
What if I don’t like tuna? Are there alternatives?
Very! If tuna isn’t your preference, you can replace it with canned chickpeas or shredded chicken, which offer a different protein source while still complimenting the dish. Experimenting with flavors like olives or capers can also add a delightful twist to this recipe!
Are there any dietary considerations I should be aware of?
Great question! This recipe is inherently low in salt and can be adapted for various dietary restrictions. If you have allergies, you can easily swap out the cheese for nutritional yeast for a dairy-free option. Always check ingredient labels for gluten, dairy, or any ingredients that may not fit your dietary needs.
How can I make Tuna Pea Pasta more nutritious?
For an extra nutrition boost, consider adding more vegetables! Bell peppers, spinach, or broccoli not only increase the vitamin content but also add a burst of color. You could also swap half of the pasta with quinoa for a fiber-rich alternative. The more, the merrier!
Tuna Pea Pasta: Quick, Healthy Comfort in 20 Minutes
Ingredients
Equipment
Method
- Begin by bringing a large pot of salted water to a vigorous boil over high heat. Once boiling, carefully add your favorite pasta and cook until al dente, about 8-10 minutes.
- With about 4 minutes remaining, toss in the frozen peas and stir gently.
- While the pasta and peas are cooking, heat extra virgin olive oil in a medium skillet. Add minced garlic and diced onion, sauté until translucent.
- Carefully drain the pasta and peas, then return them to the pot and mix in the sautéed garlic and onion.
- Add the drained tuna, fresh herbs, lemon juice, salt, and pepper. Stir well.
- Finally, sprinkle in grated Parmesan cheese, folding it into the warm pasta.
Leave a Reply