
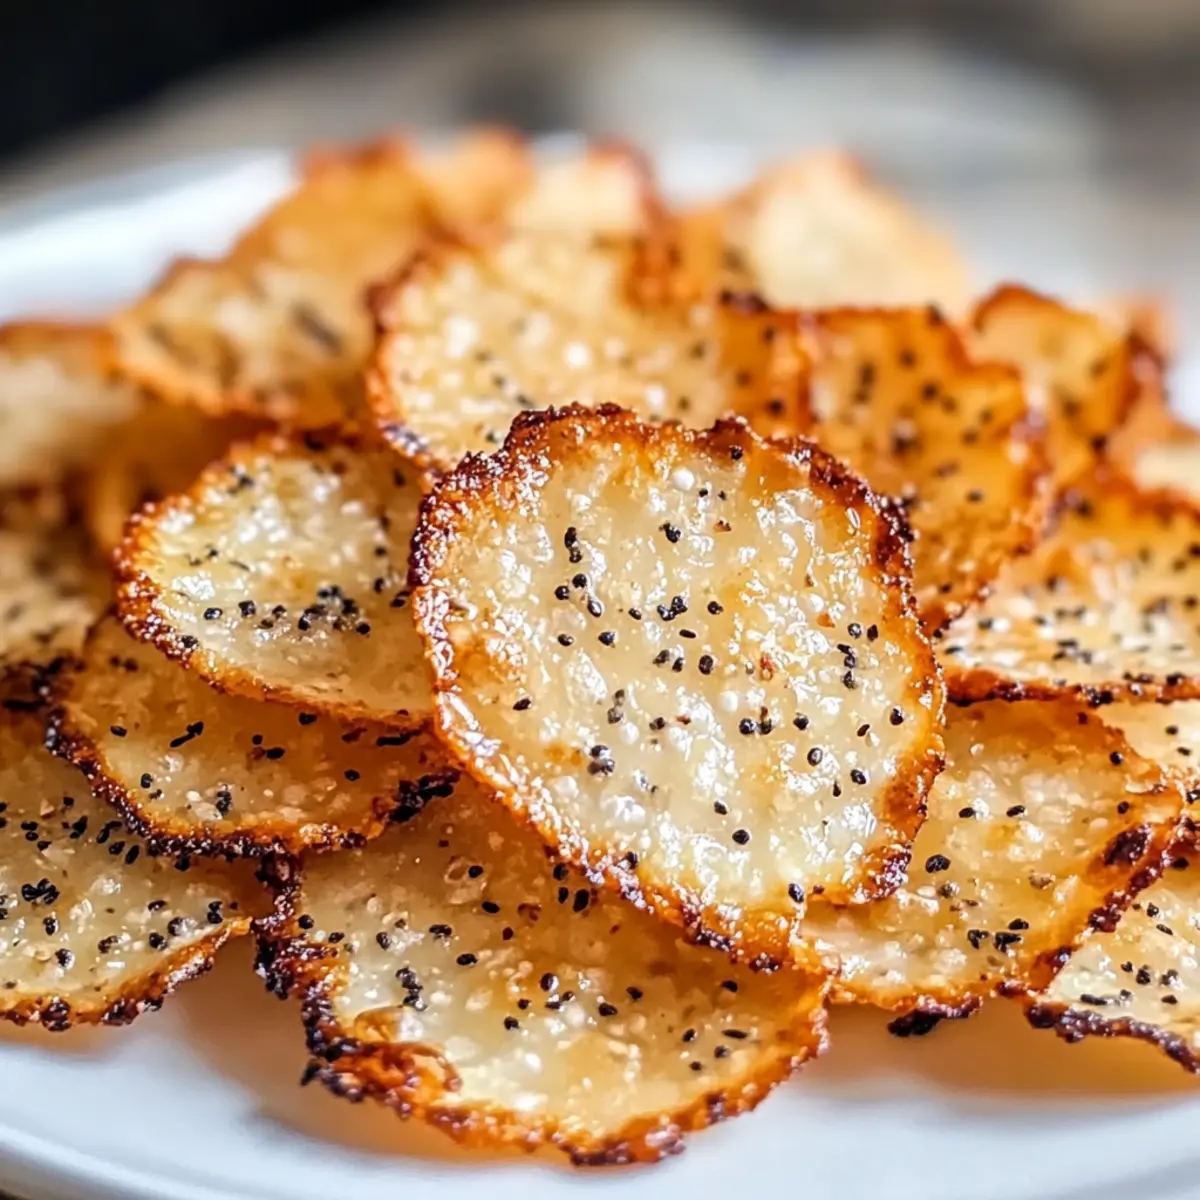
As I rummaged through my pantry one evening, a little spark of inspiration hit me: what if I could transform cottage cheese into a delightful snack? Enter my Crispy Cottage Cheese Chips—a crunchy, high-protein alternative to those greasy bags of chips often found in our cupboards. These chips are not only incredibly satisfying but also a healthy solution for your cravings, boasting low carbs and being gluten-free. Perfect for snacking on game nights, tossing over a salad, or enjoying with your favorite dip, they are as versatile as they are delicious. Ready to dive into this simple recipe and elevate your snacking game? Let’s get started!
Why are Cottage Cheese Chips a Must-Try?
Healthier Snacking: These chips are a guilt-free way to satisfy your crunch cravings without the extra carbs, making them ideal for anyone on a keto or low-carb diet.
Quick and Easy: With just a few simple ingredients, you can whip up these tasty chips in no time—perfect for those moments when snacking urgency strikes!
Customizable Flavors: Feel free to experiment with your favorite seasonings, from garlic powder to spicy cayenne, making each batch uniquely yours.
Versatile Usage: Whether it’s game night or a salad enhancement, these chips can shine in various contexts, much like Honey Pepper Cheese complements any dish.
Crowd-Pleasing Appeal: Serve them at gatherings, and watch your friends be amazed at this delicious twist on traditional chips!
Cottage Cheese Chips Ingredients
• Delight in crafting your own crunchy snack!
For the Base
- Cottage Cheese – Use whole milk small curd cottage cheese (4% milkfat) for the best crunchy texture.
For Flavoring
- Seasonings of Your Choice – Customize to your taste with garlic powder, paprika, or your favorite herbs for a personalized touch.
- Parmesan Cheese (optional) – Sprinkle on top before baking for an extra cheesy flavor boost; it pairs beautifully with the cottage cheese chips.
Step‑by‑Step Instructions for Cottage Cheese Chips
Step 1: Preheat the Oven
Begin by preheating your oven to 350°F (175°C). While it’s heating up, grab a large baking sheet and line it with parchment paper. This will help prevent the cottage cheese chips from sticking and allow them to crisp up beautifully. Make sure your oven is fully preheated to achieve the perfect texture.
Step 2: Prepare the Cottage Cheese
Next, take your cottage cheese and check for any excess liquid. If needed, drain the cottage cheese carefully to ensure it’s not too watery, as this can affect the crispiness. Using whole milk small curd cottage cheese will give you the best results in creating perfect Cottage Cheese Chips.
Step 3: Scoop and Flatten
Now it’s time to scoop! Using a spoon, place mounds of cottage cheese onto the lined baking sheet, spacing them about 2 inches apart. Flatten each mound to approximately 1/4 inch thick. This even thickness will help them bake uniformly and achieve that delightful crunch you’re looking for.
Step 4: Season the Chips
Before baking, sprinkle your chosen seasonings evenly over each flattened mound. Feel free to be generous; garlic powder, paprika, or your personal favorites are great choices. If you’re using Parmesan cheese, this is the perfect time to add that extra cheesy layer on top of your cottage cheese chips for an additional flavor boost.
Step 5: Bake to Crispy Perfection
Slide the baking sheet into the preheated oven and bake for 40-50 minutes. Keep an eye on them, checking at the 20-minute mark. You’re aiming for dark brown edges and a golden surface, which will signal that your Cottage Cheese Chips are getting perfectly crisp and ready to come out.
Step 6: Cool Before Serving
Once out of the oven, let your cottage cheese chips cool completely on the baking sheet. This step is essential, as they will continue to crisp up a bit as they cool. Once they reach room temperature, they will be ready to enjoy as a delicious snack or a crunchy addition to your meals.
Cottage Cheese Chips Variations & Substitutions
Feel free to explore these fun twists on Cottage Cheese Chips to make them your own and delight your taste buds!
-
Herb Infusion: Sprinkle dried herbs like oregano or thyme for a fresh flavor boost that pairs beautifully with dips.
-
Spicy Kick: Add cayenne or chili powder to the mix for a delightful heat—it’ll wake up your snack time!
-
Cheesy Goodness: Mix in grated Parmesan into the cottage cheese before baking for an irresistible, cheesy flair—perfect for cheese lovers!
-
Sweet Crunch: Try a sprinkle of cinnamon and a touch of sweetener for a unique dessert snack—who knew chips could be sweet?
-
Veggie Boost: Fold in finely chopped spinach or kale with the cottage cheese for added nutrients and a burst of green.
Feel free to experiment just like with my Brie Mac Cheese—every batch can be a new discovery!
-
Nutty Flavor: Add ground flaxseed or chia seeds for a nutritious twist, enhancing the crunch while boosting fiber.
-
Zesty Flavor: A dash of lemon zest or a pinch of garlic powder can lend a zesty brightness that complements these chips beautifully.
-
BBQ Delight: For a smoky BBQ style, mix in smoked paprika or a dash of liquid smoke—it’ll transport you straight to a summer BBQ!
Storage Tips for Cottage Cheese Chips
-
Room Temperature: Store cooled Cottage Cheese Chips in an airtight container at room temperature for up to 2 days. Avoid exposure to humidity to maintain crispiness.
-
Fridge: If you want to extend their life, keep the chips in the refrigerator for up to 3-4 days. Layer with parchment paper to prevent sticking and sogginess.
-
Freezer: For longer storage, freeze the chips in a single layer, then transfer to a freezer-safe bag. They can last up to 2 months, but will require a quick baking time to restore crispness.
-
Reheating: To refresh your chips, bake them at 350°F (175°C) for about 5-7 minutes until they regain their crunch before serving.
What to Serve with Crispy Cottage Cheese Chips?
Elevate your snacking experience with these delicious chips by pairing them with delightful accompaniments.
- Guacamole: The creamy texture of guacamole perfectly complements the crunch of the chips, creating a balanced flavor experience.
- Salsa: Bright and zesty, salsa adds a fresh burst of flavor, enhancing the overall snacking sensation while keeping it healthy.
- Hummus: This smooth dip marries well with crispy chips, providing a nutty taste that’s full of protein and fiber.
- Greek Yogurt Dip: A tangy yogurt dip brings a refreshing twist, offering a cool contrast to the crunchy, salty chips.
- Garden Salad: Toss these chips atop a vibrant salad for added crunch and protein, transforming a simple dish into something extraordinary.
- Cheese Platter: Pair your chips with assorted cheeses for a savory treat; the saltiness of cheese balances well with the chips.
- Red Wine: A glass of light red wine complements the savory flavors of the chips while adding a touch of elegance to your snack time.
- Dark Chocolate Pairing: For a sweet contrast, dark chocolate provides a rich, slightly bitter bite that enhances the savory crispness of the chips.
- Herbed Olive Oil: Drizzle some herb-infused olive oil over the chips before serving to add depth in flavor, creating an elevated tasting experience.
Tips for the Best Cottage Cheese Chips
-
Proper Drainage: Make sure to drain excess liquid from the cottage cheese; too much moisture can lead to chewy chips instead of crispy ones.
-
Even Thickness: Flatten your mounds to about 1/4 inch thick for optimal baking. Variations in thickness may result in unevenly cooked chips.
-
Watch the Time: Keep an eye on the baking process; every oven is different. Begin checking for doneness at the 20-minute mark to avoid burning.
-
Spacing Matters: Be sure to space the mounds about 2 inches apart on the baking sheet. This allows room for them to spread and become evenly crispy.
-
Season Generously: Don’t hold back on the seasonings. A good coating can elevate the flavor of the Cottage Cheese Chips, making them irresistible!
-
Cooling Time is Key: Allow the chips to cool completely after baking on the sheet. They will become crisper as they cool, perfect for snacking!
Make Ahead Options
These Cottage Cheese Chips are perfect for busy home cooks looking to save time! You can mix and season the cottage cheese up to 24 hours in advance, storing it in an airtight container in the refrigerator. When you’re ready to bake, simply scoop and flatten the chilled cottage cheese onto a lined baking sheet as instructed. For optimal texture, keep in mind that it’s best to bake them fresh, but you can prepare the mounds ahead, refrigerating them for up to 3 days. Just remember to let them sit at room temperature for about 10-15 minutes before baking to ensure they crisp up nicely. By taking these steps, you’ll enjoy delectable, homemade Cottage Cheese Chips with minimal effort!

Cottage Cheese Chips Recipe FAQs
How do I choose the right cottage cheese for making chips?
Absolutely! For the best results, opt for whole milk small curd cottage cheese with 4% milkfat. This type holds its structure well during baking and provides the crunch you’re looking for in your Cottage Cheese Chips. Avoid overly watery varieties, like low-fat or fat-free, as they may result in chewy chips instead of crispy ones.
How should I store the leftover cottage cheese chips?
Very! Cool the chips completely and store them in an airtight container at room temperature for up to 2 days. To maintain their crispiness longer, refrigerate them for about 3-4 days. Be sure to add parchment paper between layers to prevent sticking and sogginess.
Can I freeze cottage cheese chips?
Absolutely! To freeze your Cottage Cheese Chips, first arrange them in a single layer on a baking sheet and freeze until solid. Then, transfer them to a freezer-safe bag or container, ensuring there’s no excess air. They can be frozen for up to 2 months. When you’re ready to enjoy them, simply bake at 350°F (175°C) for 5-7 minutes to restore their crunch!
What should I do if my chips aren’t getting crispy?
Don’t worry! If your Cottage Cheese Chips aren’t crisping up, it might be because the cottage cheese had too much moisture. Ensure you’ve drained any excess liquid properly before baking. Additionally, flattening the mounds to the recommended 1/4 inch thickness and spacing them apart on the baking sheet allows for even baking. Keep checking for doneness around the 20-minute mark, as different ovens can behave differently.
Are these cottage cheese chips suitable for my gluten-free diet?
Absolutely! These Cottage Cheese Chips are naturally gluten-free, making them perfect for anyone on a gluten-free diet. Always double-check all added seasonings to ensure they don’t contain hidden gluten ingredients, especially if using packaged spice blends. Enjoy your crunchy snack worry-free!
Can I make these chips dairy-free?
While cottage cheese is a key ingredient in this recipe, you can try substituting it with a dairy-free alternative, such as soy or almond yogurt. However, results may vary, and it may require some experimentation. You might need to adjust your baking time and thickness to achieve a satisfying crunch. Enjoy the experimenting!
Cottage Cheese Chips: Crispy, High-Protein Snack You’ll Love
Ingredients
Equipment
Method
- Preheat your oven to 350°F (175°C) and line a baking sheet with parchment paper.
- Check the cottage cheese for excess liquid and drain if necessary for crispiness.
- Scoop mounds of cottage cheese onto the baking sheet, flattening each mound to about 1/4 inch thick.
- Sprinkle chosen seasonings over each mound and add Parmesan cheese if using.
- Bake for 40-50 minutes, checking for doneness at the 20-minute mark.
- Cool completely on the baking sheet before serving.
Leave a Reply